To make a picture of dried flowers and leaves, they must be collected at a strictly defined time and dried correctly. Plants are usually harvested from May to August, inclusive, and only in dry, warm, sunny weather.
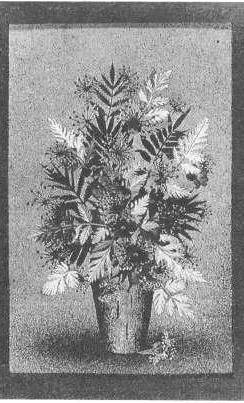
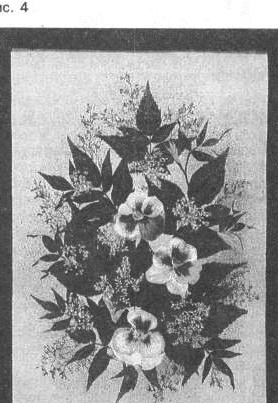
I do not use any exotic plants for my paintings, all are collected in Moscow (in Kuskovo and Izmailovo). I work with flowers of jasmine, primrose, chamomile, Ivan tea, pansies ... I dry leaves of ash, silver poplar, ornamental shrubs and raspberries ... Collecting plants, I try to find the most unusual colors. For example, the leaves of umbrella plants are very reminiscent of ferns and are at the height of summer from white to violet-green. It is this variety of shades that will help in creating a bouquet to give it volume. I collect light, delicate plants, sometimes hardly noticeable in nature, in the bouquet they are simply magnificent.
Plants must be selected very carefully - they should be without spots, holes and extraneous plaque. Most leaves and flowers are best picked in the first week after they bloom. I collect flowers not only completely blossomed, but also buds and even half-buds.
People often ask me: does the color of plants change after drying? Of course, it is changing, but do not be afraid of it. For example, young leaves of aspen from green-orange become greenish-brown, but, believe me, this is no less spectacular. And elderberry leaves often after drying acquire a purple color with a pearlescent shade. This will only make your bouquet even more unusual and fantasy.
I dry the plants for my paintings as follows: I get old, thick, large format books. This point needs to be discussed separately. Of course, you should not use books that are good, dear, or sweet to your heart. Still, it’s better to choose an outdated directory or phone book ... Every 10-15 pages I put 1-2 leaves or a flower, depending on what size they are. Then I tightly bind the book with a string and ... forget about it for a couple of weeks.
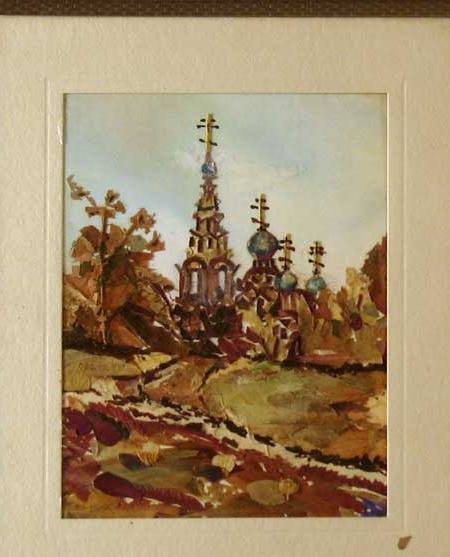
Prepare cardboard for the foundation of the future picture. Firstly, you need to toned it.Make it convenient with a damp piece of foam. It is necessary to apply several strokes of soft gouache on it and hold them on cardboard. Gouache will lie in beautiful stripes. Then, after allowing the cardboard to dry, it is necessary to glue the second sheet to it from the inside. The cardboard should dry under the load for a whole day. Then we cut out the desired shape from it - a rectangle, square, circle, depending on your idea. This must be done with great accuracy. Now our cardboard is ready for work.
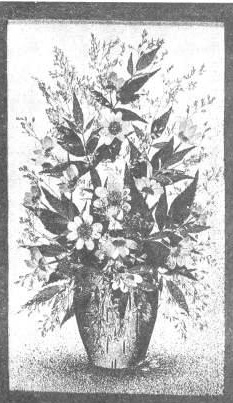
Next, you need to stick on it an application depicting a vase. It can be made of birch bark or thick cardboard. To do this, on a piece of birch bark or cardboard, it is necessary to apply the contour of the vase and cut it out. Then it should be painted as spectacularly as possible. Then, having greased the “vase” from the inside with PVA glue, gently glue it on our future picture. Let dry under load. Now we get our dried flowers and leaves. We lay them out, choosing an interesting composition. We remember it, push our plants aside and begin to stick flowers and leaves.
This is done as follows: glue PVA with a soft brush, gently lubricate the flower or leaf from the inside and glue it on the picture. Then we press with a clean sheet of paper. I advise you to cover the top of the vase slightly with leaves. This will give liveliness to the bouquet. If you are afraid and do not trust your taste, first use a postcard or a reproduction as a model. But in any case, a picture of flowers and leaves, created by your hands, will delight you and your loved ones for many years. It will also remind you of the colors of the past summer.
Our picture is ready. It’s only a frame. I want to say that it is not necessary to run behind the expensive frame to the store. You can do it yourself. I will offer a simple way for this. You will need flexible cardboard or whatman paper. From it you need to make 4 tight slats. Two of them should be slightly larger than the length of the picture, and two should be slightly smaller (by 31 cm) than the width of the picture. To do this, gradually bend and fold the cardboard or paper, until we get a dense strip 2 mm thick and 1.6 cm wide, glue the last bend with PVA glue and put it under the load. It should be noted that if we fold dense cardboard at least 8 times, then whatman paper - at least 20 times. As a result, our four blanks will look like wooden planks. We trim the strips to the size of our picture. Color them with brown gouache. Let it dry. Glue on the picture in turn with PVA glue and put it under the load for a day. The joints are noticeable on our frame, but this is fixable. We will make a decorative coating.
I way. We make the composition: PVA glue, flour, brown gouache. The composition must be made very thick. We apply it with a hard brush on our frame with a thick layer and with quick shock movements of the brush we create a beautiful relief. Thus, we cover the joints on the frame.
II method. We make a composition of PVA glue and brown gouache of medium density. We still need cotton wool and tweezers. We tear off pieces of cotton wool, take them with tweezers, dip them into the composition, squeeze it slightly and put on our frame. Then we drape beautifully, carefully masking the joints. After the frame dries (it takes 24 hours), we evenly paint our decorative coating in brown. And after an hour, when everything dries up, go through the frame again with gouache, but in a light beige tone. You get a very good decorative effect. The result will be a complete illusion of using cramped skin.
The II method of manufacturing a frame for a picture is very simple and very convenient in that we can make any shape: oval, circle, octahedron, etc. Instead of brown and beige gouache, you can use other colors to your liking.
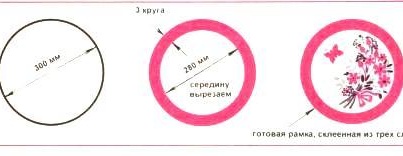
Suppose we have a round picture with a diameter of 30 cm, we outline its outline on cardboard.
Then we cut it out, draw another circle inside with a diameter of 28 cm. We cut along the contour. And now one frame is ready (or rather, one layer), and we need 3 layers to get a dense frame, so we cut out two more circles.Then very carefully glue them together. Next, let it dry for one day under load, and then process the workpiece as described above (Fig. 5).