

Who does not remember the legendary childhood toy "Rubik's Cube", which still remains the leader in world sales?
This is an excellent puzzle game with which it is fun to pass the time, both for an adult and a child.
We will need:
• plastic acrylic cubes - 27 pcs.
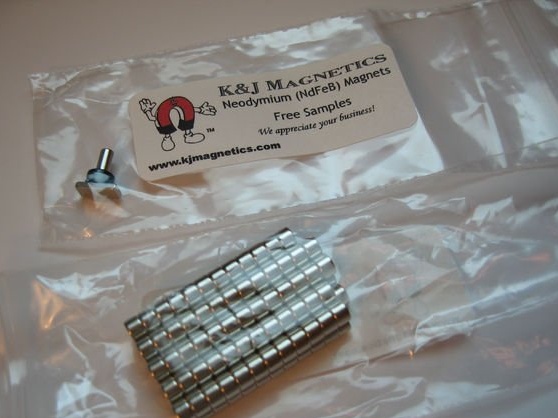
• magnets for cubes - 108 pcs.
• teski
• drill
• glue
• self-adhesive colored paper
• scissors (knife)
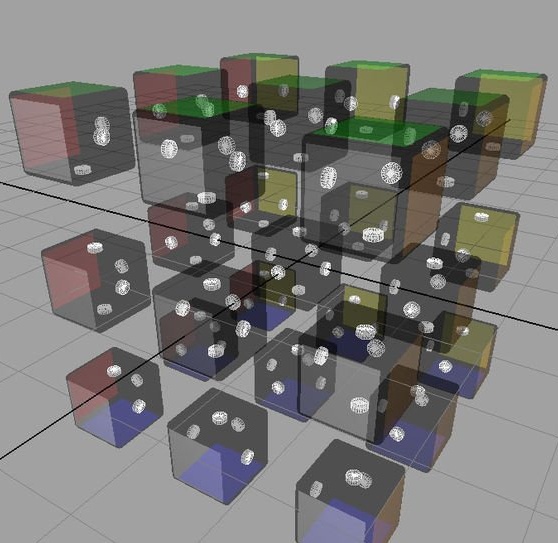
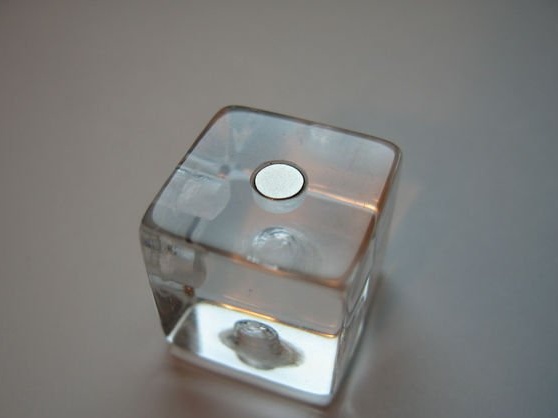
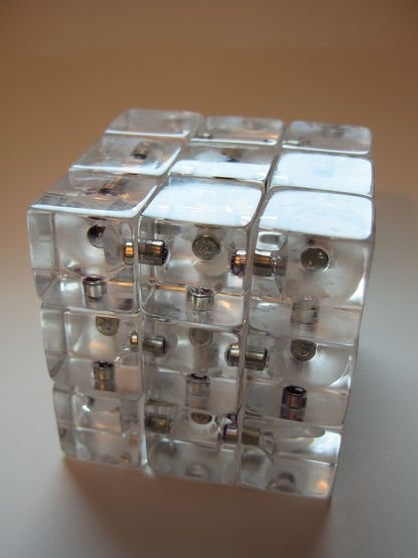
Step 1: First you need to imagine the structure of the future acrylic cube
This step will allow you to have a general idea of the structure of the cube, as well as the order of placement of the magnets.
Step 2: start picking the cubes
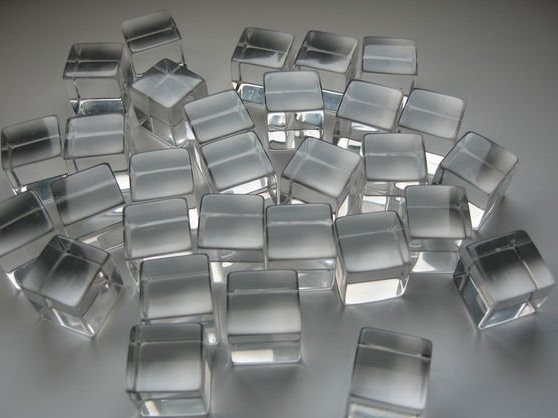
To make a magnetic acrylic cube, we need 27 pcs. plastic acrylic cube. Such cubes can be found in the store, and as a rule they are sold in a set of 10 pcs. So, we need 3 of these sets.
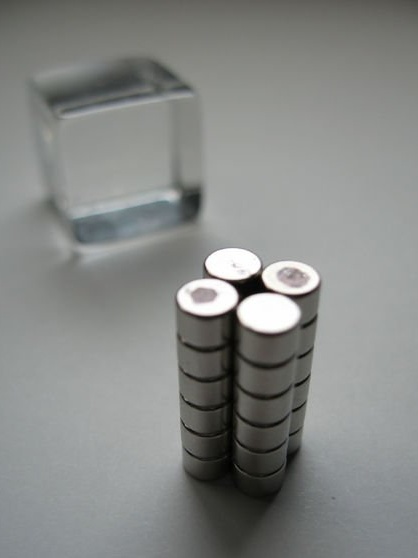
Step 3: Magnet Selection
There is a huge selection of magnets in online stores, but you should choose magnets that fit the cubes in size. To create such a cube, 108 magnets are needed.
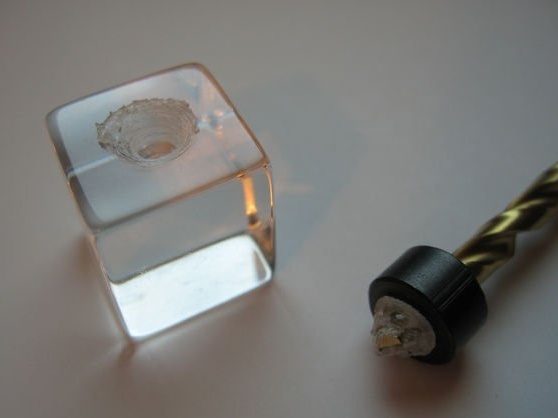
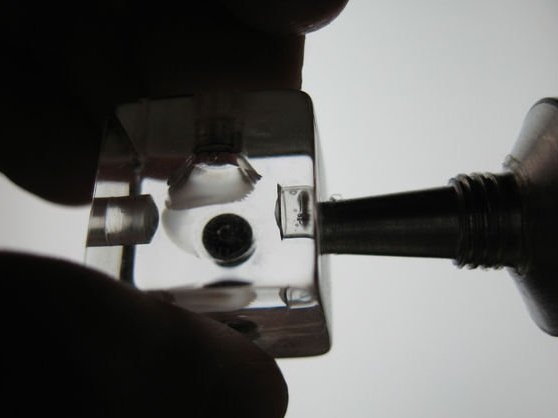
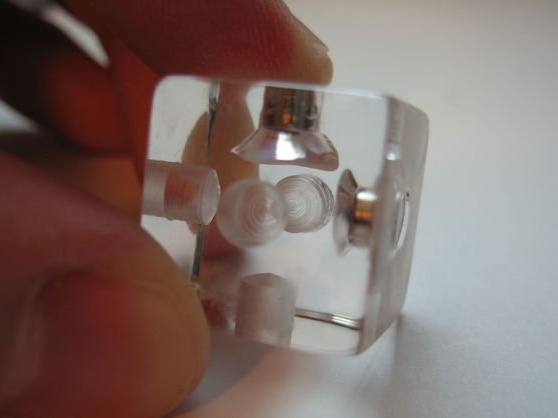
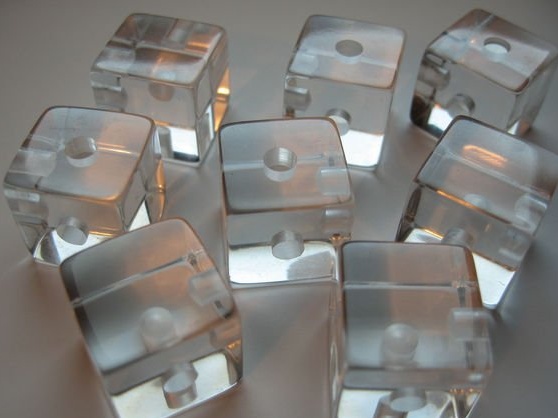
Step 4: Preparing Acrylic Cubes
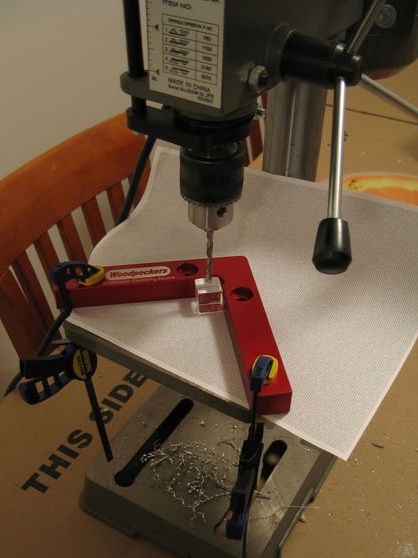
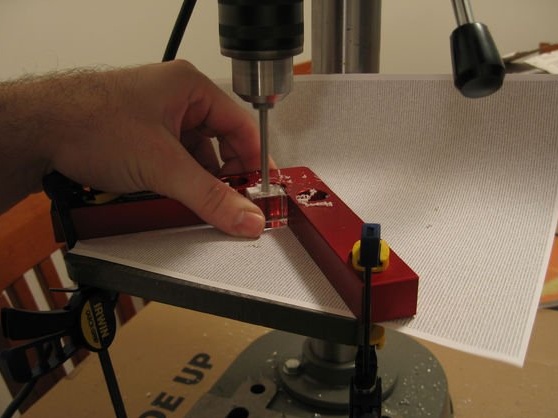
We will need a vise. Grip a part of the cube in a vice and outline the center of the cube. Next, using a drill, make a small depression. Then rotate the cube 90 degrees and drill again, as in the photo.
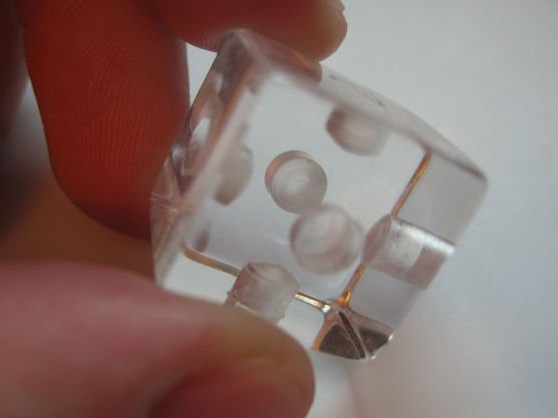
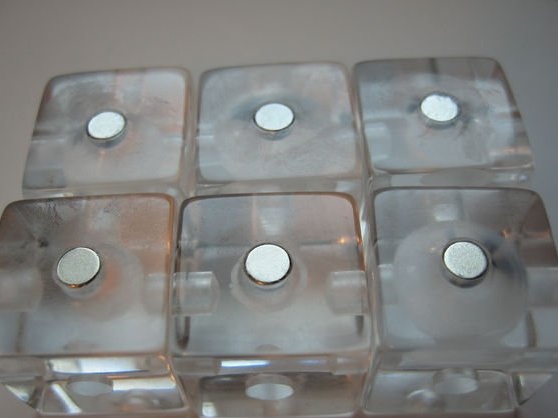
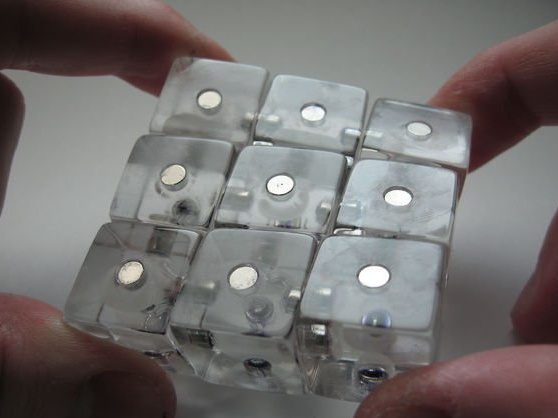
Step 5: Check the polarity of the magnets
It is very important that all magnetic axes are correctly polarized. Approximately their location will be as indicated in the photo in step 1.
In order to understand the polarity, try to assemble the magnets in stacks, those that will repel another magnet will be of the same polarity. After you figure out where which magnet is worth marking them with different colors of the felt-tip pen. Now they all have a visible polarity.
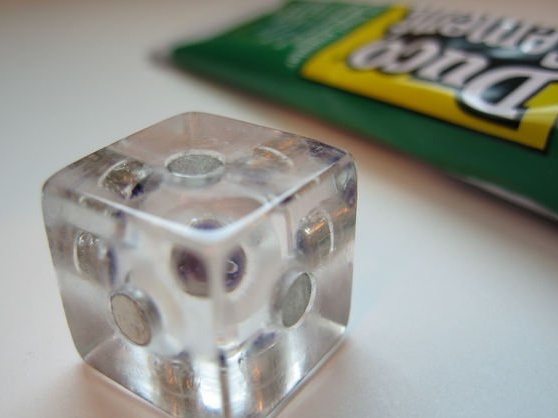
Step 6: Drilling the Central Part
For the central part, 6 holes are required, one on each side (see photo).
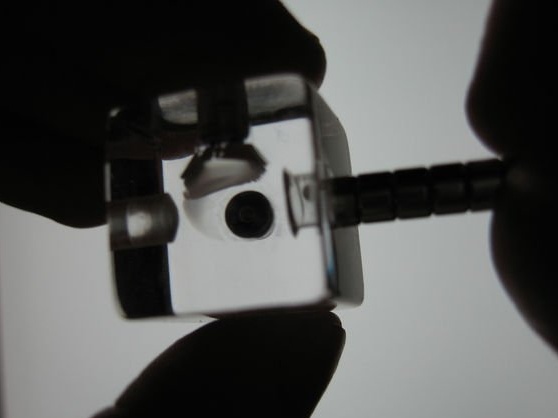
We recommend making holes with a small drill.
Step 7: Adhesive Magnets
We glue the magnets with a transparent adhesive with strong fixation. Pour some glue into the holes made and press the magnet for a few seconds. Glue should not go beyond the holes.
Step 8: Install the Central Axis
All cubes on one side must have magnets. Check them for polarity, they will become the basis of the cube. Install as shown in the photo.
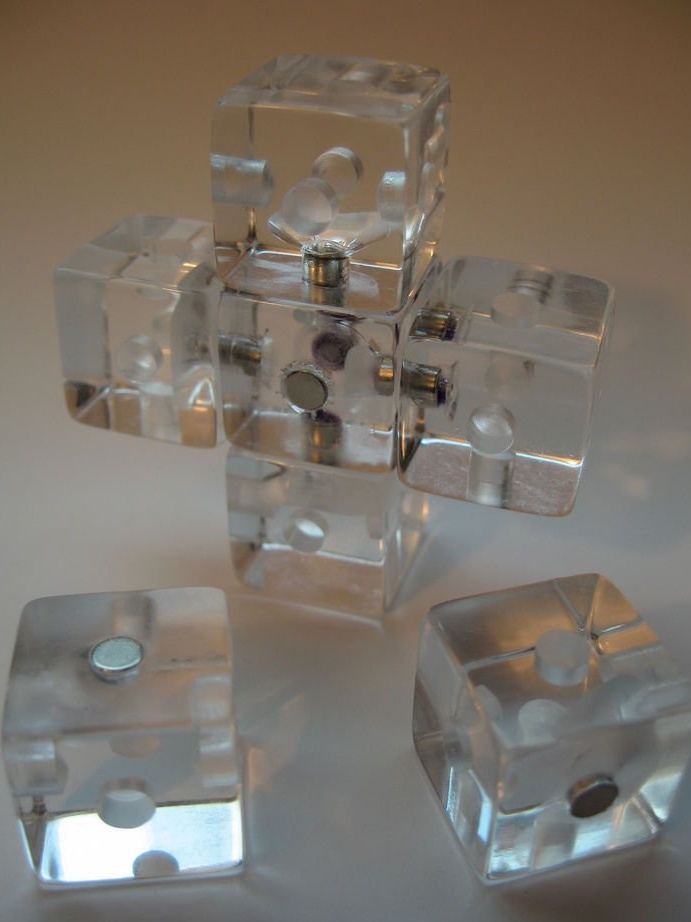
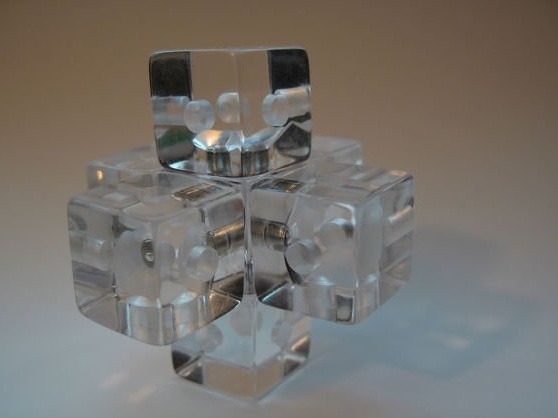
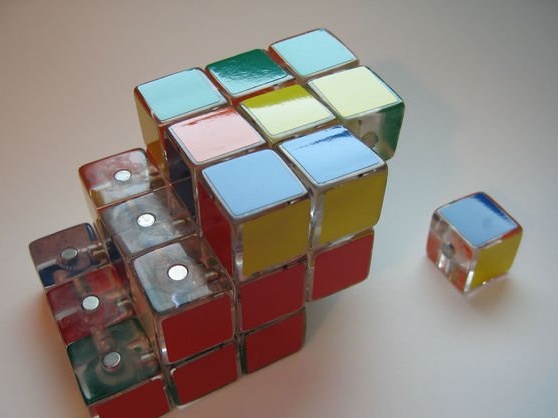
Step 9: lay out the side surfaces
Start attaching cubes to the central axis. You can give the cube an individual shape.
Step 10. Spread the corner pieces
By the principle described in step 9, we supplement our cube with the missing parts (see photo).
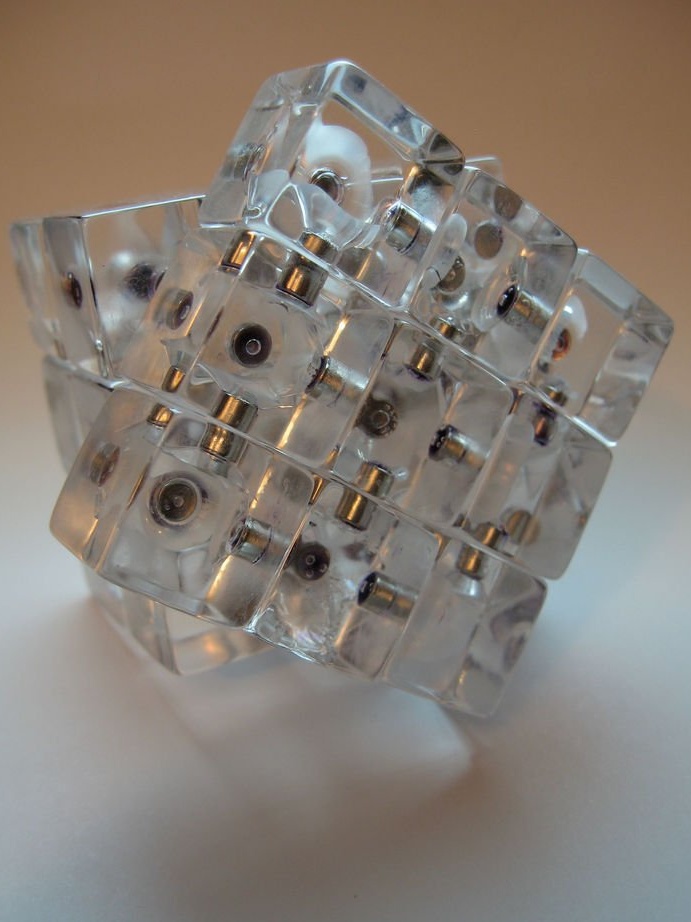
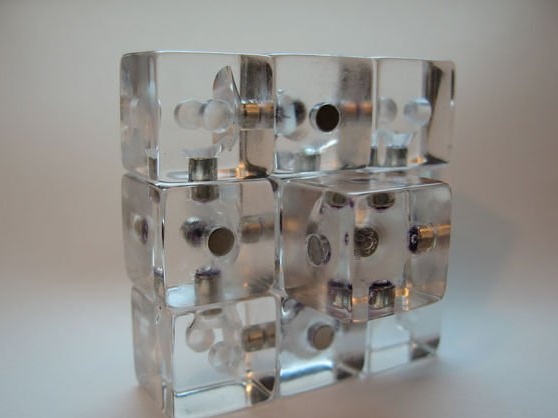
Step 11: Connecting All the Parts
The magnetic cube is ready. Its size is fully consistent with the original Rubik's Cube toy.

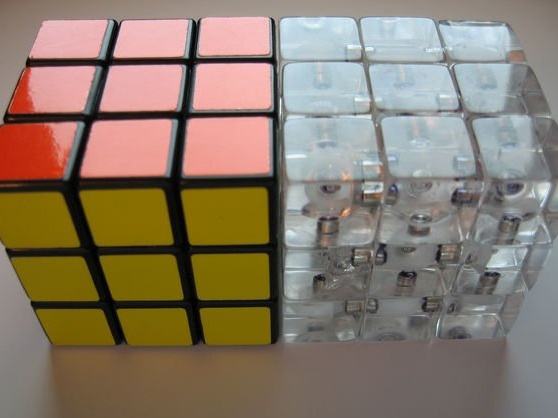
Step 12: Optional Step - Stickers!
Many people will be satisfied with the minimalism of a transparent cube, but if you want to add colors to it, then this step is for you.
Option 1: Measure the size of the squares and transfer it to self-adhesive paper. Carefully cut the paper and glue it to the squares. Orange is opposite red, green is opposite blue and yellow is opposite white. With sharp scissors and whether with a knife we cut the paper under each cube.
A home-made analogue of the legendary Rubik's Cube is ready. Please yourself and loved ones with a unique gift!