The technology for creating objects using 3D printers and pens continues to evolve. In this article, we decided to provide an overview of the video on the manufacture of 3D pens from a conventional glue gun.
We advise you to start by watching the author’s video
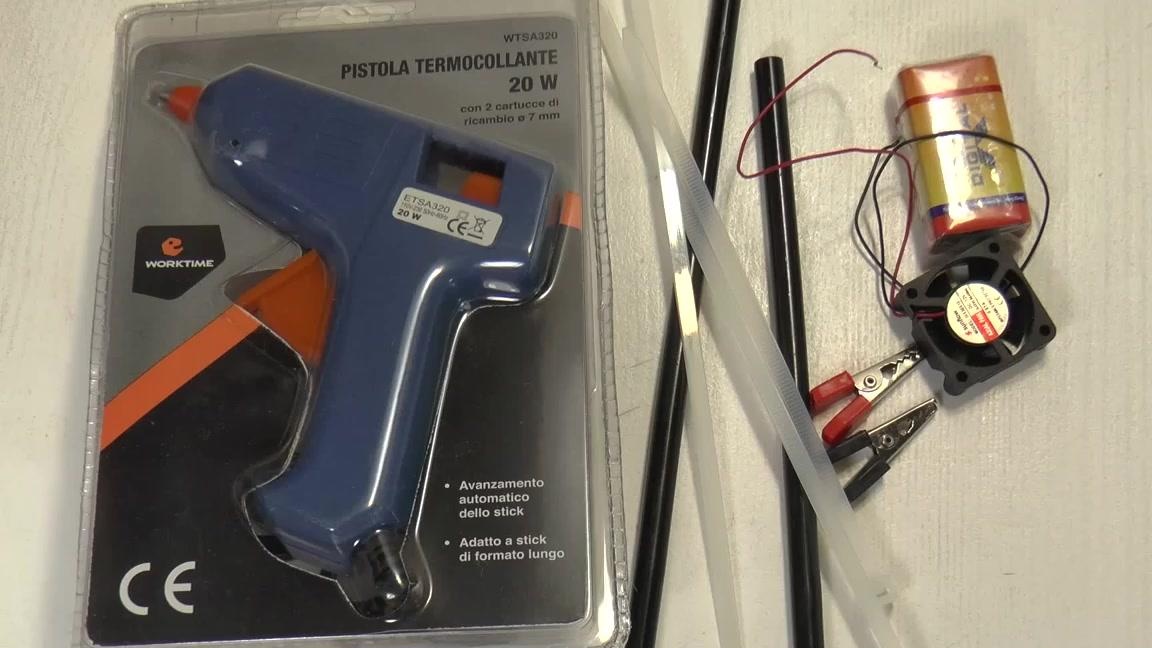
Consider the list of necessary materials:
- glue gun;
- rods of black color;
- clamps;
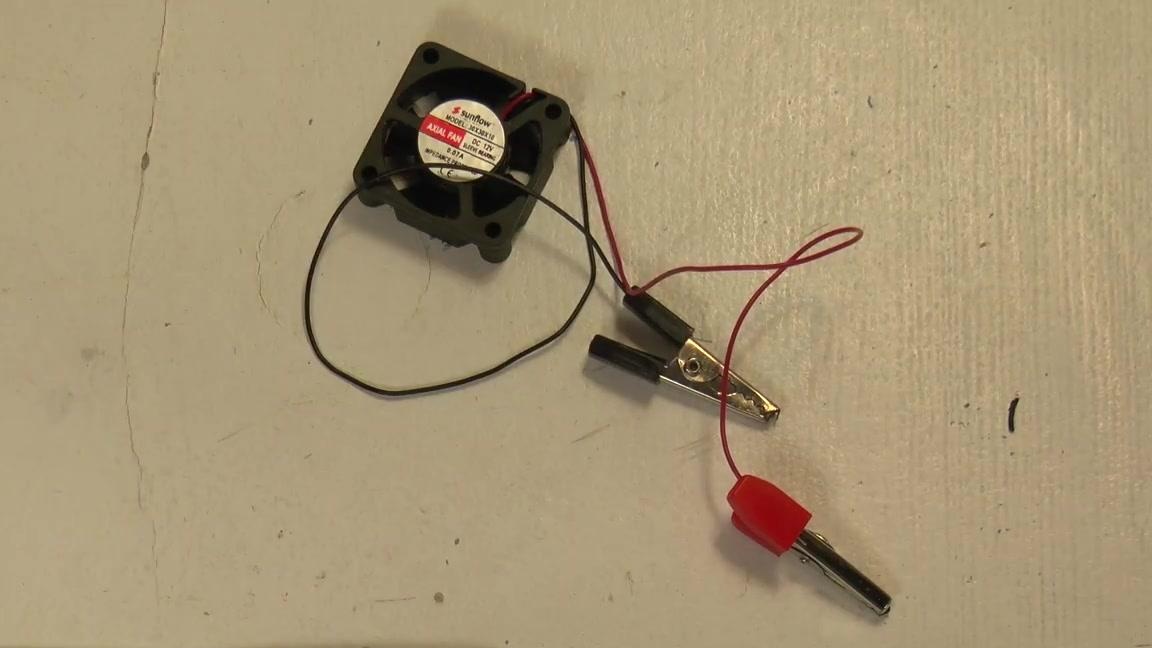
- a small cooler;
- crocodiles;
- rechargeable battery.
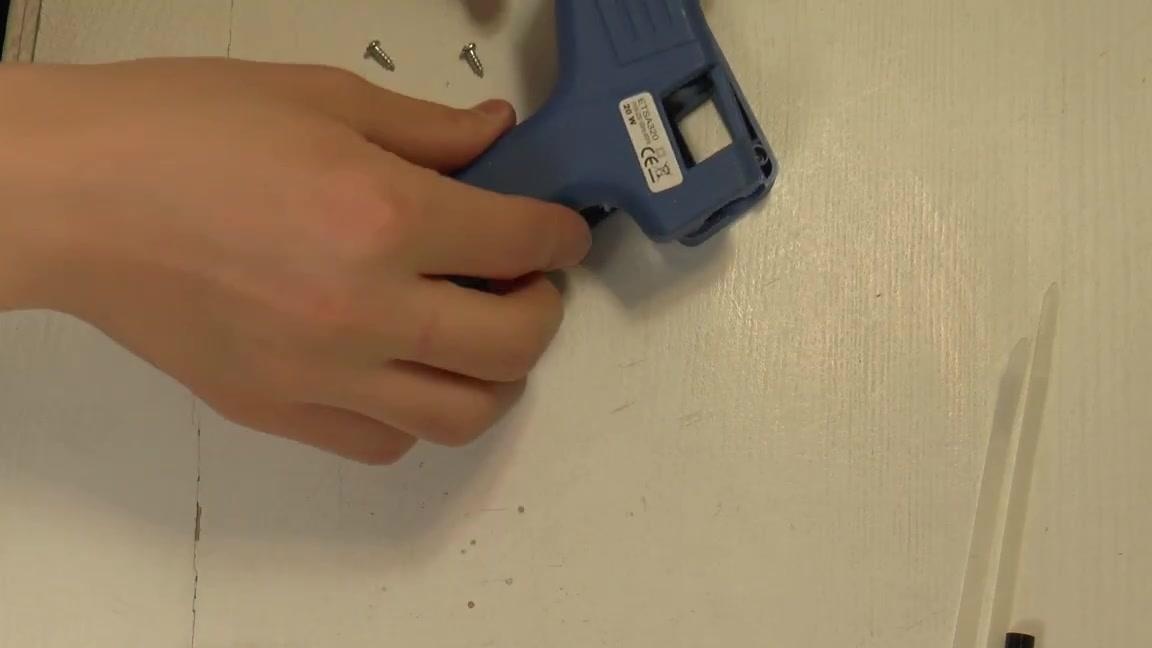
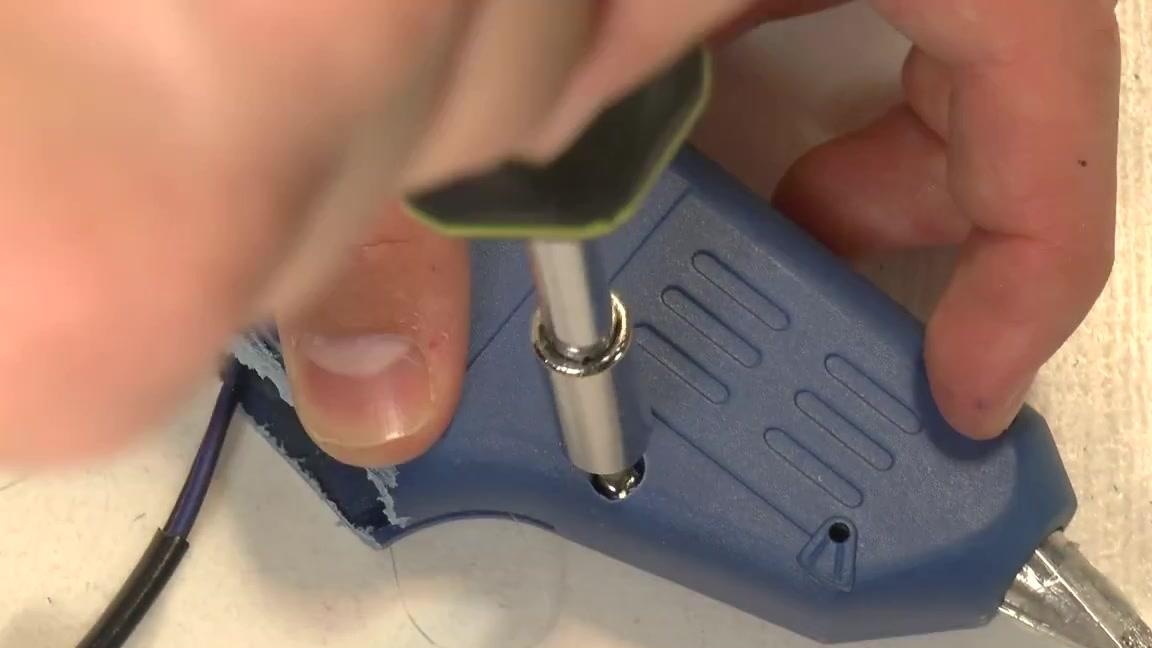
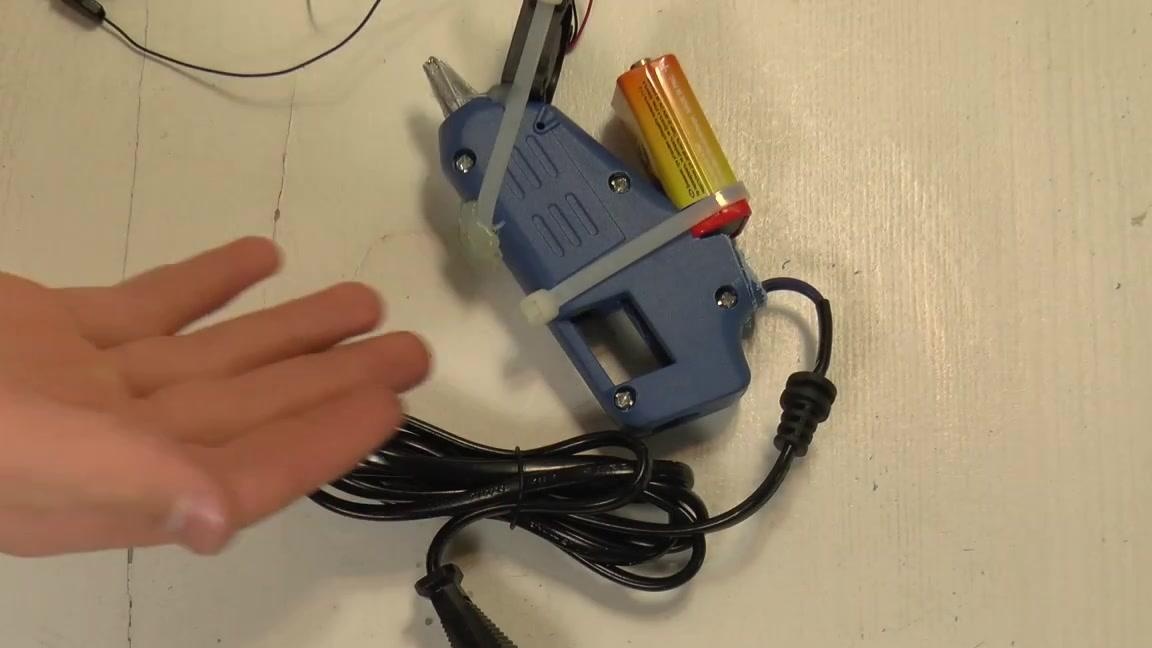
First you need to disassemble the glue gun.

In the middle of the glue gun there is a mechanism that pushes the rods and the heating element. We do not need a mechanism, so it can be removed from the gun.
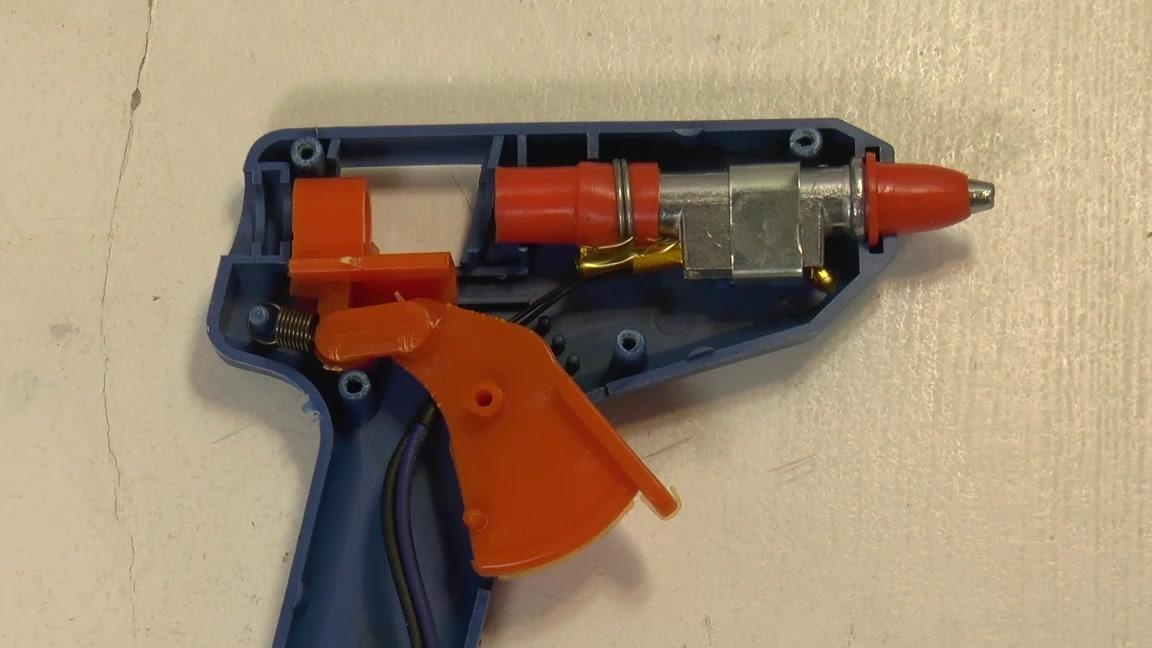
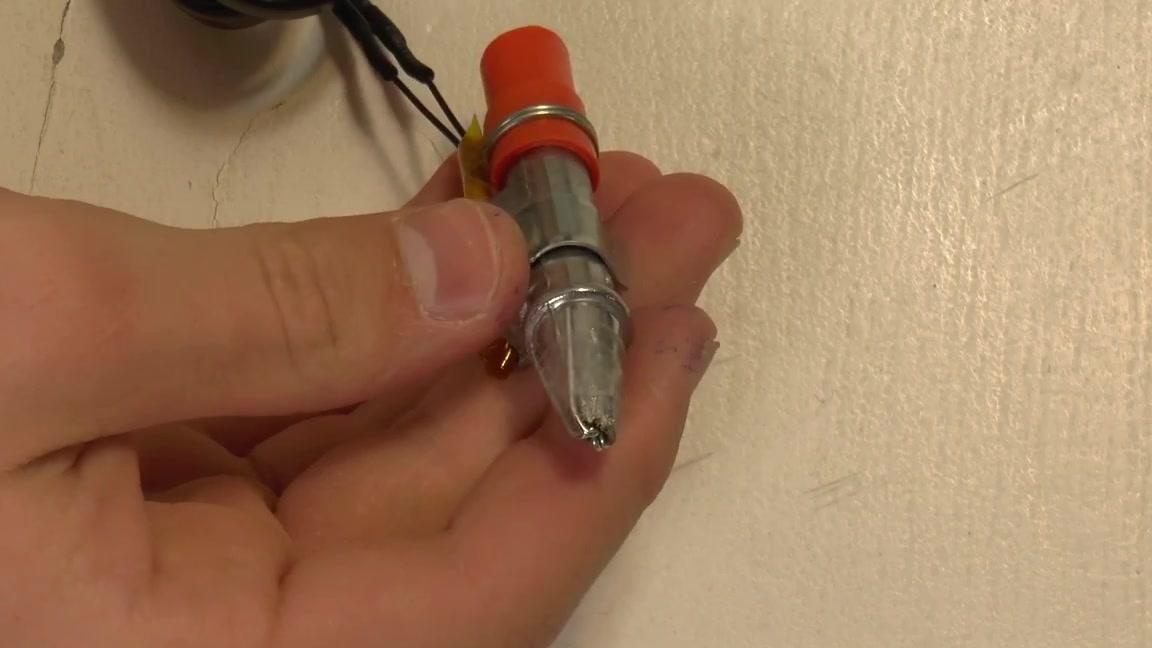
Next, we carefully pull out the heating element so as not to tear off the wiring that goes to it.
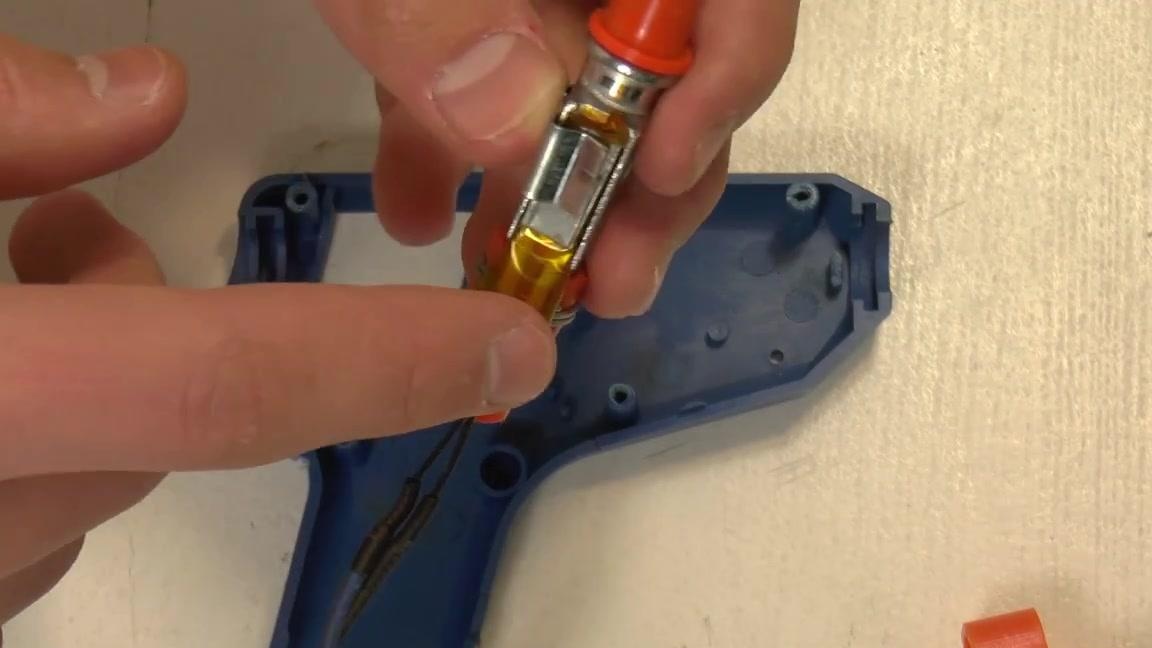
If in your case there is an elastic band on the element, then it also needs to be removed.
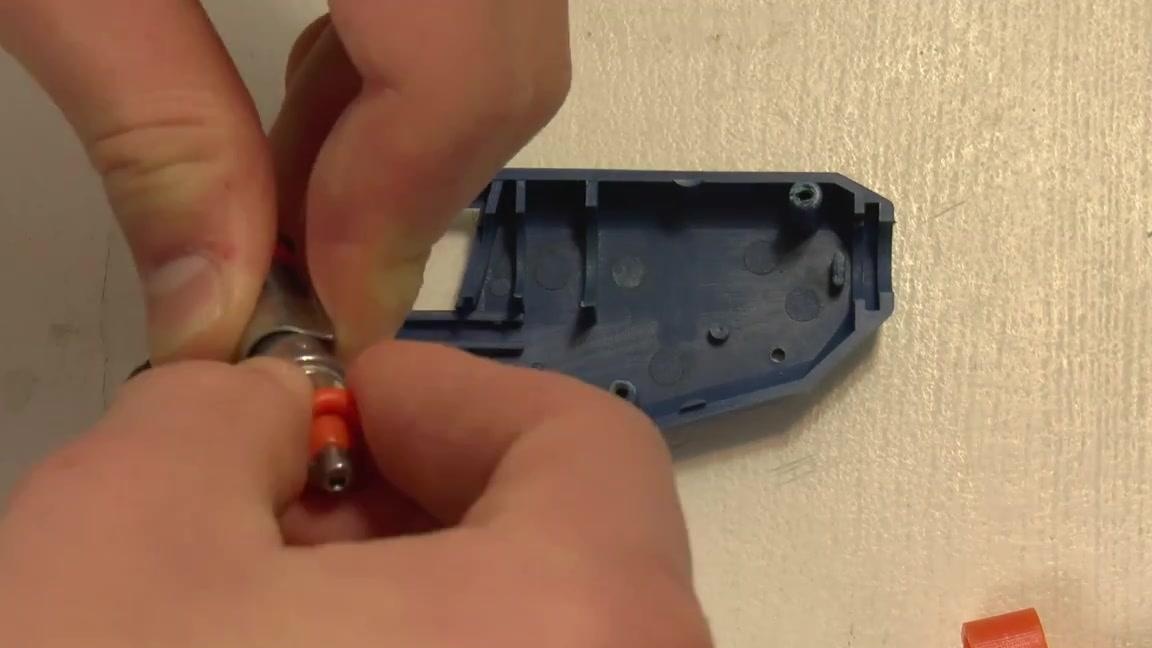
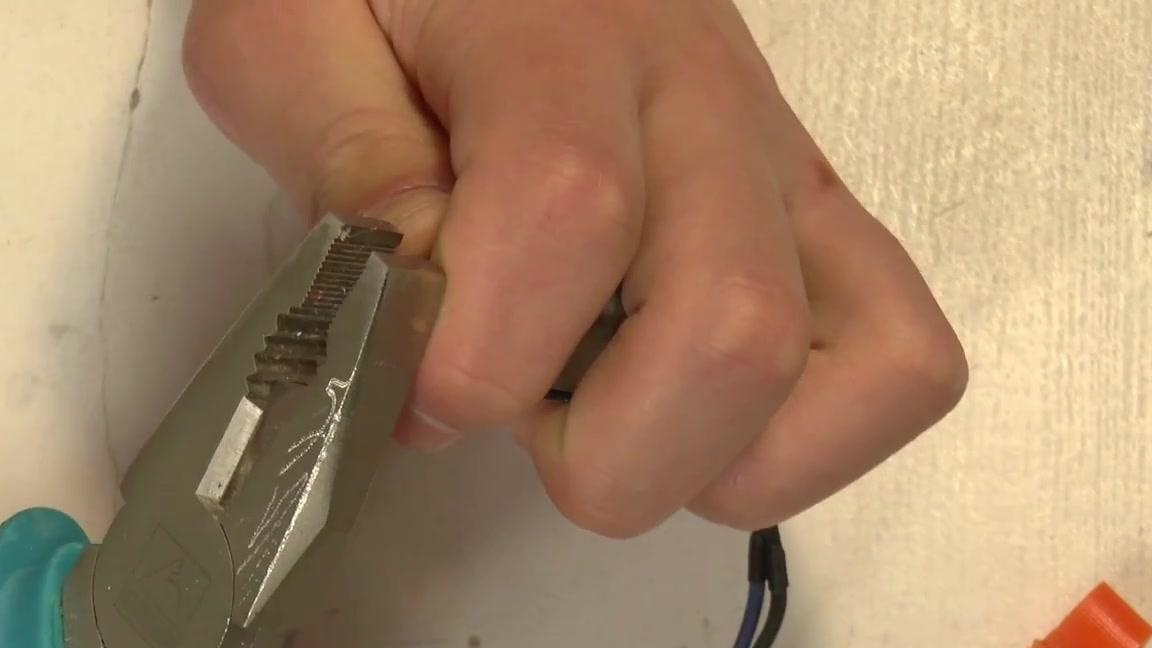
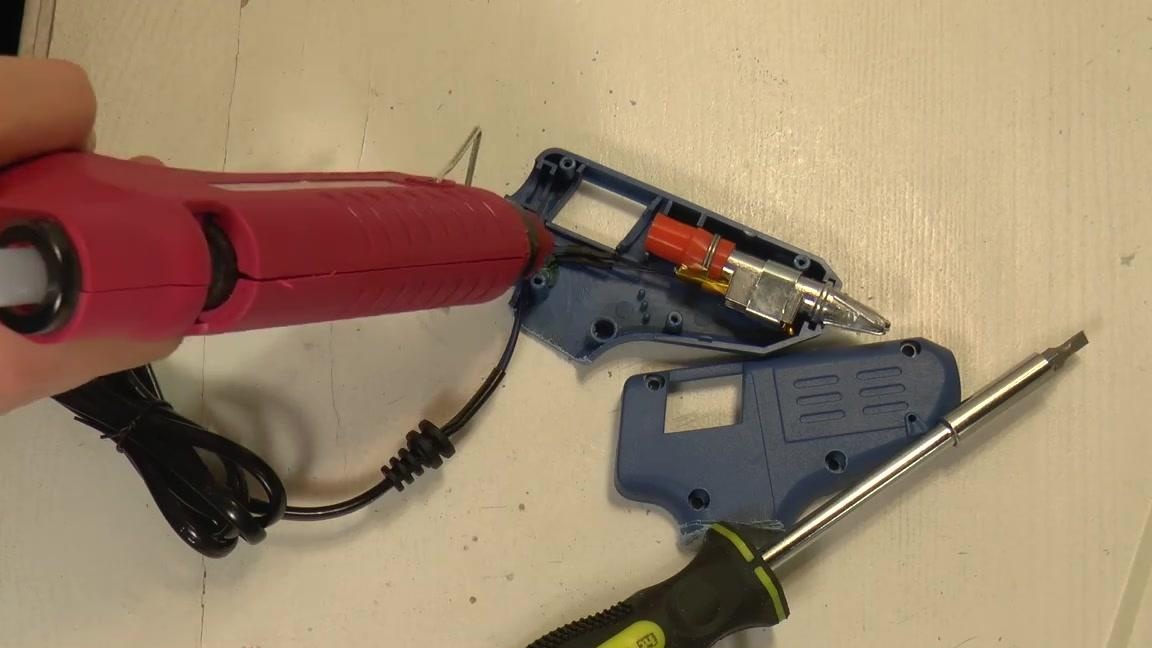
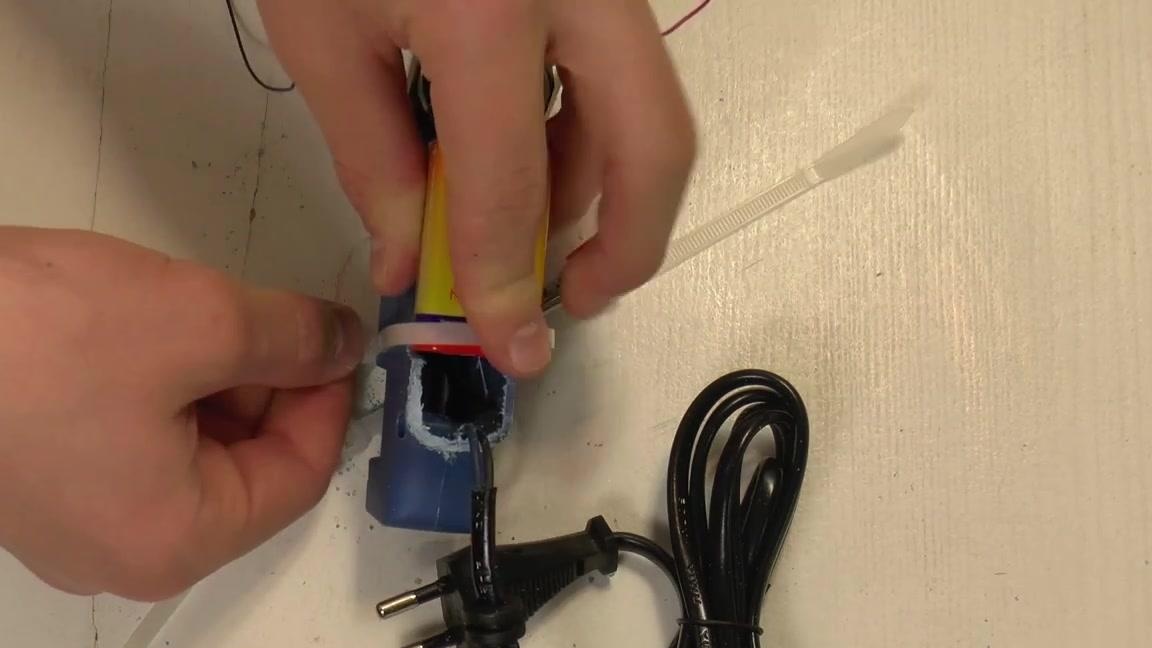
The tip of the glue gun itself needs to be slightly flattened. You can do this with pliers, but you should be careful so as not to overdo it. If you, as the author, it turns out that the nose is made of plastic, then after flattening, you can wrap it with tape, which is resistant to temperature. Thus, we have reduced the space for glue and at the exit it will be much thinner.
Next, take parts of the body of the glue gun and attach them to each other.
The handle needs to be sawed off.
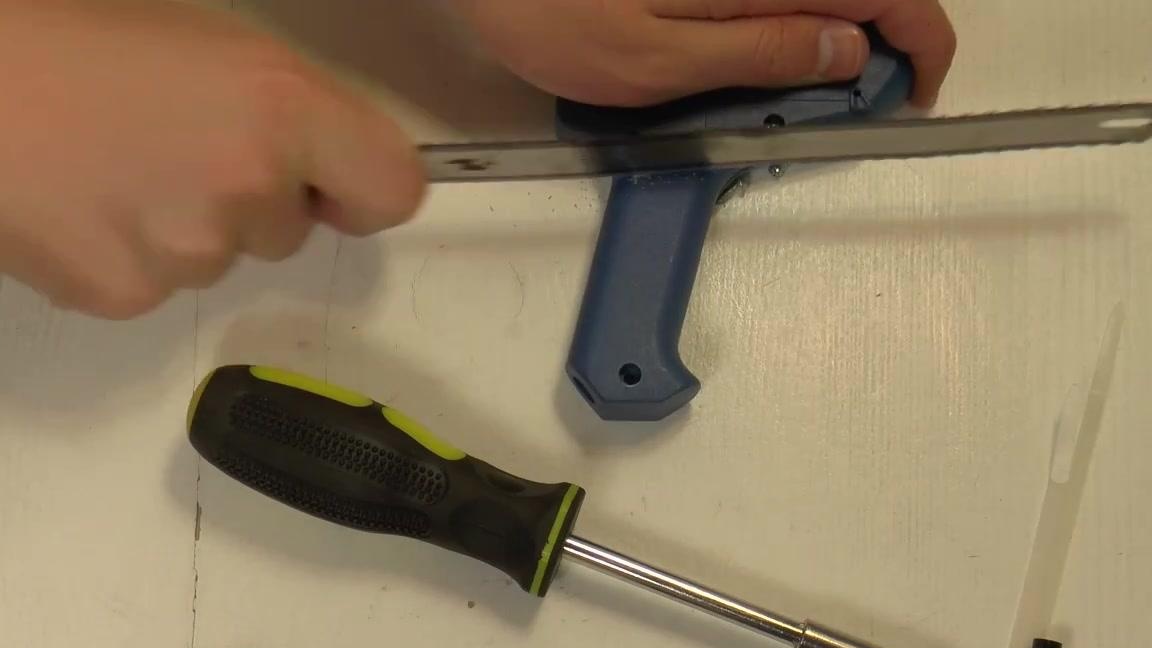
The remaining part after that will be the basis for the future pen.
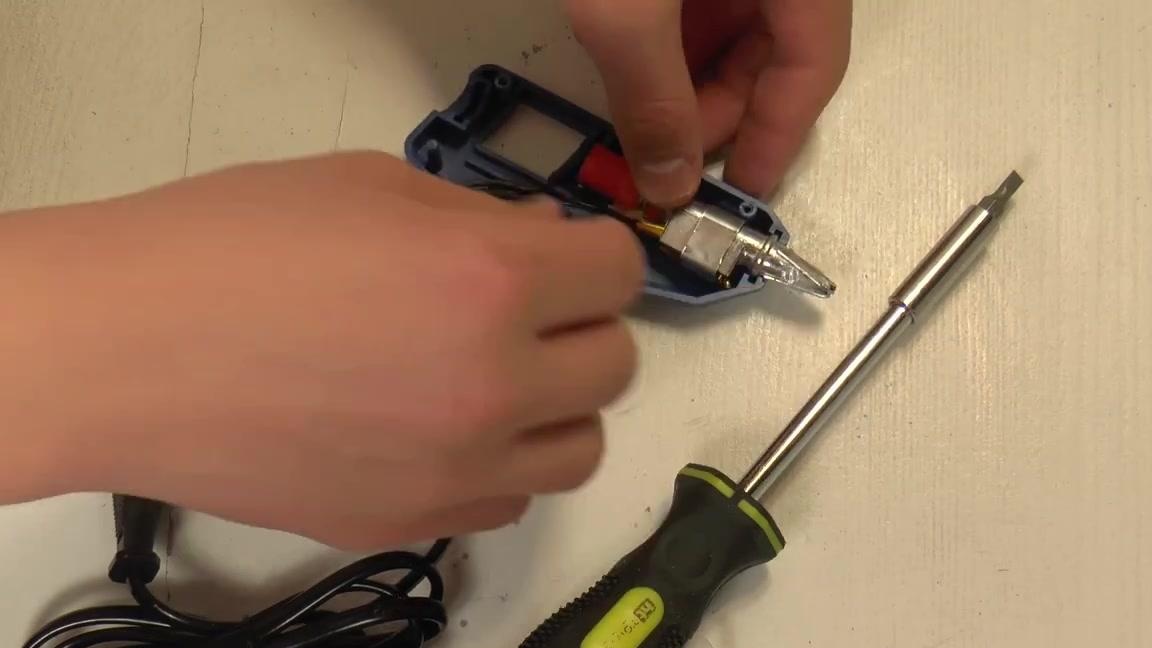
The heating element must again be shoved inside the gun. So that the wire coming from the heating element does not accidentally break out, it can be sealed.
Putting the case back.
Crocodiles must be attached to the wires coming from the cooler. According to the author, he uses crocodiles only in order not to fool with soldering, therefore, in their absence, you can easily use a soldering iron.
The cooler must be attached to the handle with the help of clamps. To keep the clamp better, a shallow cut can be made on the handle body. The cooler needs to be attached so that it blows towards the nose.
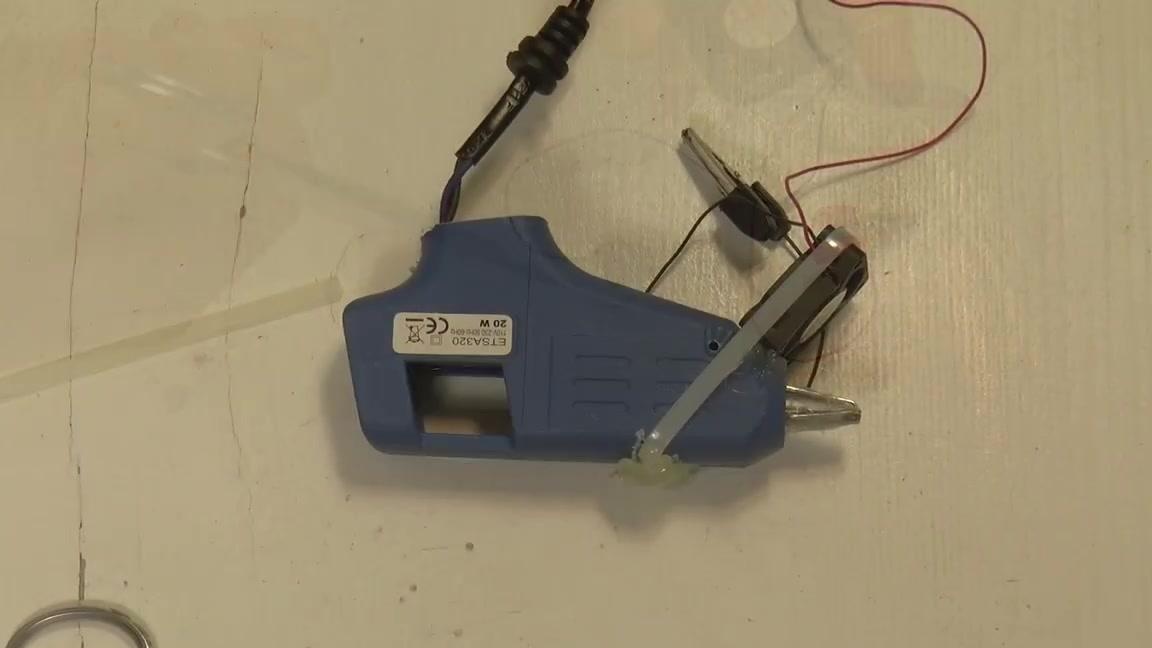
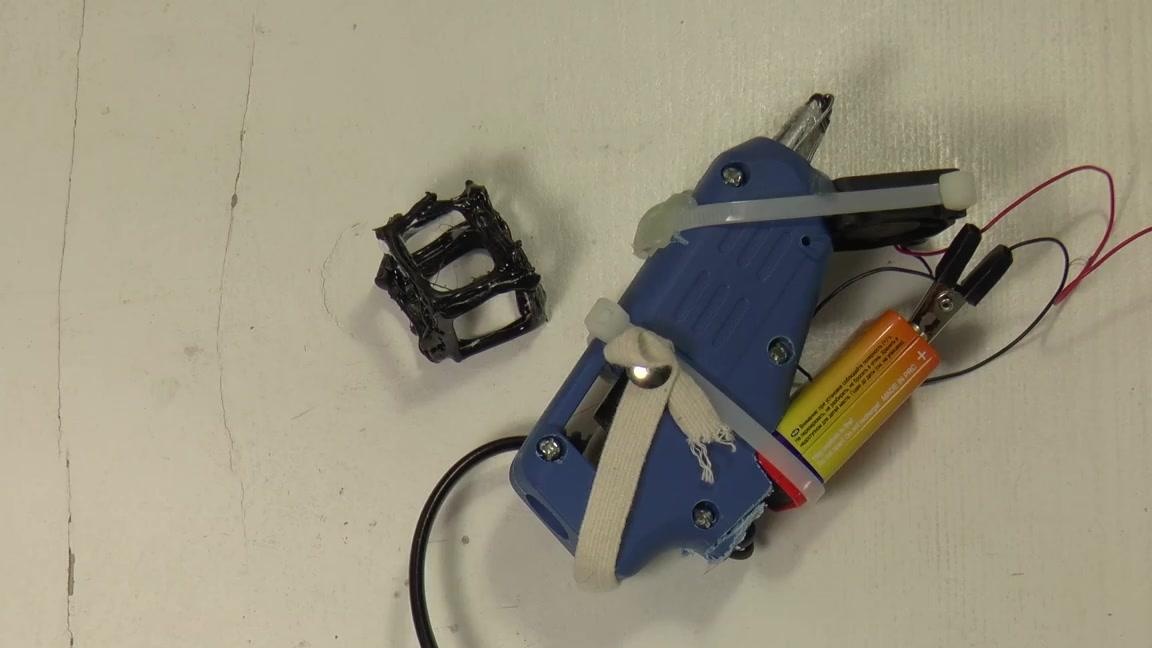
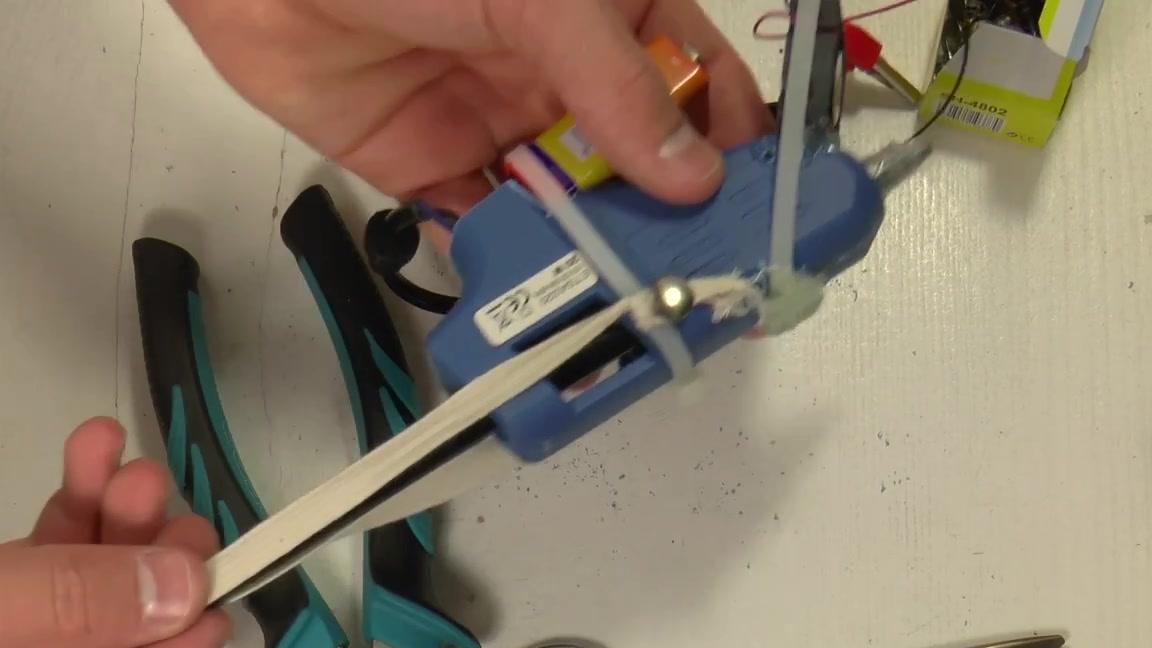
Now you need to attach the battery to the handle. It can also be secured with a clamp.
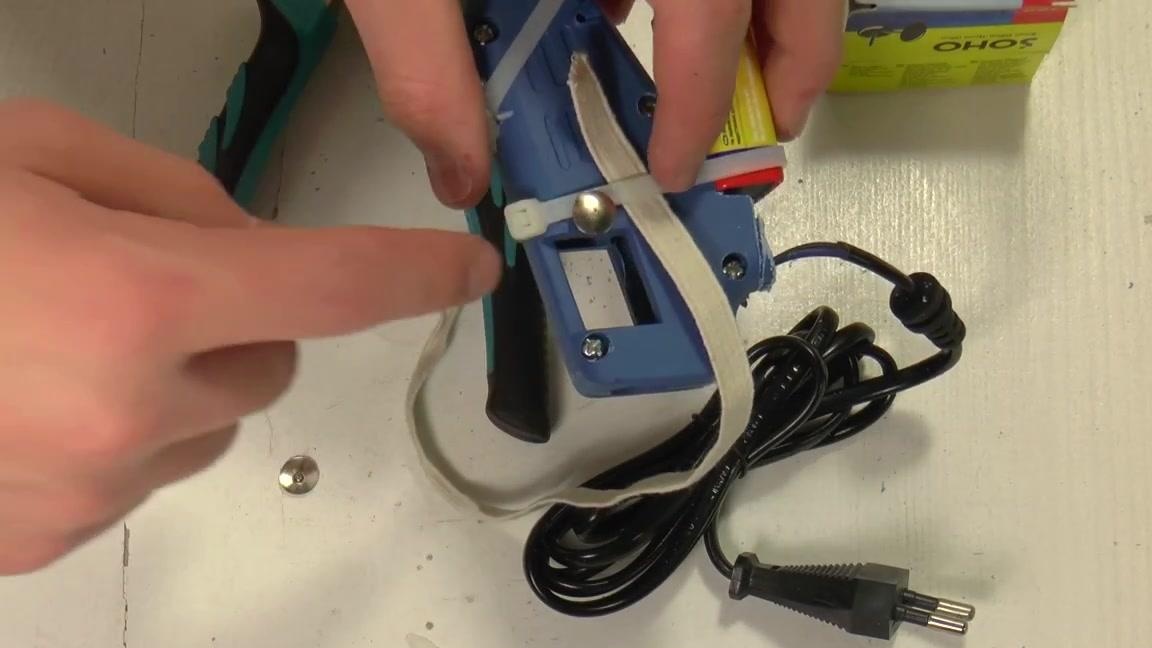
It remains only to make a system that will feed the rods, because we removed the factory one at the beginning of the work. The system can be made using an elastic band, fixing it to the clamps and fixing it on the case with one button.
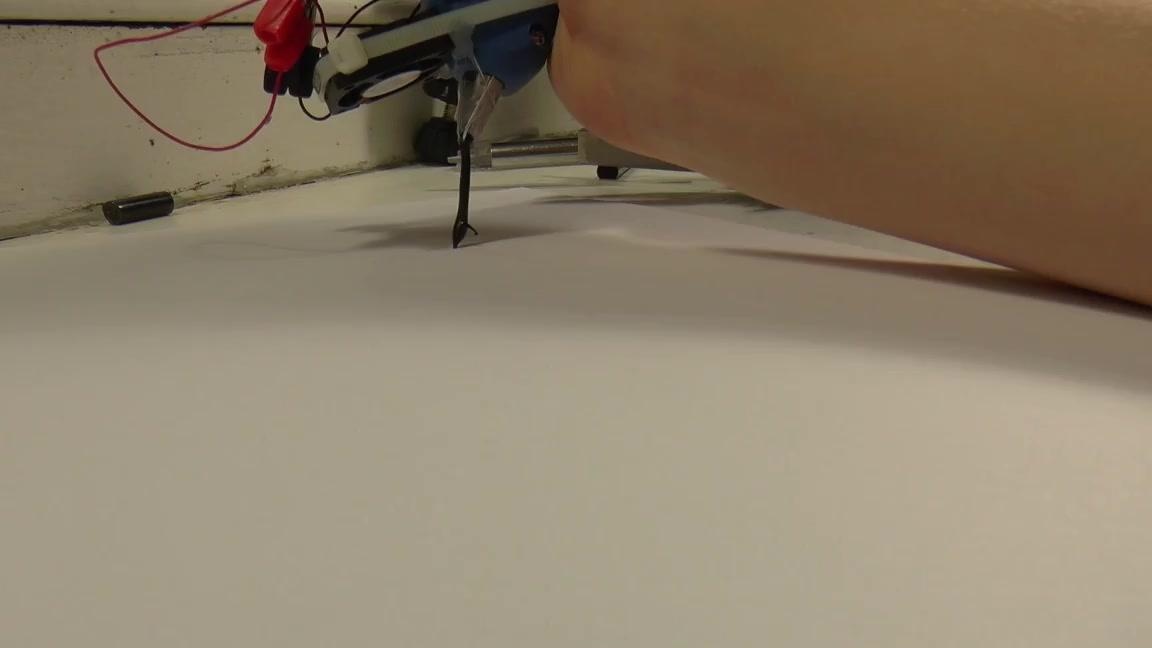
A simple 3D pen is ready. It works according to the following principle. The cooler blows air, which immediately cools the glue and allows you to get three-dimensional designs.