

Hello to all the masters, many who use a computer feel the superiority of the mouse and its convenience, but if you use the mouse on the phone, it’s also convenient, and even if you have a keyboard, your phone turns into a mini PC, in this article I will tell you how to make a mouse for phone do it yourself under micro USB.
To my surprise today, few people know that their phones have support for connecting third-party equipment. The idea came to my mind to implement it, it will not be so difficult. Almost everyone has a phone with OTG support, that is, we can use various devices with a USB connection. USB OTG adapters are sold in the markets, but their use for a device such as a mouse is inconvenient. That is why I decided to make the mouse separately for the phone, it is convenient when using the Internet, you can draw with the mouse and even play. Before manufacturing, we will verify the availability of the necessary, in order to assemble a miracle with a do-it-yourself mouse for the phone, we need:
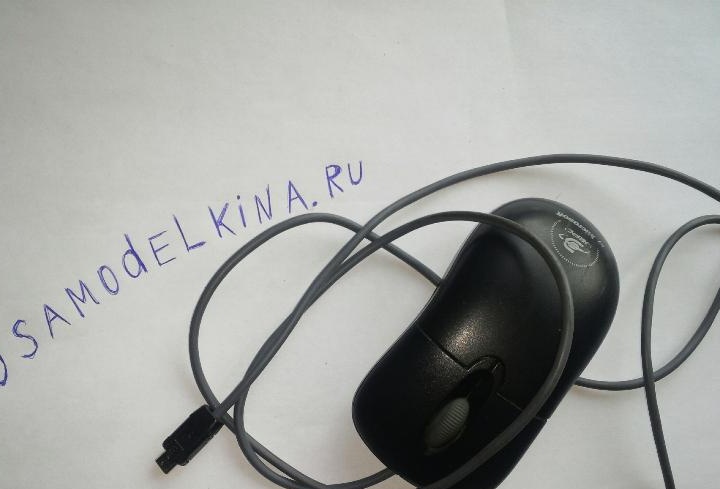
• Wired computer mouse.
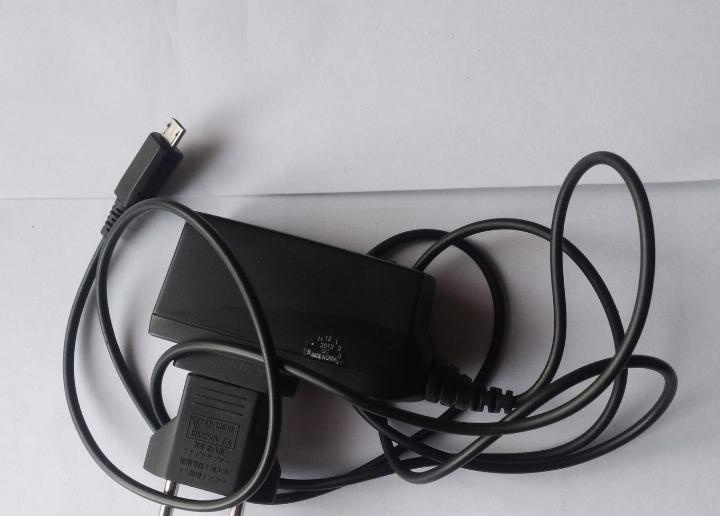
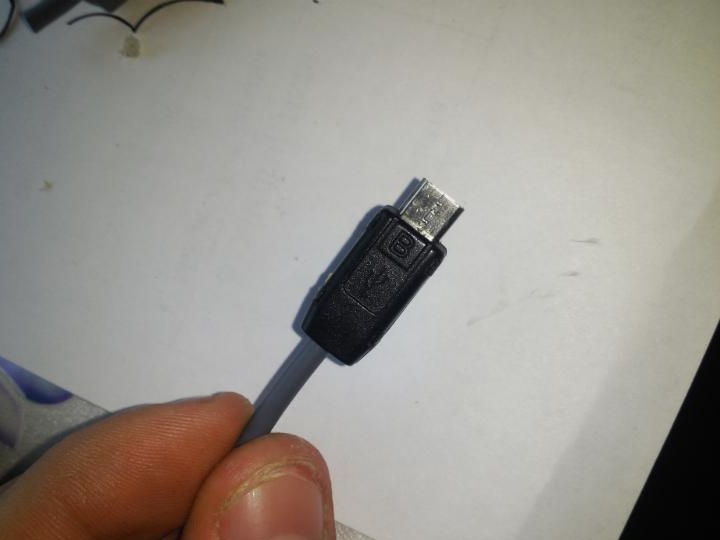
• A micro USB plug from any charge, data cable or purchased, can be found in any radio store for the price of about 15-25 rubles.
• Tools: soldering iron up to 40 watts, rosin, solder and hot melt.
• The case for micro USB, the one that connects to the phone, is sold complete with the plug itself.
All the necessary assembly, you can proceed.
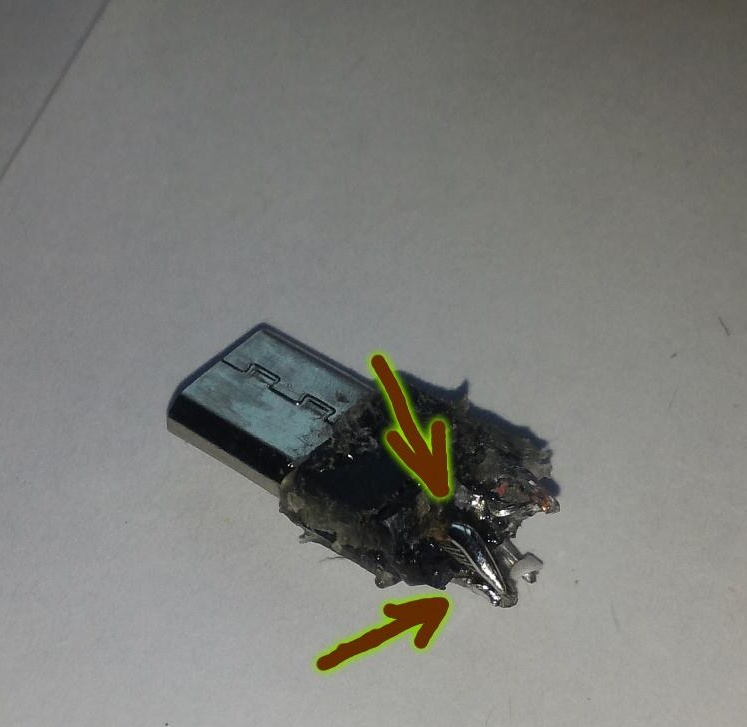
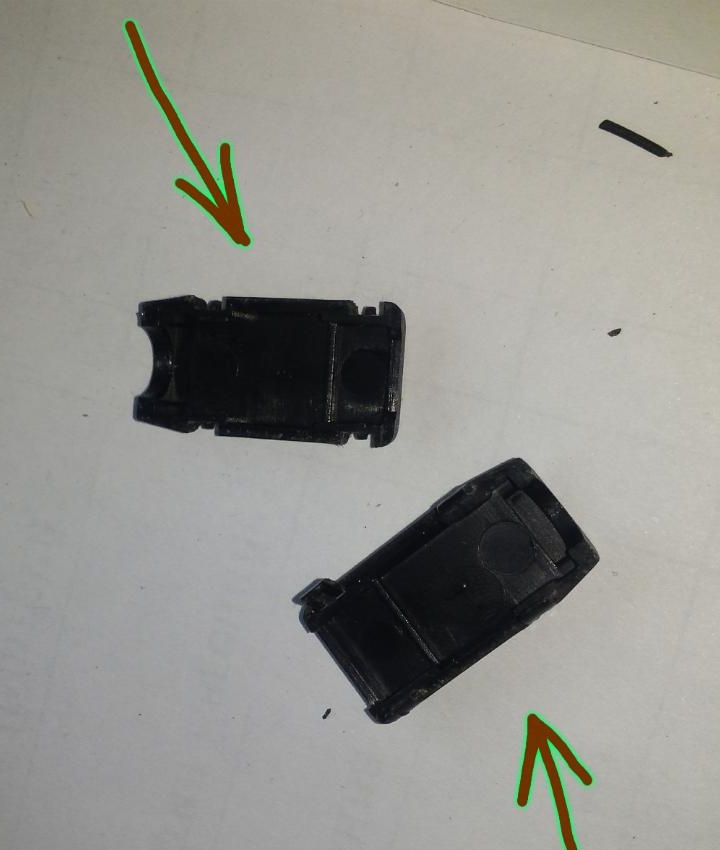
The first step is to disassemble the micro USB, taken from unnecessary charging.
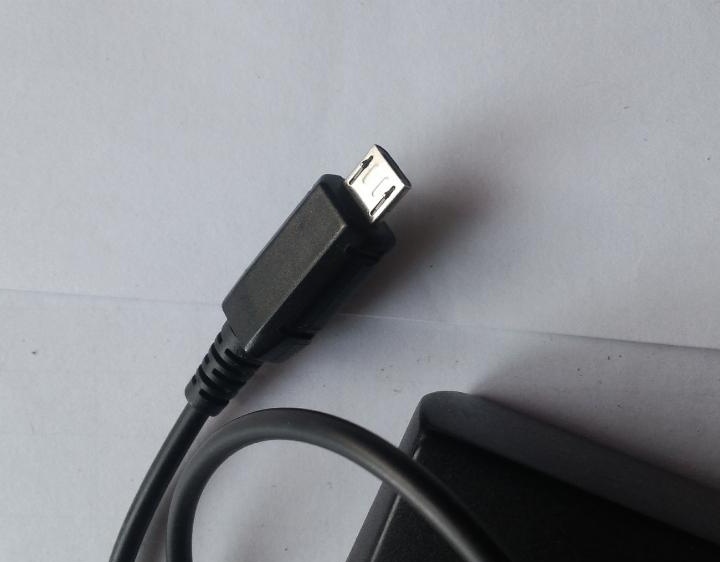
There are two solutions, or rather, if you have a rubber micro USB case, you need to cut it in half with a stationery knife, but if it is plastic, then you need to unfasten two latches on each side, then you will get access to our plug.
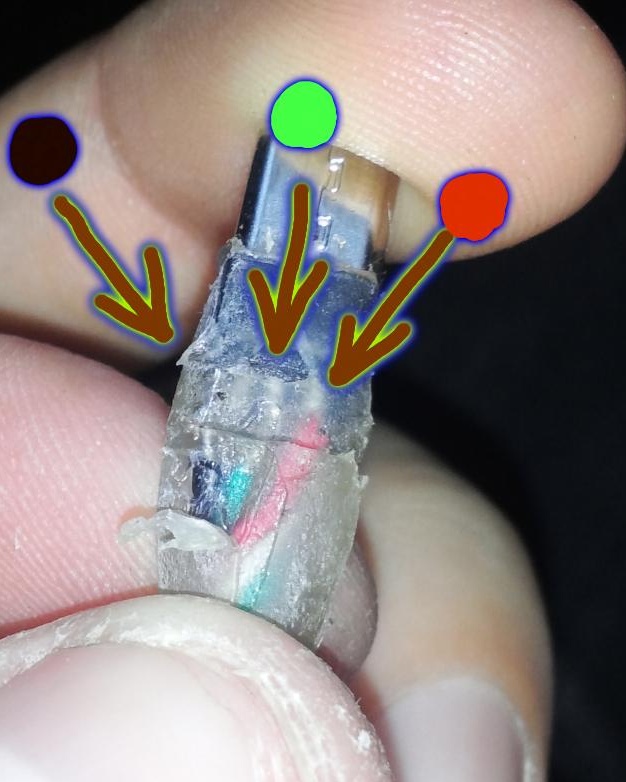
The next step is the wiring of the plug; for this, the tip of the soldering iron must be ground to a width of 1.5-2 mm, dipped hot in rosin and covered with solder, since everything is tiny in micro usb. Solder carefully, do not touch the plastic part of the plug.

After unsoldering, you can start choosing a future telephone mouse; the choice fell on a long-lying mouse with pinned wires at the end of the plug.
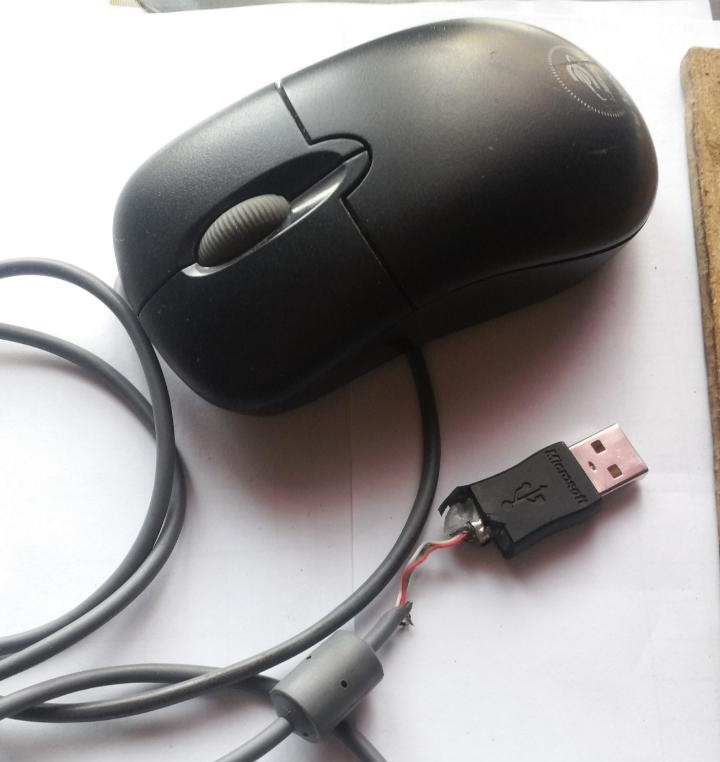
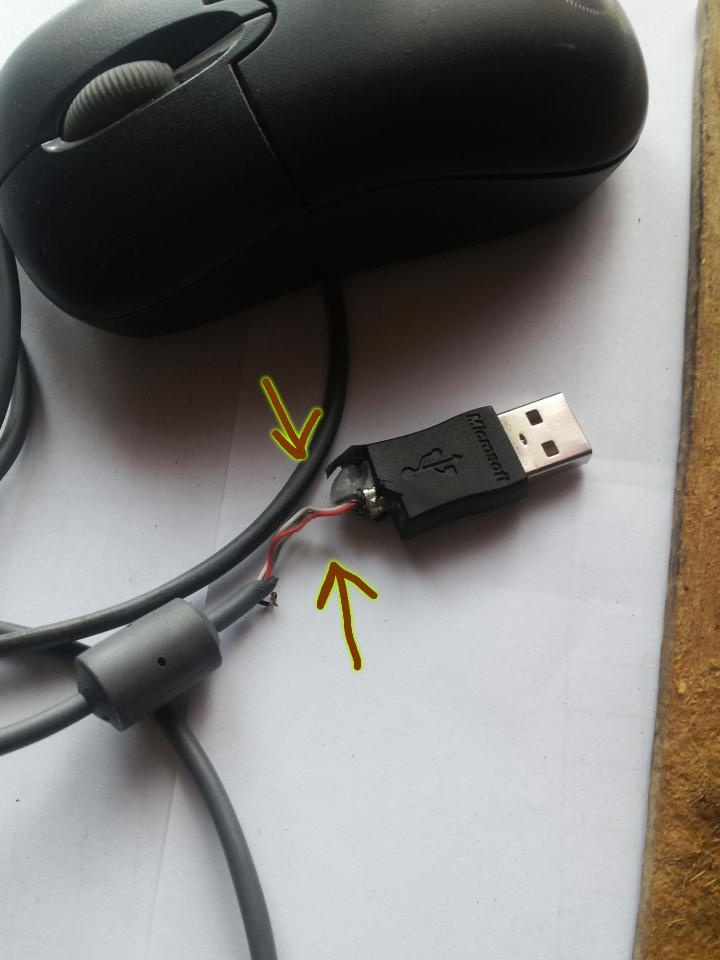
The mouse needs to be freed from the old USB, we won’t need it, we will put micro USB in its place. With a slight movement of the clerical knife we do this.
Now the assembly of the electronics remains, we use the same thin-tip soldering iron to trick four wires from the mouse, we do not need the screen of the wire, this is the same film from the pseudo-foil.
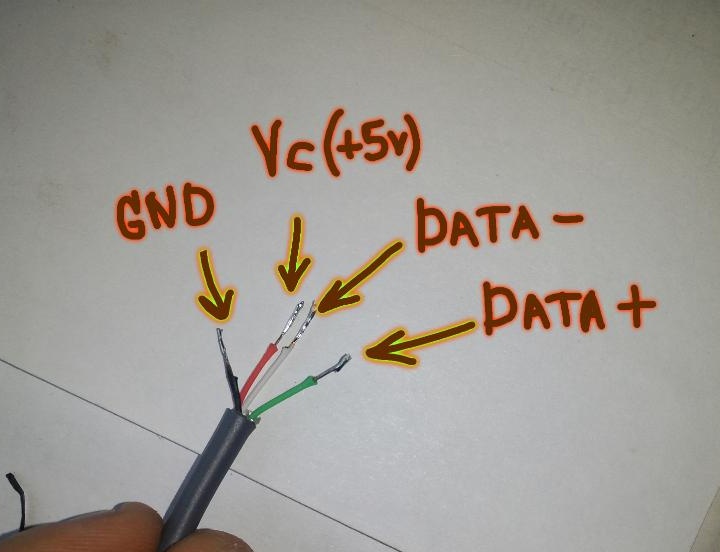
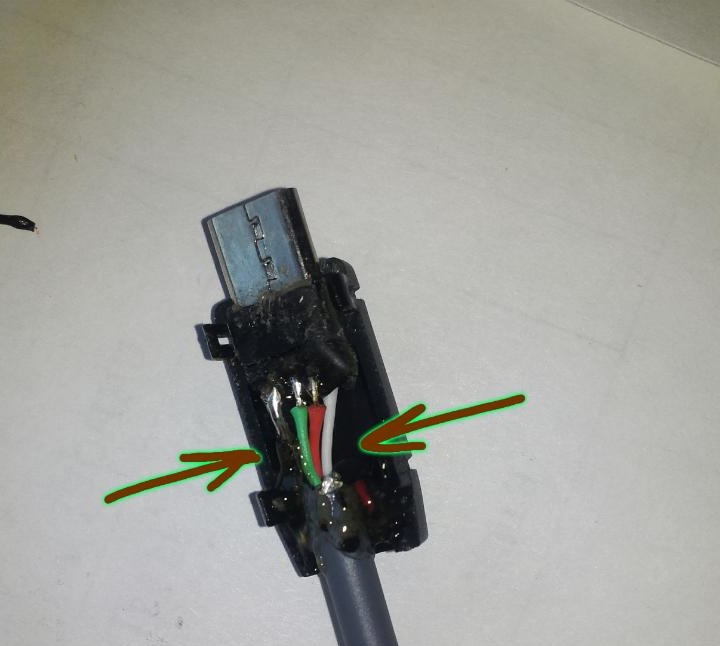
After the wires are tinned, you can study the pinout of the connection.
The fact is that if you simply solder all four wires from the mouse to micro USB, then nothing will work, the black wire is responsible for the operation mode of the additional equipment, which must be connected to the opposite side, just flip the micro USB and solder the jumper on both sides from the wire.
The colors of the wires are not in vain, the red wire is the power plus, the black minus, that is, the same mass, the green is the data power, plus, and the white is the data power is minus.
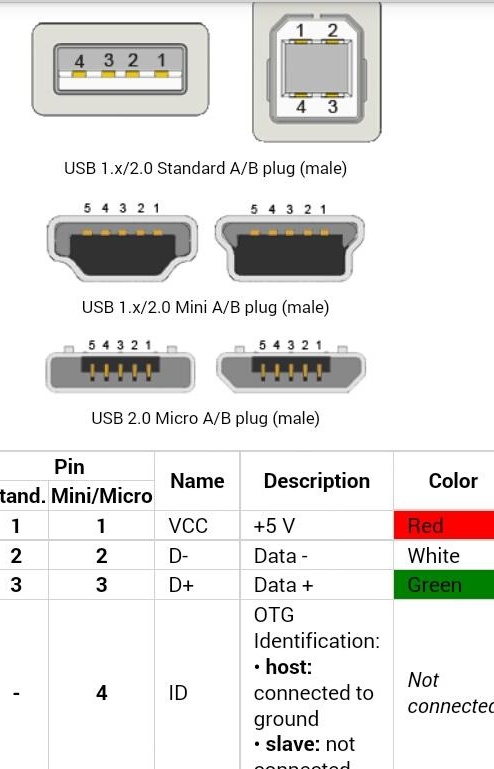
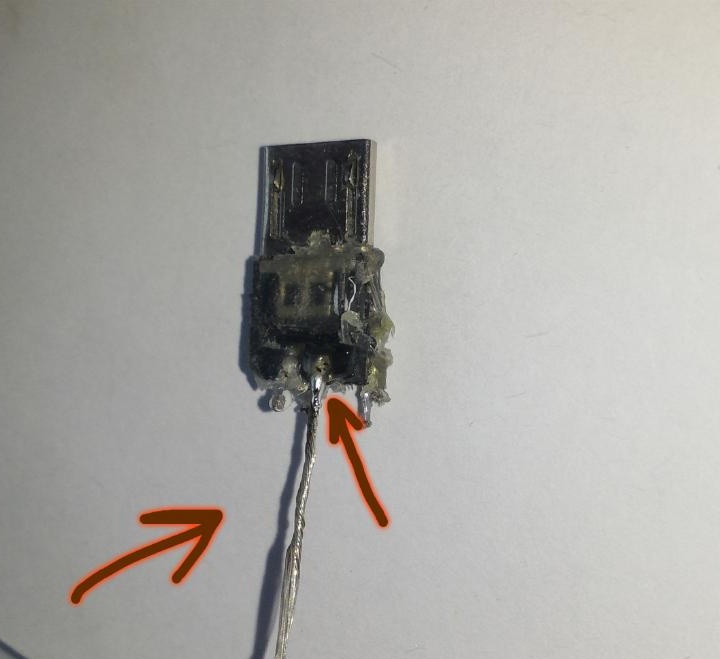
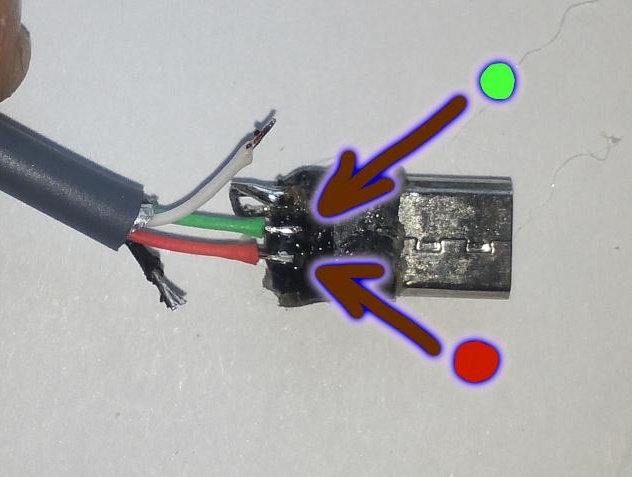
By pinout, we solder the wires from the mouse to micro USB, everything is quite simple, the micro usb numbers are shown in the photo (do not confuse the sides) and yet, the main thing is not to close the wires with each other. It looks like a soldered plug on top and bottom.
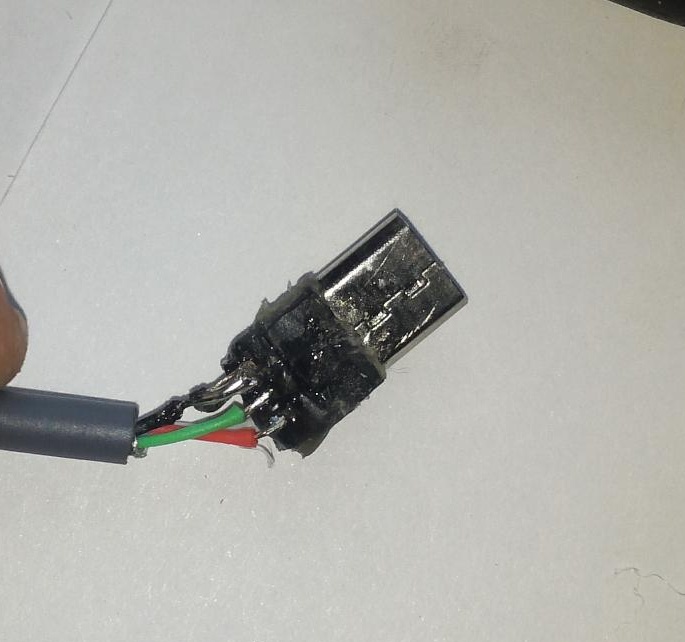
To make the mouse look decent, you need to put everything in the case (homemade doesn’t mean ugly), I was lucky in that, the case came in plastic and collapsible, having glued the whole thing a little with hot melt, we close our micro USB.
We give the glue to cool and check, everything works, when the mouse is connected, the phone notifies you that the USB device is turned on, and the laser glows on the mouse itself, a black cursor with a white border appears on the screen. Using the mouse brought me a lot of pleasure, it’s convenient to use it, it’s also nice that the wheel functions like on a computer, it creates the feeling of a mini computer, on the other hand, using the mouse on the phone is original. All successful homemade and new ideas in science technology. : wink: