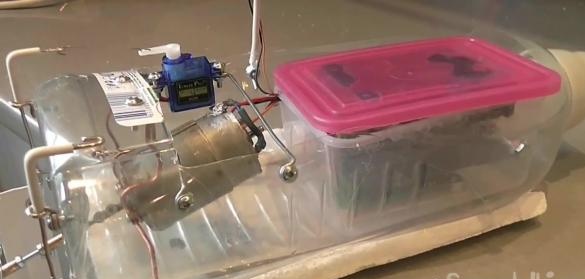
Radio-controlled boats are popular among children as well as airplanes, cars and other similar toys. In this material, we present to your attention a review of a video on the manufacture of a budget boat for radio control.
Let's start by watching the author’s footage.
So we need:
- Chinese analogue of the board Arduino UNO;
- 4 channel radio transmitter and relay receiver;
- servo drive;
- three rechargeable batteries with boxes;
- engine;
- housing;
- propeller screw;
- sealed container.
As the body, you can use a plastic bottle from shampoo or detergent, as the author of the video does. According to the author of the idea, the range of the boat is 300 meters. We will not waste time in vain and step into the manufacture of the boat.
At the beginning of work, it is necessary to connect the engine, the propeller and the housing using wire and bolts. The final result of the engine you can see in the figure below. From the same figure, you can see that the propeller blades should be located far from the engine. More precisely, this distance should be at least 10 cm. Without a long bolt, you can use several short ones that need to be connected alternately with adapters and nuts.
We check the engine for efficiency.
We fix the engine in a bottle, securing it with copper wires.
Let's move on to the assembly of electrical circuits. Begin by programming the board. Note that Arduino boards and their Chinese counterparts are connected to the PC using a USB cable that is used to connect the printer. For the firmware of the board, a special program is used, which can be downloaded from the official site. When using a Chinese board, you also need to download the driver. And of course, in the end you will need program code. All links will be provided at the end of the material.
The assembly scheme is presented in the figure below.
You can connect the board exclusively with a 5.5 mm jack.
We check the assembly and assemble the boat. Electronics should be placed in a sealed container to protect it from water.
The rotary system should be assembled on a servo drive. From it should exit the wire at right angles, placed in the guides. At the end of the wires you need to attach a blade, which can be made from pieces of plastic.
On the bottom homemade You can stick a piece of foam that will add buoyancy to the boat.
Our boat is ready. If desired, you can decorate it and paint it in any convenient color, given that the paint should be waterproof.
References:
1.
2.
3.

