

Homemade stand-alone charger or 5 volt battery booster to charge a mobile device.
There are times when such a recharging device is extremely necessary, it can be:
• An “unexpected” battery failure of a mobile device and before buying a new one (while we are waiting for a parcel from China) often has to be recharged, and sockets are not always nearby.
• A multi-day trip to nature, a mobile opportunity to recharge.
• Spare charger option in extreme situations, survival kit.
• The telephone did not pick up at the right time, and the electricity was turned off, and other cases.
Of course, such a booster can be bought, but first it must be done by itself, and then it can be bought in a store. As one of the advantages of such a device, it is the ability to charge from conventional salt, alkaline batteries.
Point 1. For the manufacture we need such ...
Materials:
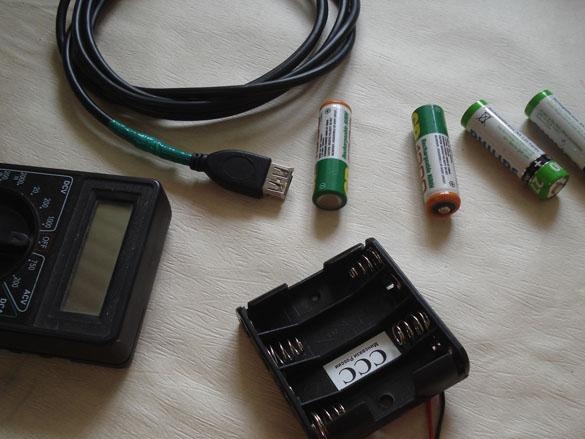
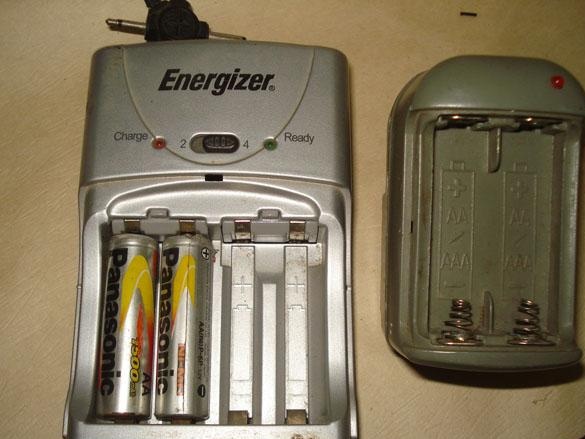
• Compartment for four AA batteries.
•. (the more the better) 4 pcs.
• USB extension cable.
• A charger for AA batteries or a charger from an old mobile phone.
Instruments:
• Soldering tools.
• Device tester.
Item 2. Production.
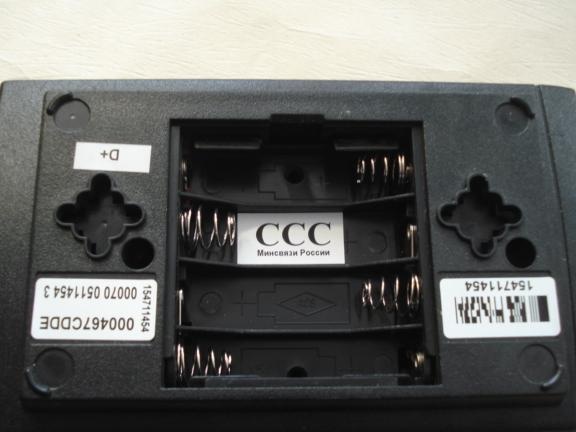
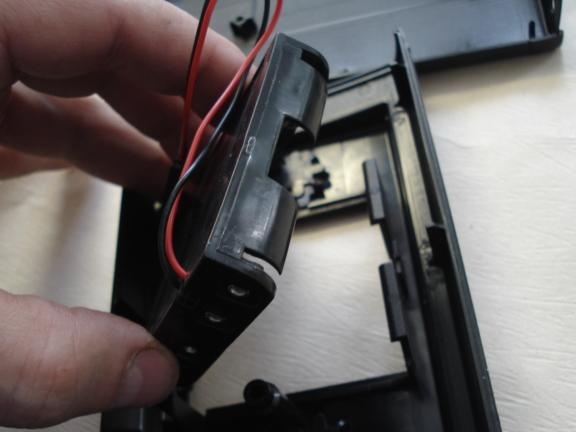
Before buying a battery compartment, look at old children's toys or an old one electronics, which worked on AA finger batteries. It’s possible to buy nothing and it’s not necessary, only a small part of where I could get such a spare part from.
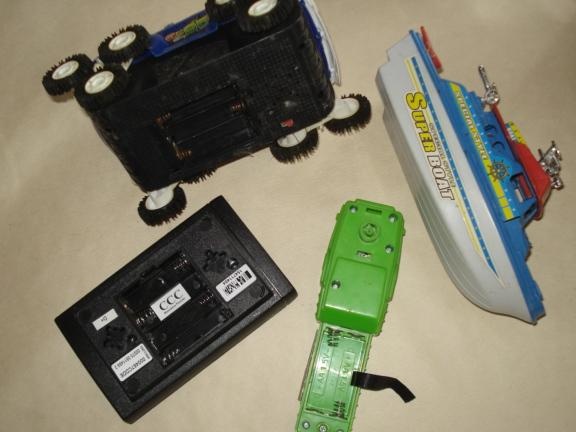
For example, we found an old telephone exchange, it contains what we need, it did not even need to be cut out, we just get it and use it.

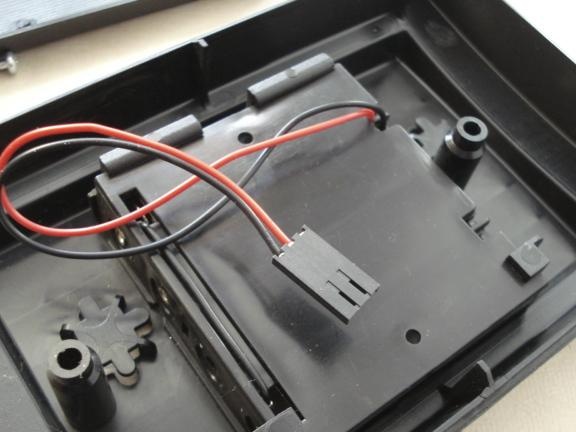
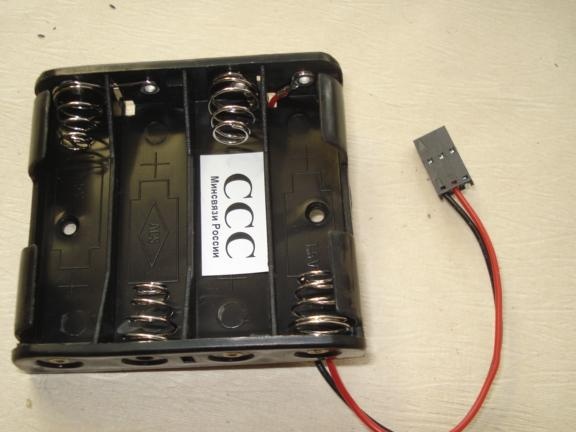
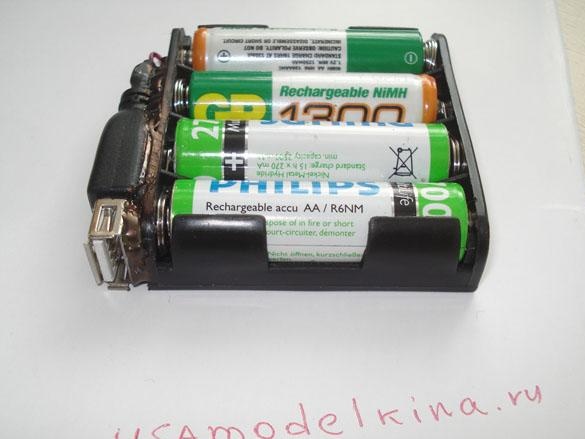
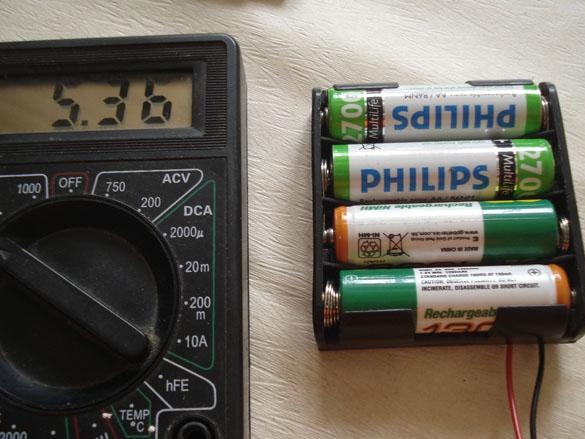
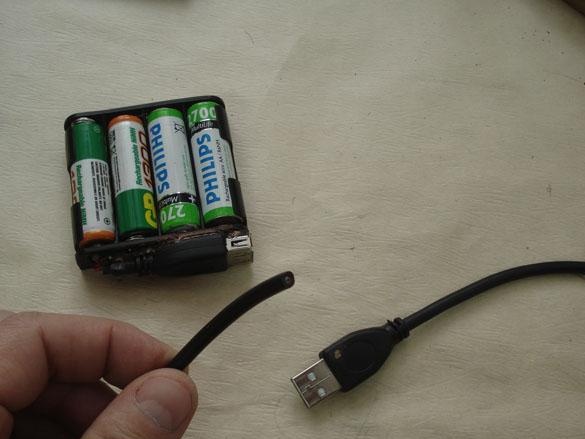
We insert the prepared four batteries, measure the voltage, it turns out more than 5 volts, then what is needed.
Almost all modern gadgets can charge from a USB connector, which is just 5 volts.
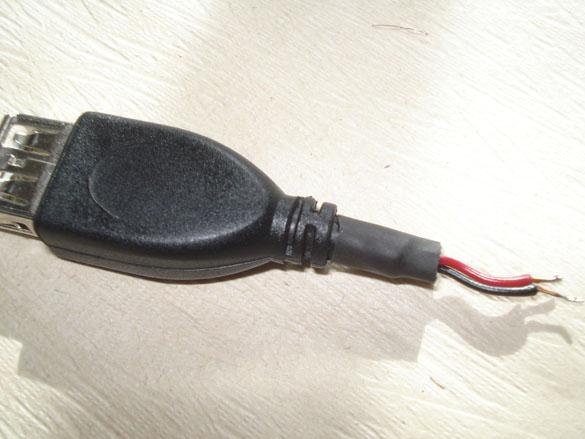
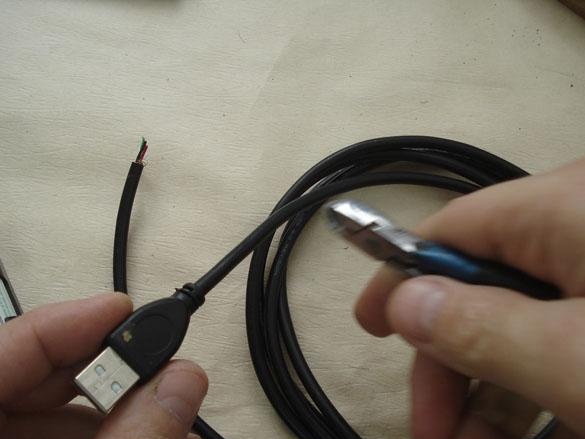
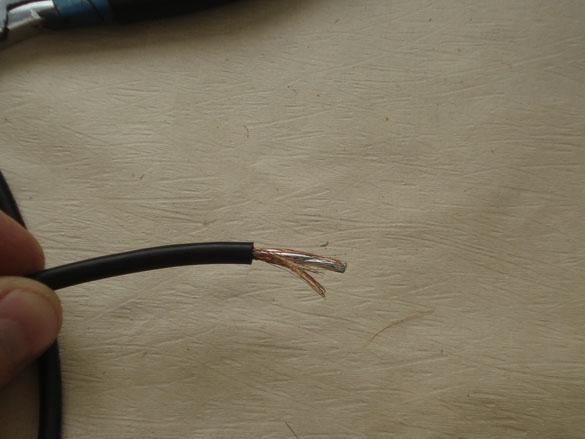
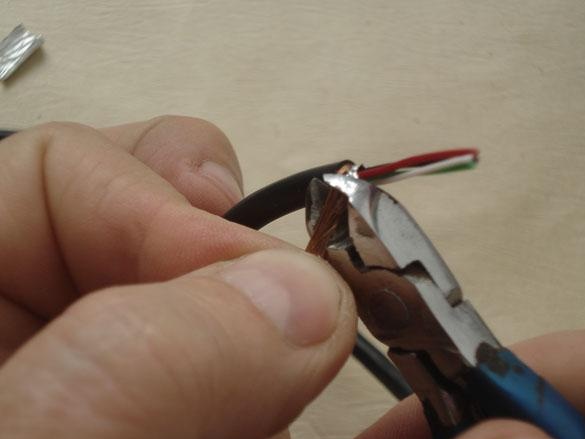
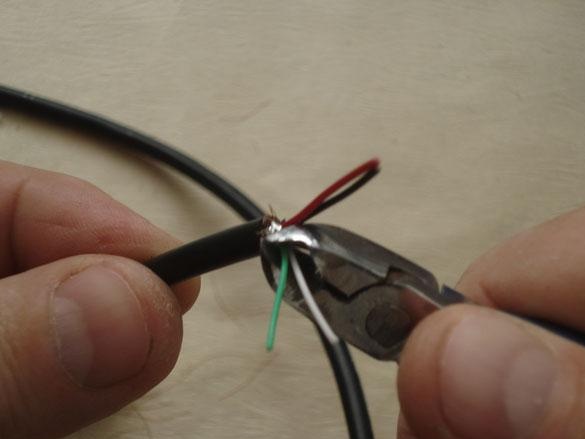
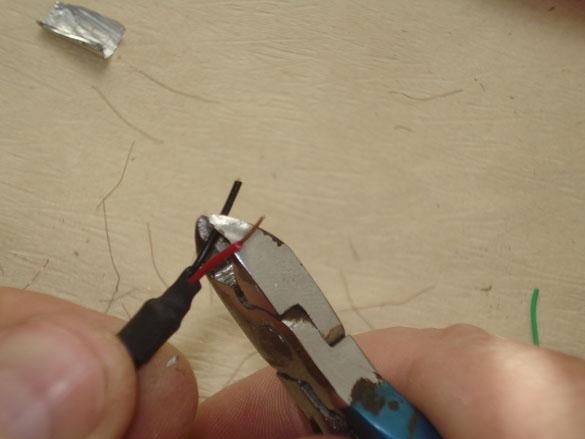
Therefore, we cut off the plug-in mother from the USB extension cable, look at the pinout of the contacts on the manual, and call the wire + and - on the device.
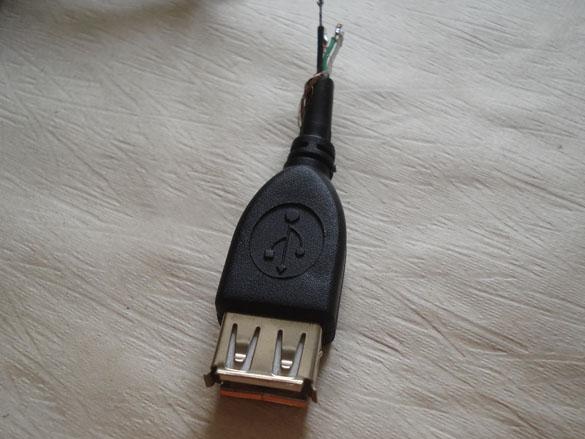
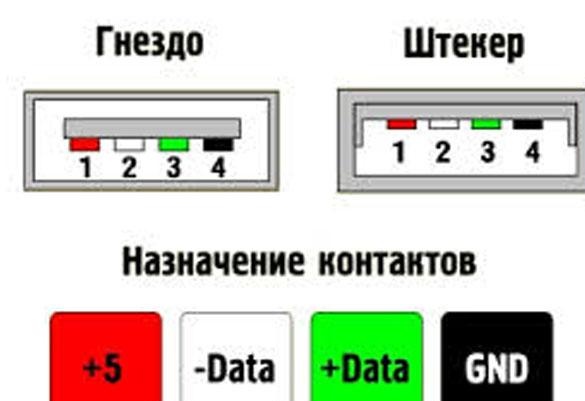

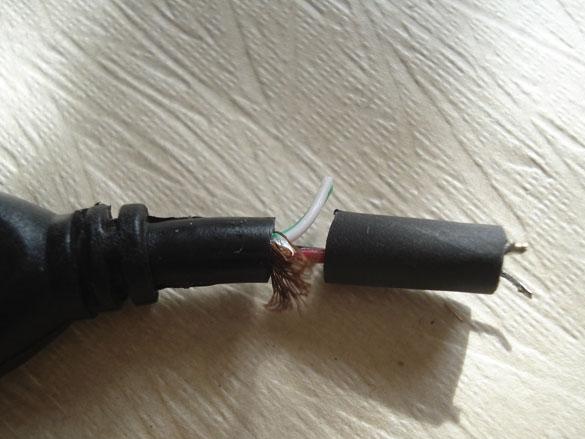
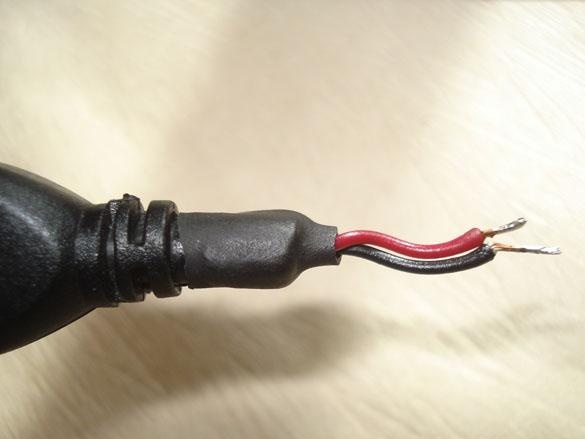
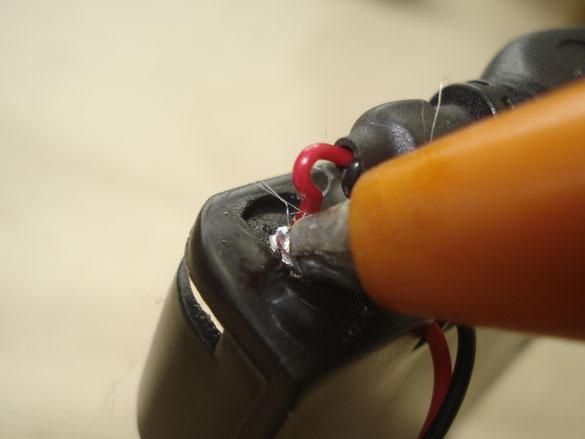
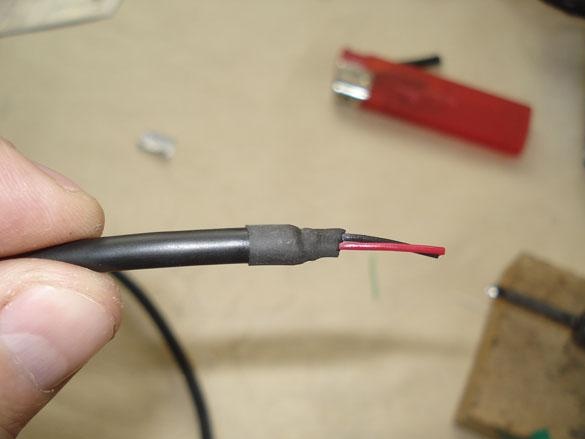
Result: + (red), - (black), the rest bite off and isolate.
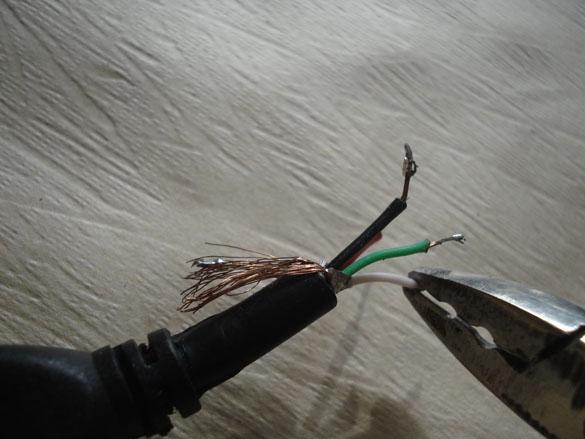
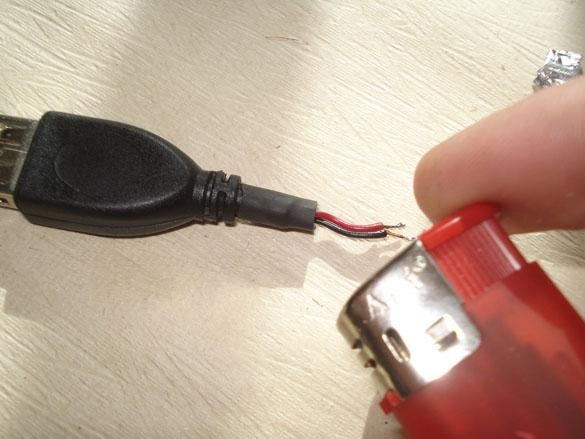
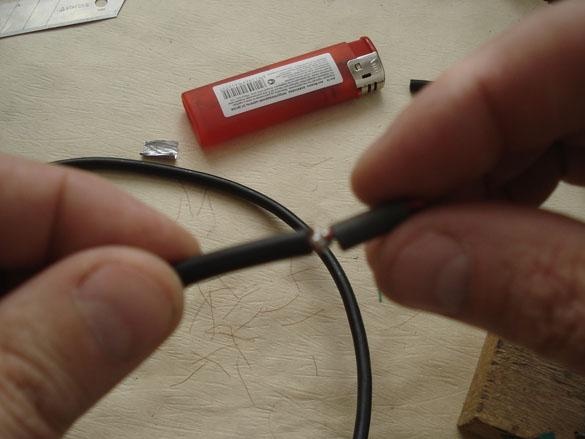
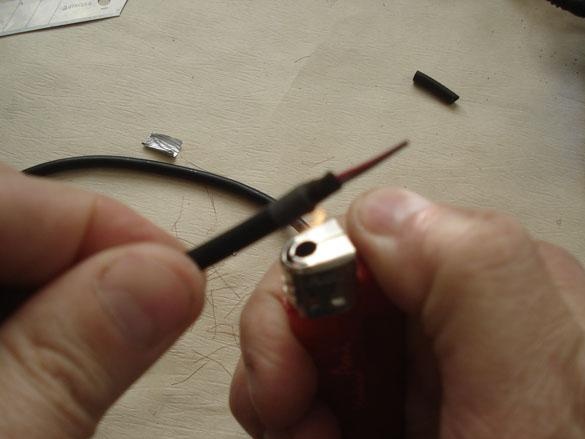
We put on a thermocambric and plant a lighter.
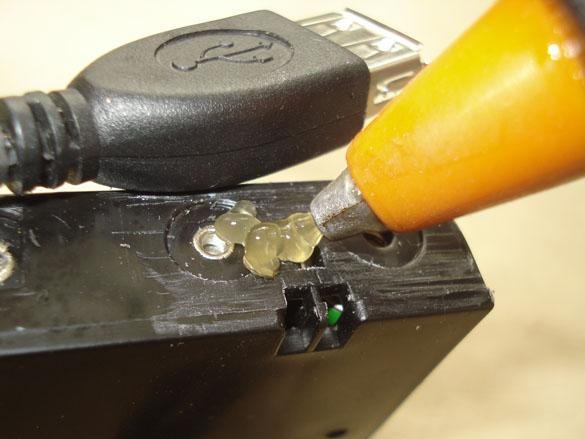
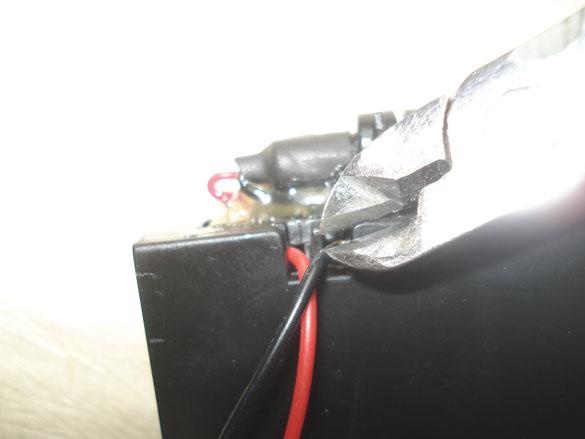
We try on the place where the plug will be attached.
To solder wires to metal rivets, you need to use soldering acid, then everything is quickly soldered and the plastic does not have time to start melting.

I apply acid with the tin stick itself.
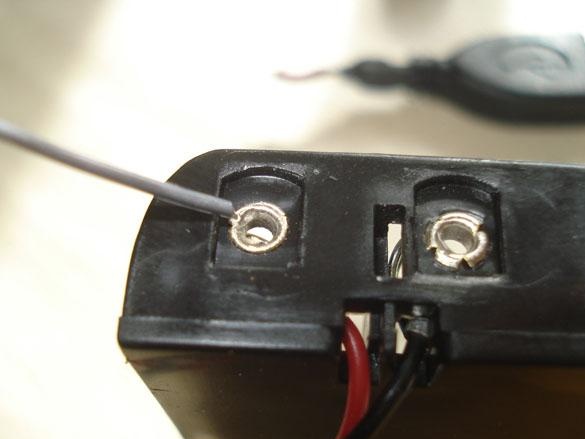
Quickly tinned rivets.

Soldered wires, + red on (+), - black on (-).
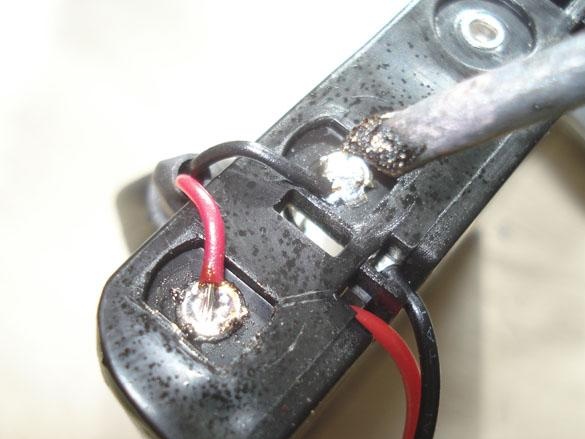
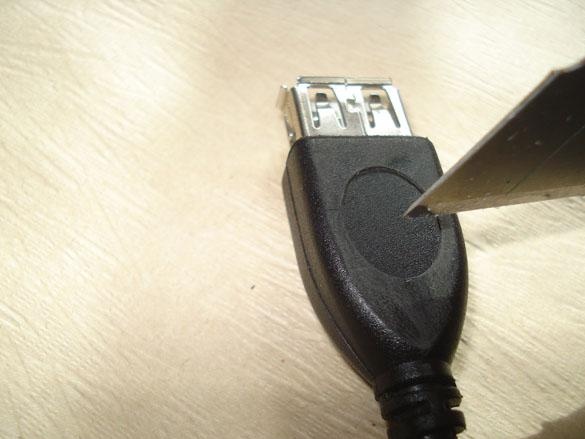
To glue the connector itself to the body, degrease or simply scrape the plastic with a knife.
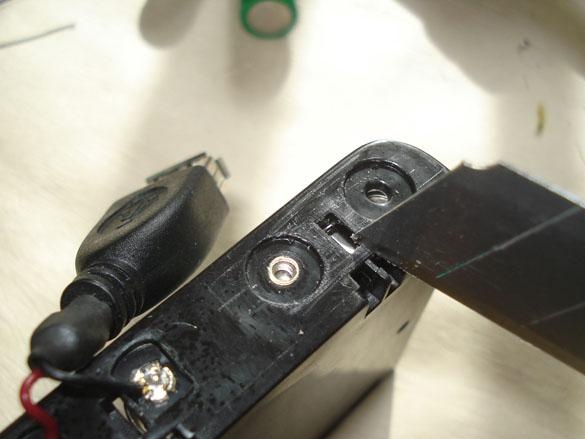
We also do with the connector.
We apply well-heated glue to the case and quickly press the connector.
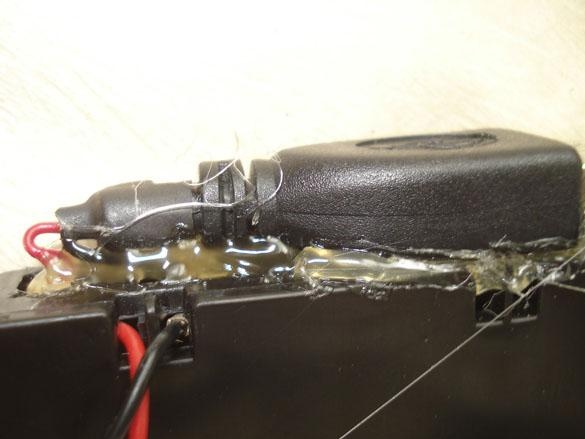
Then we glue around and also close all open contacts.

Bite off unnecessary wires, fill the ends with glue.
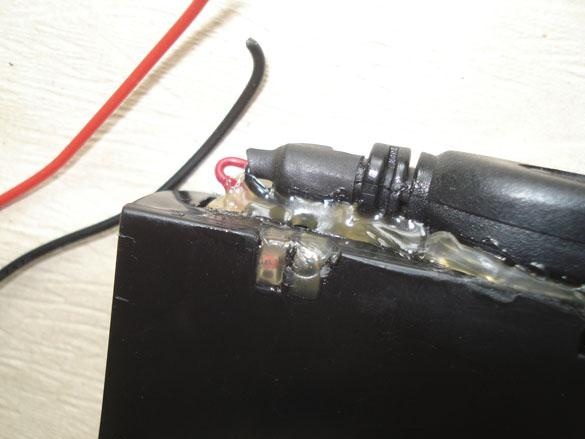
The glue can be painted over with a black marker.
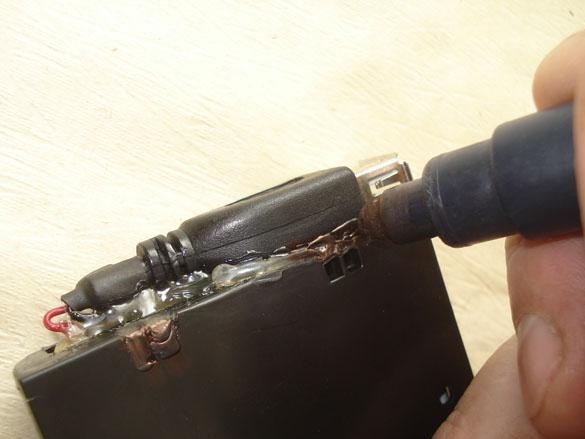
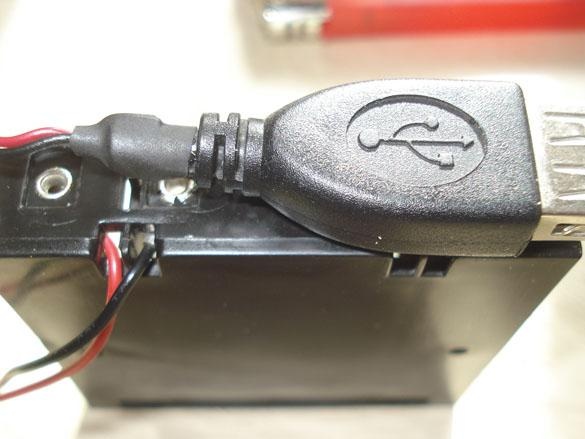
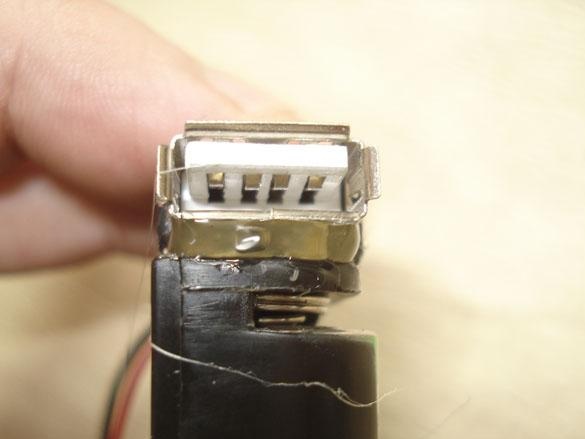
The charger is ready, we insert batteries of the same capacity.
In the photo there are different capacities, due to the lack of mine.
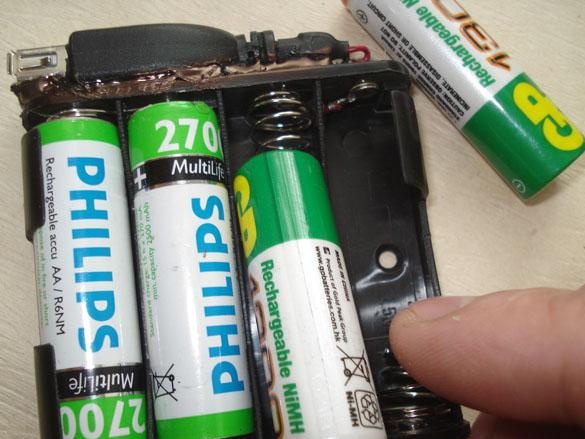
The capacity of the batteries used must be greater than the capacity of the battery in the mobile device.
Now let's make a cable for charging our charger. To do this, cut off the second connector from the USB extension cable, with a cable length of 50 cm.
We cut the wires.
Bite off all wires except black and red.
Close up in thermocambric.
We clean the ends of the wires and tin well.
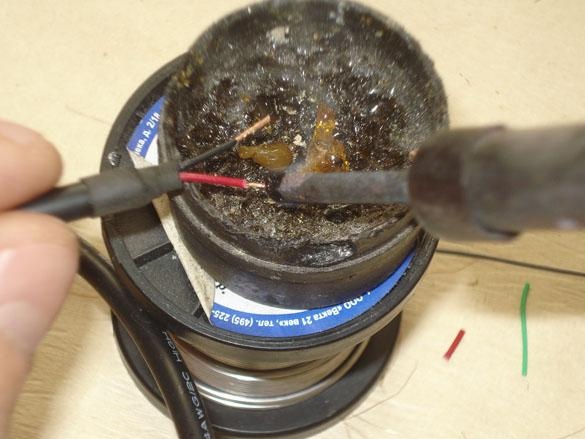
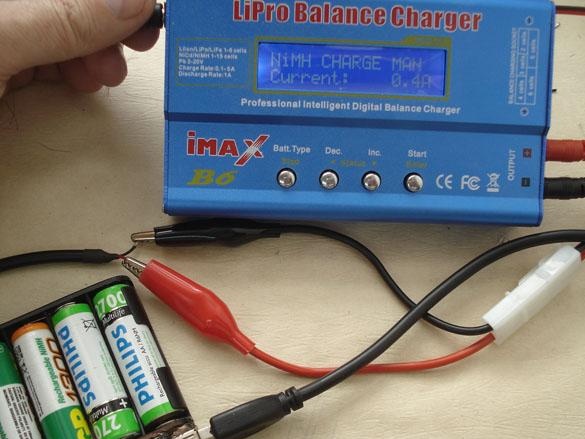
The cable is ready. You can use either a simple or smart charger to charge the batteries.
You can also use most of the chargers from cell phones.
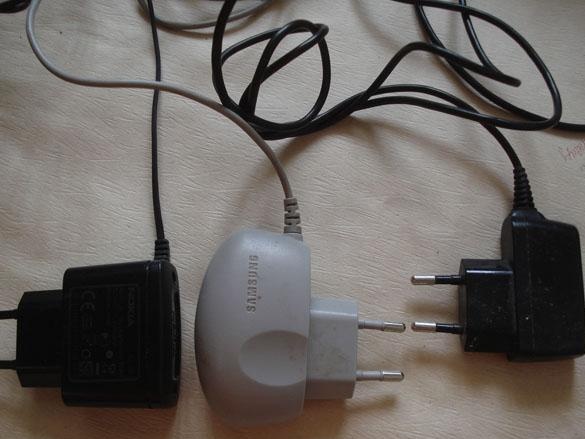
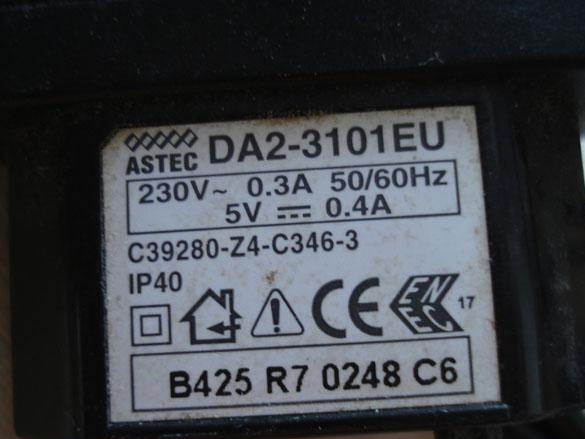
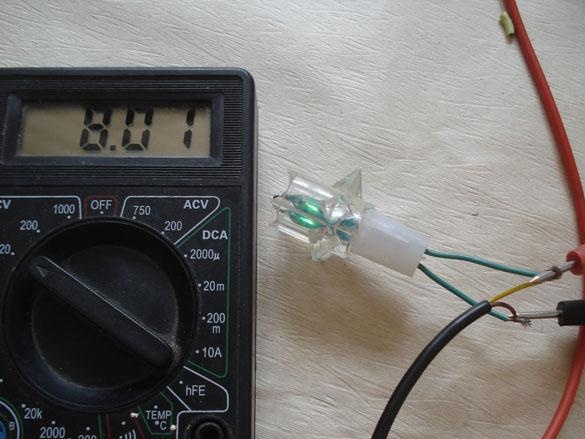
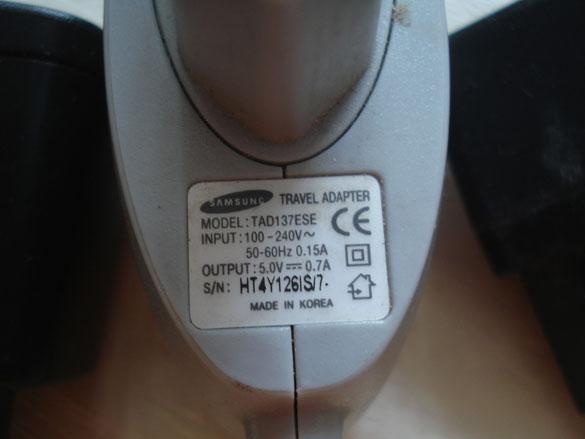
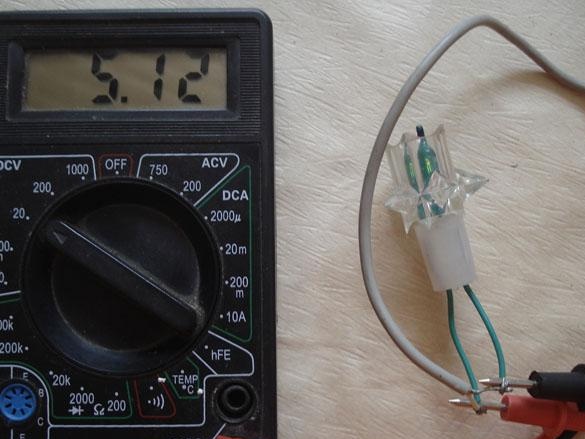
Just for starters, you need to check what the actual output voltage of a particular charger is. So for example, from my three options, the Siemens charge had 8 volts at the output instead of the proper 5 volts, as promised in the manual on the case.
To check the voltage, the output is loaded with a small 6-12 volt light bulb.
Therefore, to use it as a charger for a booster, you will first have to assemble an additional stabilizer circuit for 5-6 volts.
In the remaining chargers, the output voltage corresponded to the declared one.
You can also simply remove the batteries and charge them individually in any other charger for which batteries.
Point 3. Checking the charger.
We install charged batteries in the booster case, connect the phone to it using USB, and watch how the charging went.
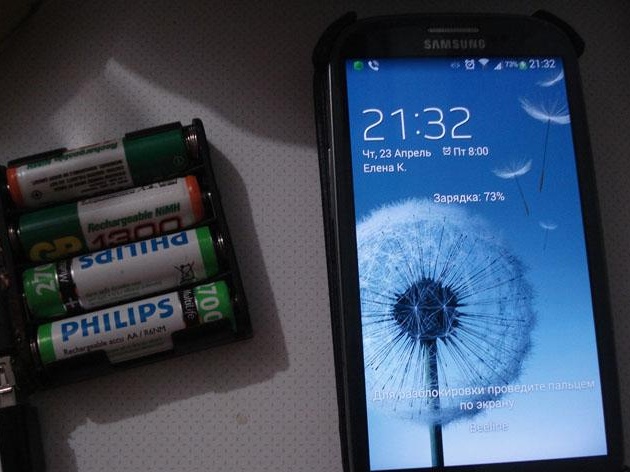
In an hour, the phone took 50% of the charge and the voltage on the booster dropped to 4.9 volts, if you put all the correct capacities at 2700 mAh, then the indicator will be even better. Now you have an emergency charger that you can take with you on the road, etc.