Before anyone who wants to make a knife do it yourself, sooner or later, the problem arises of hardening a billet made of annealed mild steel. Most of the “garage” craftsmen, who have a poor set of machines, devices and appliances, do not have the opportunity to do this rather complicated operation on their own, in artisanal conditions, since hardening requires either a blacksmith furnace or an electric muffle furnace. Until recently, while living in another city, I tempered workpieces using the muffle furnace available in the workshop in which I had a good friend. Now, when I did not have such an opportunity, I decided to make the simplest hearth for hardening knife blades the garage. In order not to “invent bike»The design of the simplest small bugle found on the Internet. I decided to do a similar, improving it a bit.
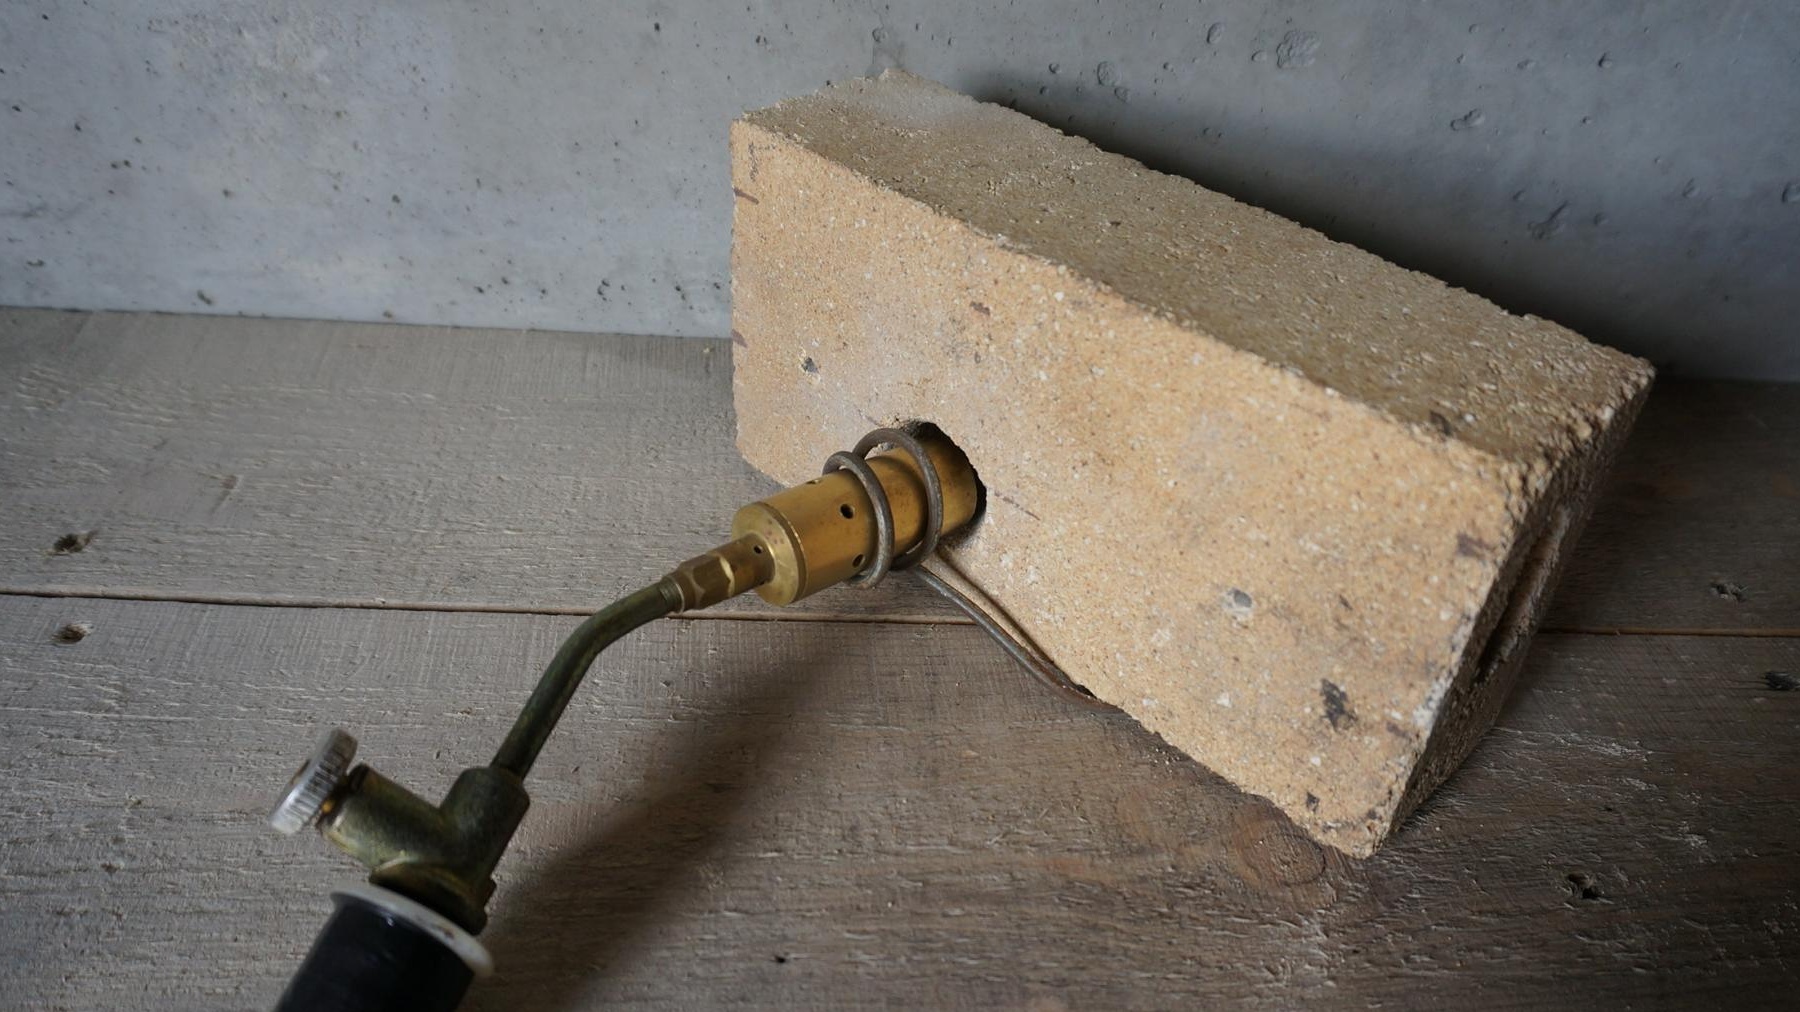
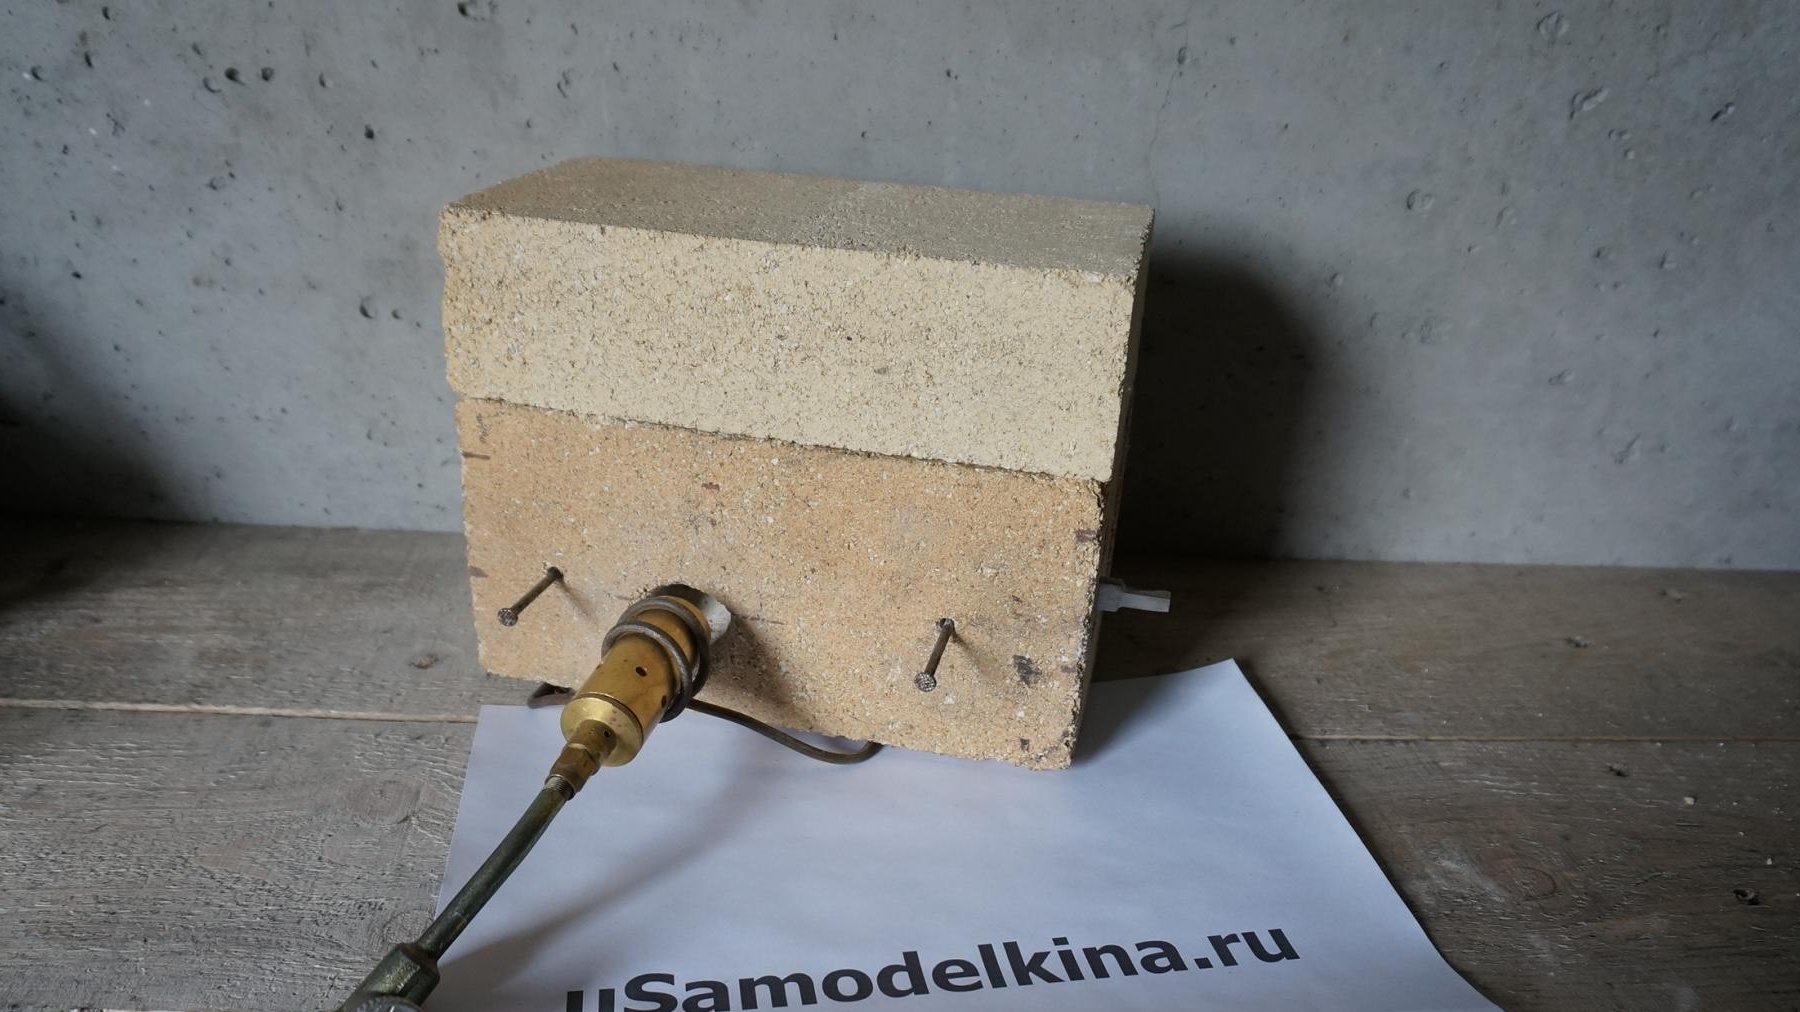
A do-it-yourself “garage” horn for hardening small steel billets consists of fireclay bricks, with specially made holes, a wire holder for the gas burner, and the burner itself. The hearth itself, to prevent the destruction of the main brick from temperature changes during heating and cooling, is lined with three similar bricks on three sides.
Made by me device not yet in work. But, given that the hearth has a small chamber for heating, and the flame temperature of the burner is about 2000 degrees C, it seems to me that the workpiece can be easily heated to the required temperature, depending on the grade of steel, from 800 to 1100 degrees.
I will check the operation of the hearth in practice in the near future, after the completion of the processing of the workpiece.
Materials and tools:
- fireclay refractory brick;
- wire;
- gas-burner;
- drill with a set of drills;
- pliers.
Description of manufacture:
Step 1: Formation of the main hole.
We mark the maximum width of the existing and possible future knife blanks at both ends of the brick for drilling holes through holes. We drill two parallel through holes with a diameter of 25 mm from the end face of the brick. In my case, the length of the drill did not allow me to drill a brick through in one pass, so I had to make holes on both sides towards each other. It is advisable to drill a brick at low speeds, since it can crack.
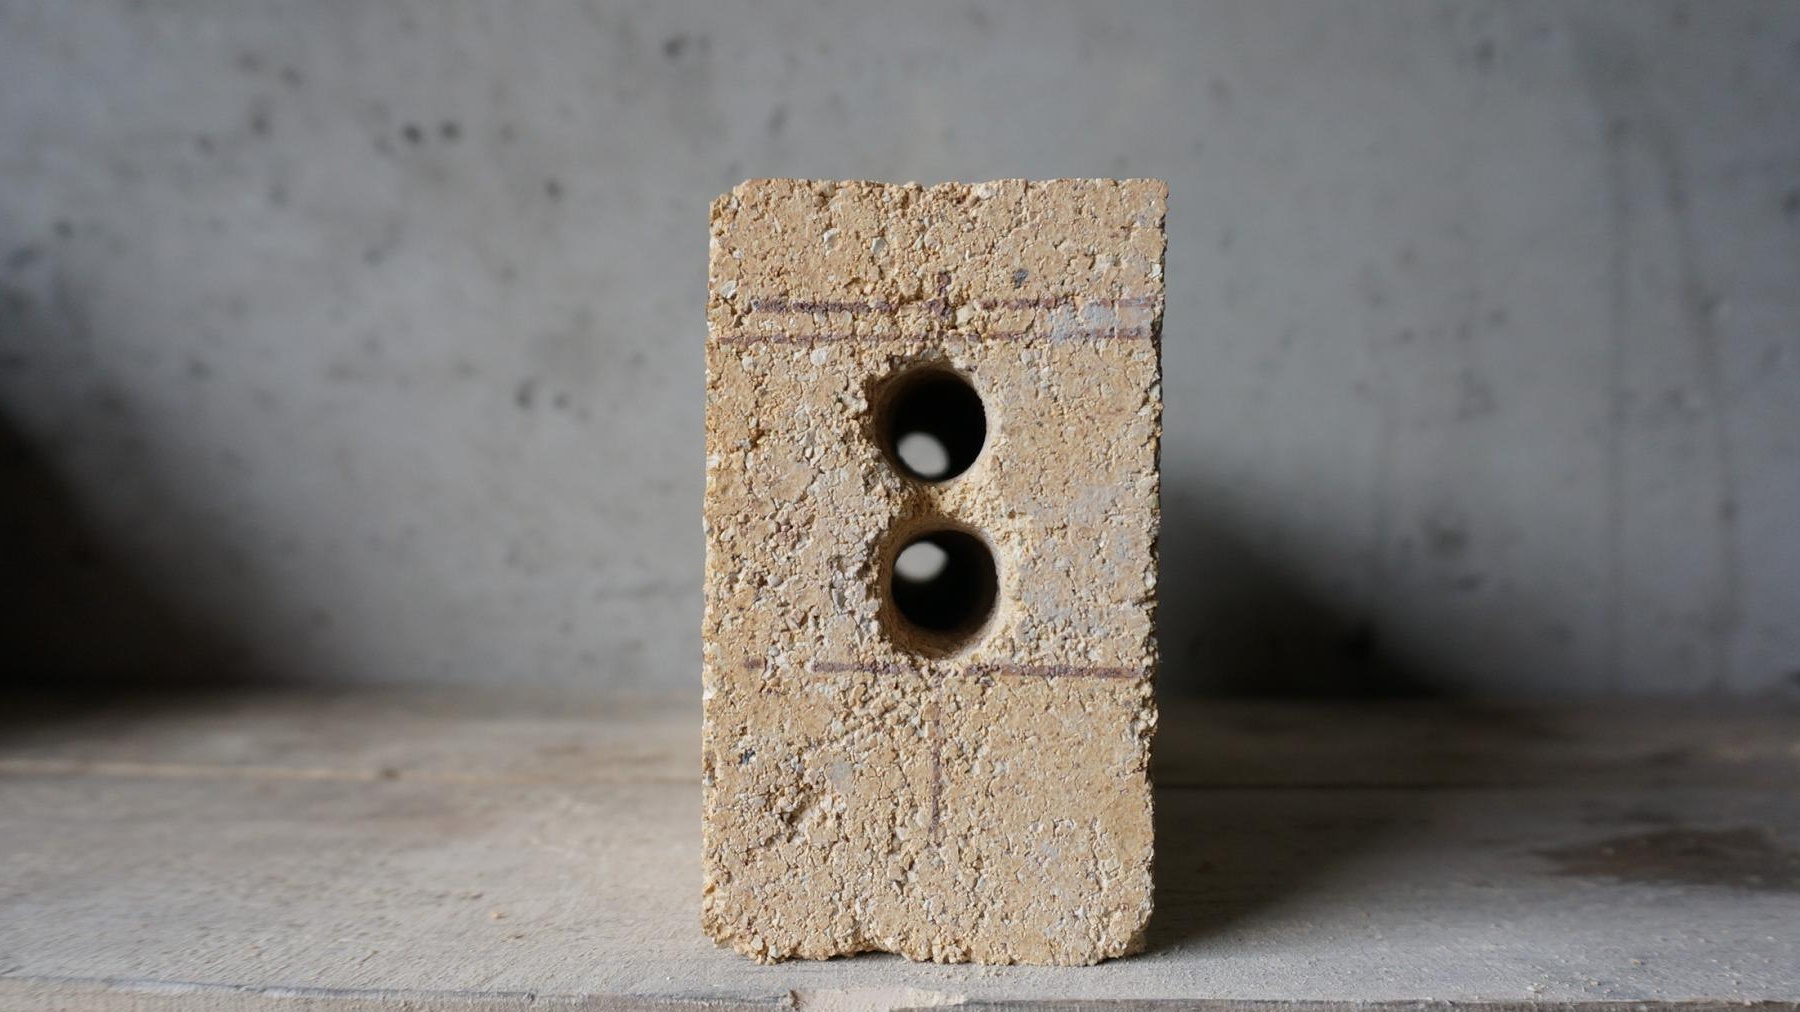
With a perforator with a drill for punching, we remove the partition formed between the through holes and thus obtain an oval chamber with a cross-section, the entire length of the brick, where the workpiece will be placed for heating to the required temperature.

Step 2: Create burner holes and workpiece holders.
On the front part of the brick, mark the approximate place where the burner flame enters the chamber for heating according to the existing workpiece. At the same time, we take into account that it should be located below the lower part of the chamber, so that the flame enters the chamber from below, approximately in the middle of the workpiece, which will contribute to its faster and more uniform heating. Using a punch, we make a hole with a diameter slightly larger than the diameter of the burner (about 55 mm). The hole should not be through and reach the rear wall of the chamber.
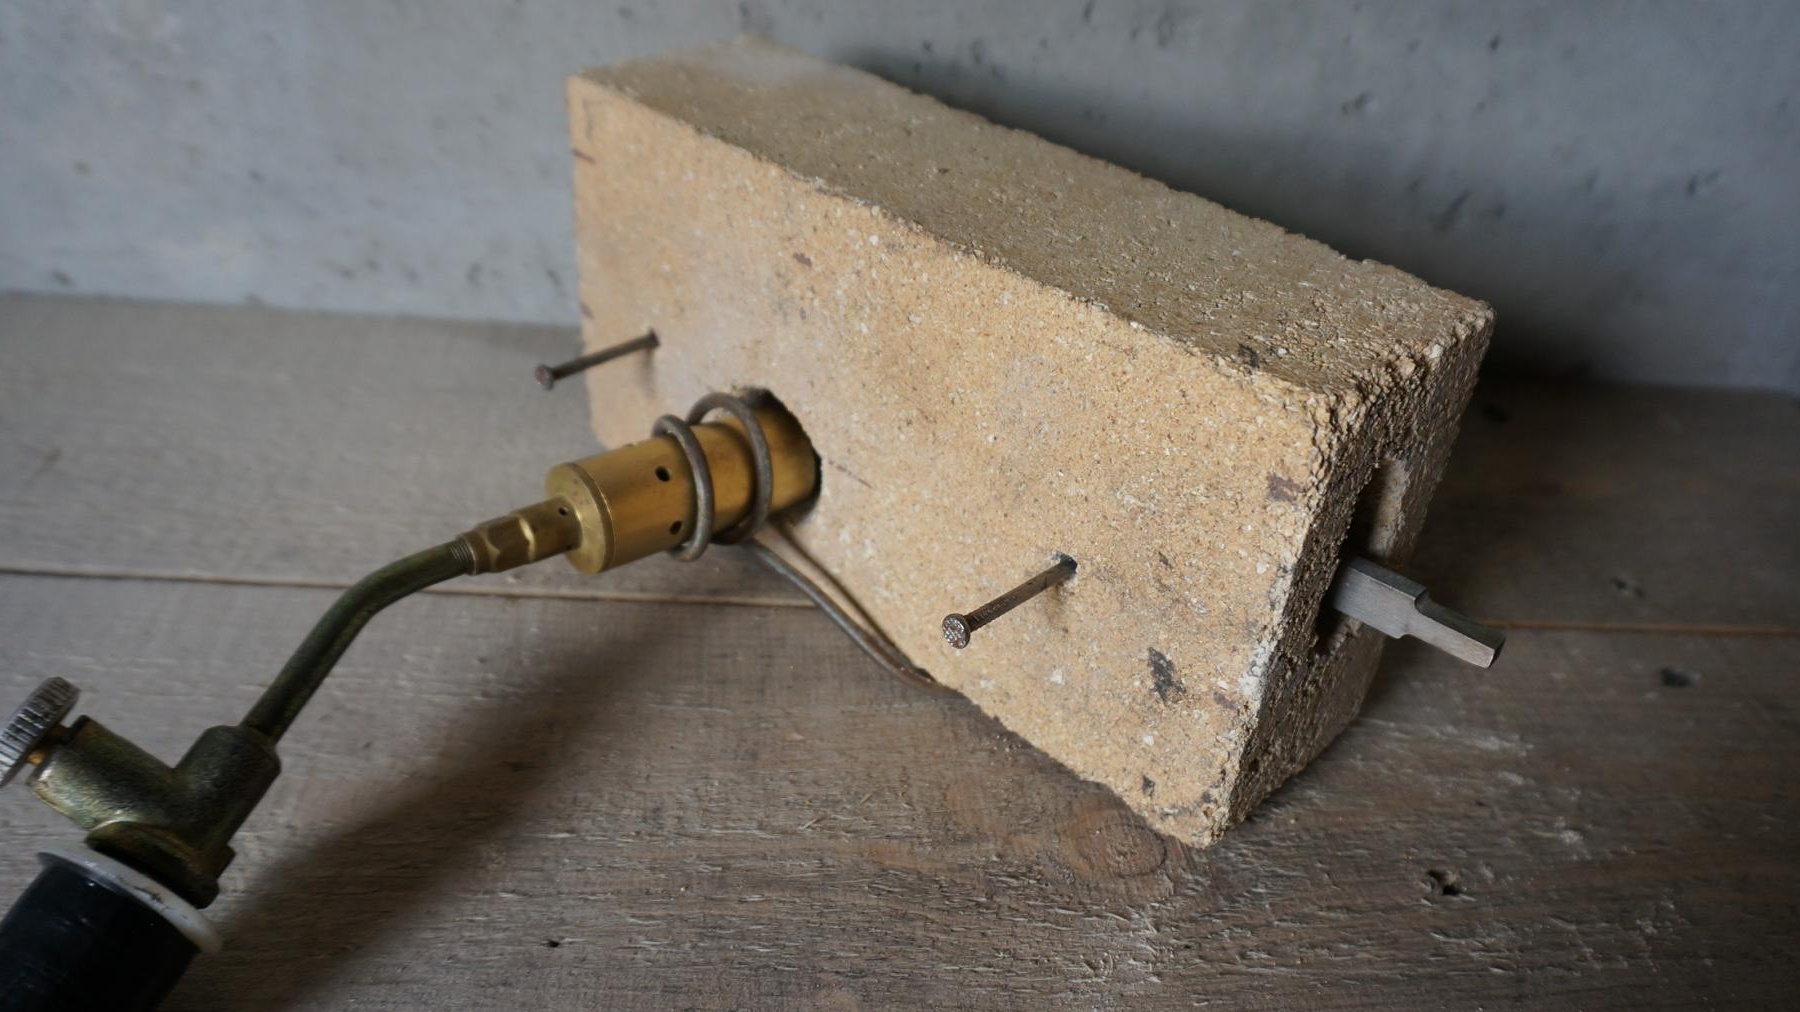
We mark on the knife blank the places for the holes of the holders, so that the knife blank set on them on the rib is at a distance of 5 - 7 mm from the bottom of the chamber and is uniformly covered by the burner from all sides. We drill holes with a 5 mm drill perpendicular to the plane of the front of the brick so that the drill enters 15 to 20 mm into the rear wall of the chamber.

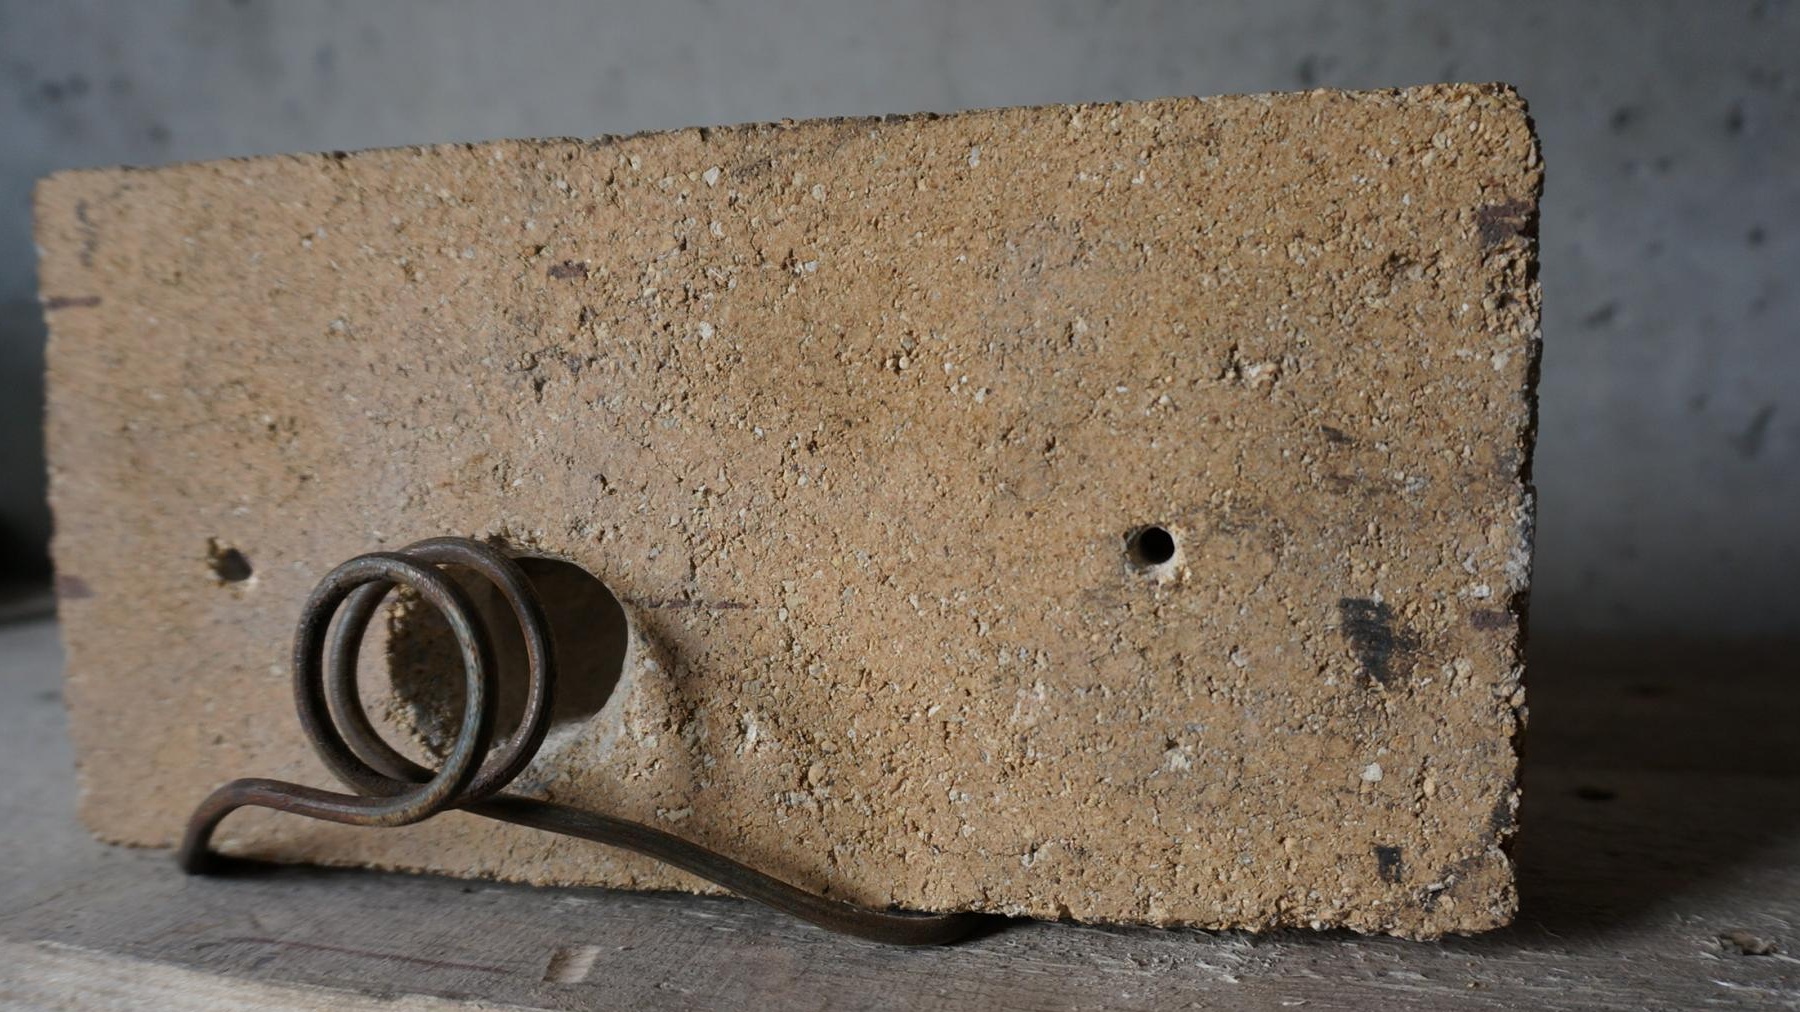
Step 3: Making the holder for the burner.
From the soft steel wire we make the simplest device shown in the photograph for fixing the gas burner in the required position. We bring the legs of the holder under the brick.
Step 4: Build the hearth.
We install a brick, with a heating chamber arranged in it, on the burner holder. We insert the nails used as holders for the workpiece. Nails should be thinner than the diameter of the holes and enter them freely, so that when expanding from heating, they do not split the brick. We set the knife blank on the rib on them so that it does not touch the walls of the chamber. We cover the main brick with a heating chamber on the back and on top with two fireclay bricks. Insert the burner into the holder. The horn is ready to heat the knife blank to the required hardening temperature.