
A book is not the thing we keep at home for decoration. Even neatly folded in a pile on the table, books will always delight us. However, why not make out their location beautifully, bringing a bit of comfort to the atmosphere? You can do this on your own using improvised tools.
Materials and tools:
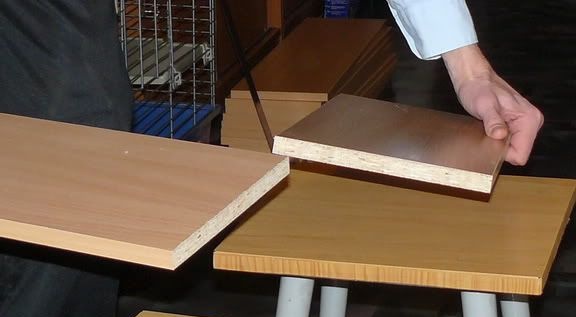
1. Boards from any material - either natural or wood-shaving option. The quantity depends on how many shelves are planned to be made.
2. If there are unnecessary chairs or armchairs with a canvas frame, you can use it. Silk fabrics, leather belts are also useful.
3. Metal rivets in addition to the previous paragraph. The quantity is calculated taking into account the fact that, on average, there are about 8 rivets per shelf.
4. Plastic dowels or screws.
5. Based on the diameter of the screws, you should choose a drill and drill.
6. The hammer.
7. Riveting machine.
8. Varnish, fabric, paint - all that will decorate the rack.
Operating procedure:
First of all, you need to cut the number of shelves for the rack that you want to install. It all depends solely on the imagination of the master and the amount of material available. As for the sizes, the recommended length is 100 cm and the width is 30 cm.
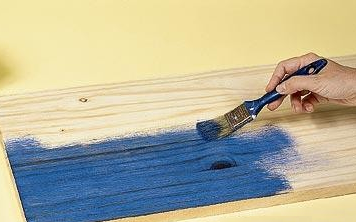
Future shelves are now given gloss by dyeing, varnishing or decorating with fabric.
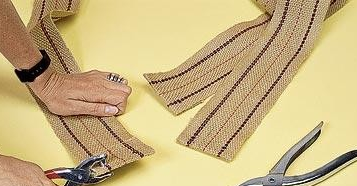
In order to keep the shelves firmly on the wall, it is necessary to prepare special pieces from canvas ribbons, leather belts or silk fabric. Their number depends on the size of the rack, based on the fact that there are two pieces per board. One length is recommended - 125 cm.
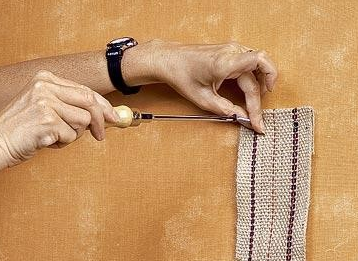
Each strip of fabric or belt should be wrapped at both ends by 5 cm. Needles or pins are useful for fixing. From the formed ends, you need to deviate 2 cm, make 2 holes and rivet.
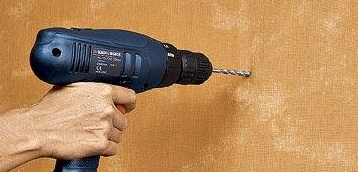
The markings on the wall must be approached with care. First of all, it is important to remember that books should fit freely - this is taken into account when creating the distance between the shelves.The level is also taken into account - based on the fact that there are 2 tapes per shelf and 2 holes per tape, it turns out that there are 4 holes per shelf. They should be located on a strict horizontal line. It is important to constantly check the size of the shelves.
After calculations, you can start drilling holes. Plastic dowels are driven into them.
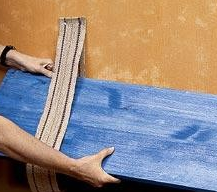
The ends of each tape are folded so that the holes match. After that, the tape is screwed to the wall.
The final step is to carefully insert the shelves into the tapes.
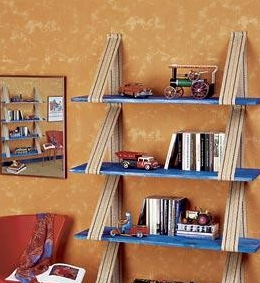
That's all - the cozy home bookcase is ready! As you can see, doing it is completely uncomplicated, and materials can be found in every home. The most difficult part in this work is to deal with hole marking. Therefore, for a start, practice on any one shelf. As soon as you deal with it, all the other components of the rack will be installed in their places easily and firmly.