
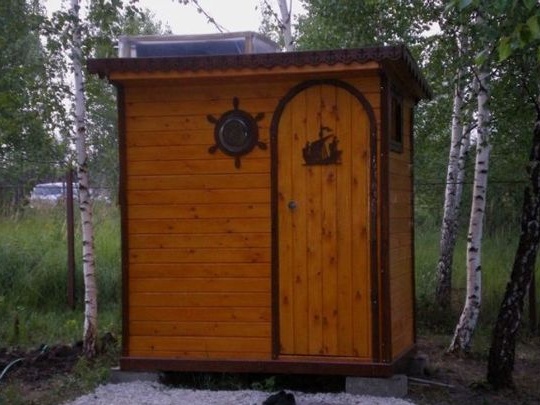
Shower cabin to the cottage, for the construction of which we will need: a drill, screwdriver, a container for mixing the cement mixture, a shovel and some other tools. With regards to materials, then here is what much. For this building it was needed: cement, sand, gravel, pipes, fittings and beams, wooden cladding, slate for the roof, pallet, tank and several old tires, hose and watering can, as well as plastic panels.
Real gardeners are eagerly awaiting the onset of the season, when they will go to their own plots to tidy up everything that nature has slightly knocked down. They work with great enthusiasm, without straightening their backs, to improve their own site. They put their souls in, making repairs in a small house, conduct electricity and water, creating comfortable living conditions for themselves. But at the same time, the usual human need for hygiene makes people return to the apartment, albeit not for long, to take a hot shower. Few people thought that there is a unique opportunity to make a shower in their own area.
1) First we need to choose a place where a comfortable-sized cabin will be installed. Usually they make 190 x 150 cm. Having marked the desired territory, it is required to fill the foundation. It will be more practical to make a foundation with pillars. To do this, you will need four pipes about a meter long and 10 centimeters in diameter. We tear out 4 trenches, install pipes into the ground and bury them, leaving 20 centimeters on the surface.
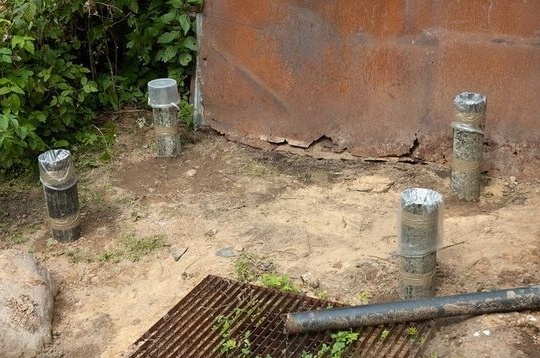
All four structures must be protected from moisture by placing around the formwork (from plastic they can be purchased ready-made in the store or use a cement mixture - as in the case described). We pour 4 pipes with cement. Pouring both inside and out. We create a protective frame around the pipes in the form of blocks of cement and sand. In the pipes themselves, until the mixture has dried, you need to install metal fittings. You can limit yourself to three rods for each pipe. We are waiting for everything to harden. Wait and continue to work. We take 4 wide wooden beams to lay them on hardened pipes and fittings. We drill 3 holes suitable in diameter for iron rods. Thus, we lay the tree, creating a lower structure that will be long and firmly held. Then, the vertical bars are set up to the height necessary for the gardener, in which the recesses for the remaining reinforcement are also drilled.
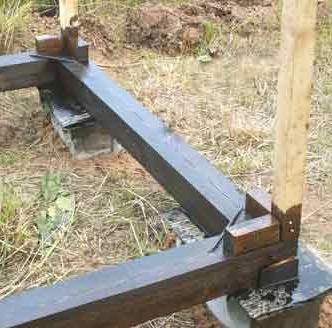
From above, everything is fastened with final bars and dressing is done diagonally.It also makes diagonal dressing on the floor so that the shower is stable (a tray will be installed there).
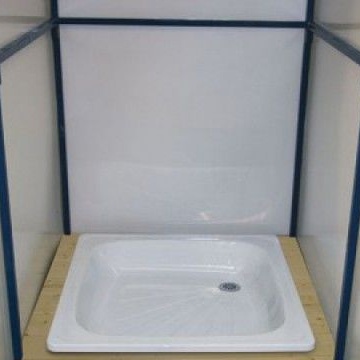
2) Floor installation. The floor can be made with small gaps between the boards. When choosing this method, you need to put a waterproof lining under the shower, from where the soapy solution will go into the drain. This is not difficult to arrange, but cold air will penetrate through the cracks, which can result in a disease. The second way is to install a pallet. After tightly laying the wooden floor, we leave a hole for the metal pallet, where there is a finished drain. Install. It only remains to attach a hose to it, which will send waste to a drain hole nearby.
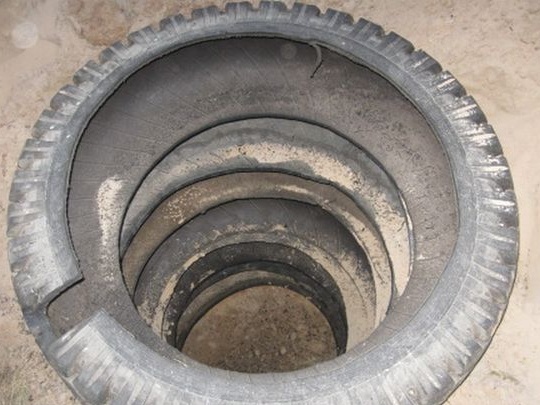
3) Near the installation, a swarm of a 2-3 meter hole in the ground. It will be rational to put it inside with old tires, or put a barrel. The iron bottom must be perforated so that the water goes as deep as possible. To this drain pit we bring a hose pre-attached to the pallet.
4) The outside is lined with planed wood, which must be varnished. When installing the door, it is advisable to seal it around the edges with rubber inserts, so as not to blow. Do not forget about the roof, it must be made of boards to install a tank of water on top. Can be covered with slate. As for the cabin insulation, you can sheathe it inside with polystyrene foam, covering it with polyethylene. We cover the polyethylene with a moisture-resistant material, which is good to use plastic panels.
5) Now the fun part. Water tank, which we put on the roof. Cut two holes in advance. 1 - for the watering can below (on which there is a screw turning the water supply on and off), 2 - for the hose to draw water. During installation, the tank can be enclosed with foil or painted in a dark color so that the water heats up faster. On top you will need to put a small wooden frame, which will be surrounded by a film on all sides. This will create a greenhouse effect and help keep you warm.
Actually, the shower will be ready on this. It will only be necessary to check everything.