
This is very useful device can be useful for you on a hike, hunting or fishing. It allows you to recharge the battery on your mobile phone phone, player or flashlight. Also given model the wind generator is sufficiently light and compact, which makes it extremely mobile and indispensable for travel.
A set of materials useful for the development of our portable wind generator:
1) Stepper motor (the author used from an old scanner)
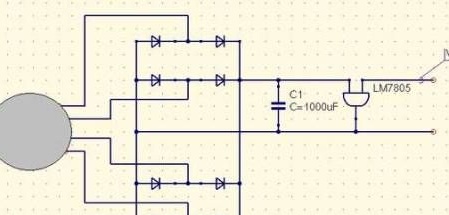
2) Rectifier diodes (it took 8 diodes 1N4007 to implement the idea)
3) 1000 uF capacitor
4) LM7805 (this is a stabilizer, it's a voltage regulator)
5) PVC-based ordinary pipe
6) A certain amount of plastic parts (a more detailed description will be in the process of creating a wind generator)
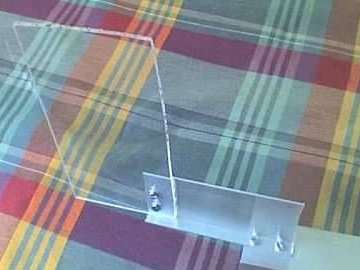
7) It will also be necessary plates of aluminum or other metal (preferably lighter weight).
Actually, let's start with a stepper motor. The author took out one from a regular old scanner that had already served its purpose and, in principle, he did not need. Actually, you can see it in the photo below. Here it is - a four-phase stepper motor.
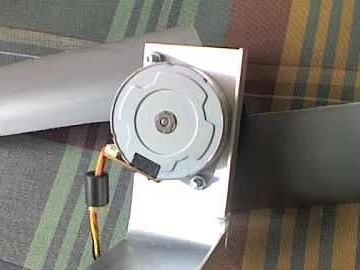
By the way, such a unit can be obtained not only from an old scanner, but also from a magnetic disk drive for example. So, if you have an unnecessary drive lying around, looking for a scanner is not necessary.
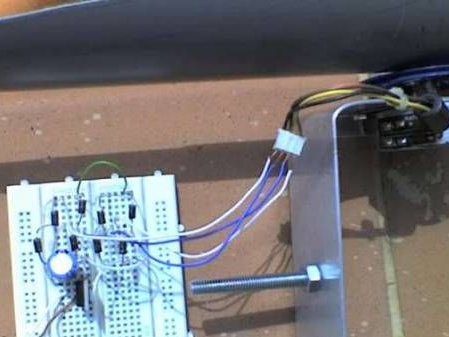
Actually, having received the necessary components from the list of materials specified in the article, you can safely proceed to the full-scale assembly of the rectifier. As already mentioned, we will need eight diodes, that is, two pieces for each step of the engine.
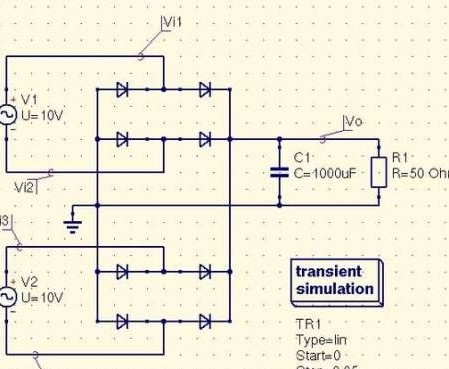
We stabilize the output voltage with a capacitor of at least 1000 μF and a voltage stabilizer LM7805.
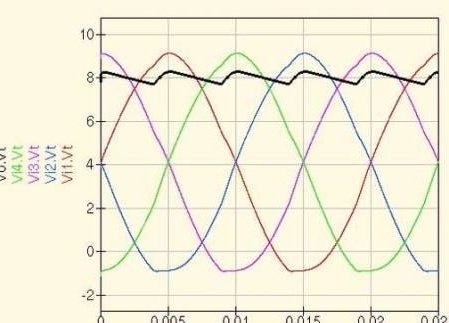
The generator made is capable of easily issuing a voltage of five volts or more. But within the framework of this particular project, since in order to charge a mobile phone and other devices, even five volts is quite sufficient.
The next step is to gather the blades.They then will catch the energy of the air for our generator.
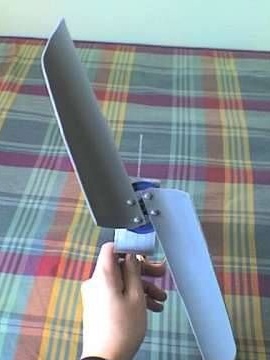
When cutting the blades, be careful, try to make them the most smooth and streamlined. After all, the easier and smoother they are, the easier it will be to catch the wind of the necessary strength so that our generator produces the right voltage.
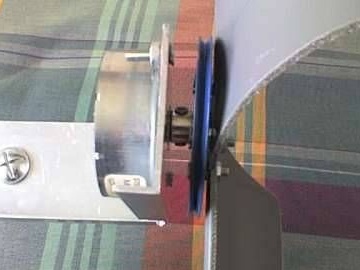
After manufacturing the blades, you can proceed to complete assembly of the apparatus. We fix the blades in a PVC pipe, on the other hand we put a plate for balance and coordination of the screw in the wind. Actually connecting the windmill to the generator, we get the finished device.
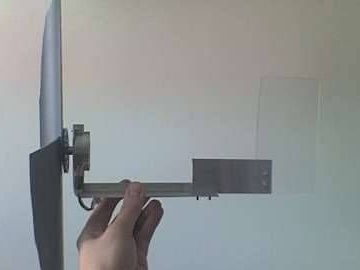
It's time to experience it in action. Below is a photograph of the operation of the assembled wind generator.

As you can see in the photo - our homemade quite adequately generates a stable voltage of 4.95 volts.

This is enough to charge both an mp3 player and a mobile phone, which means our goal is achieved!