
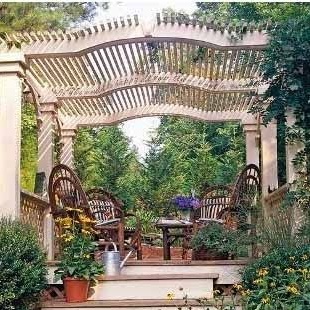
If you like to put together ideas for cottages beauty and practicality, the pergola is what you need. This building performs several functions at once - it protects from the scorching rays of the sun, acts as a support for climbing plants and simply creates a cozy, beautiful relaxation area. And you can do it yourself.
Materials Tools:
1. Drill to create pits under the pillars.
2. Jigsaw and circular saw.
3. A variety of wood drills, drill.
4. Tape measure, carpentry pencil, spirit level.
5. The hammer.
6. Safety glasses and gloves.
7. Staircase.
8. Gravel, sand, cement.
9. Tubular formwork.
10. Anchors with adjustment in the amount of 4 pieces.
11. 4 racks with a length of 240-270 cm and parameters 10x10 cm, 15x15 cm.
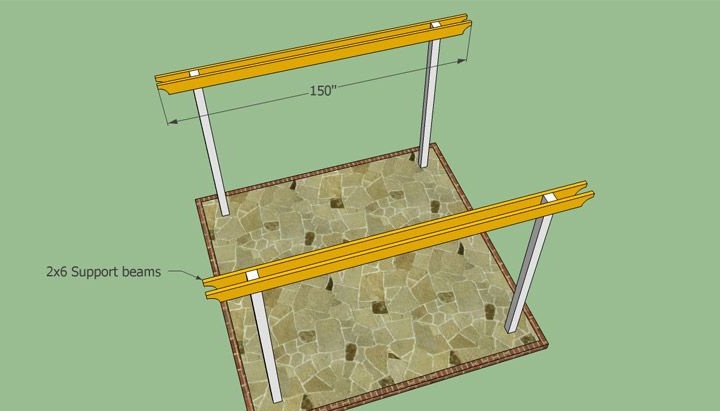
12. 4 support beams with a length of 360-375 cm with a parameter of 5x15 cm.
13. Cross beams with a length of 360-375 cm with a parameter of 5x15 cm.
14. Crossbars 5x10 cm, the length of which is 325 cm.
15. Self-tapping screws 75 mm for attaching the crossbars.
16. Self-tapping screws of 150 mm for fastening of cross beams.
17. 175 mm screws for attaching support beams.
Operating procedure:
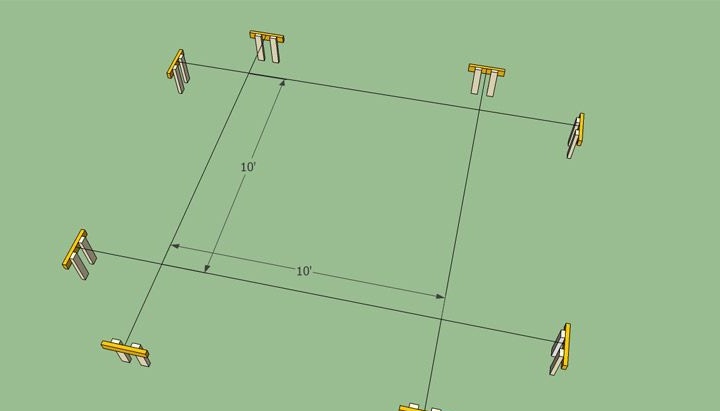
Any work of a similar plan begins with calculations. It is necessary to carefully distinguish the place of the future pergola. The contour is most conveniently indicated with a rope stretched over the pegs. It is important to remember that the diagonals of the resulting square must be equal, and the angles must be straight. Do not be afraid to double-check the calculations and, if necessary, make adjustments. It will be quite prudent to pre-drill guide holes in wooden elements.
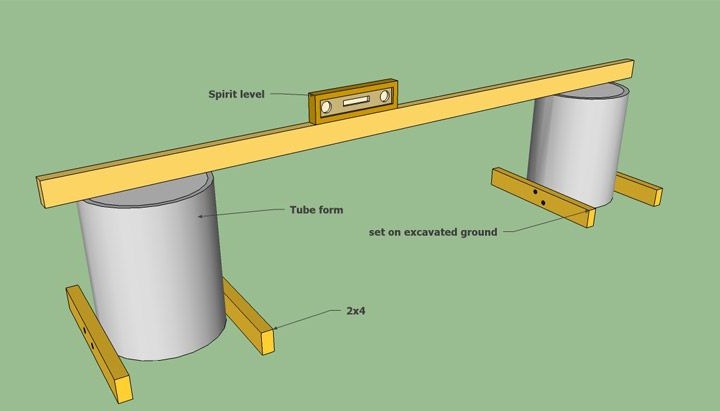
In the place where the pergola corners will be located, dig holes with a depth of about 90 cm. A little less is allowed, but it is important to take into account that they must be at least 15 cm below the level of freezing of the soil. It is recommended to choose a diameter of 35-40 cm. 10 cm of gravel is poured into these pits and rammed. After that, formwork is placed in them and the level is checked using a ruler or alcohol level. A small amount of concrete is filled into the mold. Before concrete hardening, adjustable anchors are installed. The solidification procedure itself should take at least 48 hours.
Now you are ready to install the racks. As they are used bars, which should be perfectly aligned. An alcohol level will help in determining this. The racks are fixed using the so-called capercaillie - screws with square or hexagonal heads.Alternatively, it is allowed to fix the racks in concrete, if you want to achieve greater rigidity. However, there is a great risk that the racks will begin to rot in the ground.
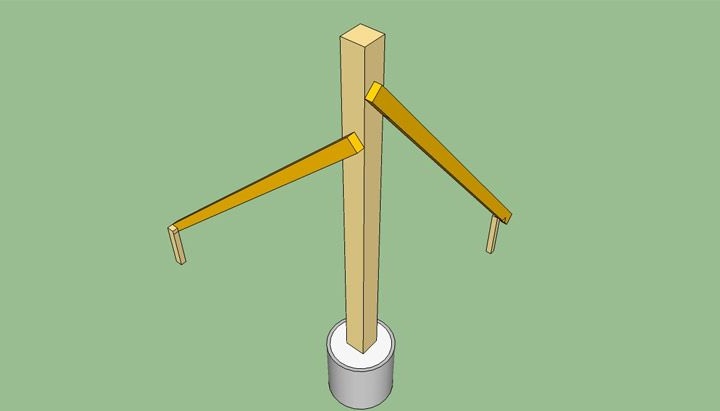
After determining with racks, you can take up the installation of support beams. Certain parameters are recommended, however, various options are allowed in accordance with the tastes and preferences of the master himself. But what should not be subject to adjustments is the protrusion of the beams beyond the perimeter of the building by 25-40 cm. At this stage, it is also important to keep track of the straight lines, which is why the spirit level is useful here. Fixation is done with clamps. After that, through holes are drilled through the beams and stand, bolts are inserted and nuts are tightened. You can decorate the ends of the beams for a unique look of the future pergola.
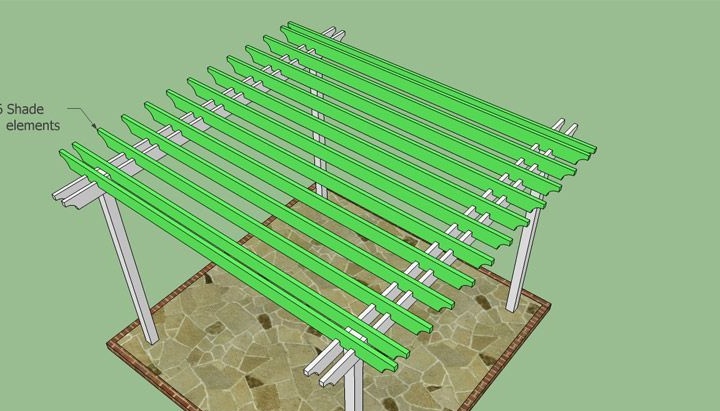
Now it’s the turn of the cross beams. Their selection should be approached with special care - evenness and excellent quality are necessary. The distance at which the beams will be from each other is individual and depends on the desired amount of light that will penetrate the plants. For installation, it is necessary to drill guide holes and fix with self-tapping screws. It is recommended to create cuts on previously applied markings, and then remove the wood between the chisels. Thanks to this procedure, it is guaranteed to get neat recesses.
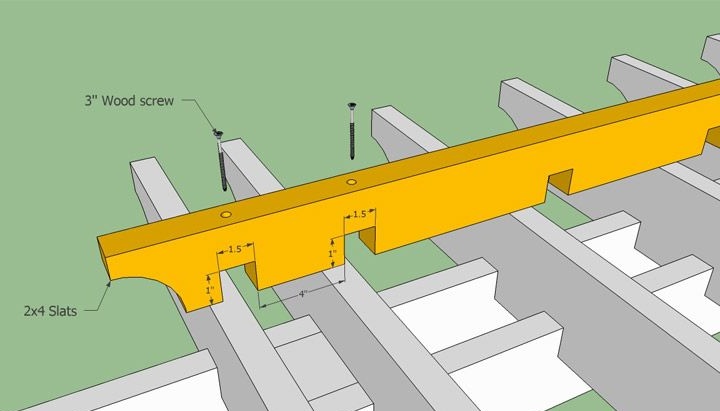
To keep the transverse beams at the same distance from each other, as well as to increase the rigidity of the structure, you need to use perpendicular crossbars. In addition, they will give pergola spectacular. The distance between the crossbars can be any, but a limit of 60-90 cm is recommended. Guide holes are drilled for installation, fixing is done thanks to self-tapping screws. Excavations will not be superfluous - they will ensure the reliability of fastening.
The final stage is the sealing of all cracks and cracks with putty on wood. Sanding with medium grit sandpaper will also be needed. The final touch will be the application of varnish.
By building a pergola, you can profitably transform the cottage, creating your own unique style.