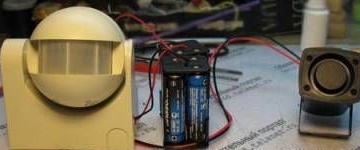
The protection of private property has always been an urgent problem. Nowadays, there are many ways to protect your values or housing: you can hire security, put an alarm, insure and so on and so forth. But what if these methods are too expensive in relation to the protected property, but leave unattended, for example, a cottage, is still not a pleasure. The author will tell you how he found a way out of this situation by making an autonomous burglar alarm do it yourself!
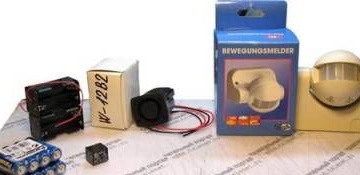
What we will need to create an alarm:
1) Passive IR motion sensor (necessary for the reaction of the system to intrusion)
The author bought a light switch for 300 rubles.
2) 12 volt siren (needed for an intrusion alert)
In this case, 105dB was used, but as you know, it depends only on your desire. The cost is about 200 rubles.
3) Battery holder
4) 6 V relay,
5) insulating tubes,
6) wires.
7) the batteries themselves.
So let's analyze what we need from the alarm itself.
The alert should work for a short time and turn itself off after a certain period of time, and then again work in the standard standby mode. The system must be able to operate repeatedly. Not a large voltage current, for long-term operation (at least half a year).
Let's start with the alteration of the motion sensor, it is necessary to transfer it from 220V power to 12V.
After analyzing the circuit, it becomes clear that it is able to work even with power supply from 8 V to 30 V. Actually, with the required 12V power, we must set the relay to 6V. We proceed to disassemble the sensor. The spherical part can be removed if one of the supports is bent. The element is fastened on latches.
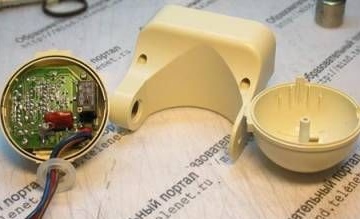
After removing the board, it is observed that the sensor is nothing more than a passive IR receiver, the reaction of which is associated with a change in the power of the IR radiation incident on it and a simple optical system. The viewing angle of the sensor is 180 degrees.
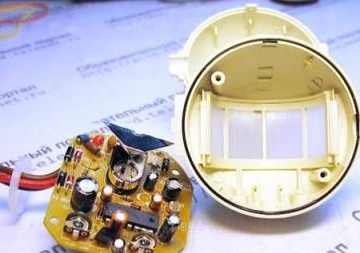
Next, you need to power the points that are on the left.Negative and positive charges, respectively, of the charges of the power source (plus +, minus -).
The points on the right are needed to connect the relay winding. And the standard relay mounted on the sensor (it looks like a black box) needs to be removed.
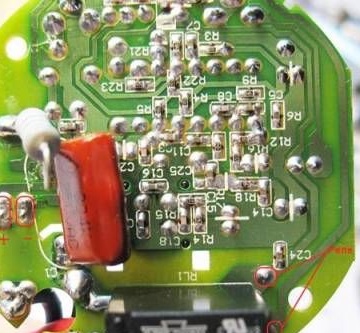
Since there is not enough space inside the spherical shell of the sensor, it was decided to output the relay to the base of the housing through wires.
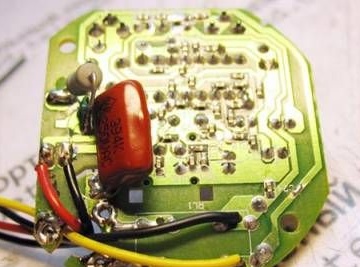
Actually, power is supplied to the sensor via a switch, and when the system is triggered, power is also supplied to the relay. Which in turn leads to the inclusion of a siren, notifying us of the penetration.
By the way, the number of possible connected sirens is not limited.
As you can see, I’ll reduce that siren, that the batteries are connected to the system through the terminals. Above and to the right is the switch, and the relay itself is located at the bottom left.
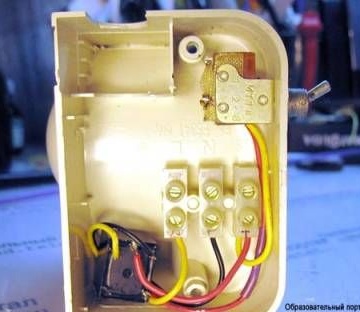
And so we put together our security system!

ATTENTION! Protect your ears before checking the siren! Otherwise, you may damage your hearing, which is naturally undesirable. And let the small size of the siren not bother you, it is really very loud.
What did we do? Thanks to the regulator, it is possible to set the time on the sensor, which the siren will work after identification of penetration into the protected area. The author got from 10 seconds to 8 minutes.
The sensor is installed indoors (for example, at the door), and the siren is displayed on the street.
It is important to know that after power is applied, the siren shuts off, so the author suggests placing the switch in a place that is invisible to the eyes.
For the sensor to work for 6 months, 16 alkaline batteries connected mixed will suffice.
Also, the system was successfully tested in the freezer, which allows us to confirm its excellent performance even in winter. at -30 degrees.
After the author installed the system in the country, he revealed:
1. Glare from the water, unfortunately, can cause a false positive system
2. If the sensor is noticed, then the attackers can stick it with iso tape, thereby creating blind spots.
