

Everyone loves to relax on water bodies of various types, whether it be a river, a lake or an ordinary pond. In the summer, it is pleasant to feel the cool air, relax to the sound of the murmur of water. Imagine how great it would be to have something like this in constant and personal use? For example, having a small plot of land and a house for rest, bask in the pond. Moreover, done do it yourself, a small pond will always please the eye with its aesthetics and cleanliness. If you think about it, this idea is quite feasible.
Tools and materials:
1) a pair of hands and a shovel.
2) cement mixture.
3) pegs and a hammer.
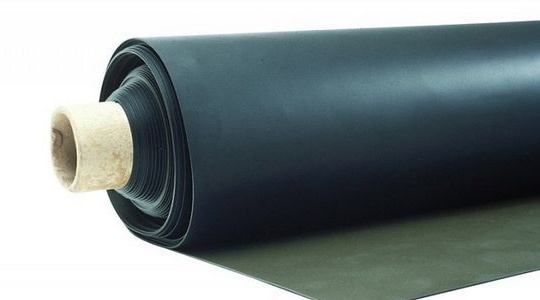
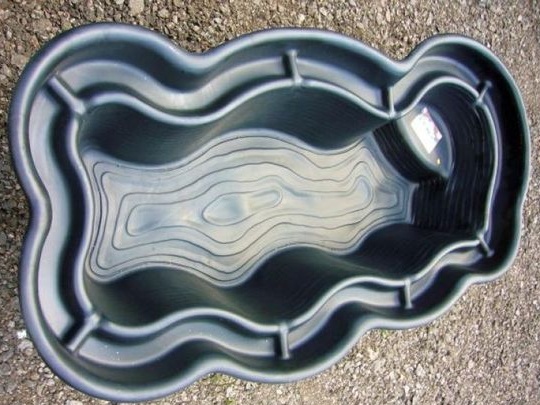
4) a pond mold or rubber film.
As usual, we start by choosing the right place. The main enemies of this invention will be the sun and trees. From warm rays, water will bloom, and the root system of the tree can damage the structure of the reservoir. Avoiding these factors, we are looking for a vast territory for the pond. You can think in advance about what in the future you will want to decorate or expand the boundaries of the reservoir. Set all kinds of decor: bridges, fountains, etc.
We determine the material that we need.
1) If the boundaries of the pond are quite extensive, it is best to choose a special film of butyl rubber. A polyvinyl chloride film is also suitable. Long service life, durability, will help to transfer the pond under the ownership of the next generation (from 10-35 years) without any problems. This method will allow you to make a pond of any shape you want. to the summer resident. There are no particular restrictions on further work.
2) If we have a small territory, it is advisable to stay on the finished form. Polyvinyl chloride or stronger plastic. Everything will rest on the material capabilities of the buyer. One thing: the pond will be limited by the size of the acquired form. At the same time, there is one very significant plus: the speed of work will increase significantly. It is enough to dig a foundation pit of the desired shape and install it inside.
In our case, the pond rummaged under the film, so we will consider this method in detail.
Stages of construction:
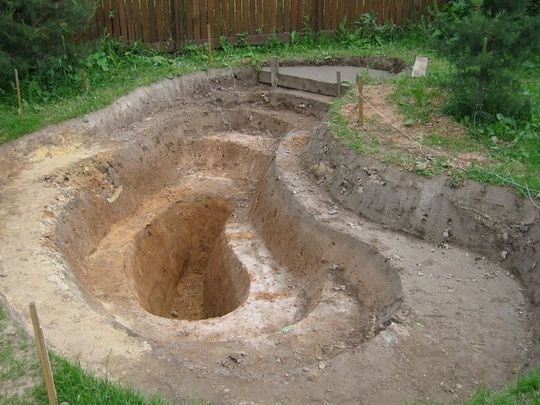
1) Pit.
The initial stage is the creation of a pit. We did not have the opportunity to commission the excavator, so we had to do it on our own. The size of the pond was not so huge as to wipe his palms in the blood with a shovel. Initially, driving pegs into the ground to indicate the contours of the reservoir, the terraces dug. Their depth was about 30 cm and a width of 20 cm. After this is done, we proceed to the main bowl. The slope of the coast should be approximately 45 degrees, and the minimum depth should be 60 cm. If you do not take these rules into account, the artificial pond will completely freeze in the winter and become excessively hot in the summer. This is in case any flora and fauna will be launched into the pond for special connoisseurs. All living things will not be able to survive the sudden changes in temperature. To fix the purchased film, a ditch with a depth of almost 20 cm breaks out around the perimeter of the reservoir.
2) Alignment.
After the pit is ready, the bottom of our reservoir must certainly be leveled. All stones are removed, whether it is a barely noticeable trifle or large cobblestones. We can use them for decorative framing. However, they can damage the coating we are laying on the inside. The surface of the film is sprinkled with washed sand by 5 cm. Fulfillment of this condition will protect the film coating from damage and extend its life, and, consequently, the life of our product.
3) Coverage.
The next step will be the laying (in our case) of butyl rubber. We take the length and width of the coating, depending on the size of the pond. On its length and depth. The latter is taken in double size. Better to stay a little better than not enough at the most crucial moment. To fix the film along the edges of the reservoir, measure out a half-meter stock. We lay the canvas completely free, working only with its edges, fixing them with cobblestones. You can just take something heavy.

4) Water.
We fill the resulting design with water, slowly removing stones and cutting off the edges of the film. We wait 24 hours so that the water, with its severity and volume, helps the coating to take the necessary shape according to the excavation dug by us. After waiting, we cut off the leftovers, leaving a quarter of a meter for decoration. You can do more, here everyone is guided by their own imagination. The blind area should be laid on cement mortar, whether it is brick, stone or simple tile. In the future, around the perimeter, you can install a fountain or bench, plant moisture-loving plants. This will complete the production.