
In this article, I will describe how you can upgrade to home musical synthesizer. The challenge will be for us to first develop and then reassemble electronic synthesizer, but with additional effects and functions.
Today on the Internet there are quite a large number of different schemes for amateur synthesizers. Most of them are based on the principle of 555 or other generator circuits. The only limitation is that such a circuit can generate only one tone at a time, and in order to play chords, we need to hold the keys together, while receiving several tones that sound simultaneously.
Accordingly, for 12 tones, we need 12 frequency generators. If your music keyboard consists of 48 keys, then you will need 48 tone generators.
So, in this case, the CMOS 4060 logic chip can save us. This chip has fourteen channel binary divider / counter with end-to-end transfer function, as well as the generator itself. The CMOS 4060 function block diagram looks like this: the Qn output will have the nth counter value as 2 ^ n, which means that Q4 2 ^ 4 = 16 (1/16 of the clock frequency), while Q5 2 ^ 5 = 32 ( i.e. 1/32 clock frequency). In my case, I will use this particular chip.
The sizes of the octaves are interconnected. The very first octave, it is C1 (frequency 16.3Hz), it has exactly half an octave C2 (frequency 32.7Hz), etc. The CMOS 4060 is capable of sharing their clock speed through the Qn outputs. To do this, you need (4060x12) tone generators, while there will be support for 7 octaves (7x12 = 96 tones).
Actually, the initial project is as follows: the design consists of a 12x4060 tone generator, and dsPIC which is designed for effects, amplifiers and control.
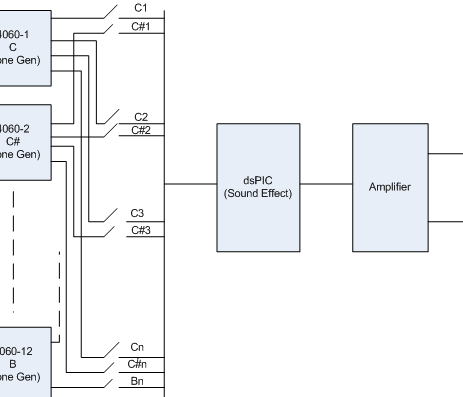
The diagram above shows the CMOS 4060 tone generators. The clock frequency of which, we can calculate by the formula f = 1 / (2xPixR2xC1). In my development, I use 4 octaves (i.e. 48 tones) starting from the C3 octave (frequency 130Hz) and to the B6 octave (frequency 1975Hz). You can choose the values that you require.
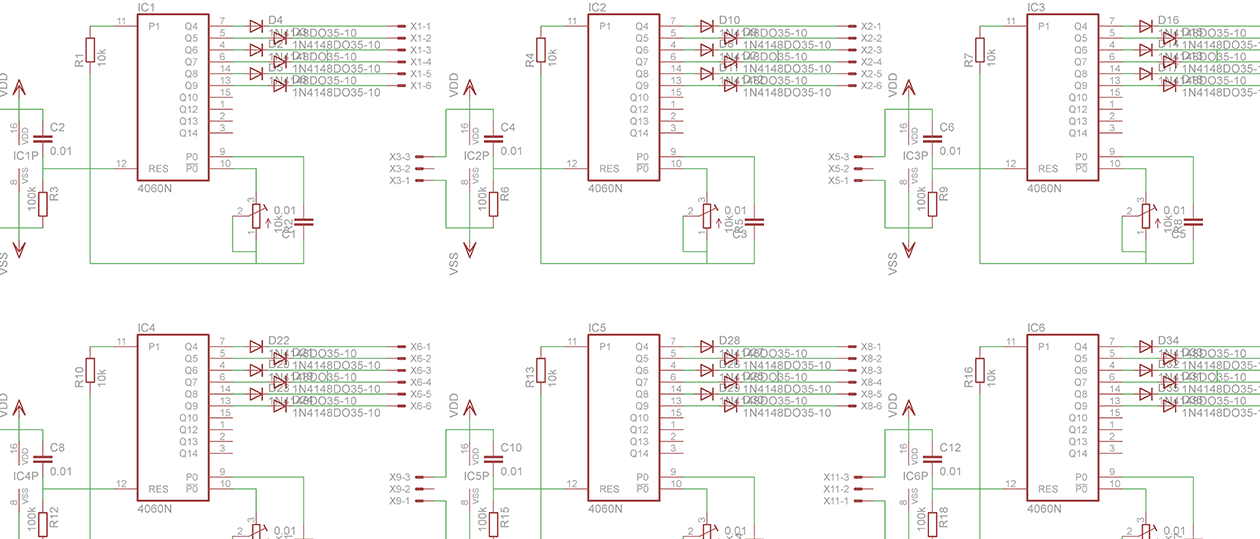
So, a scheme is prepared in which 6 output tones:
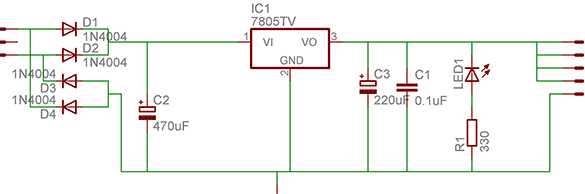
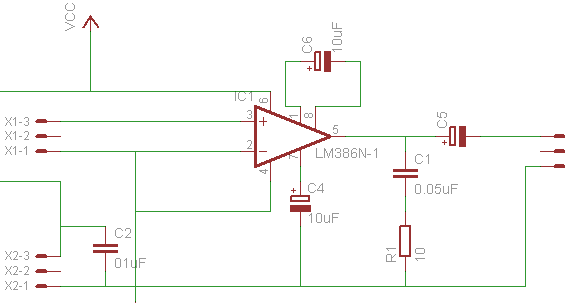
The following diagrams are a conventional 7805a power supply and an LM386 amplifier. Basically nothing special:
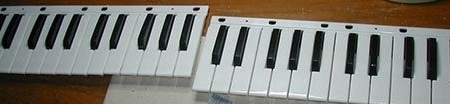
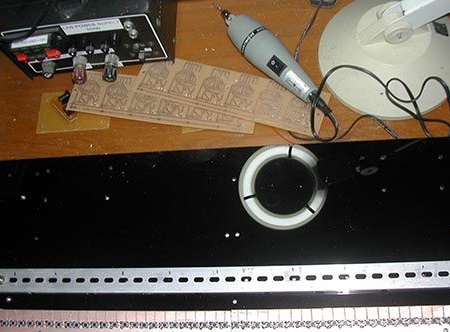
So, the first step for us will be to prepare the software and buttons. I took the buttons from the Chinese toy keyboard, which I wanted to throw away, however, it came in handy well afterwards.The only thing that confused me was that the matrix buttons were used in the toy. As a result, I made for the PP buttons:
The circuit board is shown here:
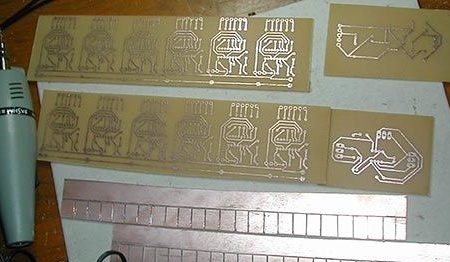
Here we see the board I prepared for buttons with the original size:
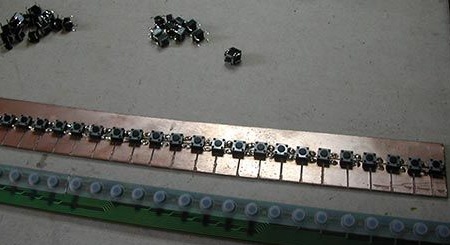
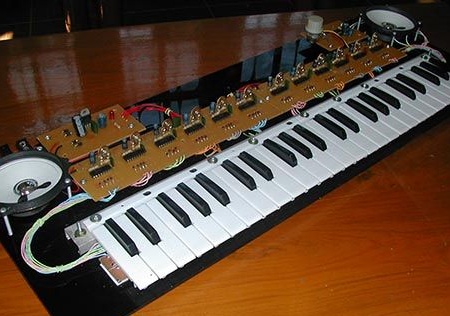
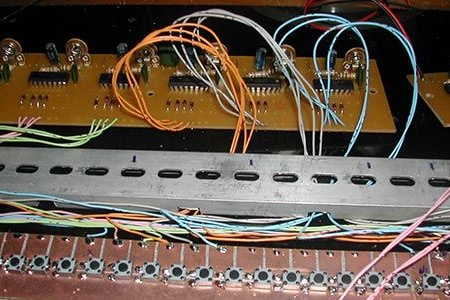
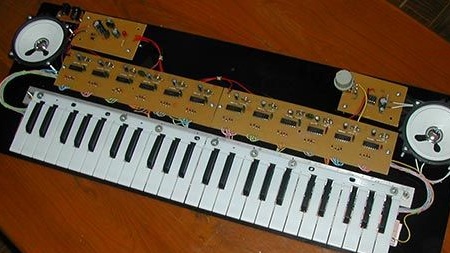
My assembly is actually shown here:
This photo shows the wires and circuits:
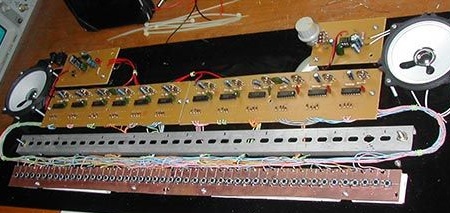
In this photo we see the successfully completed assembly:
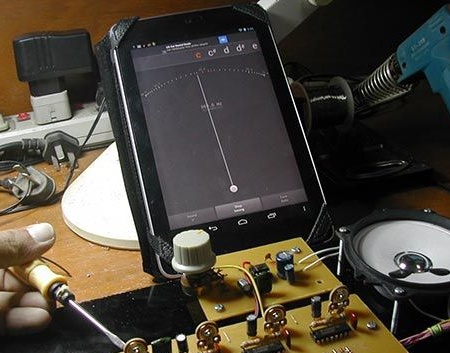
To adjust the frequency, I used Nexus 7, as well as the gStrings tuner application. By the way, I want to thank the developers for this useful application. Now we will need to adjust only one octave. Now that C3, C4 or any other note is tuned, the rest will be tuned automatically thanks to the frequency divider:
Finally, after rest and a huge amount of caffeine, the first phase of the project was completed and it turned out like this:
The following actions:
- In the image you may notice an empty space between the boards. That's right, this space is designed to control dsPIC and sound effects.
- We also need to make the top cover.
My thoughts about this assembly:
- Buttons, unfortunately, are not as soft as in the original keyboard. Therefore, it will be necessary to find a more suitable option for solving the final version of the device.
- The amplifier LM386 does not quite match the tones. At low volume, I noticed some distortion. Therefore, later, I will most likely replace it with a more suitable stereo amplifier. I would also like for me to have both left and right octaves with separate effects and sound output.
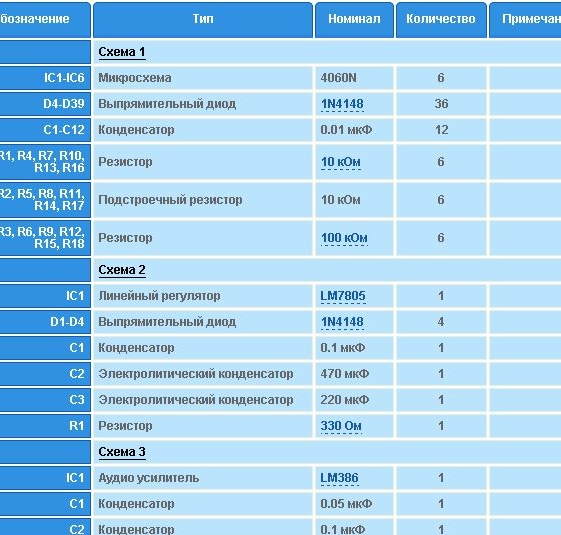
List with radioelements:
Total: Thus, you can upgrade your synthesizer. The process is naturally not fast, for this kind of processing you will need patience and some skills. However, the result requires all these efforts and will not leave you disappointed. At the exit, you will get an excellent experience that can be applied in many other alterations, upgrades or homemade electronic technology.