
For those who like to play sports and constantly improve, leg weights are simply necessary. Sooner or later, an understanding comes that the existing load is small. Thanks to a special device and you can achieve a greater load. Of course, you can go to a special sports store, but if your hands are used to work, it is quite possible to create such a thing yourself.
Materials and tools:
1. The fabric.
2. The sand.
3. Slings.
4. Zippers (zip-locks) - sealed bags.
5. Adhesive tape for packaging.
6. Threads, buckles, Velcro. As for the buckles, they can be bought, made independently or disconnected from old unnecessary things (for example, a briefcase, bag).
7. If the slings for Velcro will be done manually, then you should stock up with pliers, wire, tongs or a grinder.
8. Sewing machine.
9. The needle.
10. Scissors.
11. The line.
Operating procedure:
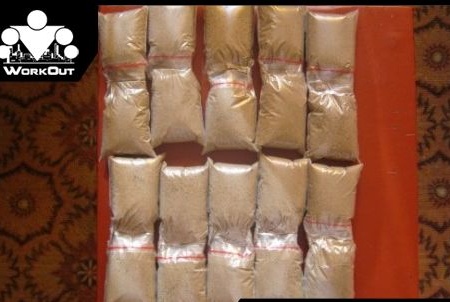
If sand is chosen as the material for weighting, it is necessary to sift it thoroughly and, if necessary, dry it. After he acquired the desired form, you need to pour it into zippers. This is most conveniently done with a bottle cap. It is important to ensure that each package contains the same amount of sand. If a kitchen scale is available, there will be no problem. If there are none, then it's okay - you just need to use bags of the same size. It is recommended 10x6 cm. When placing sand, it is important to ensure that it does not fall into the latch, otherwise it will not close properly and all contents will crumble. Filling goes to the limit, but at the same time so that it is convenient to close.
After filling, you should determine how the zippers will be located on the leg. It is best to cook 20 pieces - 10 for each leg. Every 10 pieces you need to rewind each other with tape. Packing is like it, since it is wide enough, which is convenient when applying layers to zip-locks. In general, each of them has two layers of adhesive tape, which should be well fixed.
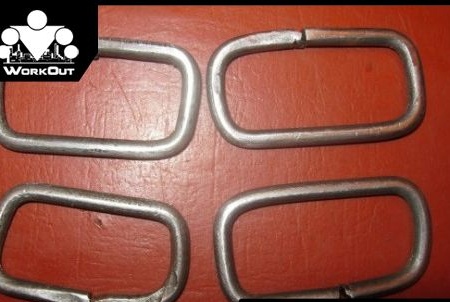
Now is the time to make buckles if you couldn’t find the finished ones. Such a buckle is made of wire with a diameter of about 3 mm. This wire bends the bottom, then sideways, up and again to the side. The junction of the ends will be located below, and masked by a sling. In total, 4 buckles are needed.
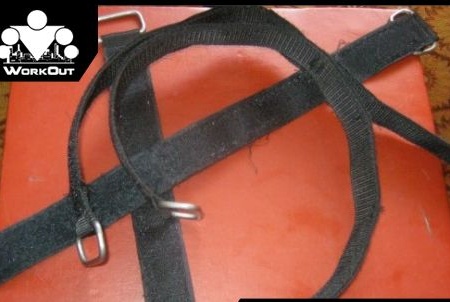
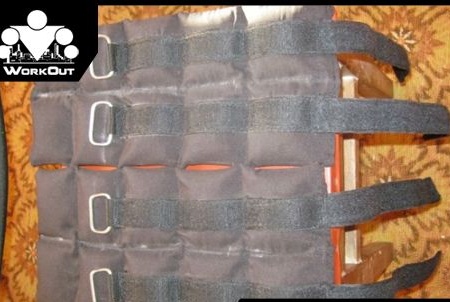
It's time to make belts for weighting, taking into account the fact that the length of one sling is an average of 60 cm.Sandbags are laid out on the fabric from which the cover will be sewn. It is advisable to choose something more simple for this purpose - jeans, tarpaulin, but you can also make something thinner, but at the same time fold it several times. On the fabric, the bags are laid out in the form in which they should eventually be. Thus, the height of the workpiece, taking into account the double layer and the decomposed appearance, will be approximately 35 cm, although this figure can be varied depending on the needs. Each bag is placed on one folded piece of fabric, covered on top with a second. The excess part of the material is cut off, but it is important to leave a larger supply. Close to each other, zippers cannot be folded, since it will be necessary to sew between them. Now a sling is applied and it is noted where the boundary between the hard and soft Velcro should be. It is recommended to install 13 cm from the edge of the fabric to a solid Velcro and buckle. Soft should follow. It is important that both are located on one side of the slings. Velcro and buckle are attached to the sling. When choosing a sling, you should pay attention to the fact that it is thin and not less than the width of the Velcro, along the edge of which you need to let the thread.
It was the turn of the bag case. To do this, the blank 34 cm high is doubled. Indentation is 10 or 12 cm long from the edge, and 3 cm above and below. In chalk, sketches are made, and then marks are made with bright threads. Before this, it is advisable to make a stitch along the perimeter. Next, the straps are sewn to the fabric, and more lines are desirable to create near the buckle. Now you can stick on the Velcro the second part of the fabric and sew from all sides, except the one where the soft Velcro is located. The cover is turned out and checked - the fabrics should not stick out in different directions. If this is all right, a few lines are done in the middle of the cover, and a few more right after the bags located there to secure them.
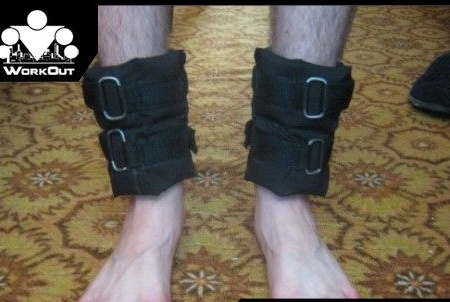
That's all - weighting materials, allowing to increase the load, hone the technique, are ready! Complexes of exercises on horizontal bars and uneven bars with their help will become much more effective.