

If your hobby is hiking, then you know very well how important it is to have a reliable and efficient source of fire on the road. A wood stove is the most optimal solution for a tourist. To use this device, you need a minimum of fuel, and of any kind: chips, cones, branches, even dry leaves and grass will fit. The efficiency of such a stove is simply excellent: you can boil a liter of water on almost a few chips. It's all about the special design of the stove, here we use such a phenomenon as wood pyrolysis.
For the manufacture of necessary:
three cans of different sizes (large, medium, small),
drill,
scissors for metal,
marker,
a small block of wood.
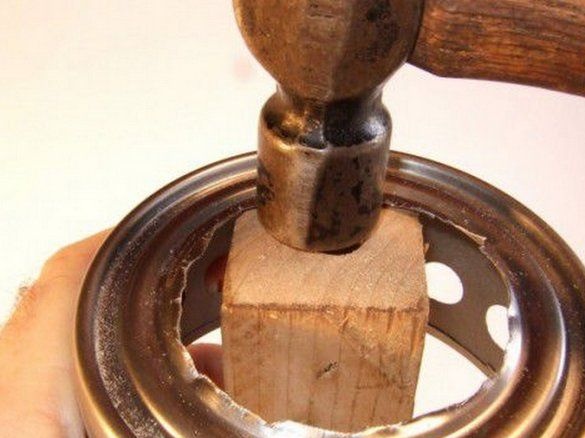
1. Auxiliary device
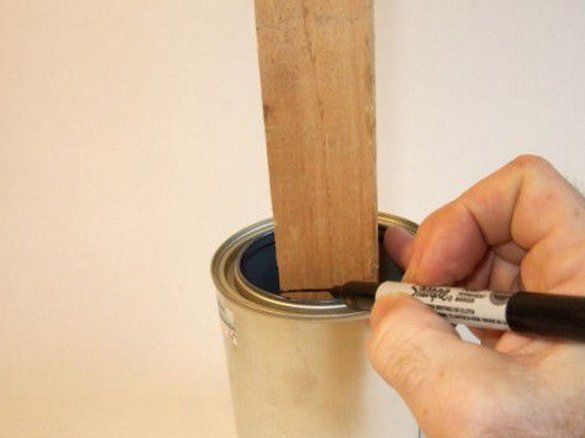
A wooden block will not serve as a part of the stove; it is needed for the manufacturing process itself. He will serve as an assistant for drilling holes and other operations.
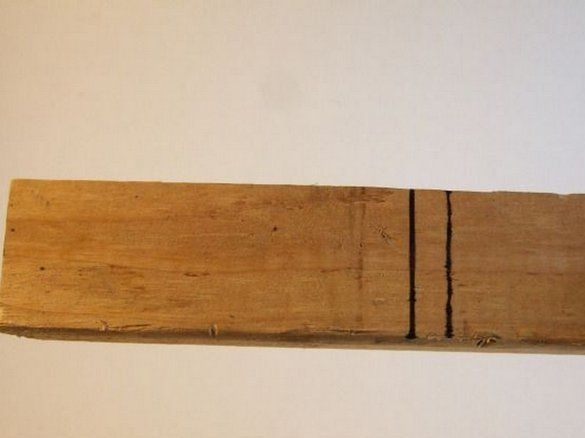
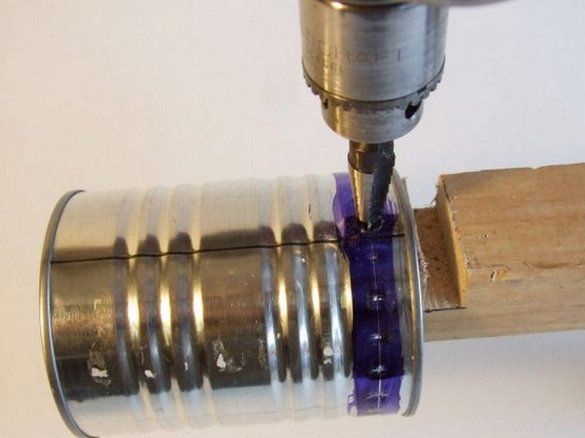
To begin, insert the bar into the jar, with a marker draw two strips approximately at the level of the lid at a distance of 7 - 8 mm from each other.
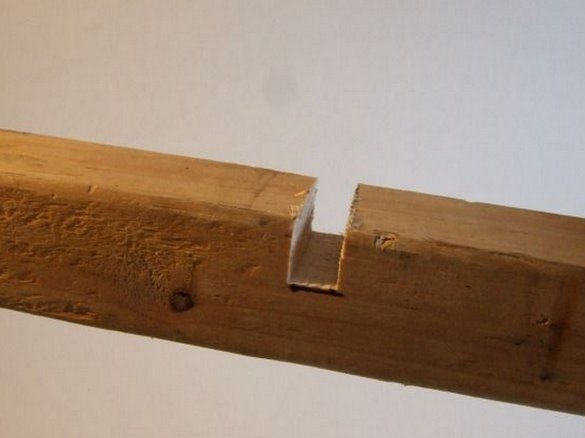
Saw a notch on the bar into a rectangular shape. This is a recess for the top edge of the can. Position the bar so that it becomes a support for the can.
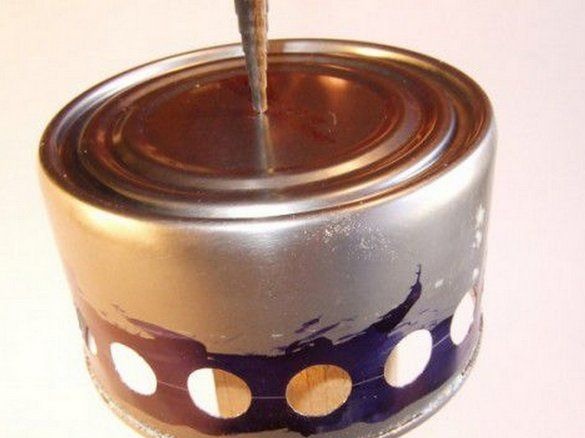
2. Holes in a large can


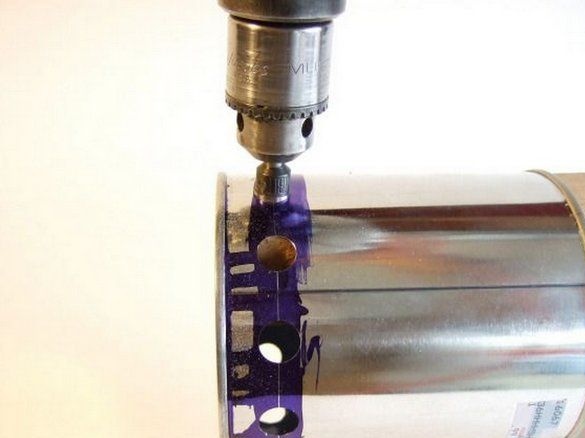
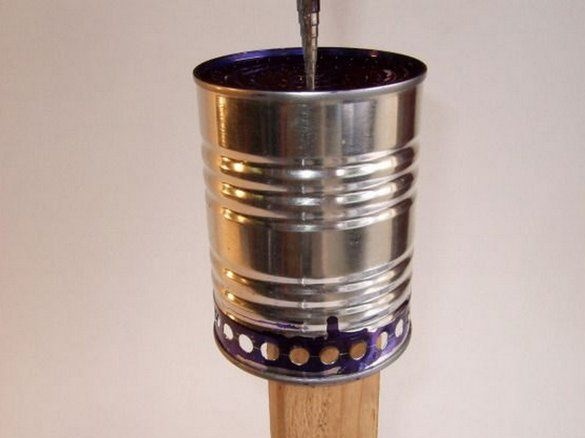
Draw a marker line along the bottom edge of the large jar. A line will be needed to make markings for ventilation holes. Author homemade I used a special dye for marking, but the markup can be done with an ordinary marker. Now drill the holes. This must be done carefully so that during the test it is possible to add a few more pieces. Thanks to these holes in the stove there will be traction, if there are few holes, it simply will not be there, and if there are too many holes, then the wood will quickly burn through.
3. Holes in the middle jar
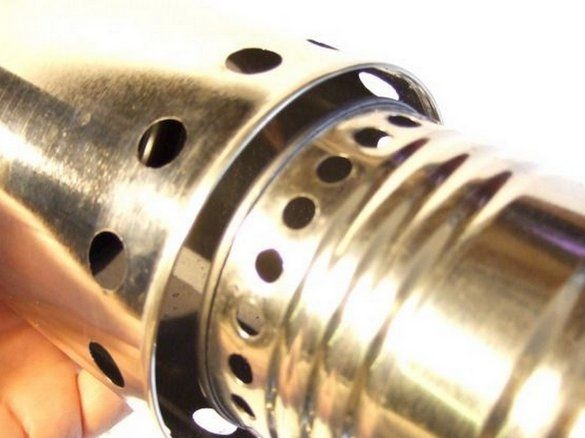
The next step is to drill holes in the middle bank along the upper edge.
We practically repeat the same thing as with a large can, only from above, and not from below.
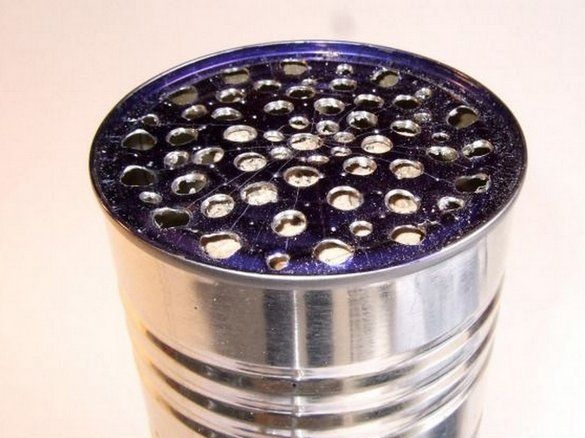
Then drill many holes in the bottom of the middle can. They must be made of such a size and in such a quantity that firewood cannot be thrown through them. It turns out a kind of sieve.
5.Assembly assembly
Insert the middle jar into the large one. In this case, a small gap should remain between the walls of the cans, which is necessary for the movement of air.
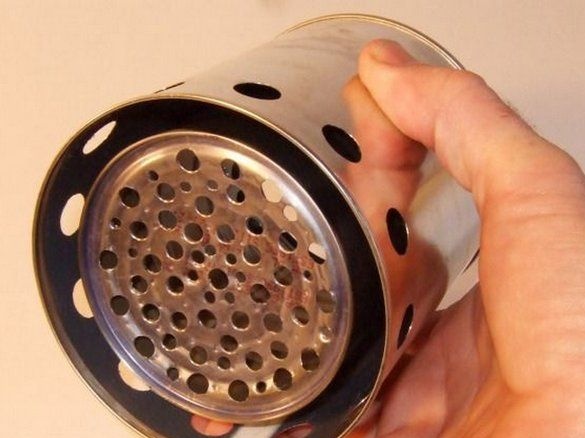
6. Ring
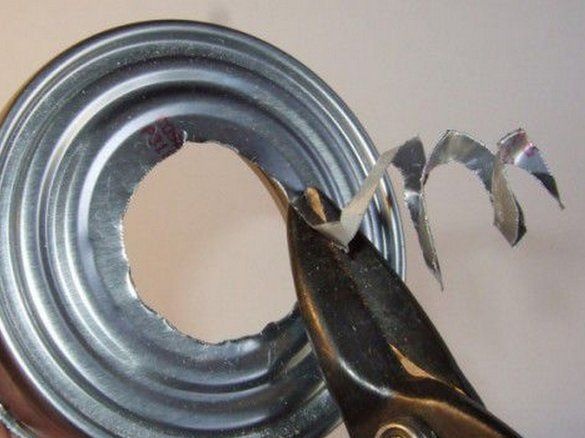
A burner for a camping stove can be made in a slightly different way, in which case it turned out round with holes. Cut the bottom of the smallest can with metal scissors. Trim the edges with a hammer and file. Drill holes in the side walls.
7. Tests of the stove
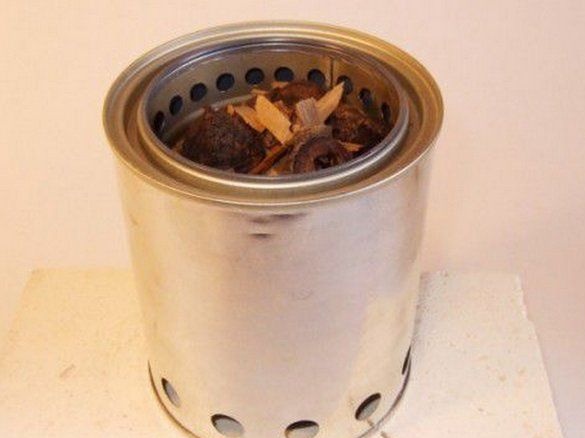
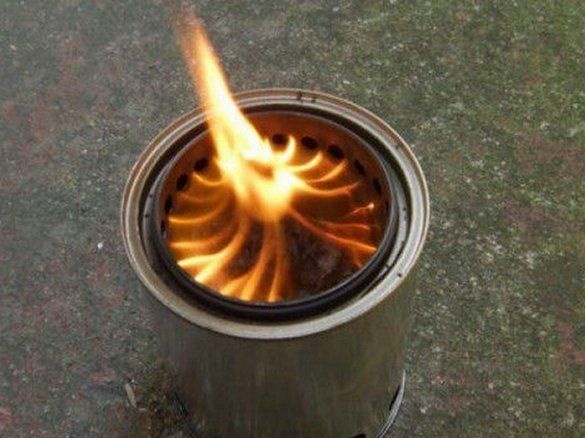


So, our camping stove is two banks inserted one into another. Put fuel in the middle of the stove - chips, cones, dry knots. Set it on fire. If you practice, then ignition will be obtained literally from one match. When the firewood has flared up well, put a burner on top, and already put a kettle or saucepan on it.
Camping wand-help is ready. With it, the tourist is not afraid of either hunger or cold.