This article will show how you can make the simplest drag in the forest, do it yourself, without much preparation and with very few tools.
Dragging is devicewhich allows you to conveniently drag and drop heavy items while hunting.
Tools Required:
1. A small hatchet;
2. Knife (sharpened);
3. A folding knife, which, among other tools, has a pin and a file for wood (Or a simple saw);
4. A skein of non-stretchable cord or rope;
So, now you can begin to make a drag. The article will describe everything in stages.
Stage 1. How skids are made.
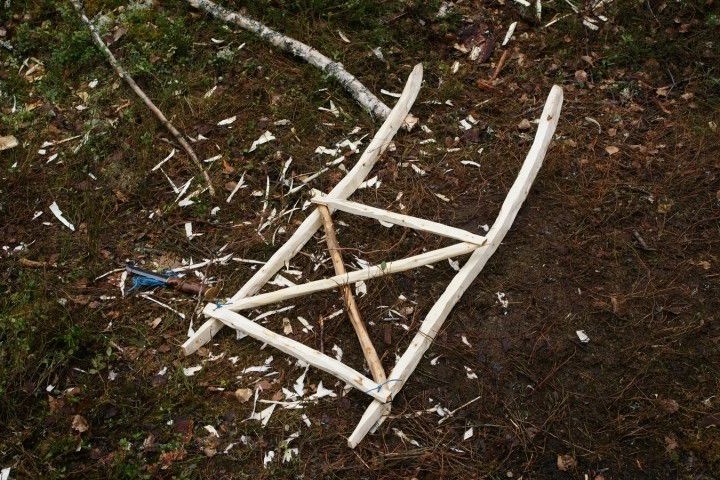
In order to make runners, it is necessary to cut down 2 small birches that grow in a bush. They are well suited because they have a well-curved lower part of the trunk, which is necessary in order to get the correct shape of the snake. In addition, they are not so pathetic to cut down, because they grow in a bush and this greatly interferes with each other's growth. The remaining part of the trunks will go to the manufacture of all other parts of this not complicated design. In total, you need two birch trunks, the diameter of which in the annular part should be approximately 7 cm. Now, two runners must be cut out of them with a rectangular cross section stretched upwards, as shown in the photo.
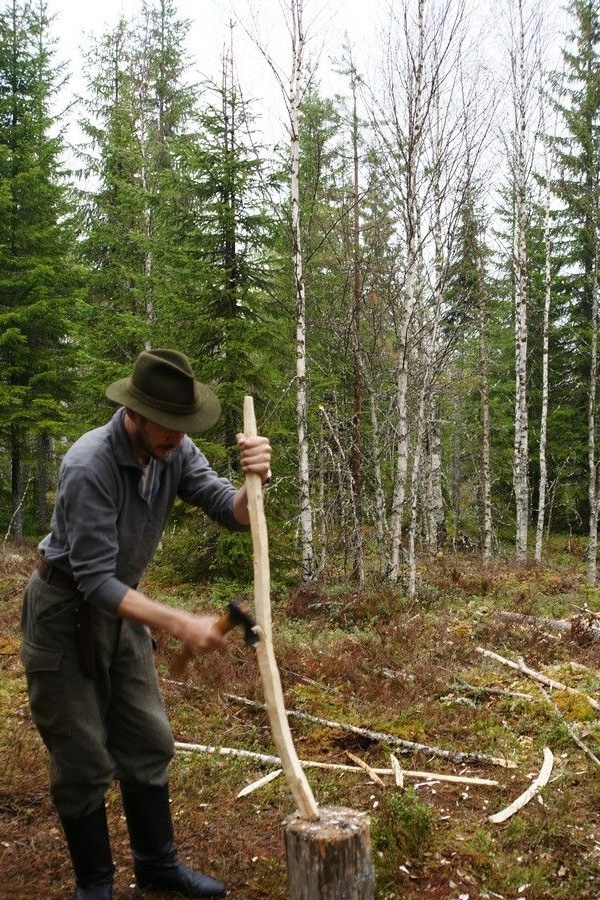
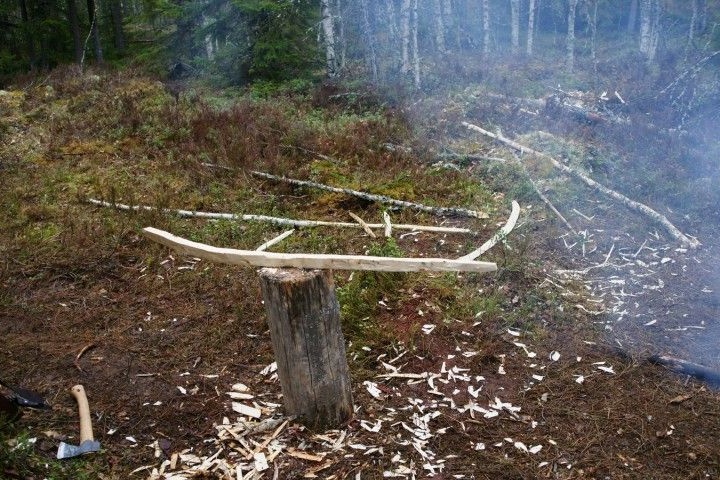
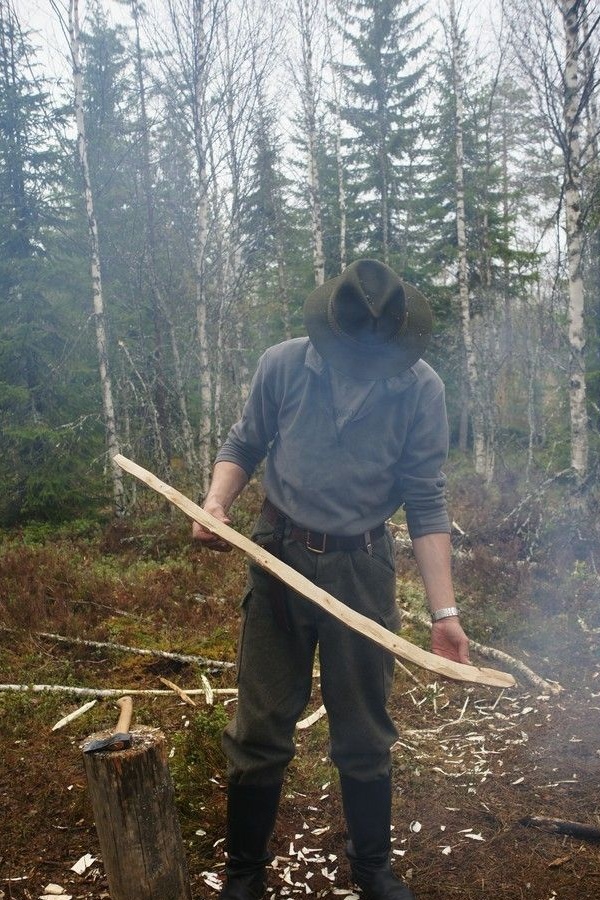
The tail of the runners, which are more curved and thicker, must be given a rounded shape. This is necessary so that the “heel” does not cling to anything when sliding. The lower surface of the runner must be cleanly trimmed with a knife, for better gliding.
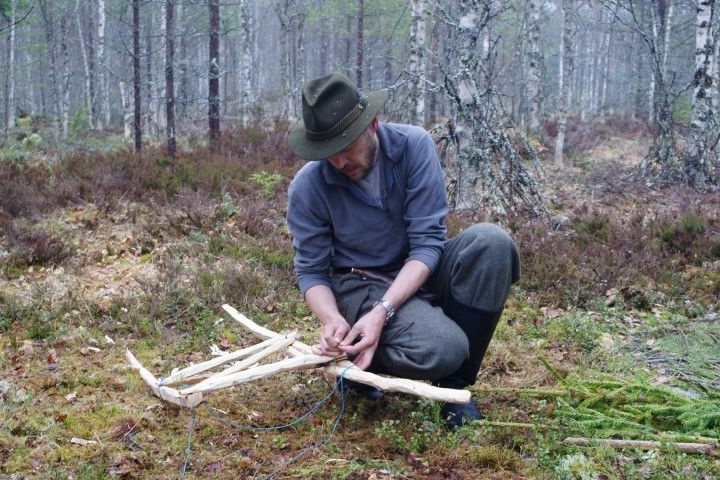
Stage 2. It's time to make the frame.
For the frame, you need to trim 4 sticks with an hatchet, 2 of which should be shorter (they will be needed for the crossbars), and 2 a little longer (for braces). After this, the sticks must be clipped from both sides at the ends in order to obtain flat platforms 2 - 2.5 cm thick.
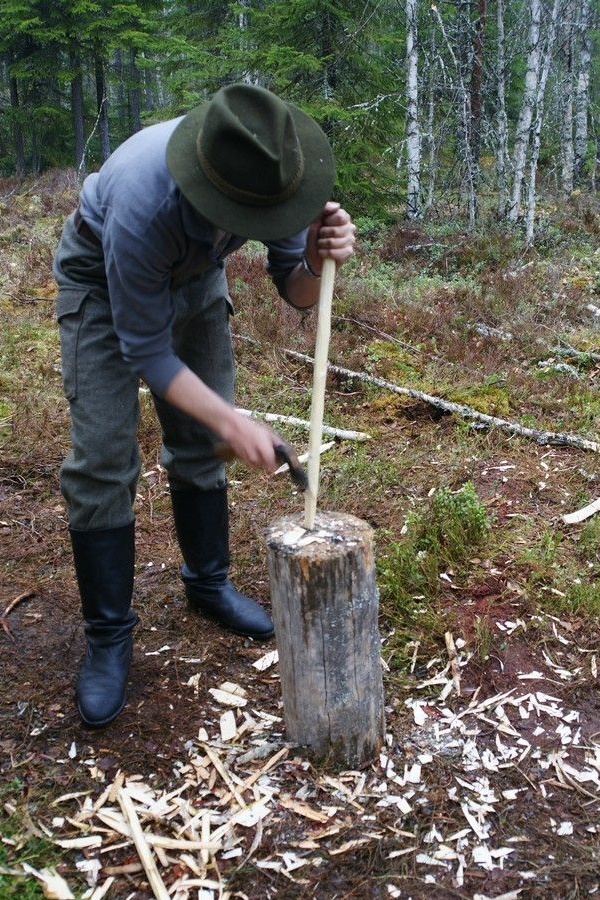
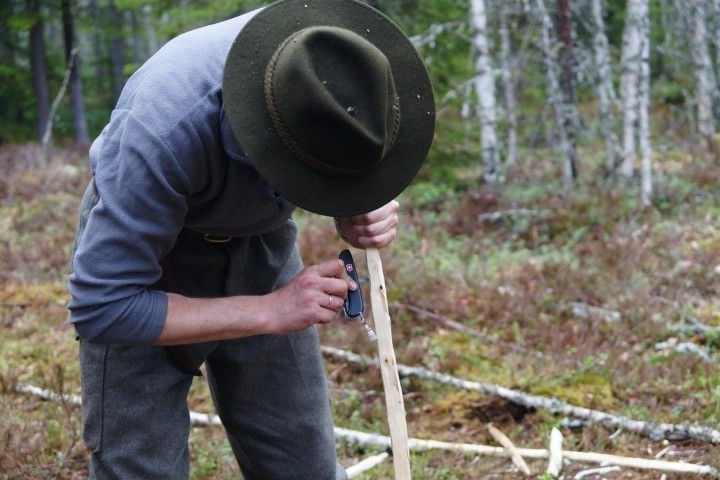
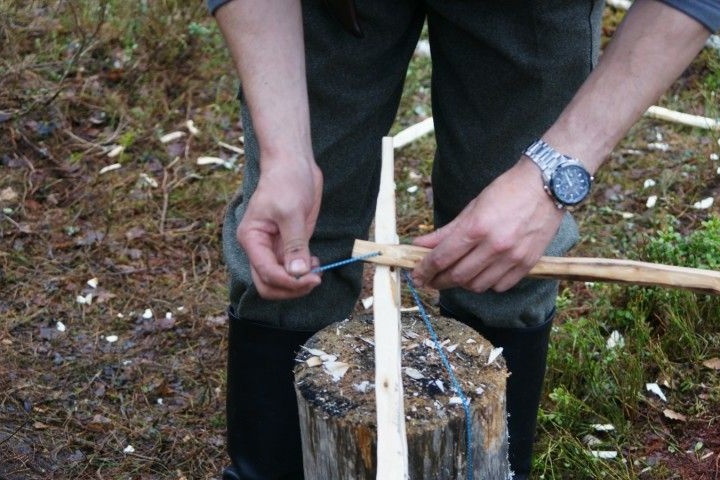
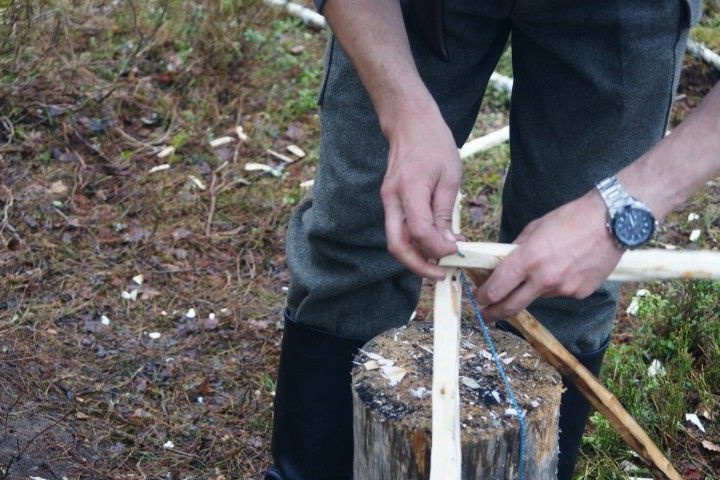
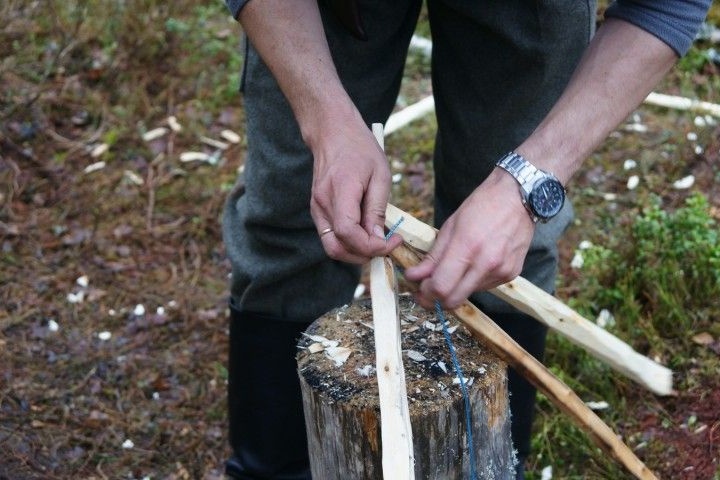
Now you need to do drilling holes for ligaments. You can make them with a folding knife auger. When drilling, you need to rotate the pin a little by clicking on it at the same time. Also, from time to time, you need to remove the knife from the hole to remove the resulting sawdust. After the hole is almost turned, it is necessary to insert a slot on the back side and drill into the meeting. This business requires good patience. The result should be a hole with a diameter of about 4 millimeters.
In the runners, you first need to drill a hole only for the upper cross member, in order to be able to measure the place where the lower one will be located.
Now you need to tie the upper cross member, as well as 2 braces, so that the structure acquires its appearance, and also allows you to mark the places where you need to attach the lower cross member.
Tie them up very tightly. First you need to thread the cord into the hole of the runner, then skip one end of it into the hole that is in the brace, and then cross the cross. Next, you need to wrap the other end of the cord crosswise, and after what is done, tie a pretty knot. In order to facilitate threading the cord, you need to melt its tip.
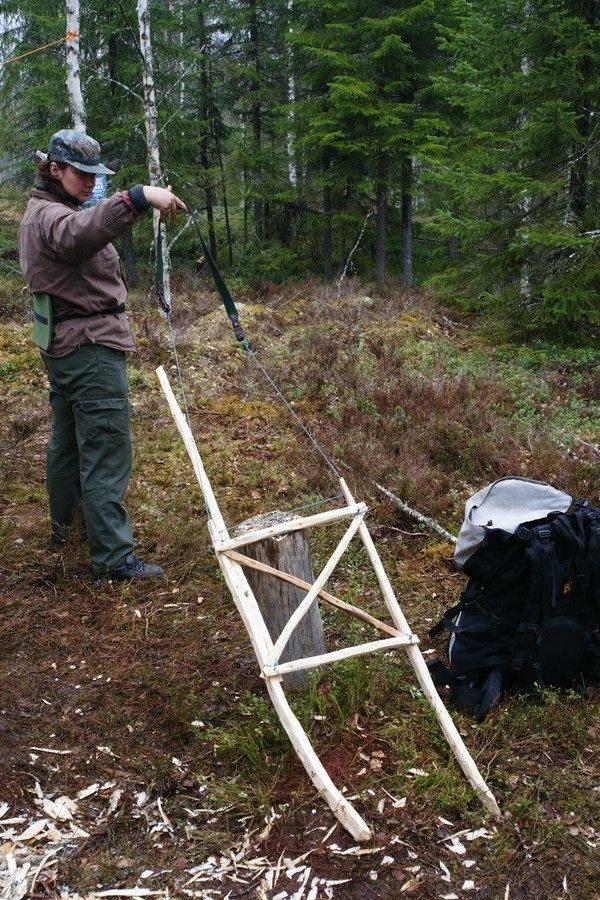
For convenient use of drags it is necessary to make a “rule” (this is a special stick of a certain length). The idea of such a rule was taken from Siberian hunting sleds, which skiers drag along.
To determine the correct length of the rule, you must try on "in place". And for this you need to finally tie the drag, tie the lower crossbars and braces.

Stage 3. Production of draft system.
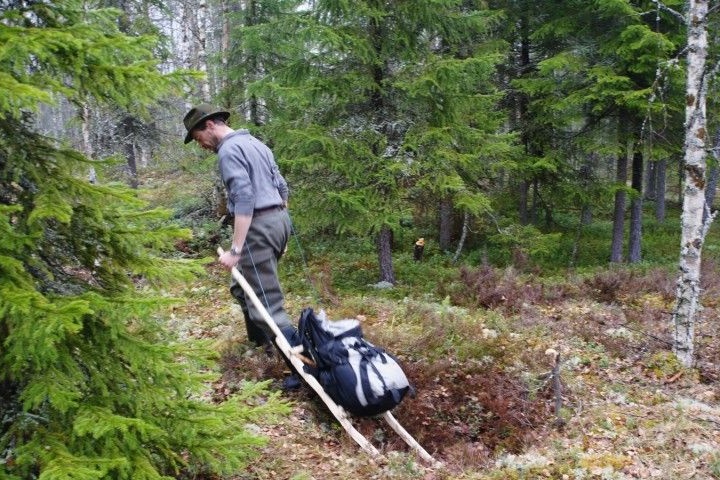
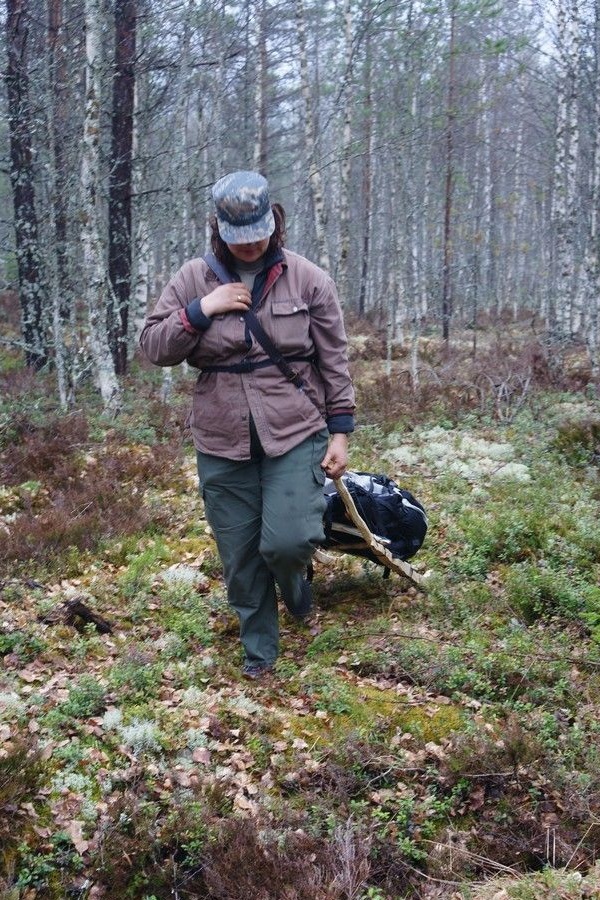
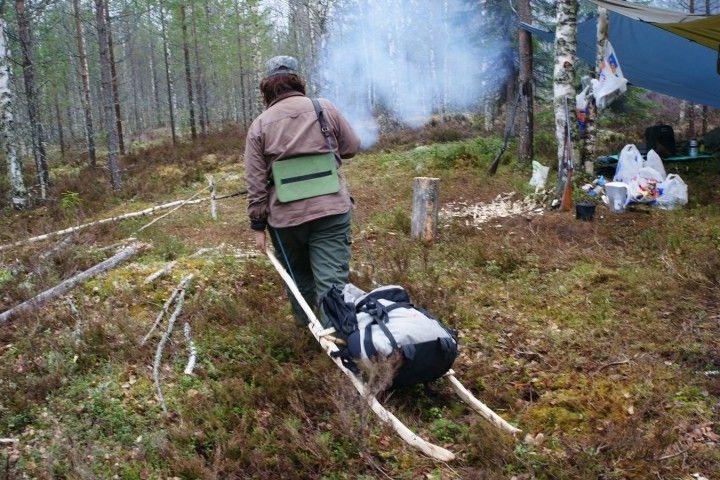
First, you need to crank the holes for the cord in the upper straight ends of the runners, while departing from the end by 5 cm. Pass the cord through them and tie the gun strap to its ends. After inserting the formed harness into the inside and throwing the shoulder strap over the shoulder obliquely chest. Next, you need to adjust the length so that the drag has risen slightly above the edges of the boots, and remains so far behind so as not to cling to it with your feet when walking. Now you can pick up the future rule, and estimate the length.
Now you need to cut off the excess from the rule and trim the handle cleanly. After that, drill “in place” 2 holes and snap parallel to the runner, which is on the left. You need to bind with those segments of the cord and into those very holes, thanks to which the main part of the structure is held. It means that all these cords need to be cut with a margin in order to be able to easily bandage the “rule” on the left and on the right hand in the future.
So, now the drag is completely ready, you can begin to test it with weights. You can put several heavy backpacks on it and attach them with a cord that you need to pass through the corners on the main frame.
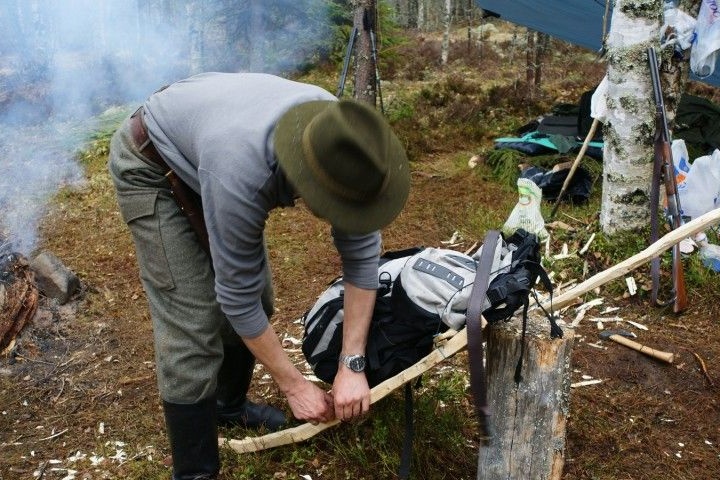
It takes less than two hours to make a drag.
The drapery should show itself well: quietly crawl along fallen trees, pass holes, and
Glide well over moss and hard ground.