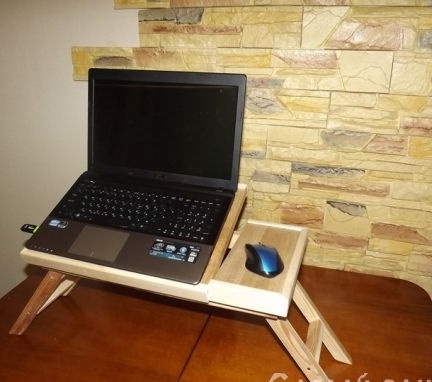
Increasingly, when the question arises about the need for a laptop table, many prefer to make it with their own hands. And there are many advantages to this: you can get the desired result by spending only a little effort and time. At the same time, the savings are obvious, especially if at least part of the material is at hand. Purchased options often disappear, especially if you want to use a table not only for a laptop, but also for breakfast in bed.
Materials and tools:
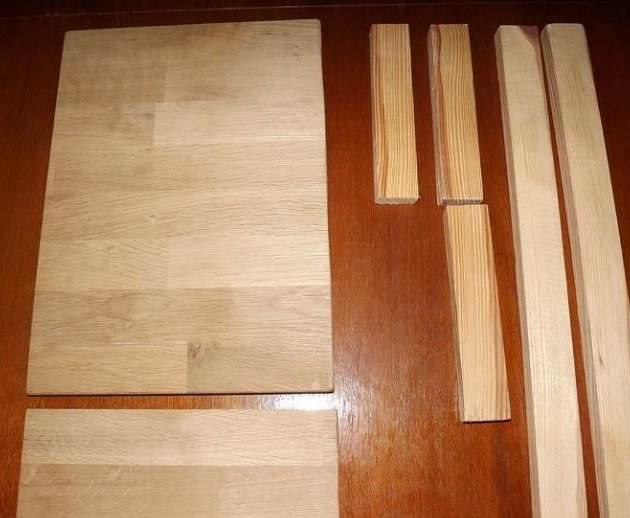
- Worktop, in this case 550x300 mm
- Wooden slats
- Saw
- Sandpaper
- Screwdriver
- Self-tapping screws
- Piano loops
- Wooden corner
- Stain
- Varnish
- Iron handle from an old bucket
Detailed manufacturing description:
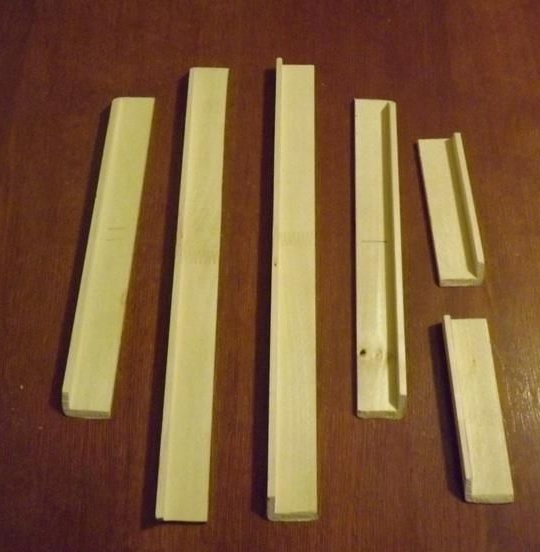
The tabletop is sawn into 2 parts, one of the parts will be under the laptop itself, the second will be unbearable for the mouse. Based on the size of the countertop, slats for the frame are prepared, in length and width they are taken 3-5 cm less than the countertop itself. For legs, approximately the same rails are taken, 4 long and 4 smaller, which will stand across. Long rails on both sides are filed at an angle of 25-30 degrees, so that future legs that will stand obliquely do not interfere, and stay confident. Prepared material is cleaned with sandpaper.
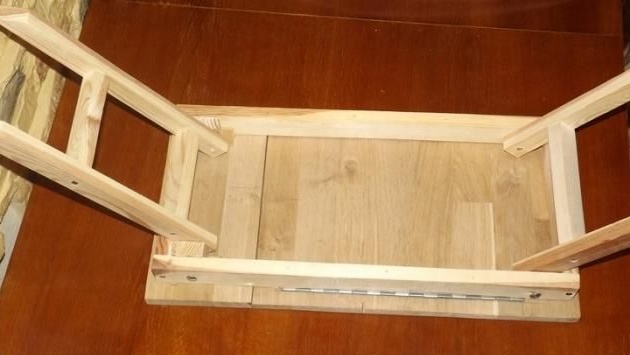
The table legs are made of 20x30 mm rails. The width of some is 200 mm, the other is 160 mm. Putting it all in two legs was easy. The distance between the small rails is about the same, they are attached to long conventional screws. It is important that the short slats do not protrude anywhere and stand level.

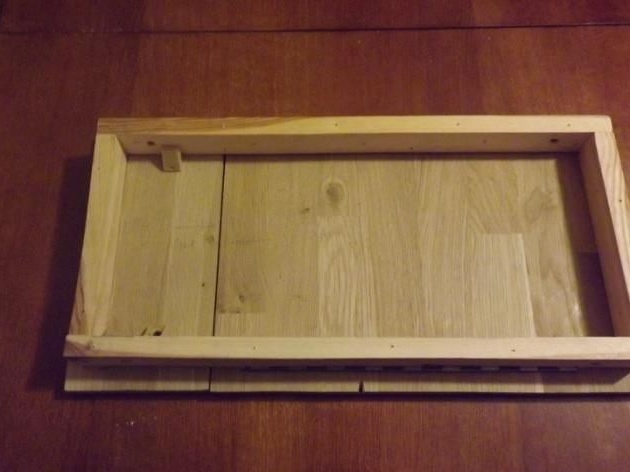
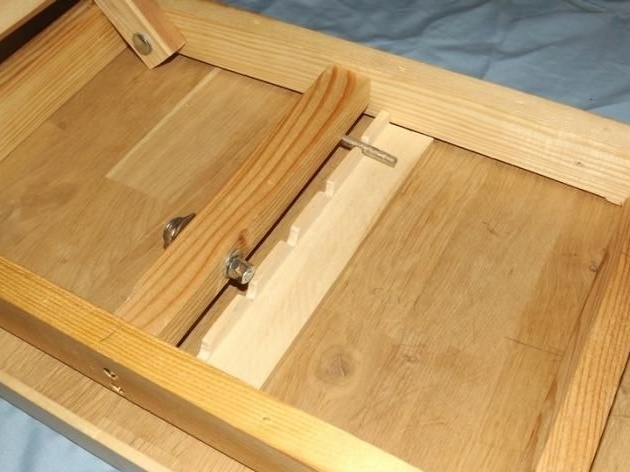
Next, the frame for the table itself is assembled from two parts of the countertop and rails. Both parts of the future table lie side by side, you can even fix them so that they would not part when assembling the frame, and everything was smooth. On each side the same indent is made on all sides so that the slats are in the center of the countertop. They are fastened with self-tapping screws to each other, and to the fixed part of the countertop on a wooden corner. Most of the countertops are mounted on piano loops.
The legs are bolted to the base of the table with bolts.If the width of the legs is not enough, then from the outer part of the legs you can put wooden blocks attached to the frame, as shown in the photo on one side of the table.
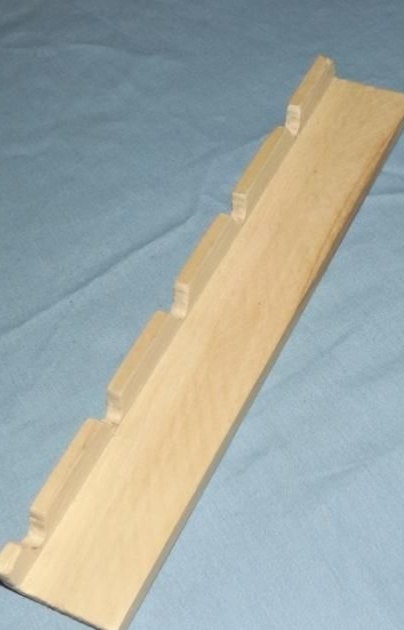
From a wooden corner 15x35 mm in size of the upper part of the table, blanks for edging are cut. These corners are placed not only for the beauty of the product, but also help to keep the laptop at a time when the countertop will be raised. These corners are fixed with liquid nails.
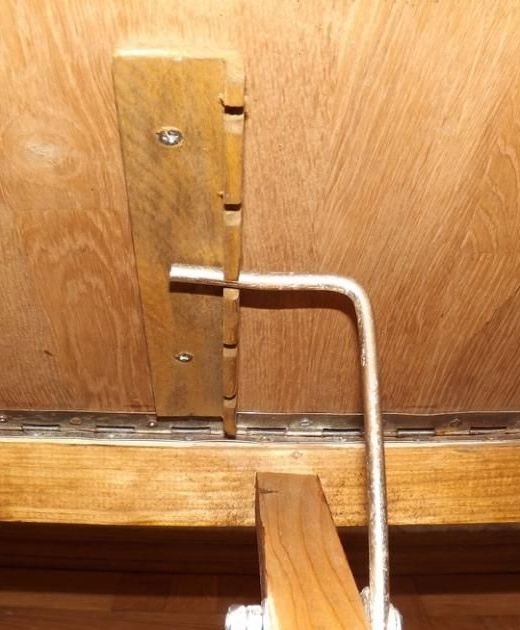
Then the author proceeds to the mechanism for raising a large part of the countertop. At another corner, you need to make several recesses, these will be the levels of raising the countertop. A corner is attached to the inside of the table. In the center of the frame is another rail with a through hole for attaching a bracket in the shape of the letter "G". In this case, the handle from the old bucket was taken for the bracket.
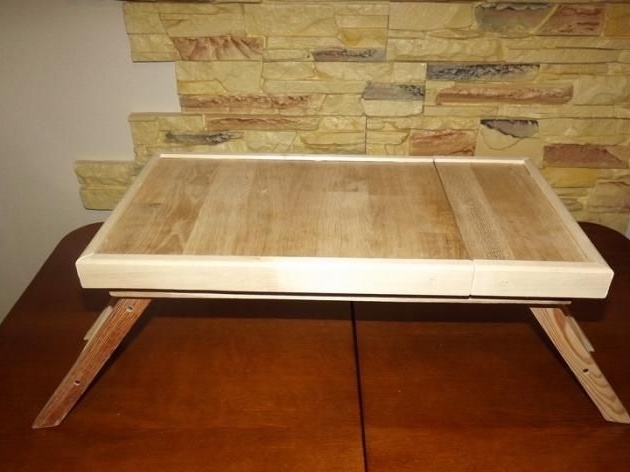
At the end of the work, it remains only to cover the table with stain and varnish. Everything, a laptop table is ready for breakfast, and comfortable work on the bed.