
It is no secret that in high-rise buildings, especially Khrushchev’s buildings, the ceiling is often the most problematic area. Mismatch of ceiling tiles in level can easily spoil the whole impression of a repair. Rarely, someone undertakes to fix the differences manually, and this is a laborious task. In some apartments, the differences are 2-3 centimeters, such a ladder can not be putty. The only true option is a suspended or suspended ceiling.
The main advantage of such ceilings is that they are able to even out any difference, but it is equally important that when assembling a suspended or stretch ceiling, you have the opportunity to not only level it, but also to decorate it, to make lighting zoning.
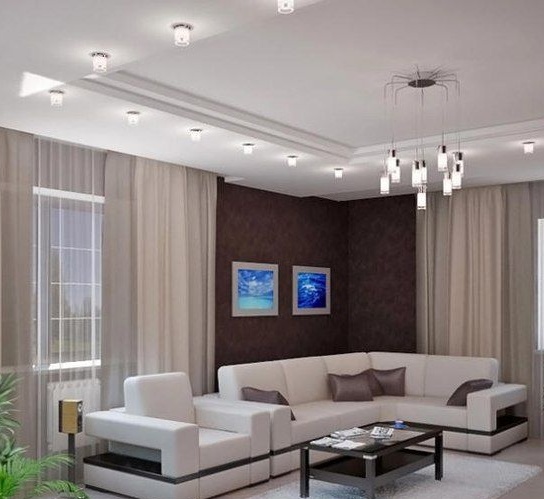
Two-level ceilings look the most beautiful and aesthetically pleasing. They allow, with the help of different levels, to focus on a particular section of your living space.
Which ceilings are better, suspended or suspended? There is no definite question, but judging by it, the stretch ceiling will cost more, plus everything else, the installation of such a ceiling requires skills and equipment.
Installation of suspended ceilings does not require special skills, you only need:
- punch
- screwdriver
- construction knife
- self-tapping screws gypsum metal
- self-tapping screws for metal type "bug"
- dowel nails or anchor bolts
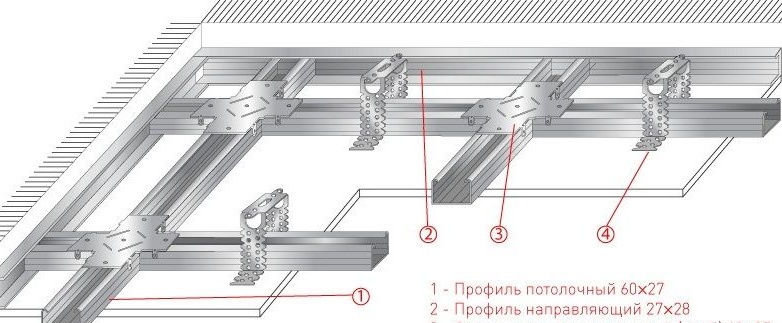
- profile 27x28
- profile 60x27
- crab type suspensions
- direct suspensions
First, decide which ceiling you need. As an option: three living room lighting zones - above the sitting area (sofa, armchair), above the TV area and the central ceiling. You can do as two lower levels at the edges of the room, and one ledge in the middle. Here for your taste and color. Switching lighting zones can create a very comfortable and even intimate atmosphere. Not candles, but still romance.
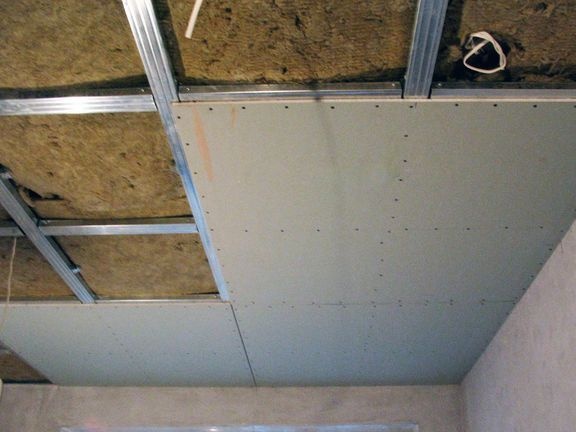
Next, we calculate the area and purchase the necessary number of drywall sheets and profiles. GKL sheets are better to take with a thickness of 9.5 mm, since they do not burden the design.

Since the ceiling is planned to be multi-level, it is necessary, first of all, to mount the frame of the first, upper level. In this case, based on your design considerations, we attach to the ceiling, using a puncher, suspensions where we have the upper level of the ceiling, for example, the center of the living room. To these suspensions we fasten the profile 60x27 with the shelf down. The profile should be at a distance of no more than 75 cm, optimally 60 cm.Also note that you need a distance from the ceiling sufficient for the free installation of fixtures. If in the center of the upper level you will have nothing but a chandelier, then you can attach the profile without suspensions, directly to the ceiling plate.
When all the frame profiles for the upper level are mounted on the ceiling, then we get a very shaky design.
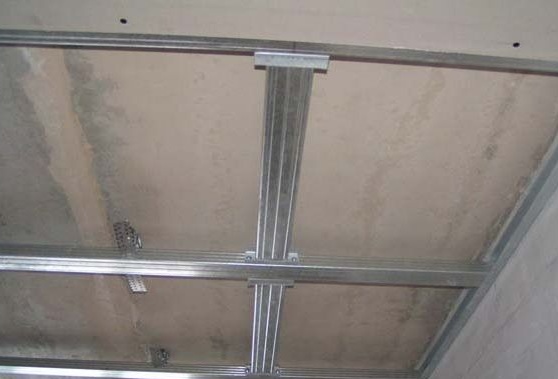
To strengthen it and give rigidity from the same profile 60x27 we carry out cross-pieces. Using connectors of the "crab" type, we also fasten them at a distance of 60-75 cm. At the ends, we enclose the structure with a 27x28 profile. This will give another surface for fastening.
The upper level is ready, it remains to mount the lower one, connect both and get a full frame of a suspended two-level ceiling.
For the installation of the lower level, you must determine its indentation from the upper level.
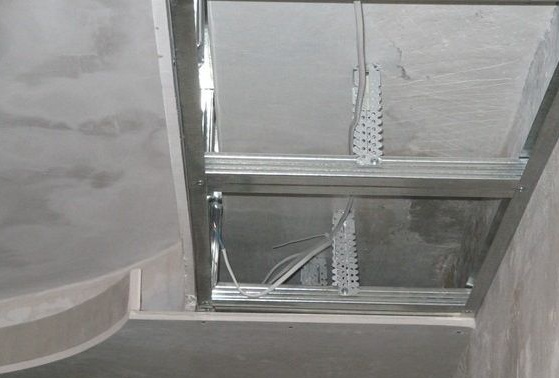
On the walls, along the perimeter, mark the level with a strip and fix the frame from the 27x28 profile. It is also worth paying attention to that the spacing from the ceiling should ensure the free installation of fixtures, for example, 7 cm. When the guides around the perimeter are ready, you can proceed to join the levels together. At the end of the upper level, we fasten with self-tapping screws sections of the profile 60x27 equal to the height of the lower level. We also fasten at a distance of 60-75 from each other. In this case, the profile on the wall and the segments of the profile along the edge of the first level should be at the same level. Although, perhaps you decide to make inclined planes, why not?
So, when the segments are mounted, we connect them with a 60x27 profile with guides around the perimeter of the room. The profile connecting the guides and the segments must be fixed, so with the help of conventional suspensions we fasten them to the ceiling and also perform cross-pieces. Suspensions and crossbars will make the structure stronger and more reliable.
Now it remains to make the wiring to the places of installation of the chandelier and lamps. If you do not have experience with electrical wiring, it is better to invite a knowledgeable person.
After the ceiling structure is securely assembled, you can begin to work with drywall.
For convenience, it is better to first mount the sheets where space allows you to screw the whole sheet, without clipping. When all the sheets are screwed, proceed to the scraps. GKL sheets are cut quite simply. On the back, we draw the line with a knife, turn the sheet over, bend and cut the paper at the place of its folding. We fasten the trim. The joints of the sheets of gypsum plasterboard and the corners are strengthened with a serpentine, putty joints and places of fastening of screws.
An important point. Do not forget to drill holes for the ceiling lights in the places of the proposed installation, otherwise you will have to disassemble the entire coating!
By this principle, you can make ceilings in any room, as well as in the kitchen, for example, highlighting the lighting above the dining table or over the cooking area.