
A small stool will always be appropriate and find use, whether in the country or in the apartment. Such chairs are very popular among children. For adults, sitting on it is convenient to peel potatoes, or to perform other types of "sedentary" work, in the country it can be, for example, picking strawberries. There is not always “extra” money to buy such a stool, but if you have a jigsaw and a board, then the question of buying will disappear by itself.
Tools and materials:
- Board 800x200x25 mm (dimensions, of course, you can take your own based on what is available)
- 8 screws 50-60 mm
- Sandpaper
- Electric fret saw
- Screwdriver
- Varnish and paint for wood
- Pencil, corner and tape measure
Detailed manufacturing description:
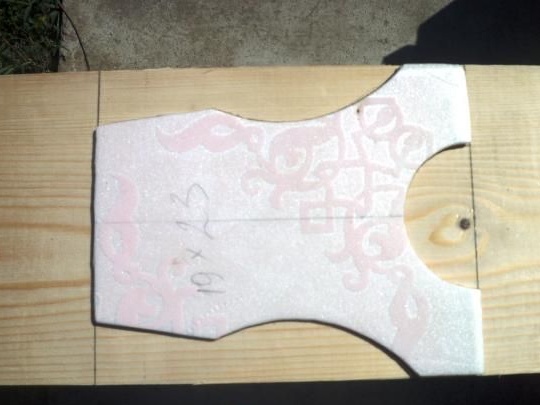
First you need to do the marking of the board. Using a pencil and tape measure, a length of 32 cm is marked. This part of the board will be the top of the stool. Further, segments for 23 cm sidewalls are marked. It is necessary to give some pattern to the sidewall, and to save time it is better to take a piece of paper or cardboard. Thus, a minimum of time is spent on marking the sidewalls.
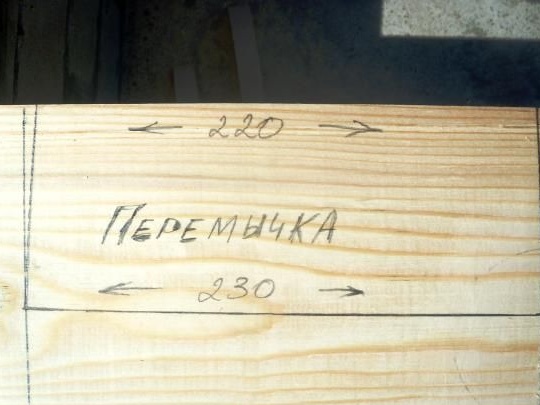
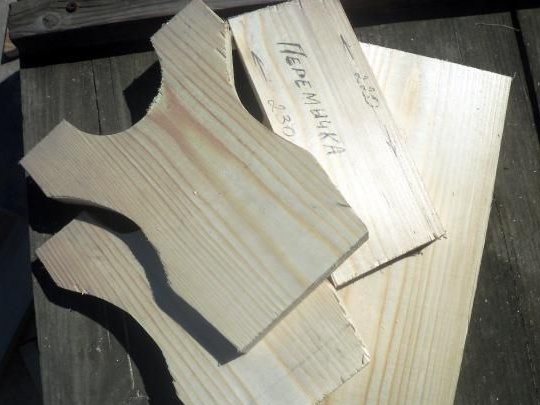
The last part to mark is the jumper for the stool. It will be in the form of a trapezoid and sides 230 and 220 mm. Its width is not very important from 80 to 120 mm, you can start from the segments you have.
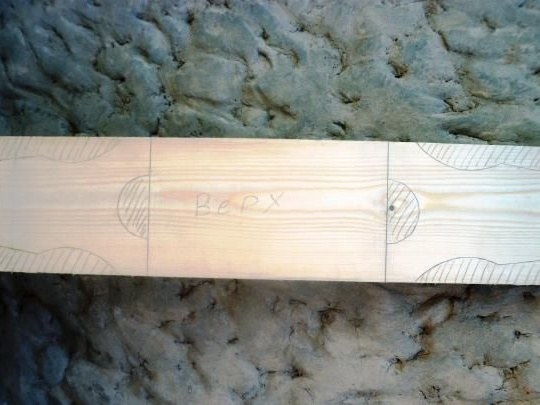
The marked board has this appearance. It is not advisable to make the contour lines bold, this can affect the evenness of the parts when cropping.
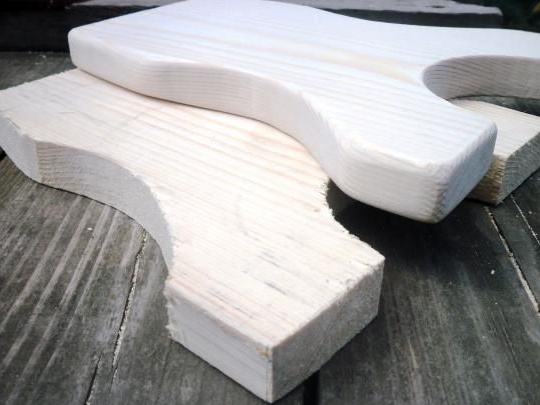
When the markup is ready, you can begin to manufacture parts using a jigsaw. For a more even cut with a jigsaw, you should lead tightly next to the line, and not along it.
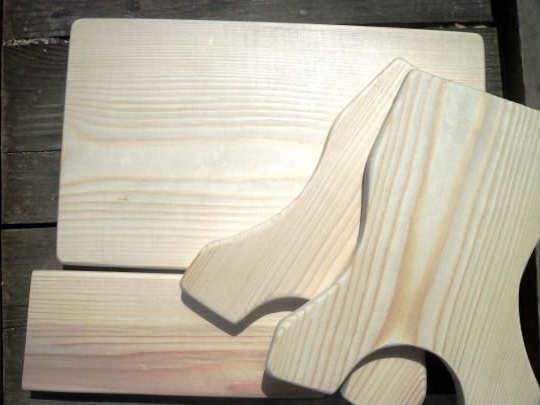
For even cutting, you can practice waste. The cut parts look like this.
Now large emery paper comes into play, sharp corners are smoothed over the entire circumference of the part, and the ends are ground.
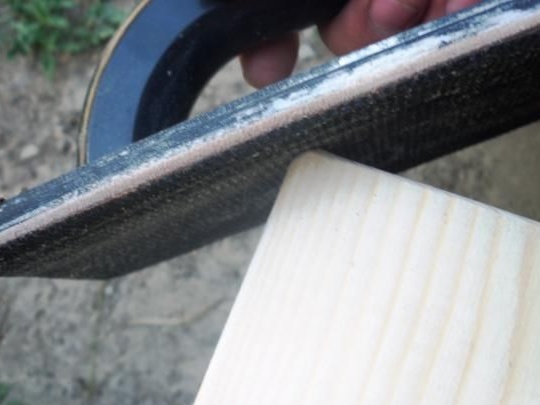
Cleaning parts will help not only give them a beautiful appearance, but also hide the bumps that appeared during cutting. Further, all details are polished with fine sandpaper. Grinding parts at this stage is most convenient, the planes are easy to handle.The main thing is to do everything qualitatively because when painting all the irregularities can appear. So, the finished and unprocessed part looks like.
Now all the parts are polished and ready for assembly.
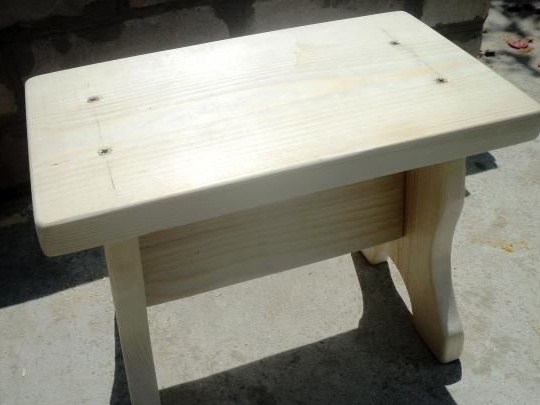
First of all, the sides and the jumper are connected with one screw on each side. Further, on a flat surface, the top cover is screwed with two screws on each side. Now you can strengthen the sides with a jumper with two more screws.

It looks like a fully assembled chair. The stool should be checked on a flat surface so that it does not stagger. If it does not hold steady, the legs are cut to the desired size.
After checking, it's time to start painting. Before this, the stool is cleaned of wooden dust and the remains of the pencil are erased. When choosing a paint color, you can not bother and take what is or which you like. You can simply leave the natural color covered with a colorless varnish. After the paint has dried, the varnish is covered, and the stool remains to dry for another day.
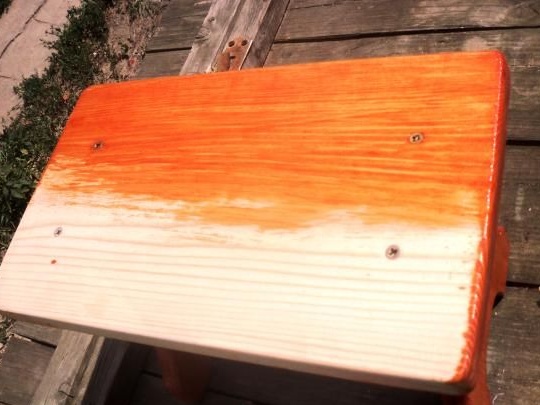
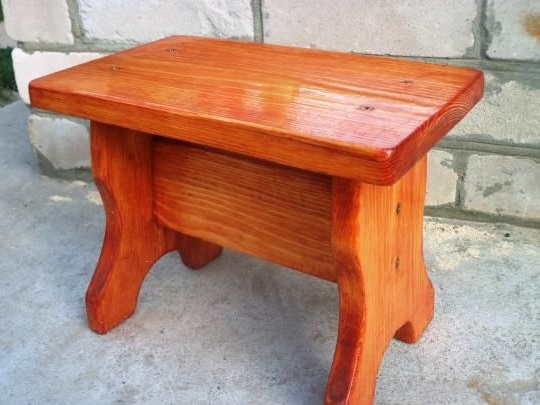
This is how the finished chair looks, covered with varnish, which is completely dry. The manufacture of parts and its assembly takes no more than three hours, then it takes a lot of time to dry the paint and varnish. Comfortable, sturdy and reliable stool made do it yourself ready to use.