
This article will be described in detail and shown in the photographs the process of manufacturing the spinner "Torpedo" for winter fishing for perch. The spinner will be made with aluminum material, which means that it will be very light. Also, the article will talk about the possibility of painting the spinner crowns.
For a long time the baits "Torpedo" was forgotten. Only recently have fishermen and winter fishing enthusiasts recalled its existence. Now they use the torpedo very often. The question is, why is she so good? Everything is quite simple, such a spinner can change the nature of the game, can vertically descend to the bottom, or twist during a dive, it can also go crookedly under the ice.
Nowadays, shops have a huge selection of spinners "Torpedo". But the price, quality and limited development sometimes make you wonder whether they should be bought in the store. It will be best to make a torpedo do it yourself, it will be of better quality and a minimum of money will be spent for its manufacture. It is recommended to use it for ice fishing.
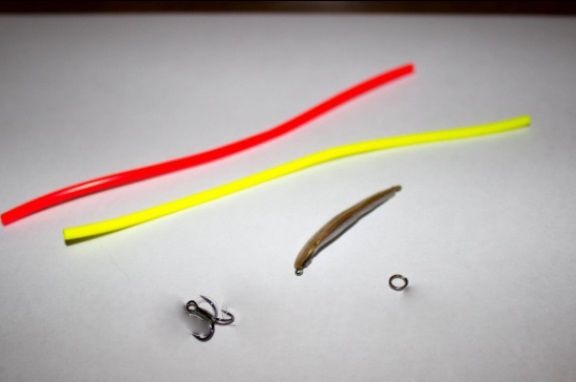
For the manufacture of spinners "Torpedo" do-it-yourself will need the following materials:
- Clockwork rings.
- Little carabiners.
- Threes.
- Solder.
- Swivels.
- Soldering flux.
- Aluminum can.
- Procrastination.
So, it's time to start manufacturing.
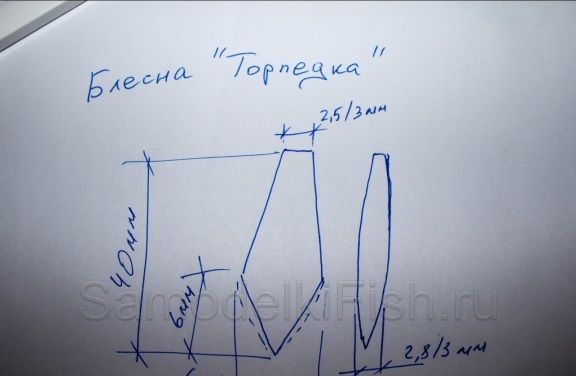
Stage 1.
On paper, you need to draw an approximate view of the future spinner. In this homemade 40mm length will be used. This length is very suitable for lightweight spinners.
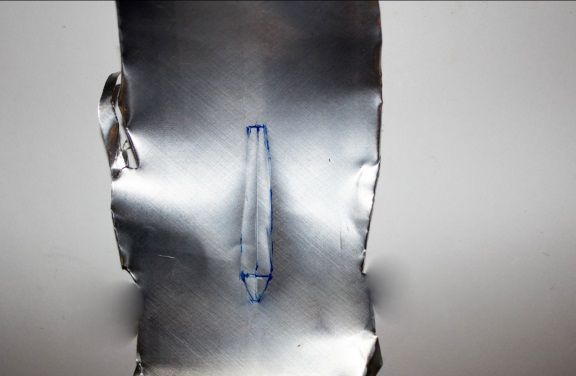
Stage 2.
Now on a small piece of metal you need to mark the contours of the baubles. For some novice residents, our sites will find it difficult to find the necessary aluminum plates. Therefore, this example will show how to make the Torpedo shine from a strip of aluminum can.
Stage 3.
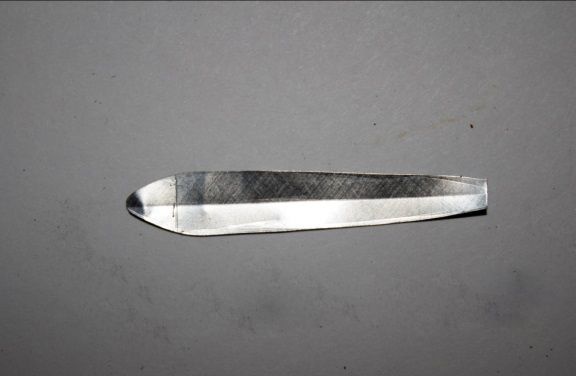
It is necessary to cut the workpiece along the drawn contour.
Stage 4.
Now, with a small file you need to bring the edges and corners. In this case, it is necessary to monitor rounding of the head.
Stage 5.
In the center of this workpiece, you need to make an even fold.
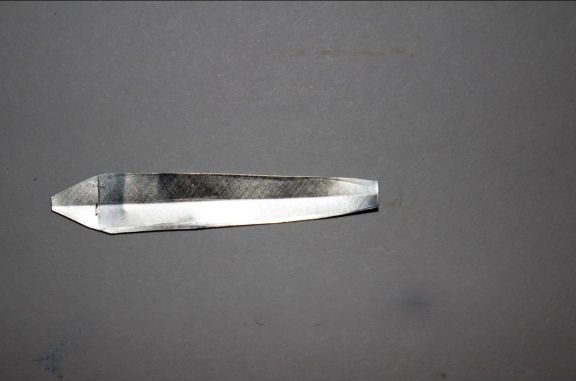
Stage 6.
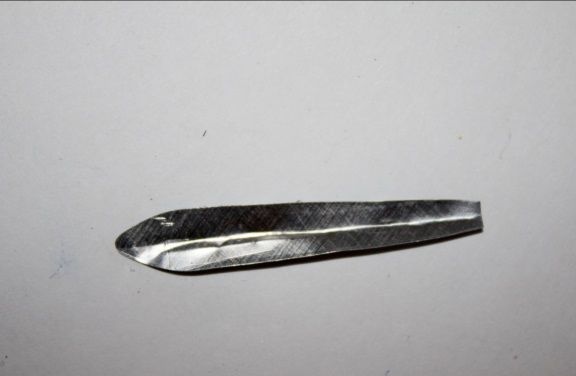
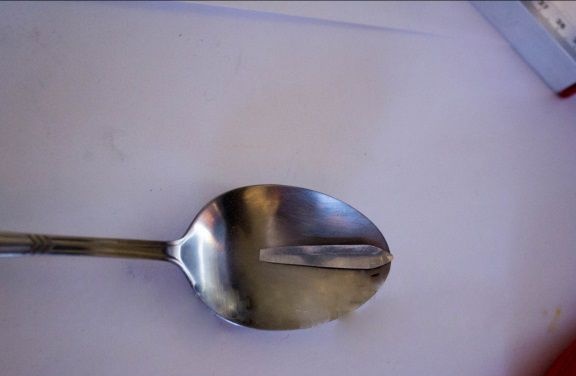
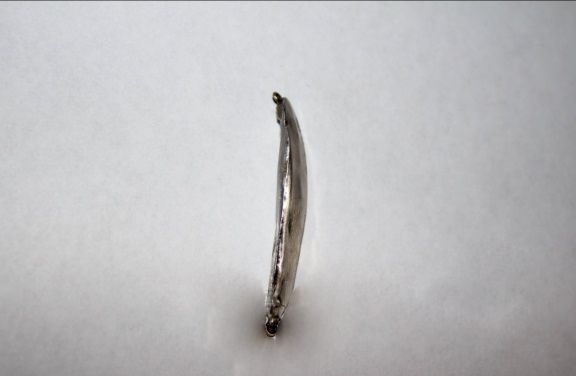
Now you can start rolling out the head of the future spinner, this is necessary so that it can look up. So, you need to put this blank on a spoon, as shown in the photo, heat it and pressing it hard to walk with a metal object. For example, a small hammer.
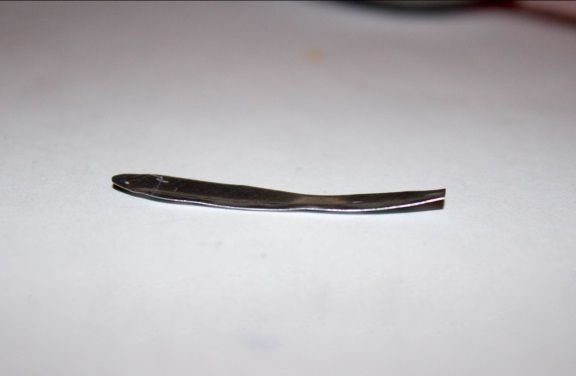
After the work done on the workpiece, you should get an arc, such as in the photo below.
Stage 7.
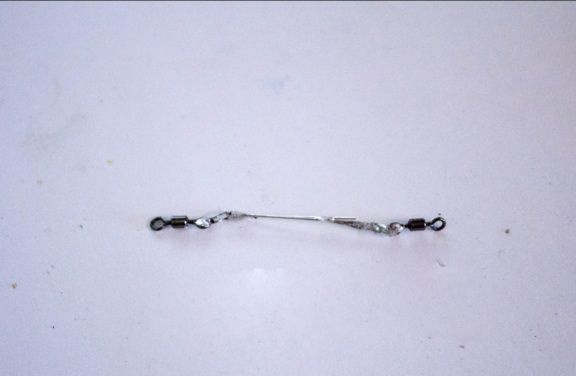
Now you need to attach loops to the workpiece, for a hook and fishing line. Before doing this, you need to make an enhanced mounting system. To do this, you can connect 2 swivels with each other with a wire. You can use any wire, in this case the old guitar string was used.
A little tip: Before you begin to solder the antennae of the wire, you need to make a few turns of the wire near the ears of the swivels for better fixation, so that no fish can break. Because, just soldering it to the workpiece, the fish can break out and leave. And doing everything as it is written here, you can get rid of such unpleasantness.
Stage 8.
The wire to the workpiece must be fixed with large drops of solder.
So, advice: everyone knows that solder adheres poorly to aluminum. To save time, you need to clean the plate, and then treat it with special soldering acid (based on zinc chloride salts). Be sure to buy solder from rosin already available inside.
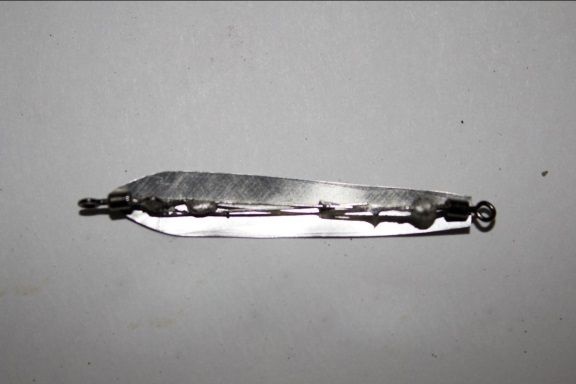
The workpiece must be filled with solder ..
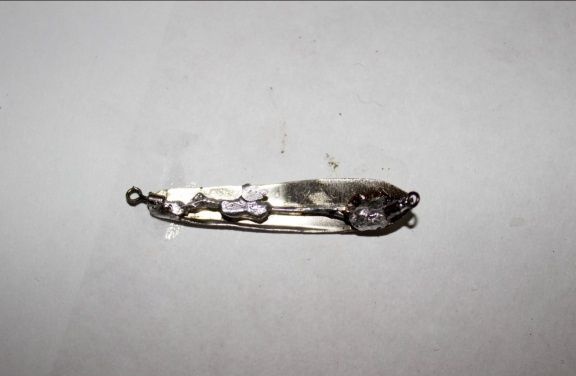
Stage 9.
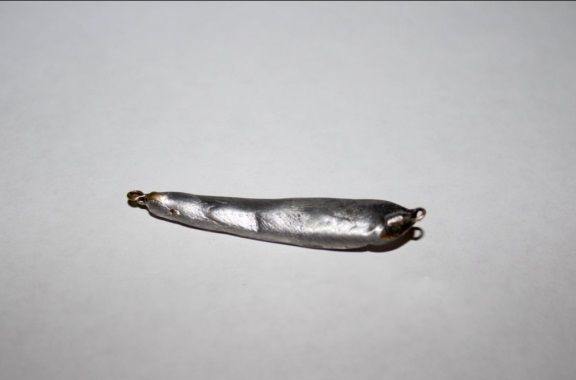
It is necessary to clean and polish the solder.
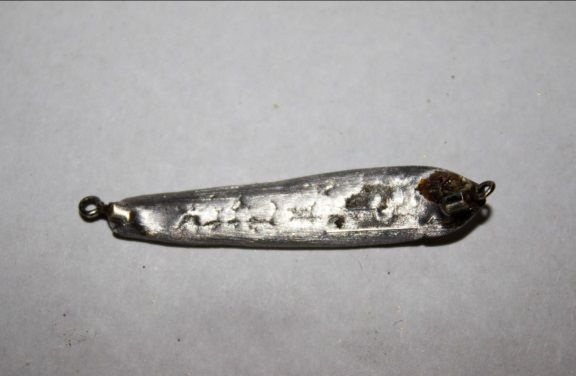
During the cleaning of solder, you need to check the play of the spinners. You can check in a bucket of water or in the aquarium, you need to achieve the game that you can arrange. You can make several spinners of different shapes of solder and different amounts, they will play in different ways.
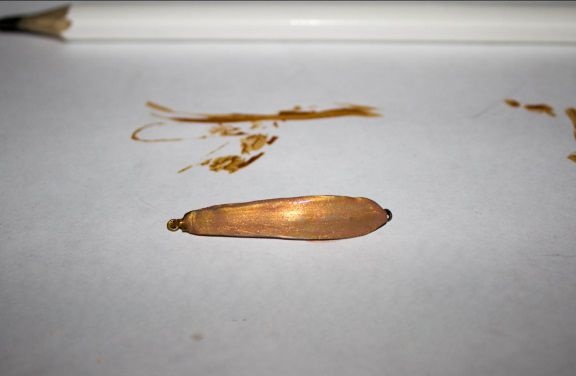
This example uses a jagged, slightly bitten shape. Lightness and this form due to the use of aluminum as a spinner crown, this made it possible to achieve an interesting game. When immersed, it rotates in a spiral, and this strongly provokes the fish to attack.
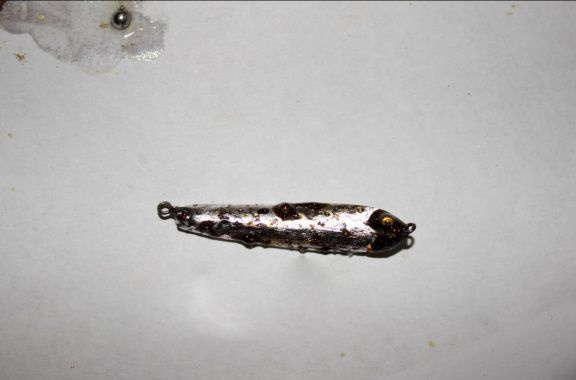
Stage 10.
Spinner painting.
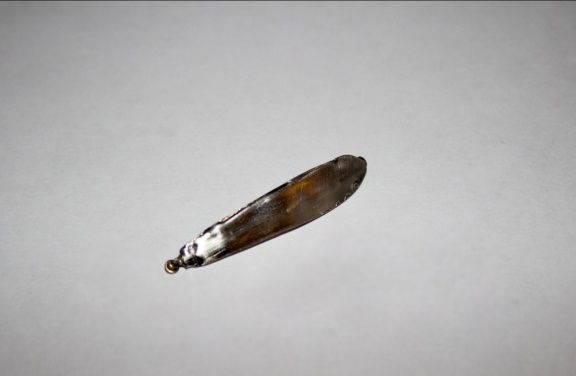
One side of the spinner can be painted with waterproof acrylic paint for copper, gold or brass, this will give it even more effect. You can buy such paint on the market or in a special store.
Stage 11.
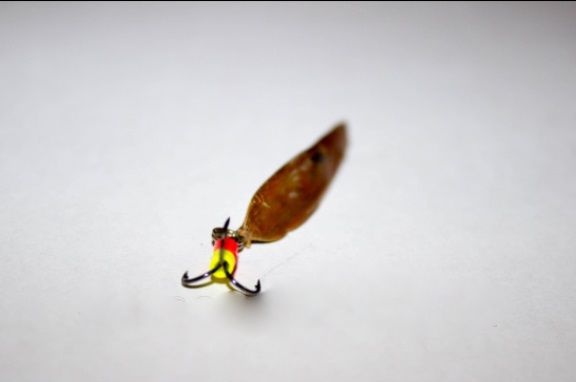
Now the crown and hook tee need to be inserted into the eyelet at the head. If desired, they can be decorated with cambrices of different colors.
Now, the home-made catchy bait "Torpedo" is ready.