
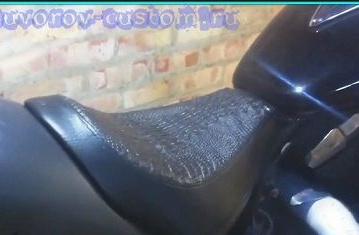
Many owners of motorcycle equipment seek to give their “iron horses” a unique and inimitable look, changing both individual components and assemblies of a motorcycle, and radically changing its appearance, building it from scratch, leaving only the appearance of the engine untouched. The original, non-factory form of such a part of the motorcycle as a seat can radically change its visual perception for the better. Find ready for sale model saddles are almost impossible, since its shape often requires individual adjustment to a converted or completely home-made frame, and custom-made models cost a lot of money. It also takes into account the fact that a home-made saddle is fitted directly under the driver and should be in harmony with the geometry of the frame. In the article, the author reveals some of the technologies used for this.
Tools and materials needed for this will be indicated in the article itself.
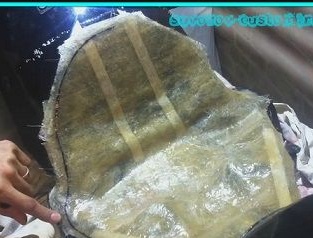
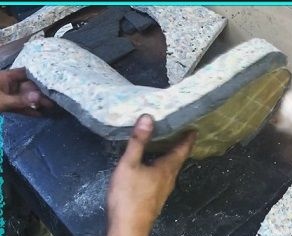
The base of the seat is made of fiberglass. Making the basis of this material, it is much easier to beat the exact repetition of the frame elements on which it will lie.
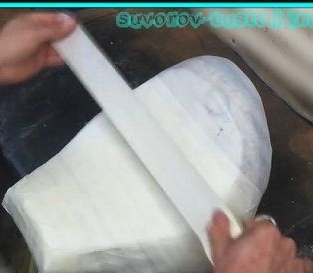
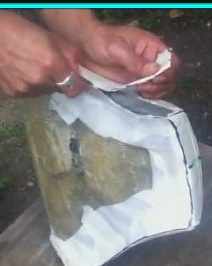
First, masking tape is glued to the frame under the future saddle, and clerical tape is applied on top of it. Subsequently, the masking will be much easier to peel off from the frame, and stationery tape will not allow the epoxy to stick to the frame.
Next, you need to prepare an epoxy resin in a proportion of 10 resin to 1 hardener. Next, apply the resin to the fiberglass and glue the seat. The thickness of the finished base should be at least 3 mm.
When the base hardens, you need to mark the edges with a marker, which will later be cropped.
For further work, it will be more convenient to remove the seat from the frame.
Now is the time to drill the mounting holes, based on where the counterparts will be on the frame, since this will not be so convenient for further assembly.
Not large metal plates (1-1.5mm thick.) Will need to be welded onto the bolt caps. Then insert them into the drilled holes (thread to the frame) and glue on top with epoxy, so that they turn out to be “poured” into the saddle. Therefore, the bolts will not scroll.
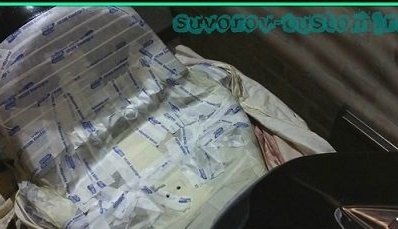
Before the polyurethane foam sticker, the surface of the base is sanded with sandpaper for better bonding.
We cut polyurethane foam with a margin and glue it to the surface of the saddle, after the glue hardens, the excess edges are cut off.
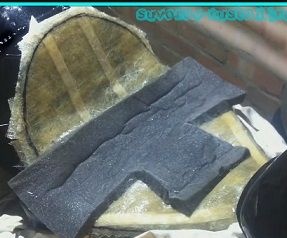
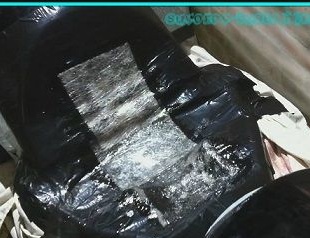
For greater softness of the saddle, you can additionally use felt (1 - 2 sheets), gluing ordinary furniture foam is not recommended. For the top layer of the seat, rubberized foam rubber is an excellent option. After the upper layers are stuck again, we cut off all the excess that sticks out of the contours of the seat and on the grinding wheel we round the edges.
Pattern
To complete the process of creating a saddle, we only have to sew a cover. To do this, you need to make a pattern and cut the necessary pieces of skin from it, then sew them. For people who are doing this for the first time, this process can be a bit complicated. To do this, the author of the article suggests using masking tape in order to facilitate the work.
Fully glue the seat:
Next, we mark with a marker all the bends on the saddle, as shown in the photo. We draw a line along the bottom contour of the saddle:
Then with a clerical knife or blade, carefully cut the tape along the marked lines. After this, the patterns are ready, you can remove them and apply to the skin. The skin must be cut with a margin of about 5-10 mm. After you cut out the necessary parts from the skin, attach them to the saddle and check again. After checking, you can stitch them together. If you are not confident in your abilities (it’s rather difficult to work with the skin), it’s better to rent it in a tailor shop.
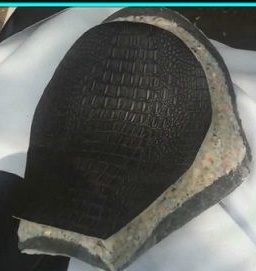
The cover is ready, it remains to put it on and fix the edges of the skin on the inside of the saddle. This can be done with glue, rivets or a stapler. For better reliability, you can glue the seat base with adhesive before stretching.
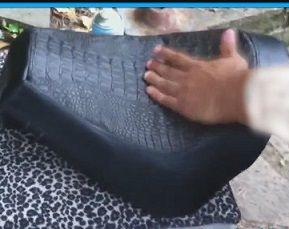
If small folds remain after assembly, they can be removed by stretching the skin and fixing it from the bottom of the saddle.
The process is completed, enjoy the result!