
Good day, dear readers.
The article will describe the creation of mines for airsoft.
Before you begin, a slight digression from the following information.
Warning:
Material for familiarization and practice for entertainment purposes.
It carries danger to the extent that a kitchen knife or other object not intended is dangerous
to cause damage to human life and health. In the initial version, it does not carry fragmentation or explosive action. Be careful and use as intended.
So, let's begin.
This technology is based on the principle of “push detonator”. Even works
from smooth pressing. Rain is not a hindrance to her.
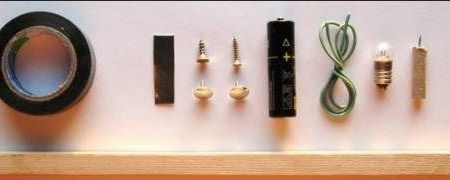
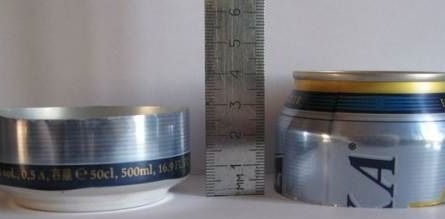
All you need to create is a little time (up to 20 minutes) and readily available materials:
•
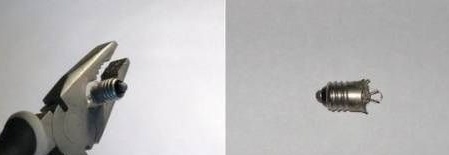
Step 1:
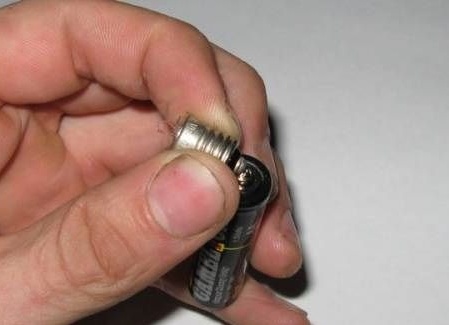
Let's create an "Electric fuse", press the pliers on the light bulb and slowly push on the bottle to find the "tungsten wire".
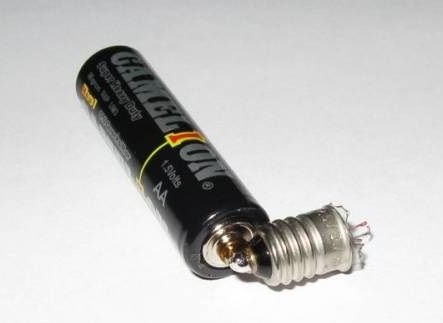
Step Two:
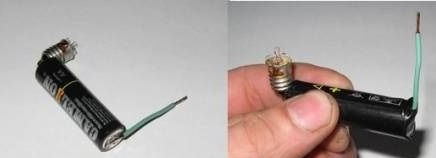
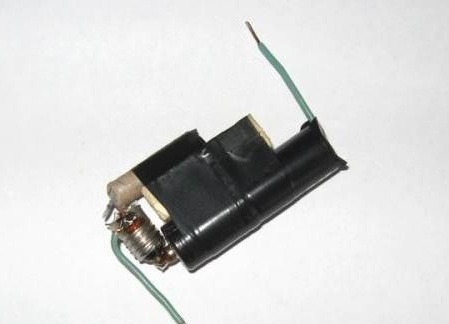
After, we clean the end of the battery with a file (+), solder the bulb 90 degrees, relative to the longitudinal axis of the battery. By the way, the lamp should be soldered so that the antennae are on the same side, the same axis.
Step Three:
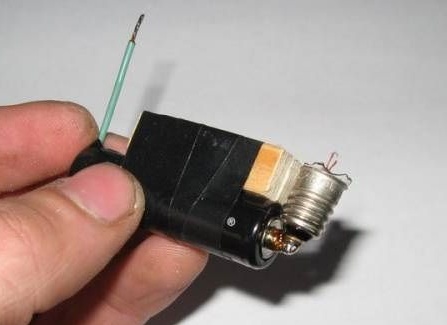
After we prepare 2 conductors somewhere for 40-45 millimeters, we clean the ends by 4-8, narrow, solder the wires to the negative pole of the battery. We shut the minus piece of electrical tape.
Step Four:
We get a glazing bead, saw off a piece 30-35 millimeters long, having slightly processed a file for aesthetics. We attach the part made with insulating tape to the battery, firmly fixing the electrical tape, which conceals the minus.
Step Five:
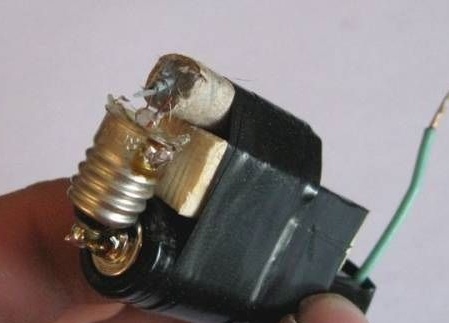
After all this, insert the charge using electrical tape. Pass the end of the wick through the hole from the ends of the tungsten spiral so that the spiral is firmly pressed against the wick (the process is almost clear, isn’t it?).
Step Six:
Our next step is to solder the second wiring to the side of the bulb. Why not solder from going from the "minus"? The bottom line is this, if you do it earlier, the second wire will certainly interfere when you wind the “glazing bead” and “charge”.
Seventh step:
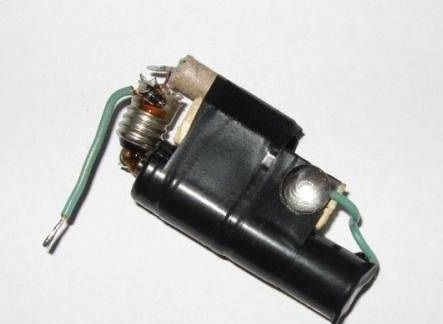
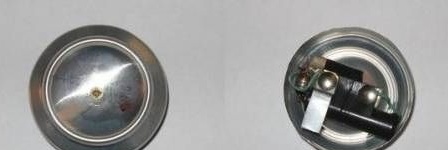
Remembering the saying that the sapper is mistaken once, we continue. The next step is to solder the wire (-) to one of the buttons from below, pierce the button into the glazing bead as in the picture below (for reliability, you need to tear the button with an eraser)
Step Eight:
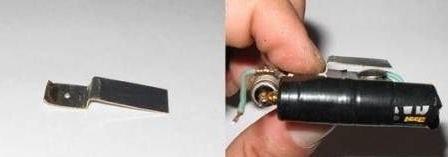
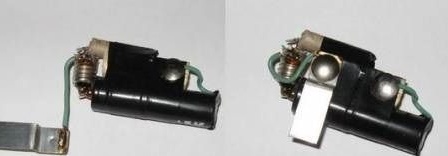
We begin to prepare a metal contact plate with parameters of 8x35 mm. Bend, make a hole suitable for the pin of a pushpin.Next, we apply the plate to the required place, we verify that its shape allows you to hang over the contact button by 3-5 mm.
Step Nine:
Postings from the bulb, assign solder to the plate. After this action, we are ready for the basis of the design of our device for the game, we fasten the plate with the button on the glazing bead at an angle of 90 degrees, regarding the battery.
Step 10:
Done. It remains to make the frame and skin of the "mine."
To do this, take the jar, cut out 2 parts, about the size of a photo.
Step Eleven:
We take the part from the bottom, drill a hole in the center, do the same work with the attached glazing bead under the self-tapping screw and very carefully, set the charge with detonation.
Step Twelve:
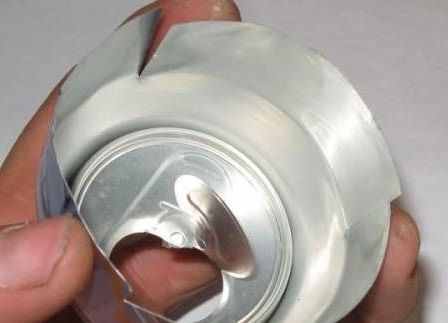
We make 3 cuts in the “sheathing” of the other part of the “mine” hull, slightly unbend the sheathing, so that it is convenient to wear the top
cover on the bottom.
Step Thirteen:
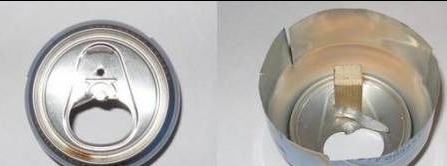
In the lid we drill a hole (as in the photo). Next, cut a piece of glazing bead (approximately 24-26) and using a self-tapping screw, insert it inside the lid.
Step Fifteen:
Fold both parts together, looking through the hole to make sure that the glazing bead hangs where necessary, namely above the button.
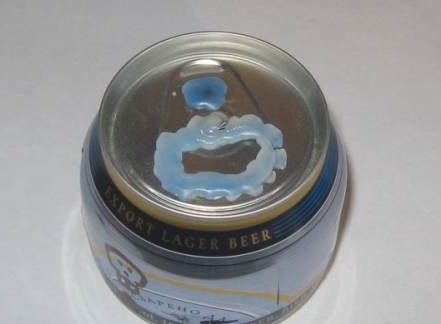
Step sixteen:
After verifying the readiness of the structure, we draw a drawing confirming its readiness for use.
Step Seventeen:
As a final step, we seal the cracks and screws with a candle wax.
The fruit of our labors is ready, I congratulate you on the creation of your own "airsoft mine."
To activate, you need:
There are a lot of options for traps, lay near a tree, cover with earth, etc.
It all depends on your imagination, good luck and victories on the battlefield: bully:.