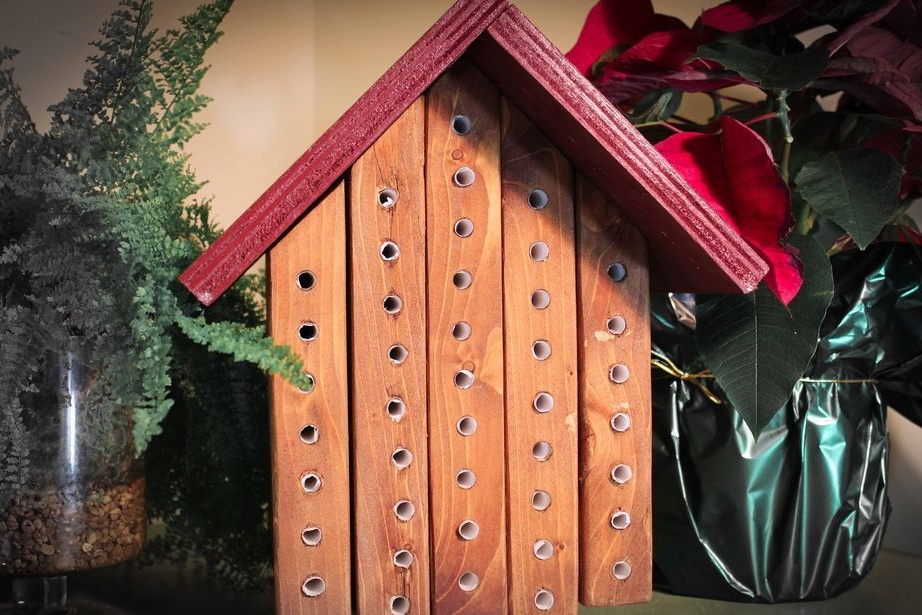
The fact that the appointment of bees is not only to get honey, but also to pollinate plants, everyone knows. But the fact that these tasks are performed by different bees is known mainly to beekeepers. So, osmium is a bee that is exclusively engaged in pollination of fruit and berry crops. On this, their differences from ordinary bees do not end there, because they do not live in ordinary evidence, but in special "houses" that look like birdhouses.
To learn how to make a "house" for osmium, see the attached video clip and read the step-by-step instructions.
Necessary materials:
- boards measuring 5 * 15 * 130 cm (the author recommends using boards made of cedar or mahogany);
- sheets of plywood measuring 40 * 40 * 2 cm;
- glue for wood;
- screws;
- paint (optional);
- stain;
- parchment paper;
- sandpaper;
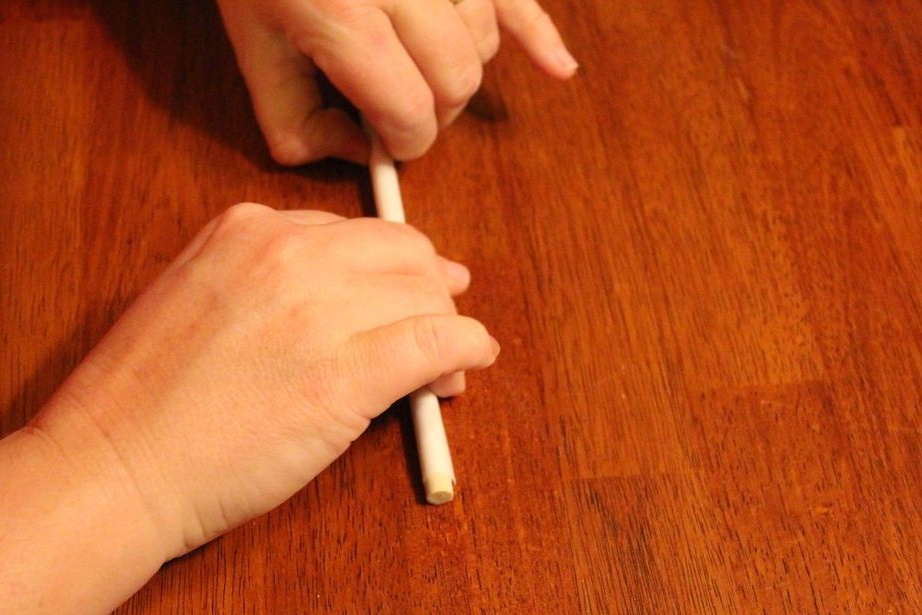
- wooden dowels 0.6 * 18 cm in size.
Tools to be needed:
- table saw;
- a drilling machine or a hand drill;
- band saw (optional);
- drill with a diameter of 1 cm;
- wooden clamps;
- brushes;
- roulette;
- a pencil.
1 step
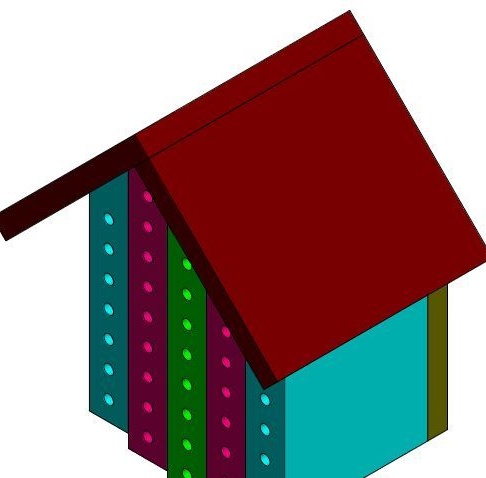
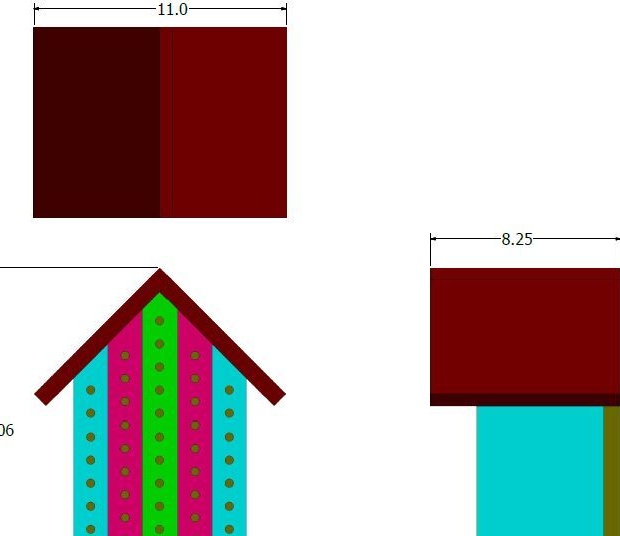
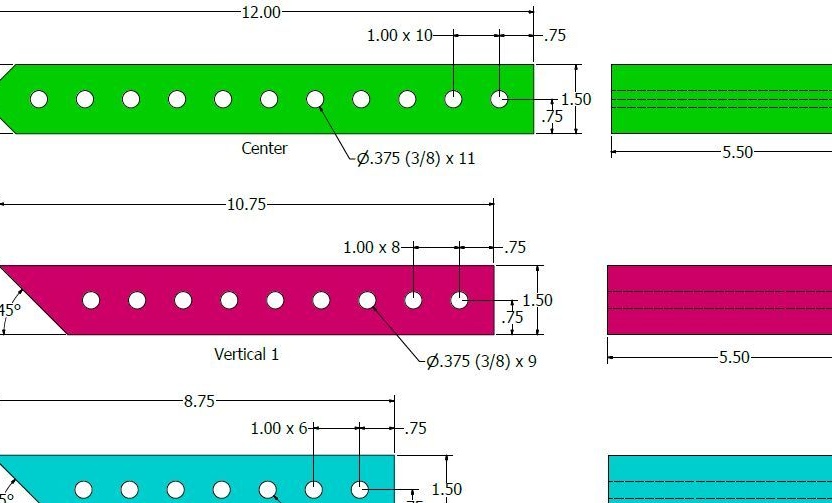
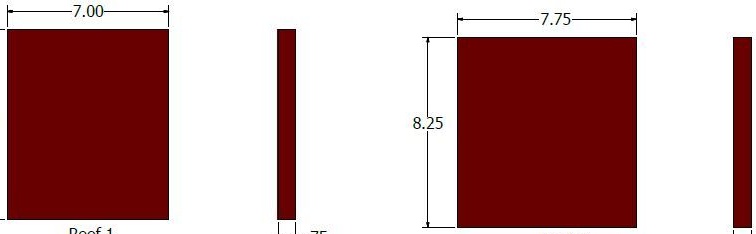
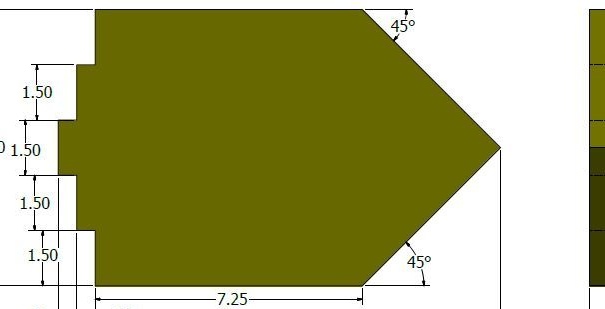
First of all, read the drawings, according to which you will make evidence.
2 step
Saw plywood sheets into parts necessary for the roof of the evidence. To do this, follow the drawings indicated in Step 1. In particular, you need to make the details according to drawing No. 4.
Also from plywood, make a part according to drawing No. 5.
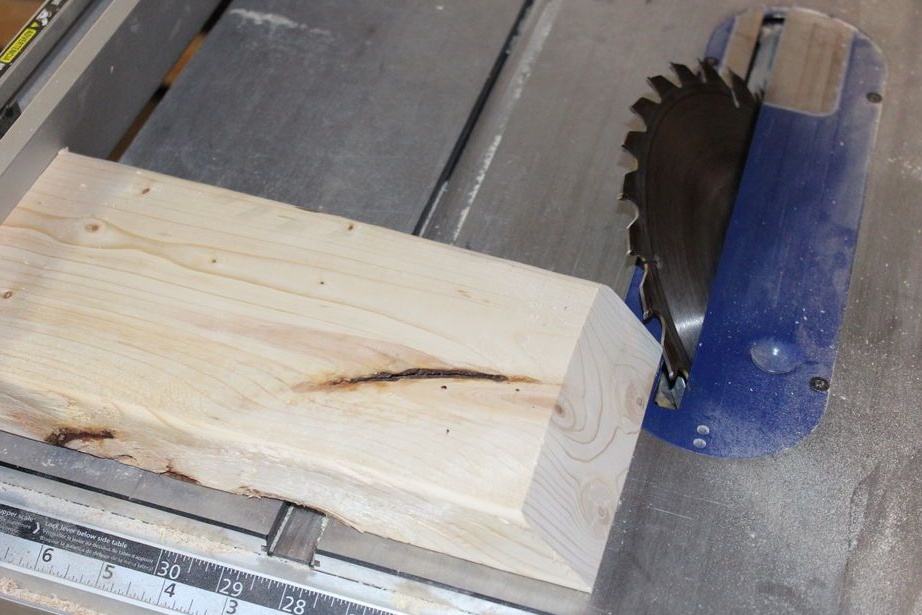
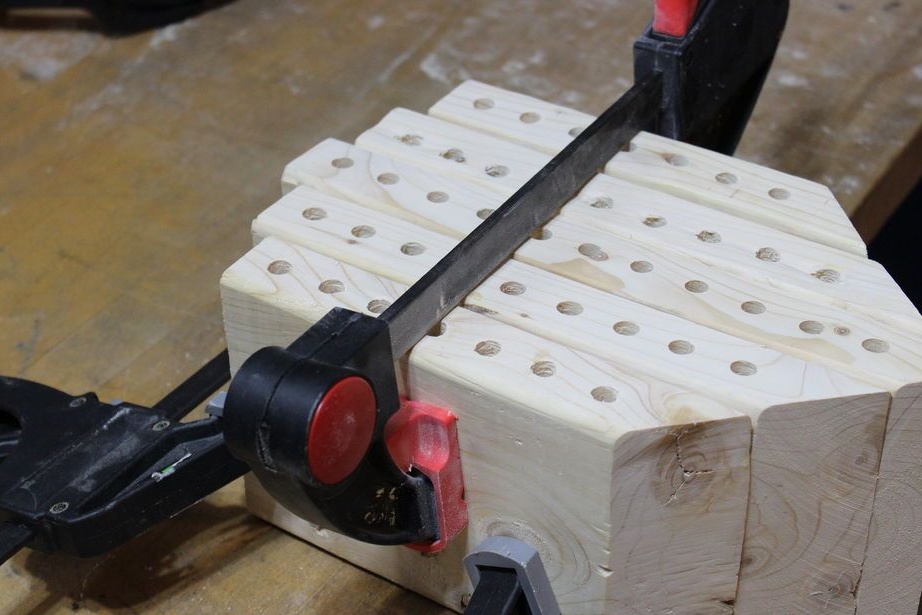
Saw wooden boards into pieces measuring 5 * 15 cm. To do this, follow the drawings indicated in Step 1. In particular, you need to make the details according to drawing No. 3.
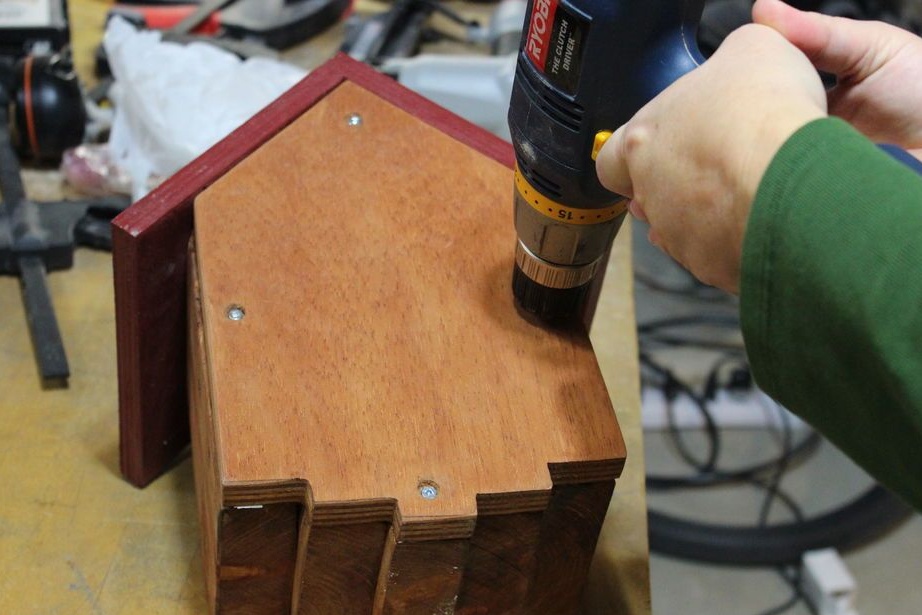
3 step
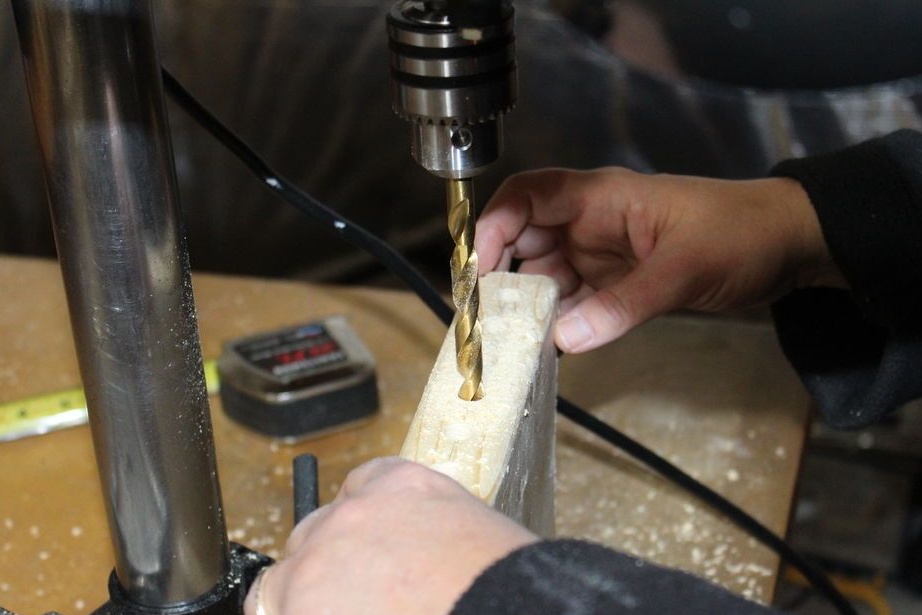
Now you need to drill holes in the parts made. The hole depth is 14 cm. For this purpose you can use a drilling machine or a hand drill.
4 step
Now you should collect the details of the evidence made in the previous steps into the overall structure with glue. Before final assembly, polish the parts with sandpaper and make sure all parts are aligned.
Leave the evidence for several hours to allow the glue to dry.
5 step
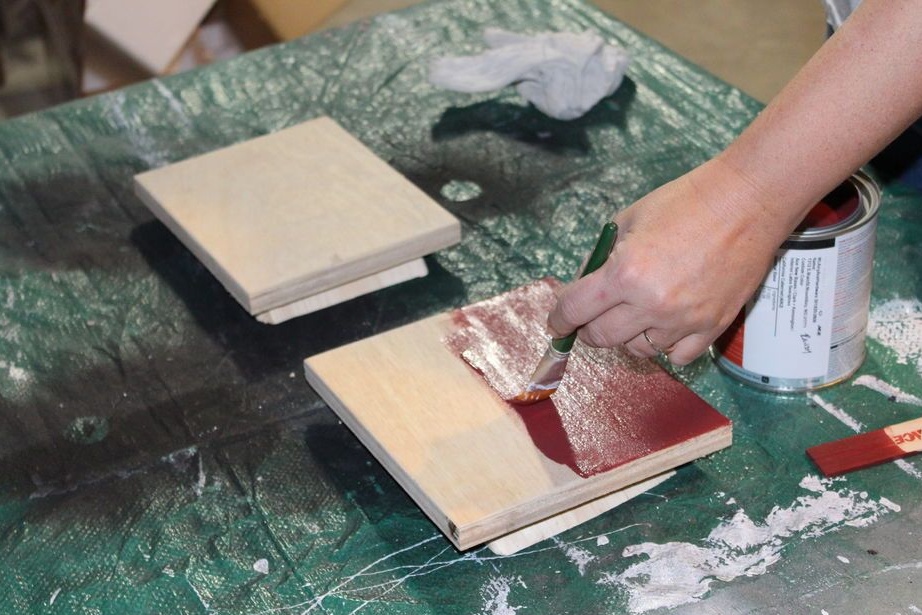
Now paint the roof parts on one side and leave them to dry completely for a couple of hours.
A little trick: before applying the paint, polish the parts with sandpaper - this will ensure even and smooth application of the paint.
6 step
Cover the surface of the evidence body with a stain. The author suggests making a stain that will not be toxic, do it yourself. To prepare it, you need to mix in a container ¼ cups of hot water with 3 tablespoons of coffee in granules.
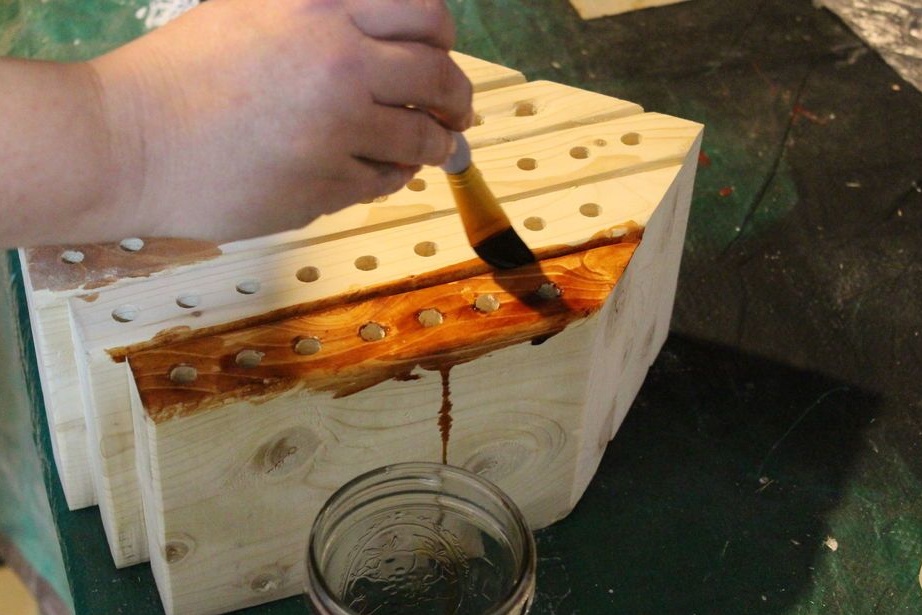
After that, with a brush or sponge from cellulose, cover the evidence with the finished mixture and leave the structure to dry for several hours.

7 Step
Now attach the roof parts to the evidence frame using glue and screws (or nails).
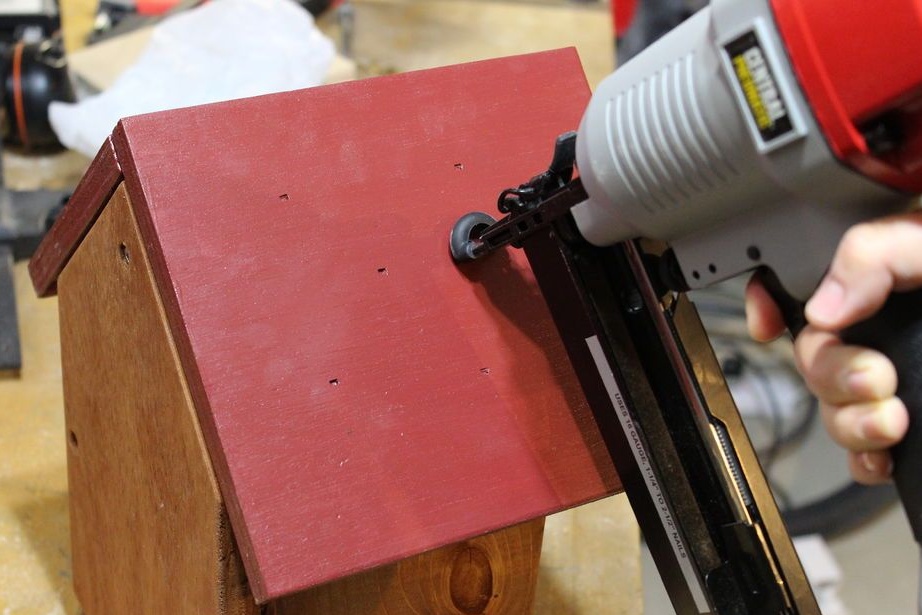
If paint peeled off at the fastening points of the screws, then paint over these spots using a small brush.
8 Step
Using dowels and parchment paper, make removable pipes for evidence. To do this, alternately wrap the dowel with each piece of paper, getting tubes. Pieces of paper should be 15 * 6.35 cm.

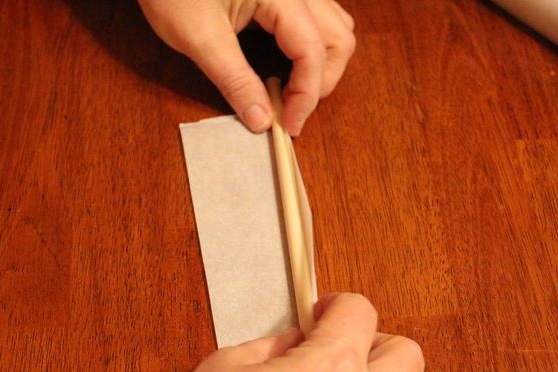
Remember that for the manufacture of pipes you can not use silicone parchment for baking, paper from recycled cardboard, wax paper, etc., since such materials will be dangerous for bees during wintering.
9 Step
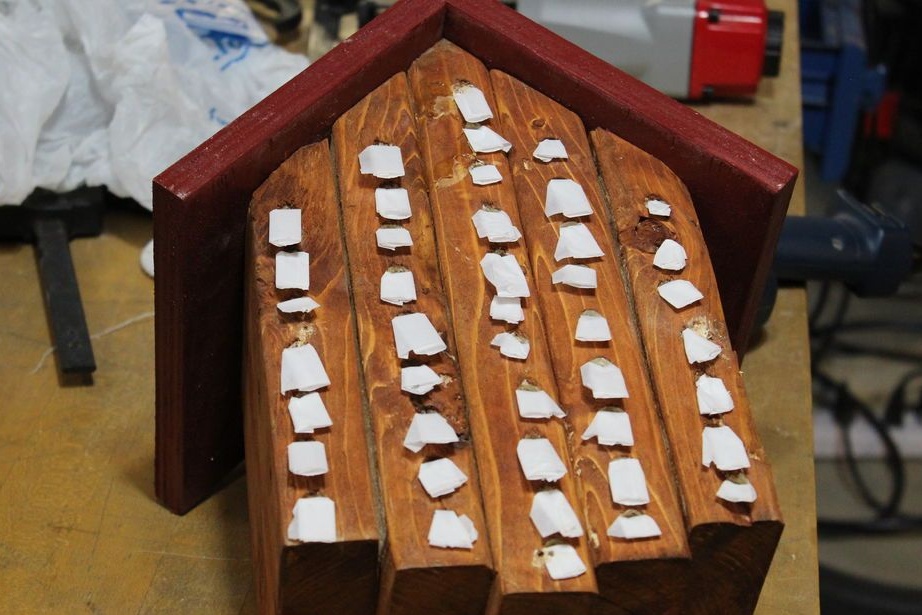
Now place the paper tubes in the holes in the evidence as shown in the photo.

Try to have paper pipes protrude 2-3 cm from the back of the evidence.
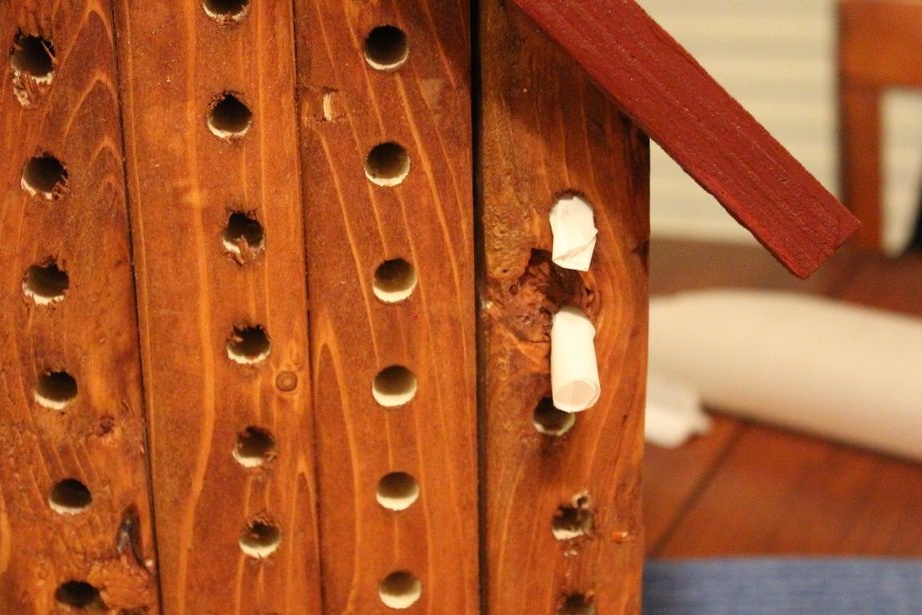
Then the ends of the pipes must be bent so that the holes remain open only from the outside.
10 step
After that, fix the part, made according to the drawing No. 5, with the help of screws on the back surface of the evidence.
Now that the "house" for osmium is ready, you can use it in your garden. Be sure that your trees will be fruitful thanks to the work of little helpers!