
This tool can find application both in the technology of manufacturing printed circuit boards (applying a protective varnish to create a pattern of conductors), and in art (stained glass painting, batik), for applying a coating layer - varnish, paint, special contours.
At the moment, there is a large assortment of tools for sale for the above needs, but it is mainly made of glass.
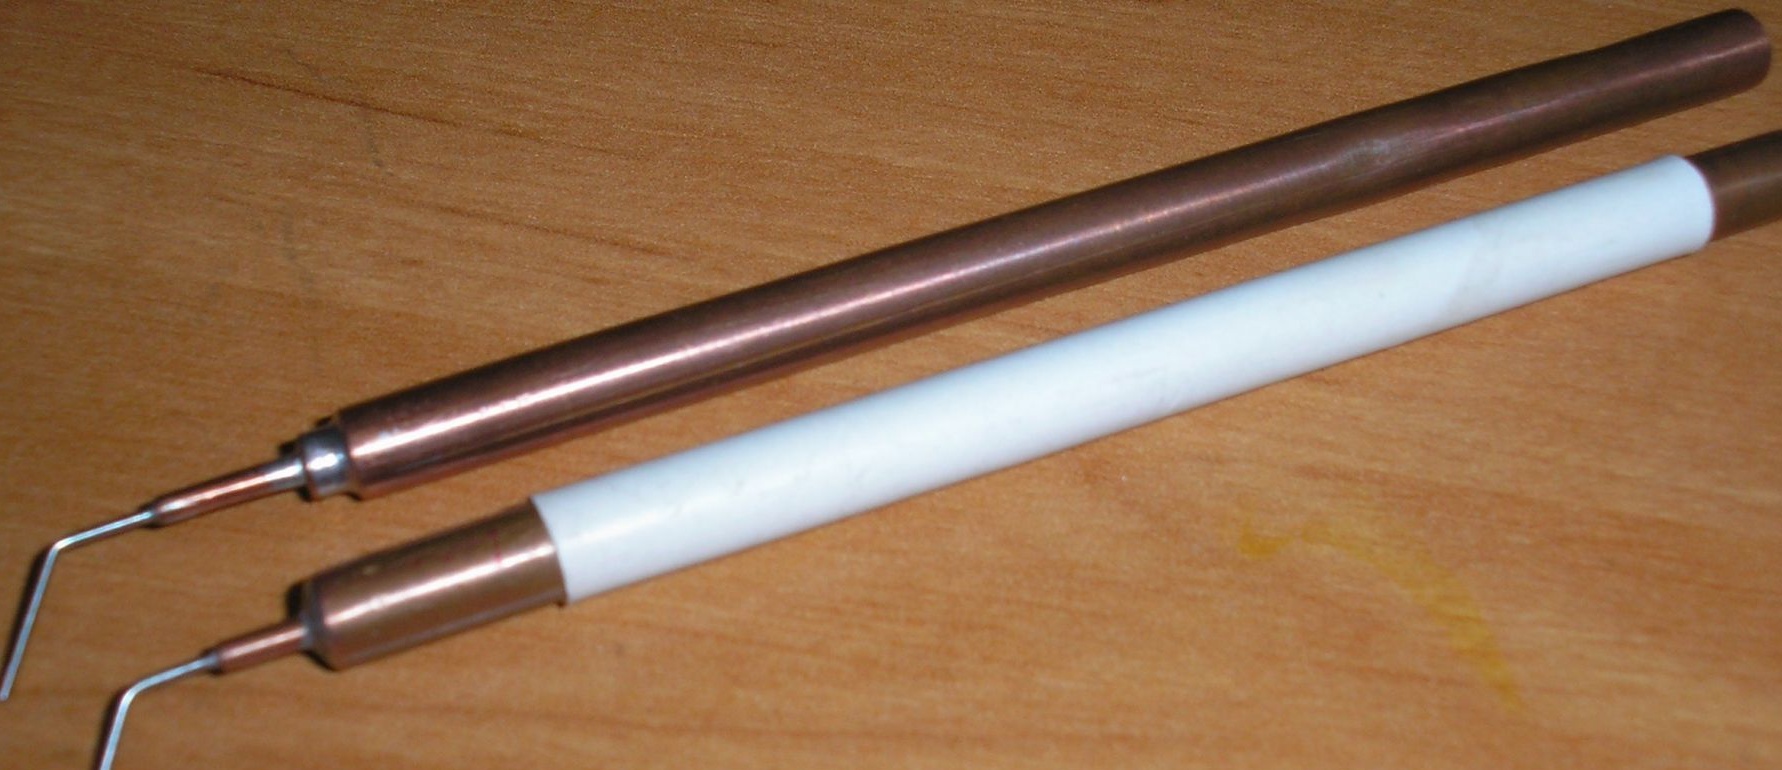
The advantages of this performance of the tool - it does not break, it is easy to clean. There is also a drawback - the level of fluid intake is not visible, but with a certain dexterity you can get used to and navigate.
For the manufacture we need:
- a piece of copper tube, thin-walled, with an outer diameter of 6 mm, a long one - 100 mm;
- a piece of copper tube, with an outer diameter of 2 mm, a length of –15 mm;
- a needle from a medical disposable syringe;
- copper foil;
The tube with a diameter of 6mm and 2mm can be removed from old inoperative refrigerators, from a condenser and thermostat.
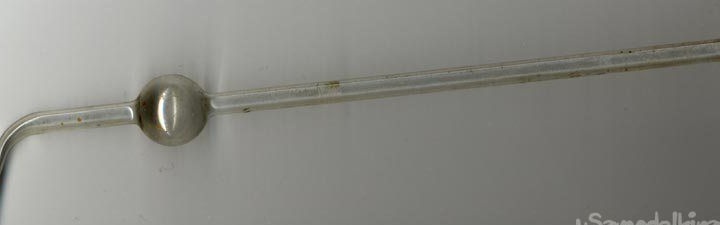
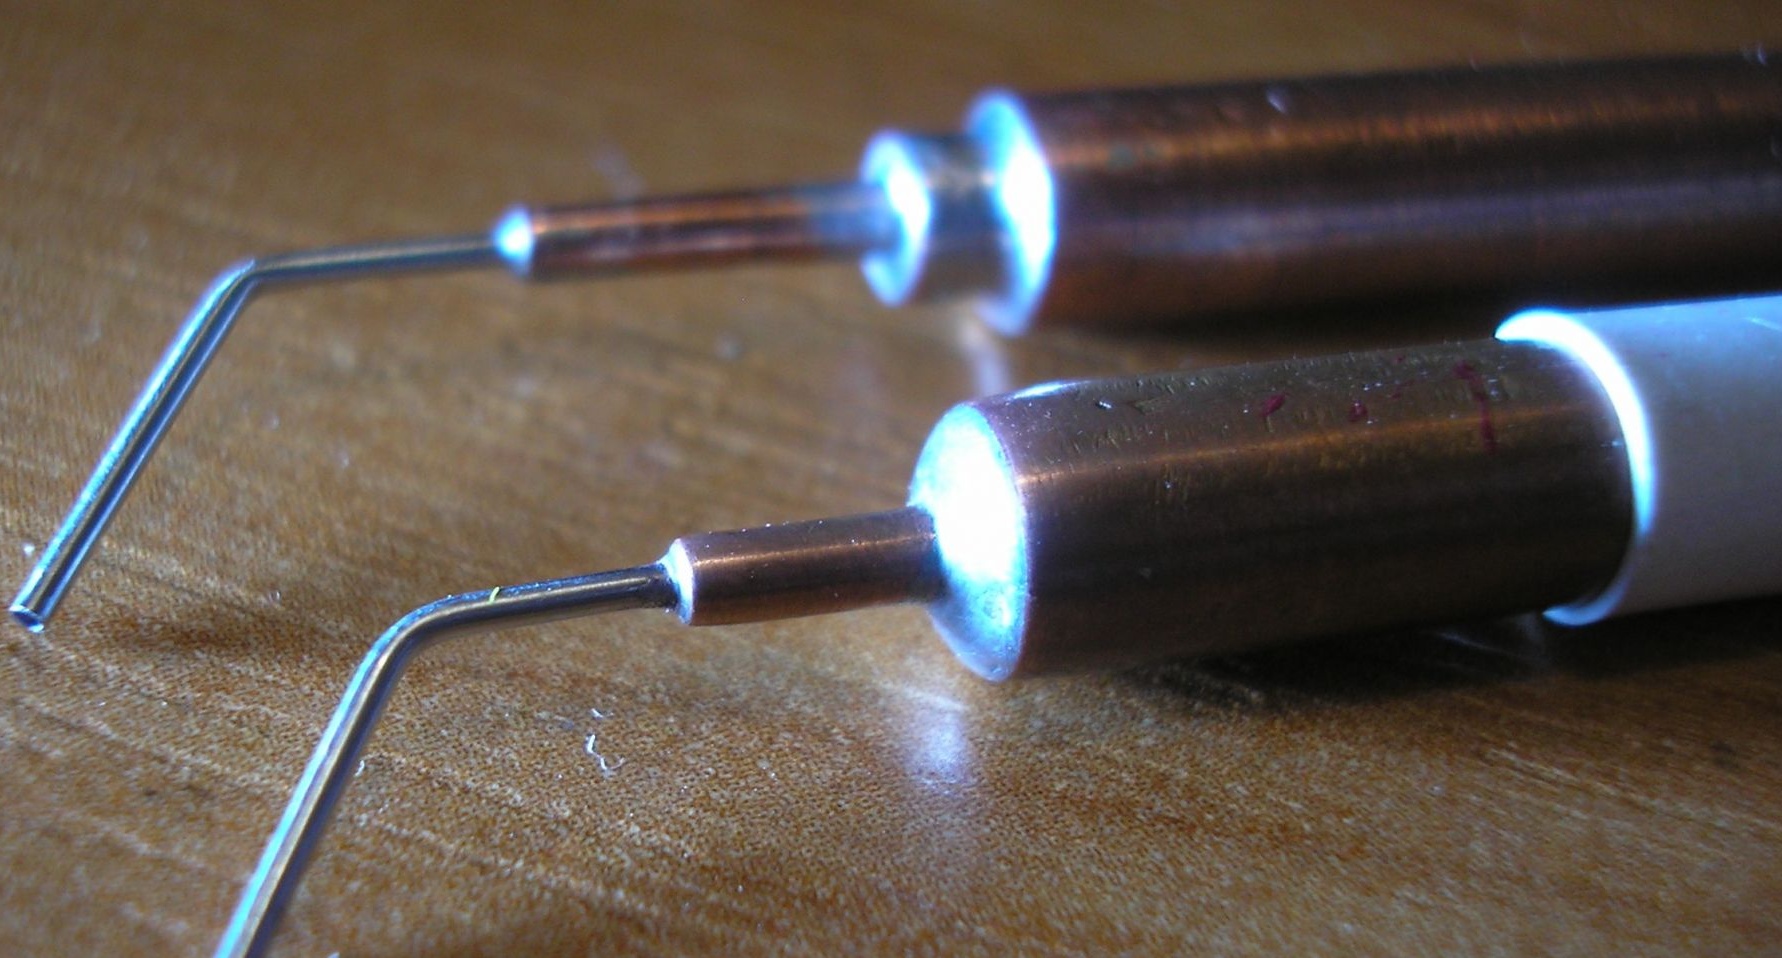
The first thing to do is cut off all the tubes of the length we need. Since all the elements of the tool will be soldered with a soldering iron between each other, it is necessary to carefully clean all the places of soldering. The design looks like this:
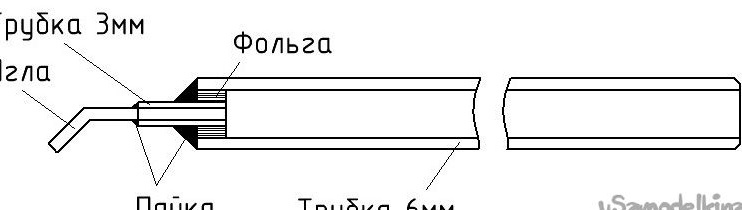
First, take and cut a strip of 5mm wide foil, about 4cm long, for now. We clean it on both sides with fine sandpaper. We wrap it tightly around one of the sides of the tube with a diameter of 2 mm, until the diameter of the winding becomes equal to the inner diameter of the six-millimeter tube. We cut off the excess foil and insert the tube with foil into the end of the 6mm tube, to the depth of the foil width. From the end of the resulting “telescope”, we process it with flux and heat it up well beforehand using a solder, it is necessary that all parts are soldered.
After the soldering cools down, we take the needle from the syringe, 18 mm long, insert a piece of wire or wire (as a mandrel) into it and bend the edge of the needle at an angle of 45 degrees at a distance from the edge of 8 mm.We clean the needle with sandpaper and insert it into a 2mm tube, to a depth of 5mm. We also solder and clean all the soldering spots after cooling to a shine.
The tube is ready. You can use a piece of insulation wire or heat shrink tubing to put on the outside of the resulting tool.
It is necessary to clean the tube immediately after use - with acetone or nail polish remover. For deep and severe blockages, use a piece of wire or wire of the correct diameter to clean the needle mechanically.