

It happens that you walk through your favorite garden, but something is still missing. Of course, benches that can be made do it yourselfand then sit on it and relax on warm summer or spring days. In today's master class, we will learn how to make a beautiful and neat bench for a summer cottage or a private house.
To get started, let's collect all the necessary materials that we need:
- five boards (sizes 15x3, 8x200 cm),
- four boards (dimensions 15x3, 8x65 cm),
- two boards (dimensions 15x3, 8x17.5 cm),
- twelve concrete slabs (dimensions 50x50x5 cm),
- threaded rods M16 4 pieces (length 55 cm),
- M16 nuts and washers (8 pieces) for attaching the rods in the structure,
- glue for wood (to fix the back backs),
- antiseptic for wood.
Now look at the drawing. Try to save all the necessary parameters. Fig. 2
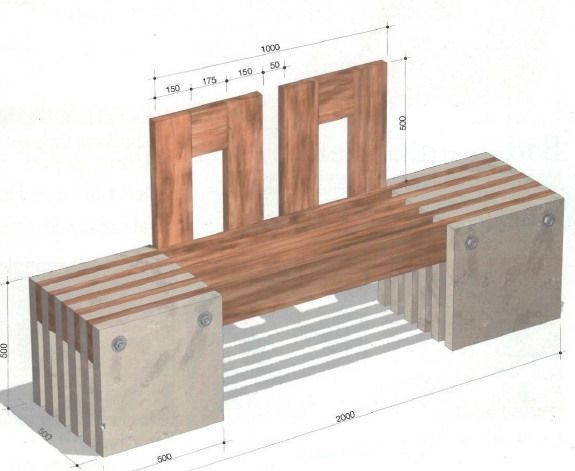
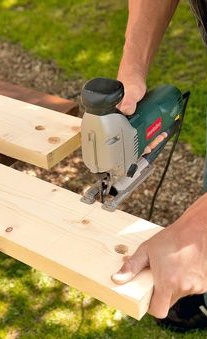
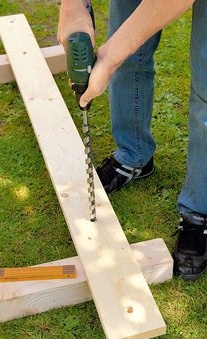
We proceed to the assembly of boards and stoves. To do this, on each board (2 m) from the top, back 7.5 cm, from the edge of 10 cm and 40 cm - on one side, and then put down small dots. On the other hand, do the same. Using a drill (18 mm), drill holes at the points you marked. Fig. 3, 4
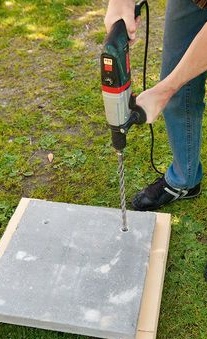
On all five boards, make four holes at the indicated points. On the slabs, make exactly the same points with the same coordinates and drill with special drills on concrete. This must also be done on all plates. Remember that each of the units must have holes for the rods. Fig. 5
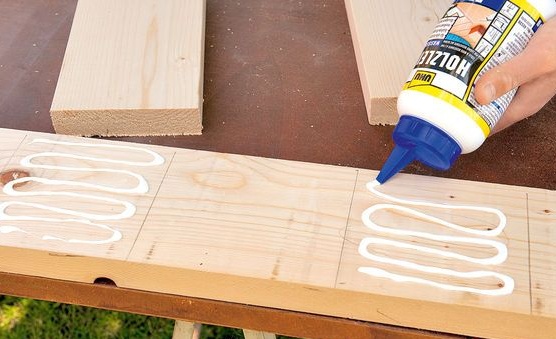
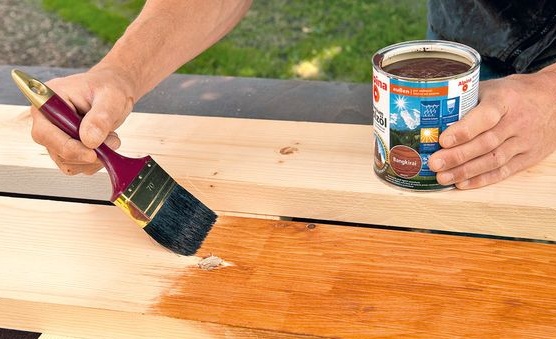
After you have done all the preparatory work, proceed to the processing of the tree. To do this, be sure to cover your wood with an antiseptic, wait until the material dries well, and start collecting the back of the bench. Take and on one of the boards for sitting, which is 2 meters in size, measure from both sides 50 centimeters. This is where the edges of the bench plates will be located. Then from the marks already made, you need to measure 15 cm directly to the very center of the board. These will be parts of the back. Then back off another 17.5 cm from the new marks and separate several sections on both sides (15 cm each) for another pair of boards. Ultimately, the gap that remains should be equal to 5 cm.
Now on the areas (15 cm) you need to apply glue, which can tightly fasten the bottom of the bench and its back. Then glue the remaining boards (length 65 cm) to a 2 meter board, but be sure to stick perpendicular to the board for sitting. You can fix it with self-tapping screws for reliability. Fig. 6, 7
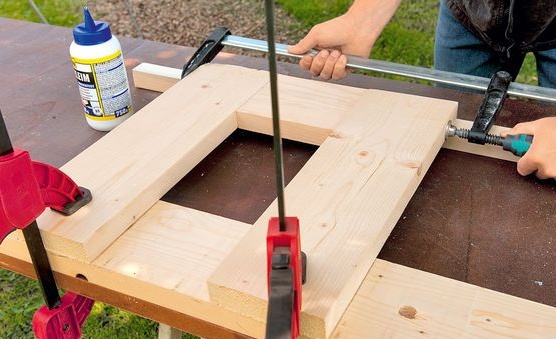
Then between the protrusions (Fig. 7) you need to glue the pieces (17.5x15 cm).All parts must be clamped and held tight until the glue completely dries. Then, when everything dries, it would not hurt to cover everything with an antiseptic. You can also varnish all the wooden parts of your bench. Fig. 8
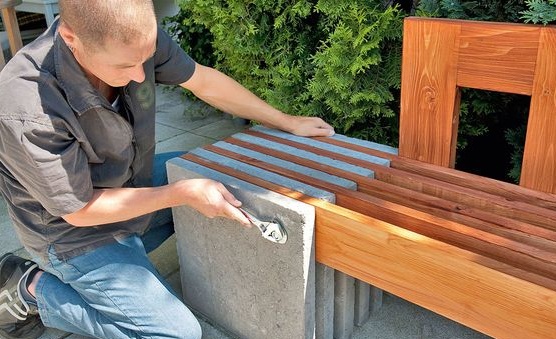
Now start collecting all the details of the shop. To make the bench neat and of high quality, assemble it on both sides. Fig. 9
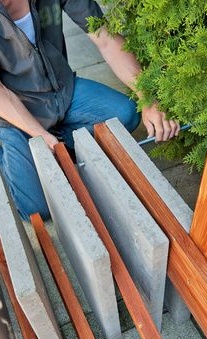
After inserting the prepared plates between the boards, pass the rod through the holes. And only then, when all the parts on both sides are well tightened, you can proceed to tighten the nuts. Fig. 10
Congratulations! Your resting bench is ready!