This project describes the process of creating a new scooter dashboard. do it yourself. Since such panels in scooters often have an unappealing appearance and look like a speedometer print on a plastic, it makes sense to ennoble the look of the moped by creating a tuned panel for it.
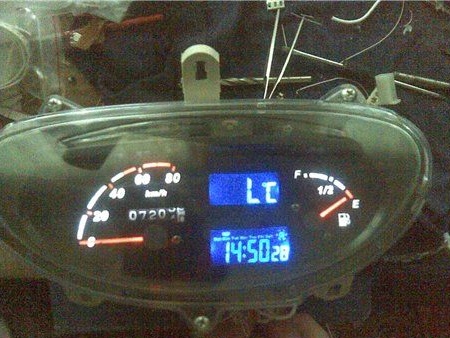
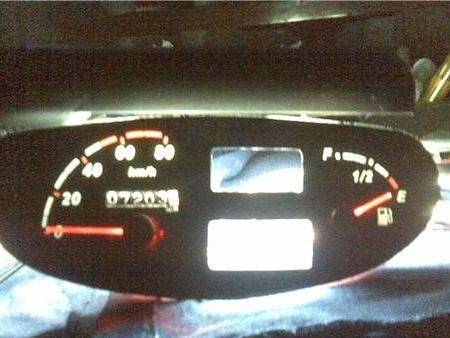
On the new panel, the speedometer line ends at 80 km / h, this was done intentionally to make the scooter seem less cubic and leave room for electronic clock and speedometer.
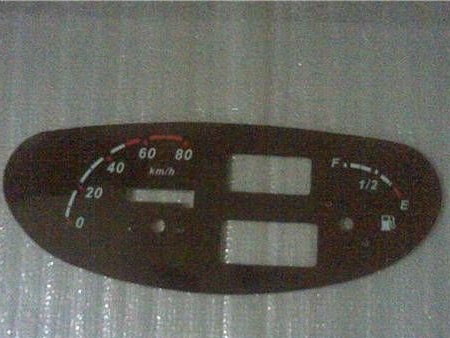
Making the basis of the panel.
Old panel:

According to the outline of the stock panel, it is drawn on a computer and a new base is cut out. It is printed on photo paper and then laminated. Holes for arrows and digital indicators are also made.
The author recommends to use pigment ink for printing, and use a matte laminate. Pigment ink will not be visible when the panel is illuminated, and a matte laminate looks better.
A rigid base is made of thin plastic (selected according to the thickness of the original panel), the holes are duplicated in it and the print is glued.
Arrow making
The arrows, it was decided to make new, because the old had a very cheap look.
To highlight the arrows, the “prism” effect was used, as on new cars.
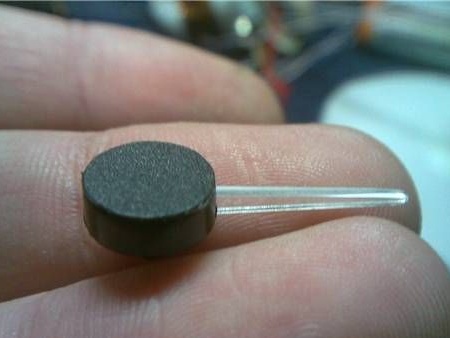
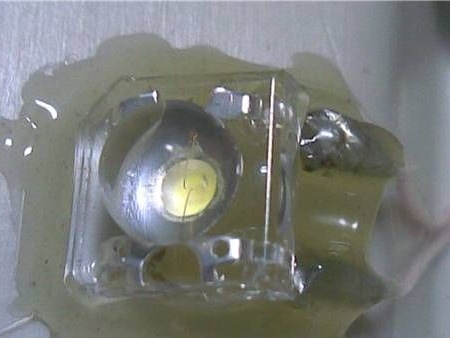
It was decided to start with the arrow indicating the fuel level, since it is simple.
The central part was taken from the native arrow; for the arrow itself, plexiglass or transparent plastic can be used as material. An engraving machine and a polishing machine were used to process it.
In the central part with a piece of black plastic, the fasteners of the arrow were closed.
Inside the central part, the end arrow has a polished angle of 45 degrees. This is done so that when a light ray hits, it is reflected and directed further along the arrow.
Here is the output:
Here it is on the other hand:
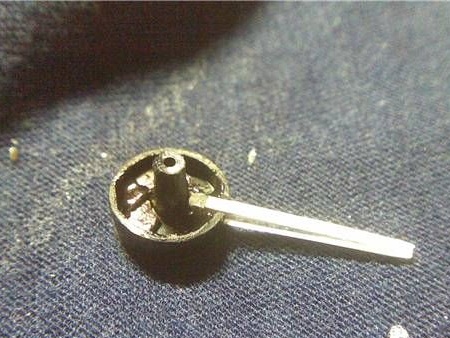
As you can see, a white film is pasted from the bottom of the arrow, which serves as its background. Closer to the central part, the opening area was left for the passage of rays of light.
If you have accurate scales, replace the metal counterweight in the central part by fitting it to the new arrow. And you can leave your own.
Backlight
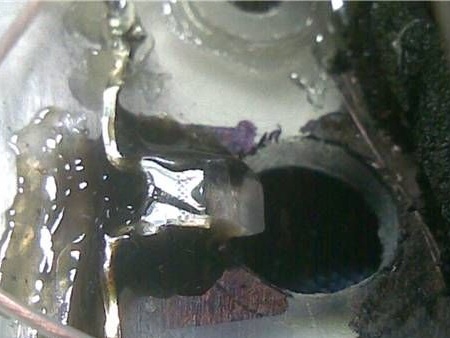
It turned out to be a problem to find a suitable light source, since there is very little free space near the arrows and the LEDs simply did not fit there. As a result, the author decided to fit the 3 mm LED to the desired size. Excess plastic on the diode was removed as much as possible. As on the arrow, a 45 degree shot was machined and polished.
The diode was horizontally mounted between the body of the device and the panel, and the glow was directed upward.
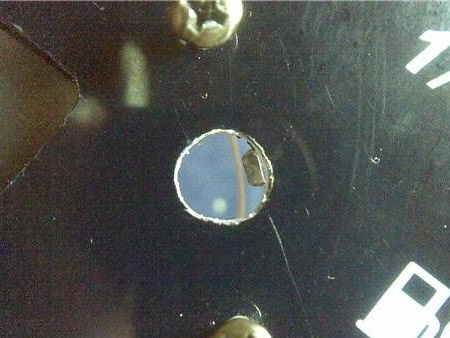
The hole for the arrow poses is expanded, the LED is glued:
According to the author, one LED is enough to illuminate the entire arrow at any turn.
Two LEDs were used to illuminate the speedometer needle. In general, the larger the scale, the more LEDs. And the rest of the technology remains the same.
To illuminate the dashboard itself, white SUPER FLUX diodes were used, in the amount of three pieces. They were attached to the body of the tidy with glue.
Dashboard with arrows:
To illuminate the displays, a gray substrate was removed from the back of the screen and an acrylic plate was installed in its place. LEDs were installed so as to illuminate it from the ends.
In order for the numbers to shine, and not the background, you need to do the following: from the top of the display, the developer is removed with a blade and rotated until the screen turns black. Next, leave it in this position.
Here is the result:
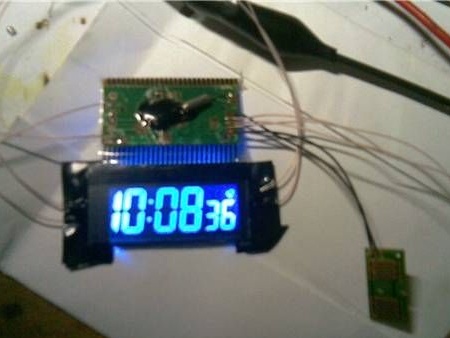
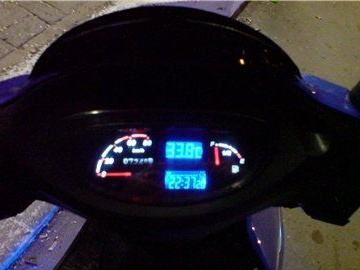
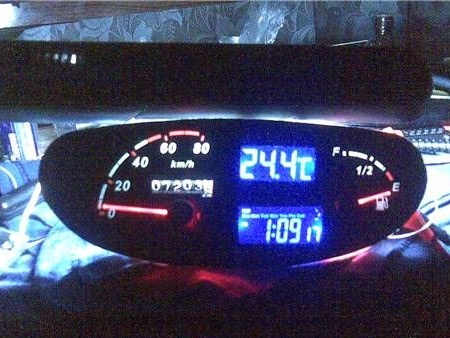
The clock and thermometer were made in the same style and installed on the panel.
Here is the finished panel: