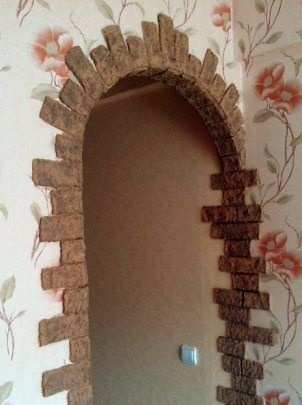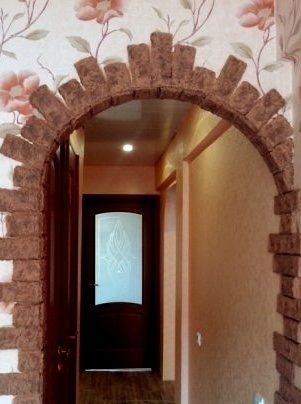
Today's workshop will tell you about how to make a brick arch decor in the house using papier-mâché technique. Believe me, an imitation from the present simply cannot be distinguished! Therefore, in order not to lose time, we move on to work, and already at the end you can enjoy such beauty.
To begin, let's decide on a list of materials that you will need:
- cardboard packaging for eggs and boxes from household appliances,
- adhesive Bustilate (you can thick PVA),
- starch
- mosquito net or for washing clothes,
- rectangular shape in size of a brick,
- brushes for paint and glue,
- basin or bucket,
- latex gloves.
1. Take a cardboard, tear into pieces and pour boiling water so that it softens. It is advisable to add water several times. When two hours have passed and the water has cooled, take do it yourself and start chopping pieces of cardboard to about the same size. If you have a construction mixer, you can grind with it. About one lot of raw materials came out per batch of “bricks”. Fig. 2
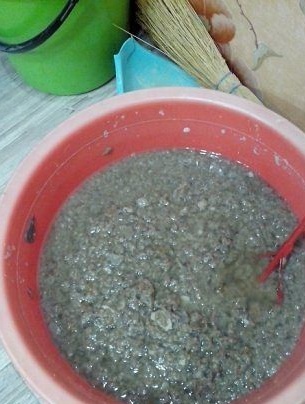
2. After the gruel is ready, lay it in the net and squeeze it well. Believe me, you don’t need any press here, everything turns out fine with your hands. Pic 3
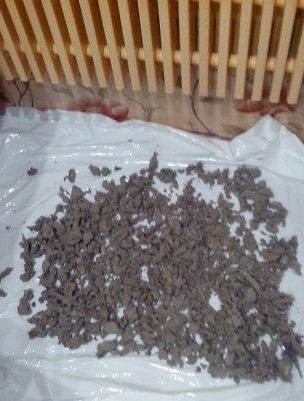
3. The lumps that you have as a result of the spin cycle must again be torn into smaller ones. Tear to such an extent that you get the texture of natural stone. Therefore, do not overdo it. Now starch comes in. Take two tablespoons of starch and dilute in 0.5 cups of water. Now this mixture needs to be poured into a pan with 1 liter of boiling water and cook the paste. Now pour the paper chips into the bucket and start pouring the cooked paste into the same little by little. Remember, pieces of cardboard should be slightly moistened, not drenched. Therefore, do everything gradually and slowly.
4. Add 3 tablespoons of bustilate to the mass and mix everything thoroughly with your hands. You should get a "stuffing" that does not crumble, does not spread, and when squeezed into a fist, juice does not flow from it.
5. Now take the rectangular shapes, cover them with polyethylene and put a lot of papier-mâché in them.At the same time, you need to ram everything well with your fingers. Next, remove the brick from the mold, put it “face” on your palm, and with the other hand apply glue to the wall. After the procedure, apply a brick of papier-mâché to the wall and press with your fingers over the entire area. Even if the brick loses its shape - it's okay. The mass is malleable, so immediately give the desired shape to your brick. Fig. 4
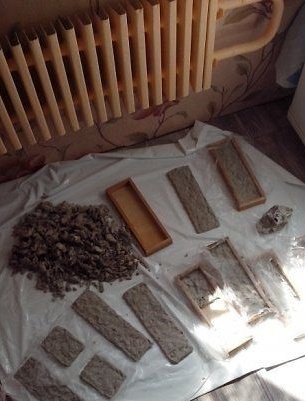
6. There is one caveat in these bricks: the more moisture in them, the more they will sit down. Therefore, calculate how much distance can be between them after drying. Fig. 5
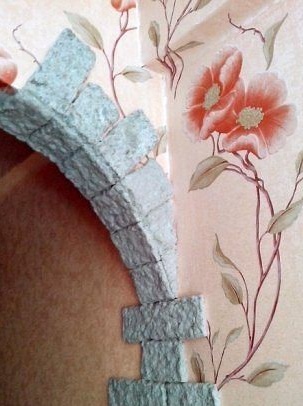
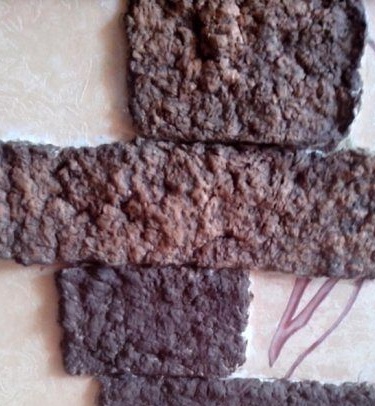
7. When all the bricks dry well (this is approximately 2-3 days), proceed to paint them. Personally, I took acrylic white paint for interior work and mixed it with brown and brown colors. Try to thoroughly brush every brick, each cavity with a brush so that everything is well painted over. In a separate jar, I also added yellow and orange color to this paint, and then showed a volume with a semi-dry brush (this can be seen on the upper two bricks). Fig. 6
In principle, that’s all. It turns out here is such an old brick arch without unnecessary costs and efforts. Do not be afraid to experiment, do it with pleasure and admire your work. Fig. 7
