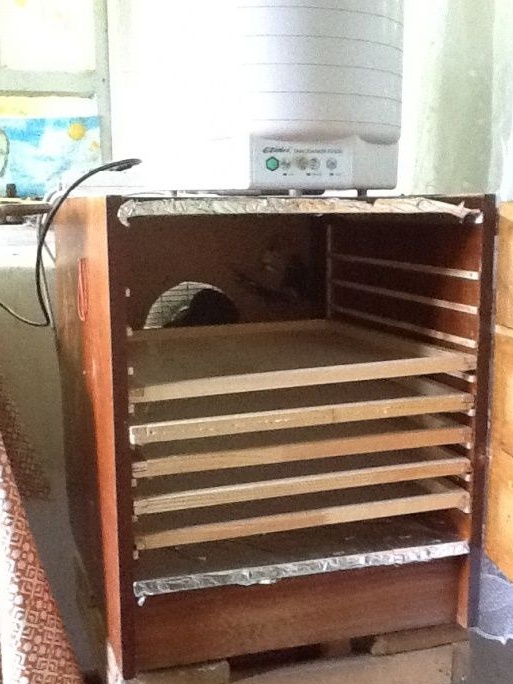
If you are a supporter of a healthy diet, and even more so yourself are engaged in the cultivation of wholesome food, a dryer for vegetables and fruits will be your indispensable ally. I want to offer you the option of a home-made electric cabinet for drying fruits, vegetables, herbs, berries and mushrooms from Ilya Tretnikov.
Materials and tools:
- plywood sheets for the body
- wooden slats
- self-tapping screws
- mosquito net
- drill
- furniture stapler
- heater
- foil
- power cord with plug
- electrical tape
We prepare the basic elements
1. Wooden case for dryer
It can be an old bedside table or a wooden case made up on its own.
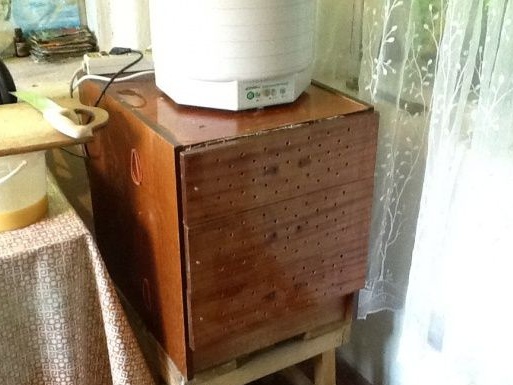
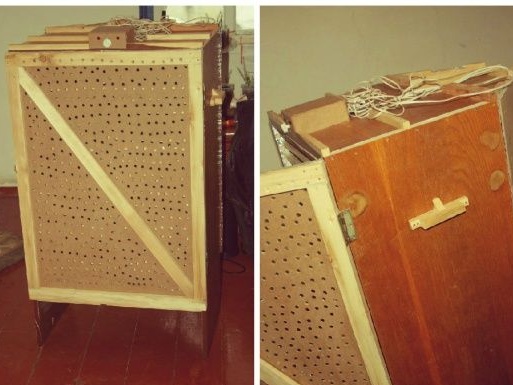
Be sure to drill a lot of holes in the "roof" or the wall opposite the fan for the free exit of moisture from the products.
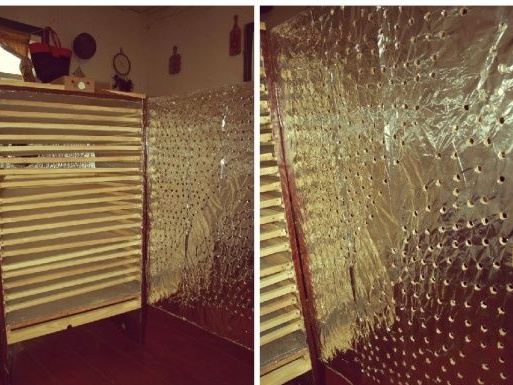
To avoid harmful emissions from the walls of the case when heated, it is recommended to sheathe it from the inside with foil without lamination. In addition, this is an element of additional thermal insulation.
2. Griddles
Do it yourself they are made of wood frame and mosquito net. It is better to connect the frame rails using self-tapping screws, and fasten the mesh with a furniture stapler. To prevent the mesh from being uncoupled, its edges are wrapped several times. To stretch the mesh on a wooden frame is first in width, and then in length.
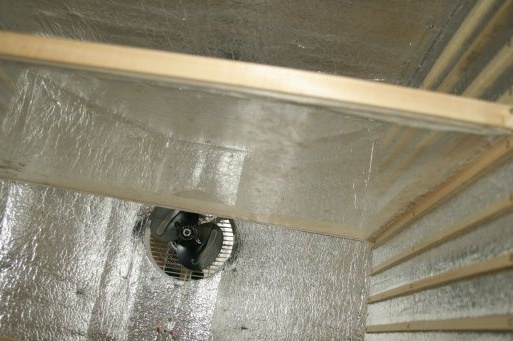
3. Rails for placing baking sheets in the dryer
Can be made of the same wooden battens measuring 5 * 8 mm in profile. Their fastening to the wooden case is carried out using self-tapping screws.
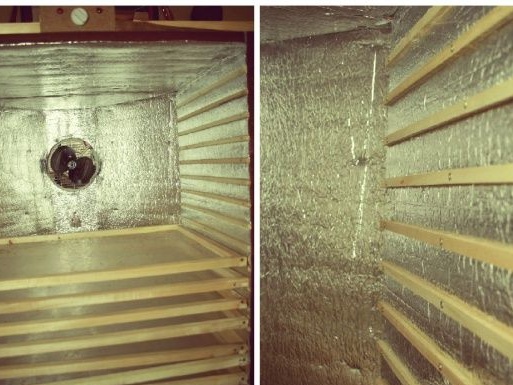
Let's proceed to the calculations and installation
Step 1. We do without nails
For a given fixtures nails are completely unreliable. In this case, the author of the master class recommends using self-tapping screws. So that the self-tapping screw does not damage the integrity of the structure, drill a hole with a smaller diameter from the diameter of the legs of the self-tapping screw and only screw in.
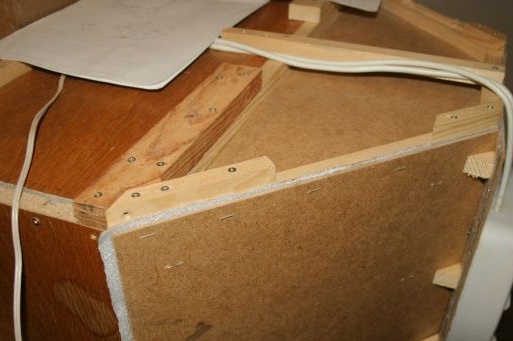
Step 2. Determine the design of the future dryer
Ilya Tretnikov suggests considering two types of dryer designs for fruits and vegetables.The first type is up to 13 kg when loading products, square. The second type - the design is complicated and fresh food loading volumes are possible up to 40 kg. This option is complemented by a pyramidal installation for fans that provide uniform air circulation. Due to the pyramidal shape, the air flow receives a specific direction of movement and reaches the farthest corners.
Step 3. We select fans
According to the recommendations of the author of the master class in the dryer, up to 57 cm deep, up to 39.5 cm high on the inner working surface and 41 cm wide, just one fan is enough to get high-quality products at the outlet. Accordingly, a tree with a thickness of 1.7 * 1.7 cm is used, and we get the deco size - 41 * 45 cm.
The total depth of the dryer (57 cm) - the length of the pan (45 cm) = space for dispersal of air (12 cm). If you make a dryer for fruits and vegetables with a load of up to 13 kg - this is enough.
During the construction of a dryer for fruits and vegetables, along with a pyramidal design and dimensions: the width of the inner working surface - 61 cm, the height of the inner working surface - 83 cm, the depth - 42 cm - 2 fans are installed. A baking sheet measuring 41.5 * 60.5 cm.
The total height of the dryer (83 cm) - the length of the pan (60.5 cm) = a place for dispersing air from the main body to the wall of the console (22.5 cm).
Step 4. Thermostat and electricity
In order not to delve deeply into physics, Ilya Tretnikov recommends simply buying a “dutik” heater, as it is popularly called, and immediately getting a set of all the necessary details.
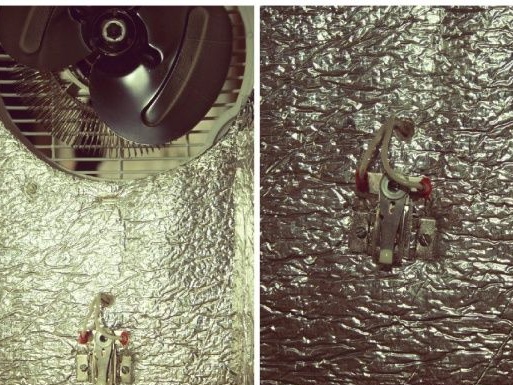
Step 5. Installing the spiral
Ilya Tretnikov recommends leaving only one heating coil. The one that blows better.
Step 6. Installing the dryer switch
It is better to distribute the functions of the switch in this way: the fan is on / the heating coil is on and the fan is on / off.
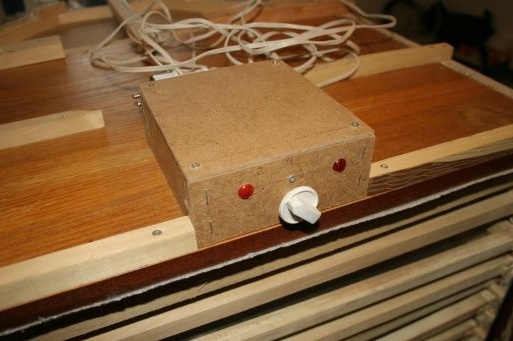
Step 7. Dryer operation indicators
Ilya uses 2 bulbs:
- the first is an indicator of the overall operation of the device, that is, it is lit when the position is on, it is not lit when the position is off
- the second - the position indicator "on" / "off" for the heater.
Step 8. Installing two fans in a pyramidal design
When creating a dryer with a pyramidal design, Tretnikov uses 2 fans, each with one heating coil. But the adjustment of the operation of both heating elements will be performed by only one thermostat. That is, it is very important to obtain as a result the simultaneous opening of the heating elements, since otherwise the drying process will become uneven. To verify the uniformity of temperatures, it is sufficient to place several thermometers on different planes throughout the entire cavity of the dryer.
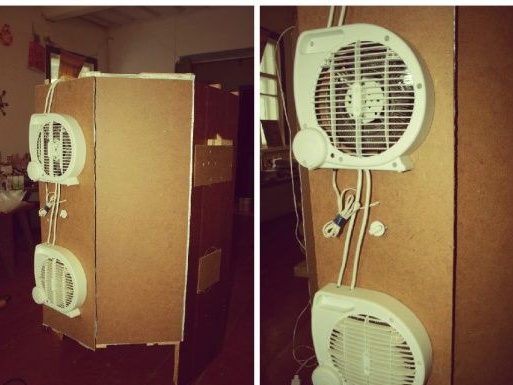
Step 9. Install the dryer
Particular attention is paid to the fact that the dryer must be lifted above the surface of the support, that is, it is important not to forget to attach the legs in order to avoid overheating and, again, even distribution of heat inside.
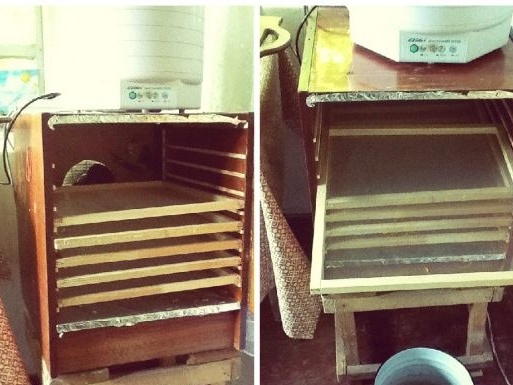
Step 10. Security
It is necessary to organize the operation of the dryer through a filter for the network. Such a thing is equipped with an additional fuse.The maximum power of our device reaches 2 kW.
By the way…
Ilya Tretnikov recommends using heaters with an even body, which greatly simplifies their connection to the body of the dryer for vegetables and fruits.
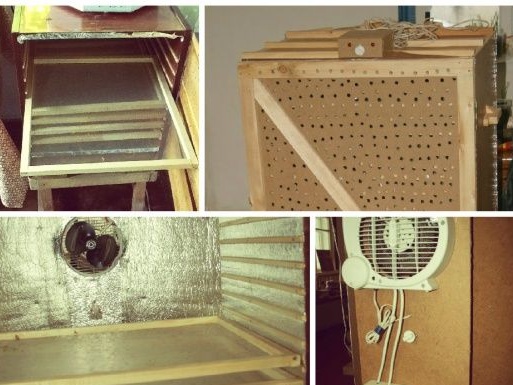
With the help of this simple but reliable device, you can dry any vegetables, berries, fruits, herbs, mushrooms, seeds. In addition, the main advantage over a purchased dryer is that you set the drying temperature of the products yourself. Namely, 40C is the most optimal heat indicator for preserving all vitamins.
