
In this article, the process of manufacturing a match float in home conditions using improvised materials.
In order to learn how to make a long-range casting float with your own hands that will satisfy any fisherman with its characteristics, read below.
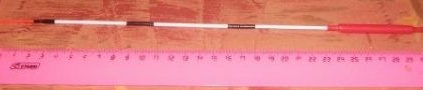
Homemade match float.
Match fishing is kept separate, along with numerous fishing methods and types. Perhaps this is due to the fact that fishing for this tackle is not always productive and successful. But still there are those fishermen who prefer to fish on match floats. Such fishermen can often be found fishing in ponds.
Surely everyone knows that fishing for a match means fishing “for long casting”. For casting heavy or light match floats, you need to have a fishing rod that will be equipped with an appropriate match reel, and which will be of a suitable system. It is necessary to equip match tackle with appropriate equipment (a float, hook, sinker or a set of sinkers that will correspond to the weight).
At first glance, everything is quite clear and simple, but there are certain tricks and subtleties, both in the use of gear, and in the use of hooks, match rigs and floats. Of course, in the match, all fishermen knit, make and assemble rigs with their own hands. Many use purchased floats (slider, wagler, etc.), but still there are real lovers of this type of fishing. Such fishermen independently make match floats, which they are very pleased with.
Match float. Manufacture.
To date, store shelves are filled with a variety of match fishing floats of varying value. However, the economic crisis that has just arrived is forcing people to pick up tools and start manufacturing the necessary attributes for float fishing with their own hands.
First you need to determine for yourself the goal, which one you need to make a float, heavy or light, slider or waggler.
Below, by the example of manufacturing a float, it will be shown how to make a match float yourself. Such a float is made very quickly and easily.
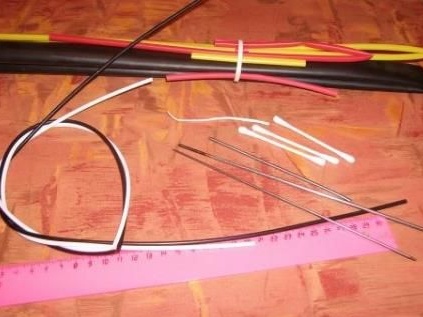
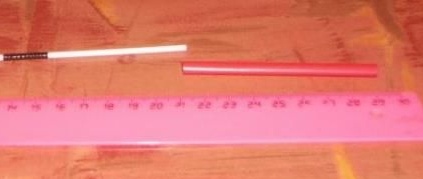
So, for the manufacture you will need to prepare the following materials:
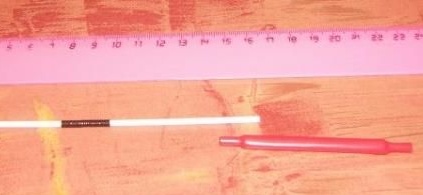
- The top of the antenna.
- Shrink sleeve 6mm. (For body shaping).
- A piece of steel wire. (For forming a fastening loop).
- Shrink tubing 3.2 mm. (For fastening parts of the antenna).
- Ear sticks 4 pcs. (For antenna).
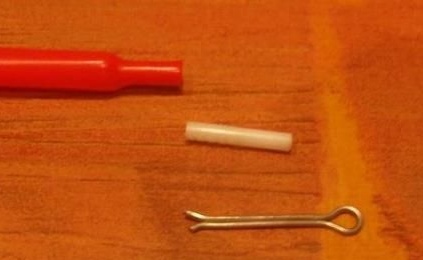
Getting started, the first thing you need to remove the cotton from the ear sticks. After removing the cotton, tubules are produced that have a very small weight and diameter. The strength of the tubes obtained will be enough for such a float.
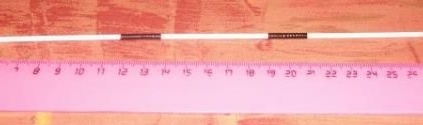
Now you need to open two pieces of thermofit (20 millimeters long from the tube and 3.2 millimeters in diameter). Thermofit must be put on the tips of the ear sticks. Heat it over a small fire and connect the parts of the antenna into one. Connecting the parts, you need to ensure that the connections are very accurate.
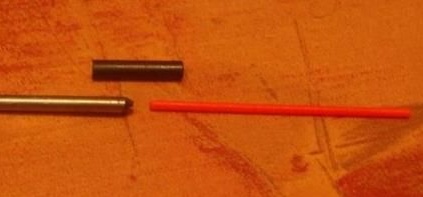
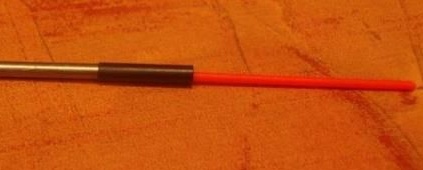

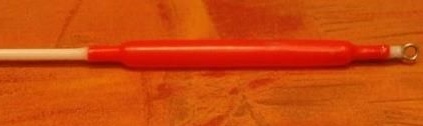
Next, you need to take another piece of thermofit, as well as a three-millimeter drill and heat to form the upper part of the antenna. In this case, the top of the antenna must be crimped with a heat-shrink tubing. The resulting part of the antenna blank must be glued with Moment glue.
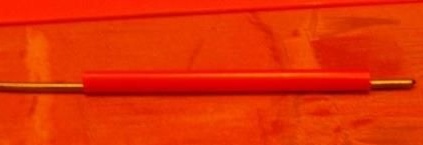
Now you can start shaping the body. For this work, you need a piece of heat shrink (with a diameter of 6 millimeters and a length of 80 millimeters.). First you need to burn one side, and then the second. Then you can glue the antenna.
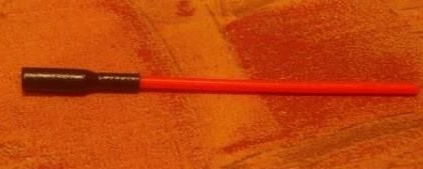
The attachment site must be made of a piece of wire and a piece of tubule from an ear stick (20 millimeters long.). Before the wire is inserted into the tube, a little glue must be poured inside. After the work done, it is necessary to straighten and cut the ends of the wire. Next, you need to glue it all into the second hole in the body. After, this area must be further strengthened with layers of glue. To do this, you can use glue "Second". Only in no case is it a liquid option, for strengthening it is necessary to use the gel-like glue "Second". This is necessary in order to make this connection stronger, even despite the small weight of the float.
If you do everything in order and instructions, you can get a float with a carrying capacity of about two kilograms. However, if you increase the diameter of the body of the float (for example, take a heat shrink tube with a diameter of 8-10 millimeters), its load capacity also increases. If desired, it is possible to weight the attachment point with lead and get a waggler with a small load and a large dead weight. In any case, thanks to the fit, you can get a float with the right parameters.