
This article is a step-by-step instruction with illustrations about creating an unusual battery-powered lamp that looks like a “magic cube”. It is quite simple to manufacture and has a rather original look.
To create it you will need such materials:
- Plexiglass;
- Sheet of thin metal;
(a thin stainless steel will look best)
- LED powered by 1.6 volts;
- 100 ohm resistor;
- Battery "tablet" at 3 volts;
- Button with fixation;
- The wire.
And the tools:
- Superglue and PVA;
- The glue gun.
- Soldering iron;
- Scissors for metal;
- Jigsaw;
- Drill.
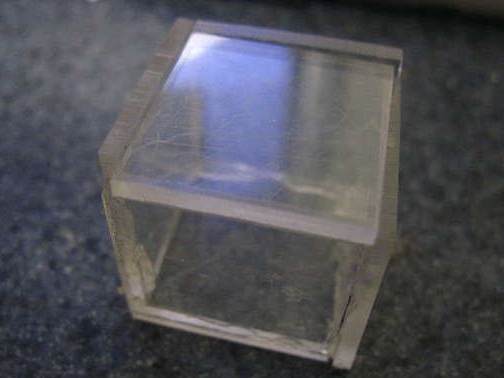
Step 1. Make a cube.
Six identical squares are cut from plexiglass, approximately the size of a photograph:

In one of the squares, a hole is drilled under the button.
Then a cube is assembled from five squares, and the joints are glued with superglue. There should be a square without a hole, until we touch it.
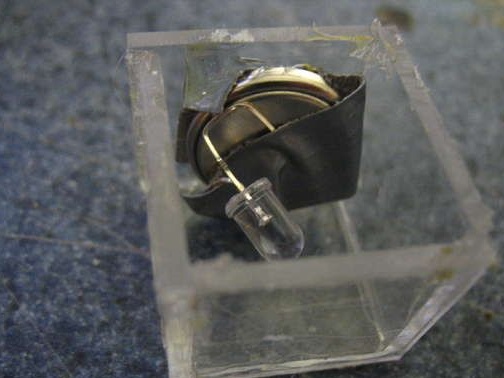
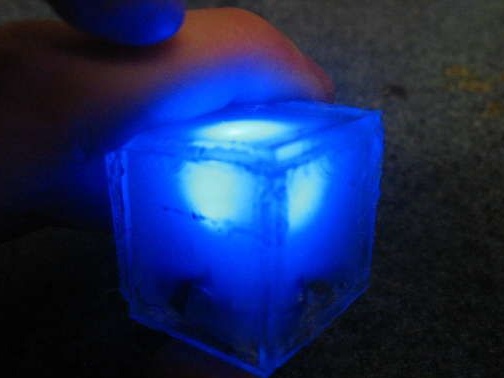
Step 2. The electrical part.
Next, the battery, LED and button are collected in a circuit. A plus is applied to the long leg of the LED, and a minus to the short leg.
It is absolutely forbidden to warm the battery with a soldering iron, otherwise it may explode!
The circuit will be checked for operability, since during further assembly it will be flooded with an adhesive gun and there will be no access to it.
We put the structure into a cube, and glue the button to the hole.
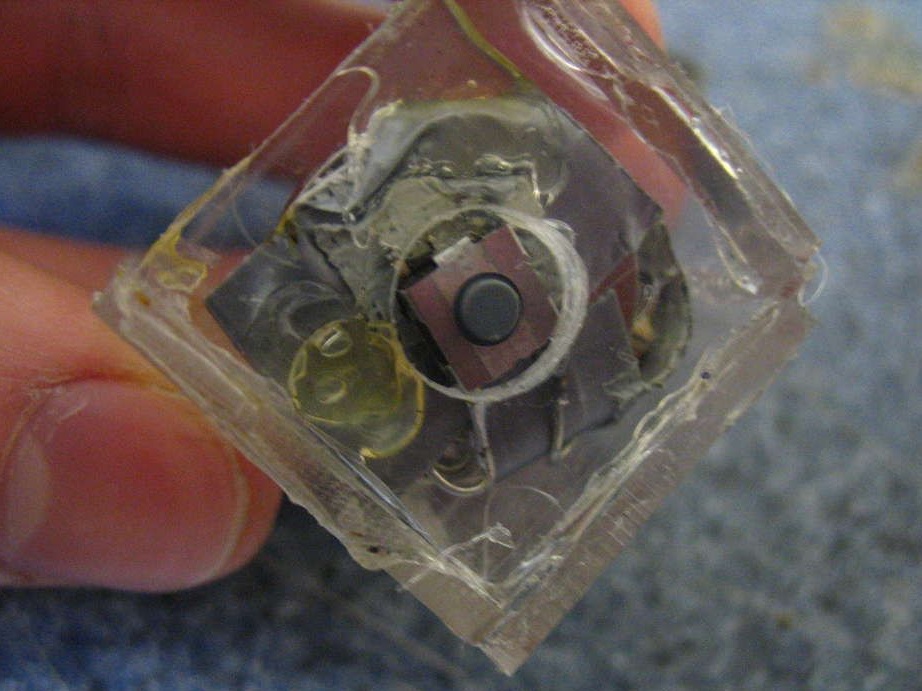
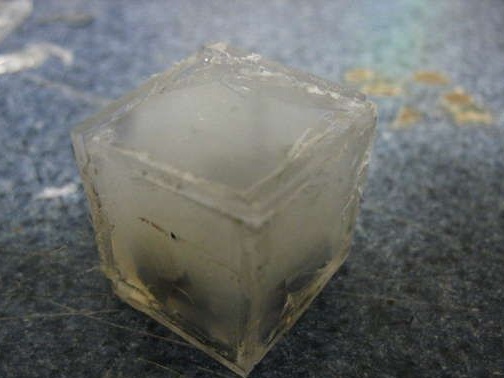
We warm up the glue gun and fill the entire free space of the cube with glue. This is done so that the light from the LED spread evenly on all sides of the cube. After the cube is completely filled, we fit and glue the remaining square of the plexiglass.
Here is what happened at this stage:
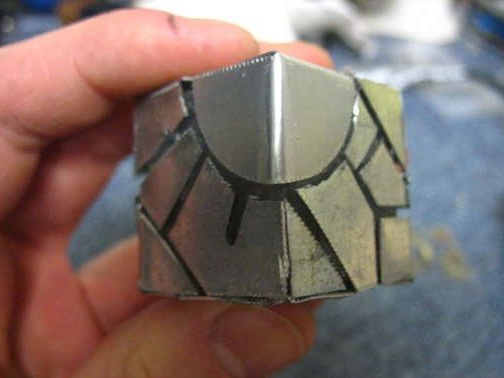
Step 3. Metal armor.
The cube is almost ready, but it still does not look very good. To improve its appearance, its walls will be covered with a pattern of metal sheets. You can draw stencils yourself, you can use ready-made ones:
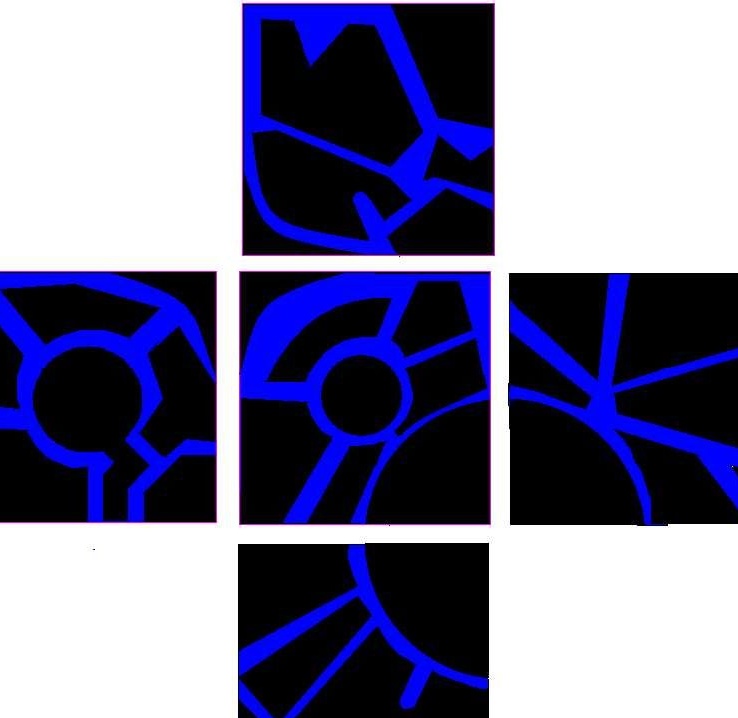
Stencils are printed on a printer (preferably on a laser so that the ink does not float). Then cut out and pasted on a metal sheet.To do this, it is better to use PVA glue. Then, along the contour of the glued printouts, metal pieces are cut out with scissors for metal. To remove paper from them, it is necessary to wet it a little.
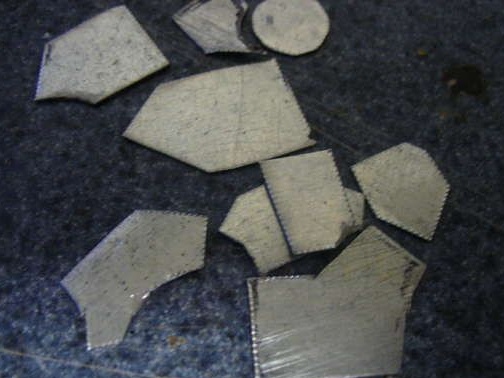
Also, the metal surface can be treated with felt, this will give them shine.
The final step will be the gluing of metal pieces to the surface of the cube. You can use superglue for this.
So that the button does not stand out, a small piece of metal is glued to it. Here you need to glue carefully so that the superglue does not get inside the button and does not block it.
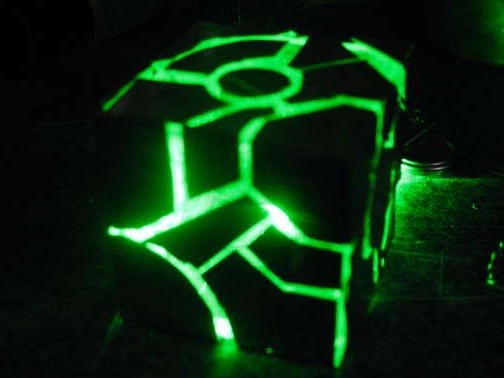
Here is the result:

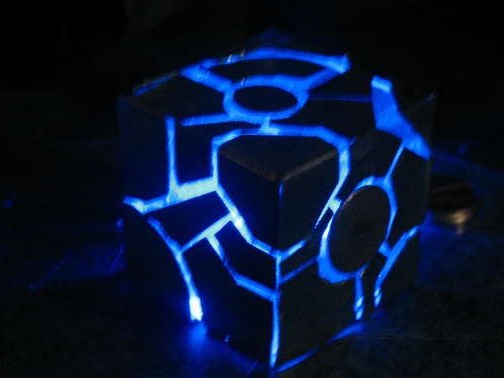
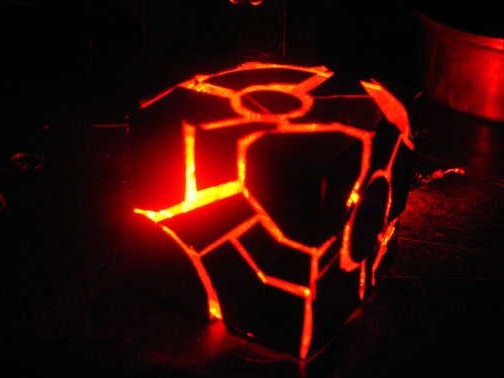
As you can see, without spending a lot of time and effort, you can assemble a pretty good lamp. If you slightly change the design and power the diode not from the battery, but from the power supply, the “magic cube” can be used as a night lamp.