
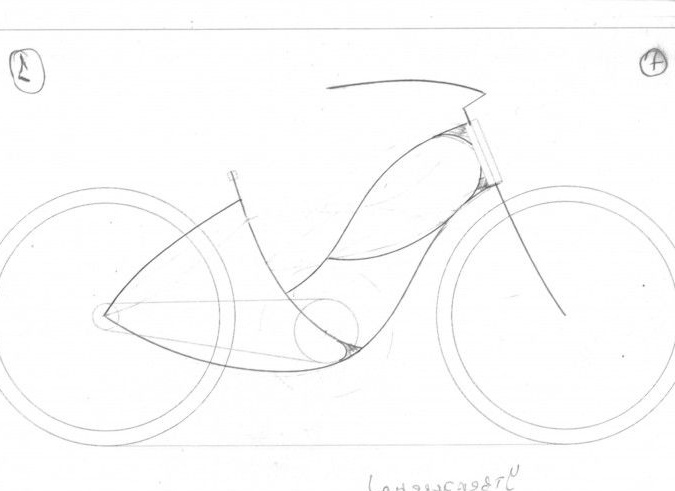
In order to independently construct a bike mount, it is necessary, first of all, to determine the geometric dimensions. When located on the frame, you need to sit and feel comfortable with a straight back and legs fully extended. With this landing of a cyclist, you feel great moving along the streets of the city, in parks.
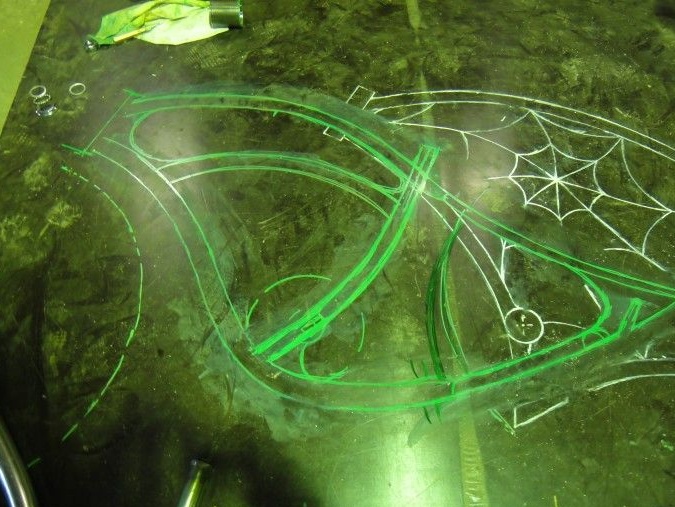
To begin with, we define on the sketch where the steering glass, carriage, and saddle will be located.
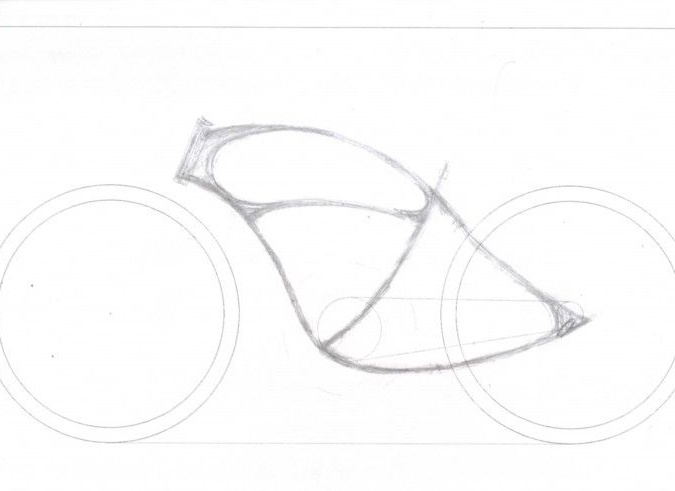
During pipe bending, the frame may slightly change from the initial sketch. As an option, for those who are tight with imagination and performance, you can draw a sketch in volume using special programs.

With this construction, you can then print the drawing on a one-to-one scale, which will greatly simplify the work. Having a sketch or printout, you can begin to purchase and bend pipes.
Tools and necessary materials:
- angle grinder (grinder) with cutting wheels;
- pipe bender (electric or manual);
- files and sanding paper;
- marking tool, ruler, tape measure, scriber for metal;
- pipes of different diameters;
- sheet metal;
- services of a turner and welder (if you do not own the skills yourself);
- painter or spray gun with primer, paint and varnish;
- A special various cycle tool for assembling nodes.
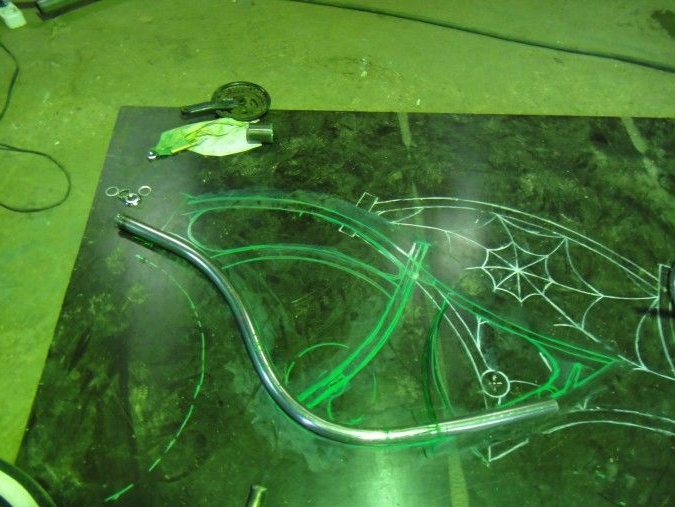
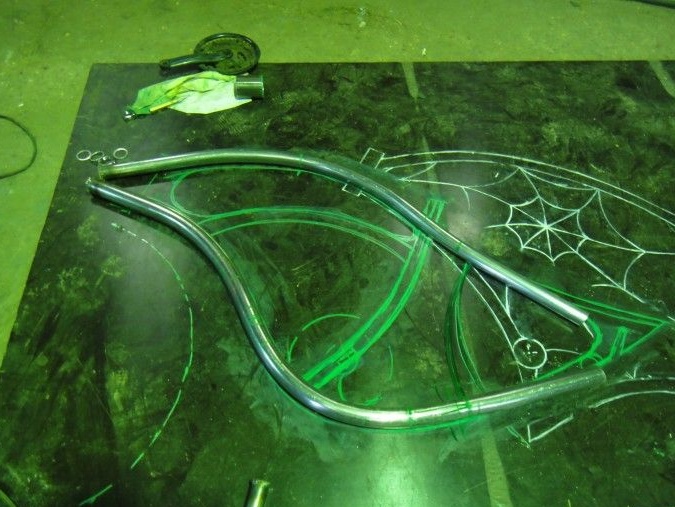
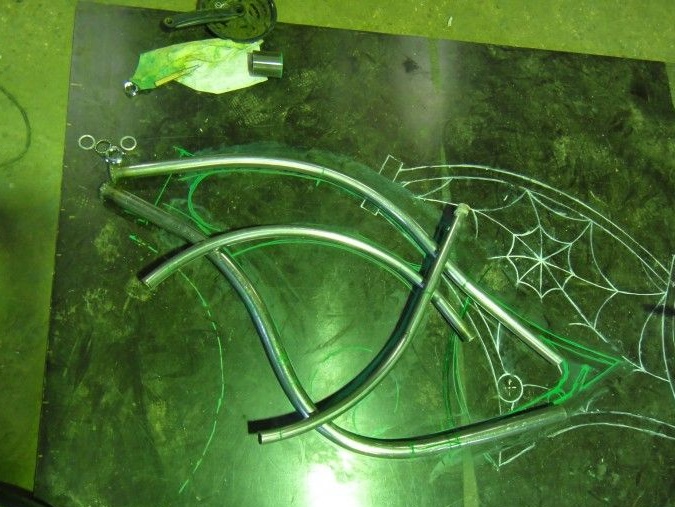
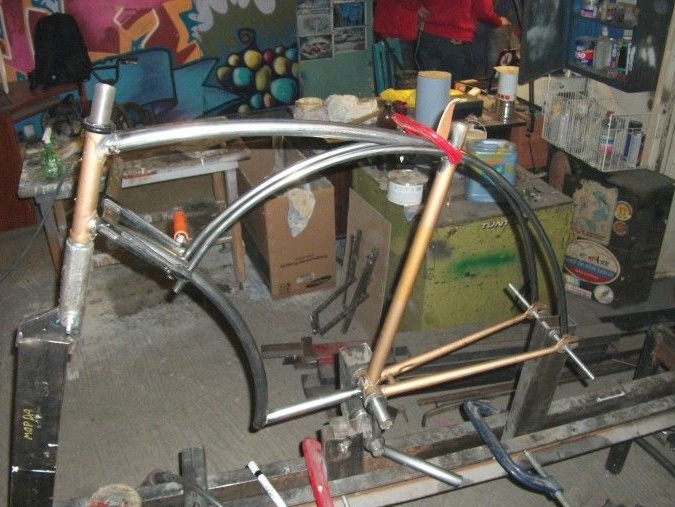
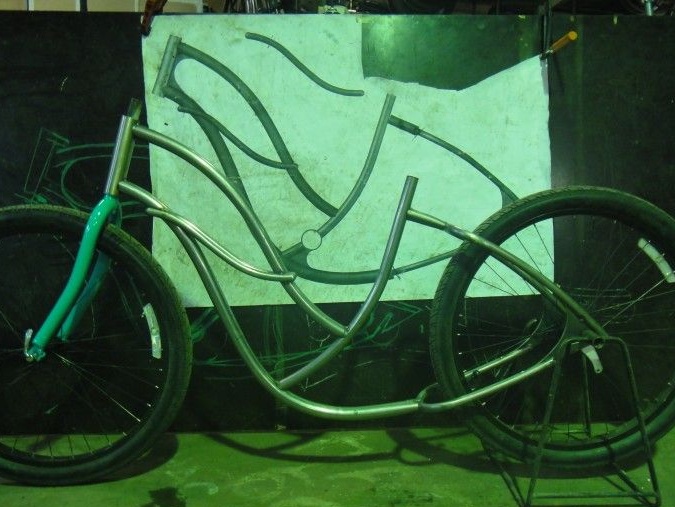
In the process of bending pipes and fitting, you need to try on the components and components of the bike.
When all pipes are bent, they must be cut to size and fit the corners, cuts, rounding. Having done the fit, it is necessary to smoothly and precisely, with tacks, weld all the components together.
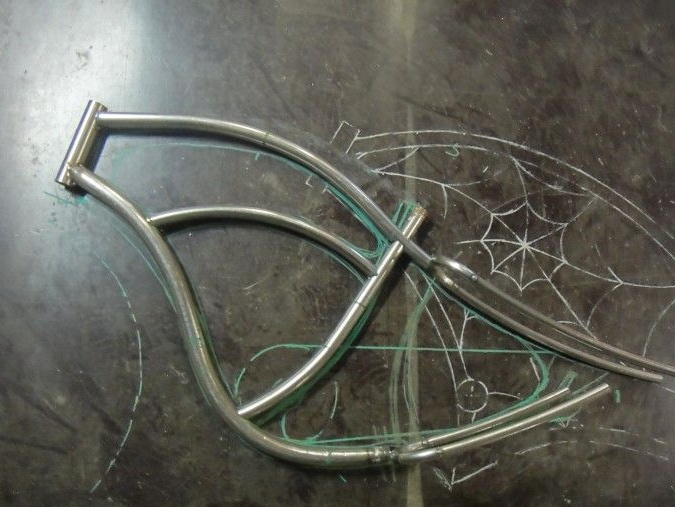
In addition to bending the nodes, such turned parts are necessary: a steering glass, a glass for the carriage (with threads); sheet metal parts: “scarves” for reinforcing the frame structure, feathers for attaching wheels.
For final welding, the structure must be fastened in a rigid snap so that the welding elements do not lead. For example, this:
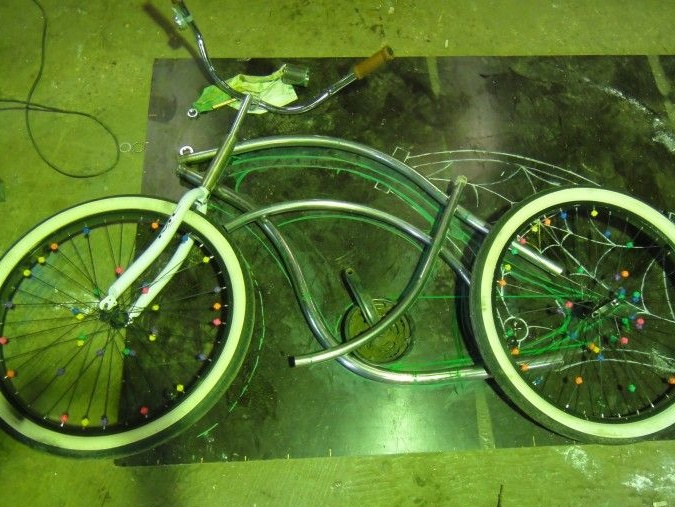
After the final welding, a good analogue of the factory bike bike frame is obtained.
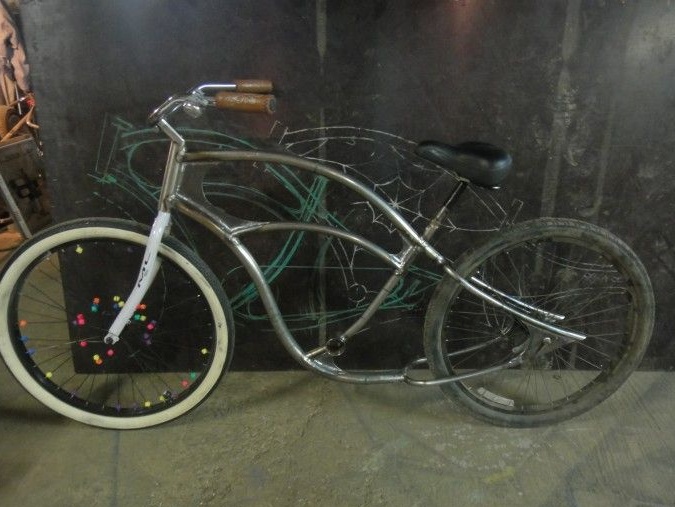
If desired, you can make a frame of any design and complexity, male or female.
Next, a few final steps: putty (if necessary), a primer with subsequent polishing, painting in color, applying a layer of varnish, followed by polishing the layer.
After all operations with the frame, all nodes are set and go.
All creative ideas and success.