» For children »DIY Toy Chest Box

DIY Toy Chest Box

DIY Toy Chest Box

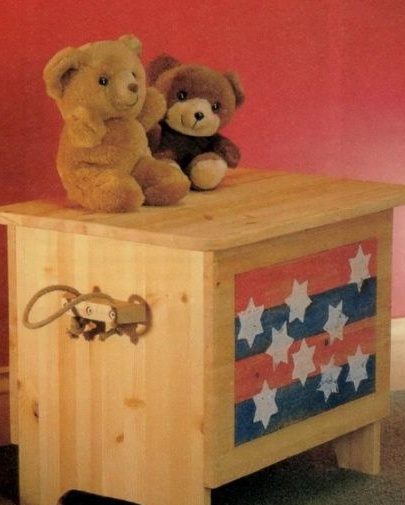
Many parents are familiar with the problem of teaching a child to put toys in a place specially designated for them. Often children are naughty, not wanting to clean up. However, the reproach does not always work. A wonderful way out of the situation is to turn the cleaning procedure into a pleasure. To do this, you can create a special storage place for toys.

Materials and tools:
1. A pine board, the dimensions of which should correspond to the dimensions of the future chest. Thickness is recommended between 16-18 mm.
2. Pine blocks in the amount of 2 pieces. Parameters should be 150x40x25 mm.
3. Self-tapping screws 30 mm with countersunk heads.
4. Fixing loops, special type closers and blocks designed for handles.
5. Workbench with clamps.
6. PVA or wood glue.
7. Varnish or acrylic paint.
8. A tool for measuring.
9. Electric drill and jigsaw.
10. Countersink drill of a special form designed for making holes for plugs. The diameter should be 6 mm.
11. Chisel.
12. Screwdriver.
13. The hammer.

Operating procedure:
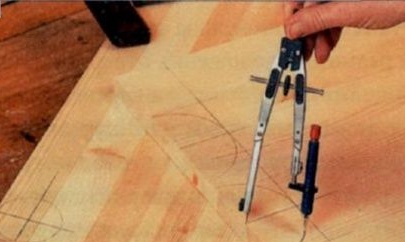
The first step is a drawing with a detailed indication of the parameters of each part.

Now you can start directly marking the parts. This is where the drawing comes in handy. Those places to be removed are recommended to be shaded. It should be borne in mind that the rounding radii on the top cover need the same. They should be 23-30 mm. The radii of fillets on the base are 45-50 mm.

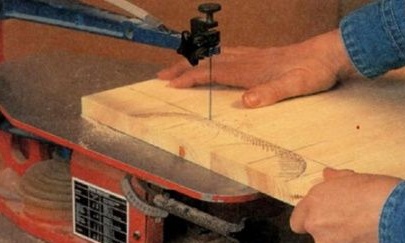
Further, all the details are given the necessary form. A jigsaw is used for this procedure. The mating parts are best checked for compliance immediately. If deficiencies are found, adjustments are made.

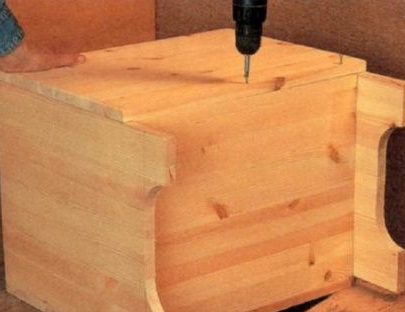
Mounting holes on the front and rear walls of the item are made using a core drill. And with the help of a screwdriver, all the walls are connected with self-tapping screws. In the process of these actions, it is necessary to carefully monitor compliance with the strict rectangular shape of the structure - the final appearance of the chest depends on it.

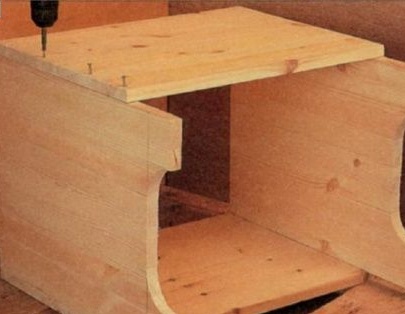
Now you can make the bottom. It is necessary to constantly check the drawing. It is fastened with screws with screws. It is recommended to immediately check the stability of the product and, if necessary, make adjustments.

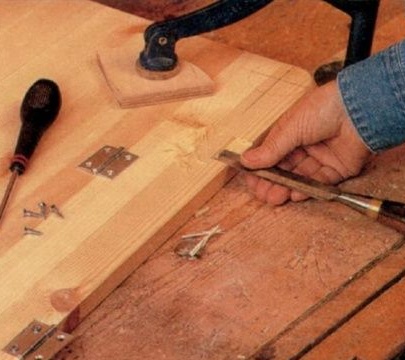
The next stage is the lid of the future chest drawer. It can be either one-piece or one-piece, depending on the preferences of the manufacturer. The size is selected depending on the perimeter of the product from all sides.In the place where the front side will be located, a protrusion of approximately 25-30 mm is made. This protrusion will be the handle with which the lid will open. You need to attach the cover to the most ordinary door hinges.

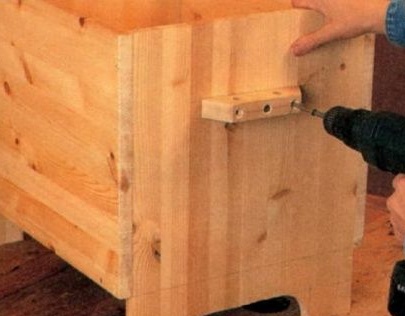
In order to make it convenient to move the box, you must first take care of the presence of special handles. It is recommended that you select the rope options for pens. They will be mounted on wooden blocks installed on the box in advance. In the blocks, holes are made with a diameter equal to the diameter of the rope. The rope in them is threaded and tied. It is important to pay attention to the fact that the loops were not large enough for the child to stick his head in them. For safety's sake, it is worthwhile to install closers in order to avoid pinching your fingers with the cover.

The last stage is decorating the chest. To do this, you need varnish or acrylic paint of any color. What to apply is an individual choice, depending on the preferences of the child and the manufacturer's imagination.

The effort to make such a box will take a little, as well as materials. However, the result will exceed all expectations - cleaning will turn into a joy for the baby and accustom him to order.
0
0
0

Add a comment

    • smilesmilesxaxaokdontknowyahoonea
      bossscratchfoolyesyes-yesaggressivesecret
      sorrydancedance2dance3pardonhelpdrinks
      stopfriendsgoodgoodgoodwhistleswoontongue
      smokeclappingcraydeclarederisivedon-t_mentiondownload
      heatirefullaugh1mdameetingmoskingnegative
      not_ipopcornpunishreadscarescaressearch
      tauntthank_youthisto_clueumnikacuteagree
      badbeeeblack_eyeblum3blushboastboredom
      censoredpleasantrysecret2threatenvictoryyusun_bespectacled
      shokrespektlolprevedwelcomekrutoyya_za
      ya_dobryihelperne_huliganne_othodifludbanclose
9 comments
The author is just fine for making such a necessary thing. In stores, such boxes cost a lot of money. I would add some colors, because this chest is designed for children, and they love everything bright. You can make it to the tone of the children's room, so that everything is in a single color scheme. To give a cheerful mood, you can stick stickers of different animals. Children will definitely like this.
Great job. It bothers a little that the cover itself is not in the photo. At its upper position, questions will arise on the injuries of small fingers and cones on the heads. Another controversial moment in the decor, a certain inspiration of the analogy of the American flag. And here would be a fabulously cartoony much more suited.
It seems to me that he is more suitable for this. It will be convenient and practical. You can fantasize over the design the miracle of the box, give it a special mood. For example, glue the walls with wallpaper or duct tape. It should be interesting.
If we consider the box for toys, then it seems to me that it is somewhat massive and the wheels will not fix the situation. I would like to know how old the chest is for children? I don’t imagine at all the little ones near such a chest. And here, as a mysterious chest of a teenage girl is quite possible.
Yes, yes, it's time to get Dad to build such a wonderful chest. We have a special mesh box for children's toys. But how can it compare with this box? I agree that the wheels are not enough, but screwing them is not so simple. And also this box for the child can be decorated with your favorite cartoon characters or something else.
The chest turned out to be roomy, and the master obviously made the corners round, so that the children would not get injured. But here, of course, you can’t do without the help of the pope - after all, this is a man’s job. Another plus of such a chest is its budget - it does not require large expenses for its manufacture, it is enough to buy boards, the rest are “trifles” and so on is in the arsenal of each owner.
Very good idea. Firstly, you don’t need to spend money on such a closet in a store, which by the way will be expensive, moreover it is made of natural materials, which is important when a small child is at home. Plus, if you involve a child in the manufacture of such a box, I’m sure that he will gladly lay down the toys himself.
It turned out a wonderful chest! I would love to use it as a repository for hand-made little things. For example, such a chest is well suited for balls of yarn for knitting, ribbons and boxes with different types of buttons. And for our toys in our family we use a separate cabinet, because there are too many of them.
The chest turned out to be good, solid. But I just do not understand, where is the door? Does the lid open up? If so, then the child will put toys on the lid and refuse to clean them in order to put the rest inside. And high up for the door. I would do it on the side so as not to injure either my head or legs when opening.
The chest is clearly not enough wheels - you can use the "standard" furniture. And yet, in case of "exacerbation of the disease of disobedience" (and this is not uncommon in children), it is useful to make the box lockable.

We advise you to read:

Hand it for the smartphone ...