
Many people have icons at home - centuries-old traditions require giving them to newlyweds, putting them near cribs, and so on. However, if you already place such an image, then not next to a computer, TV, or other secular objects. The location should be appropriate. And a special shelf, made independently, is quite suitable for such purposes.
Materials and tools:
1. The size can be any - depending on the icon. In this case, for example, the average dimensions 300X350x40 mm are taken into account. Based on this, you need to stock up on a solid pine board with a width of 150 mm and a thickness of 15-20 mm.
2. A glued shield designed for a bottom with a width of 210 mm and a thickness of 15 mm.
3. Trimming of fiberboard and birch plywood, which will be needed for the templates.
4. Self-tapping screws.
5. Emery cloth.
6. Electric fretsaw.
7. Drills and drill.
8. A milling table having a bypass cutter with a bearing.
9. The lathe. In the absence of this tool, you can contact the workshop.
10. Pencil.
11. Metal meter line.
Operating procedure:
First of all, it is worth drawing on the fiberboard the details of the bottom, sides and sides of the shelf. Parts must be full size. Sawing occurs with a jigsaw, immediately after it you need to process with an emery coarse-grained skin. On the patterns, holes for self-tapping screws are marked, on which the product will be assembled in the future. Patterns are drawn on birch plywood, the thickness of which should be 8-12 mm. Each stencil is cut using a jigsaw carefully at low speed. Again, the irregularities are processed with sandpaper, smoothness of forms is introduced. If this is not done, all the flaws will be noticeable on the shelf itself in the future. You can also do without a fiberboard, but for this you need to be sure that your hands are accurate. As a result of the work done, three templates will be available - sidewall, side and bottom. Now the holes are marked, based on the fact that there will be 2 pieces in the bottom, 3 in the side and 4 in the sidewall. They are necessary for attaching to the main template blank. Everything is drilled with a drill with a diameter of 3 mm.
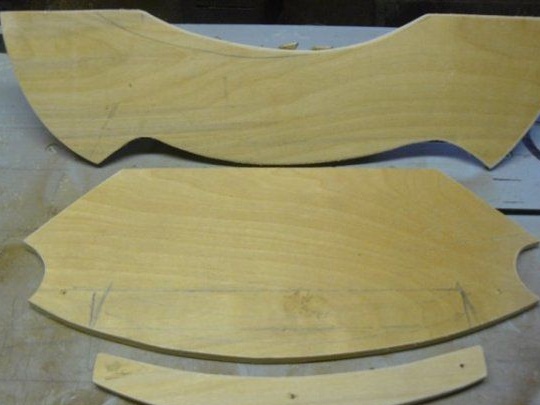
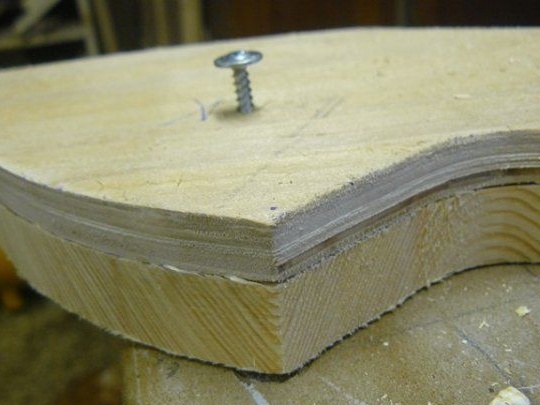
After preparing the templates, they are applied to the board and outlined in pencil. Sawing is carried out with an electric jigsaw along these lines, however, you must leave a margin of space for milling.You can fasten the templates to the blanks using self-tapping screws using pre-made holes.

The workpiece is milled on a stencil on special equipment.
The sides, sides, bottom - everything is done in the same order. In total, 2 bottoms, 2 sides and 2 sides should be obtained. But for turning decorative parts you will need a lathe. If not, you can contact a specialist. In the event that, nevertheless, decorative details are made independently, it is important to monitor their identity, otherwise the evenness of the shelf will be violated.
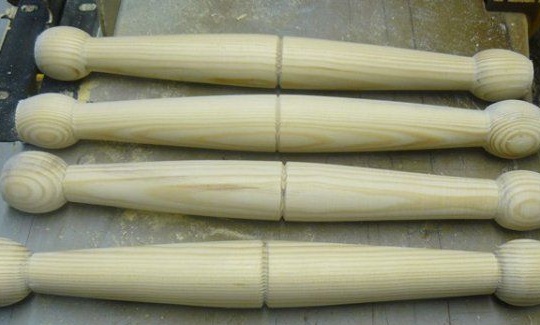
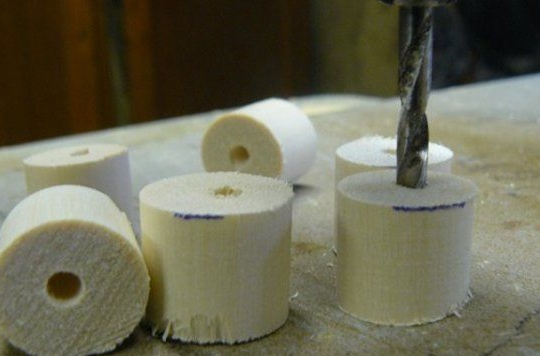
Next, you should grind a round beam, the diameter of which will be 15 mm. From it are formed by cutting 6 cylinders of the same size and a length of 15 mm. Using a three-millimeter drill, holes are formed through each of them. All details are processed by sandpaper.
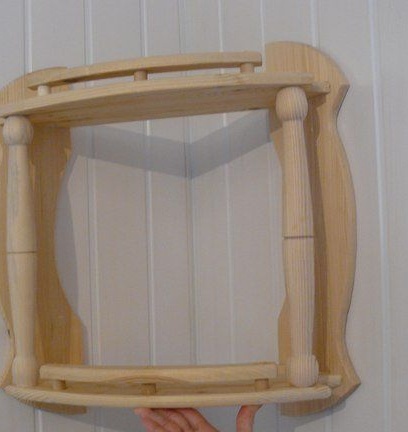
Now you can start collecting shelves. Given that all openings are made according to patterns, overlays should not occur. The bottoms are screwed to the chiseled elements using 41 mm screws.
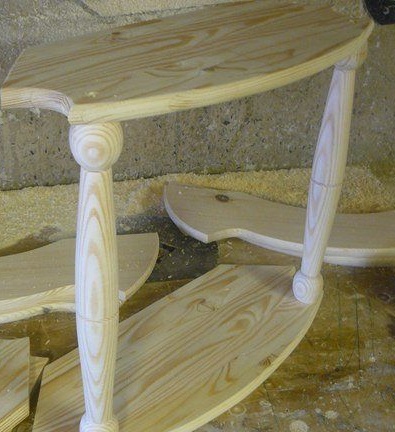
When connecting the sidewalls with the bottoms, the screws should fall into the middle of the ends of the bottoms - this means that all the calculations were carried out correctly.
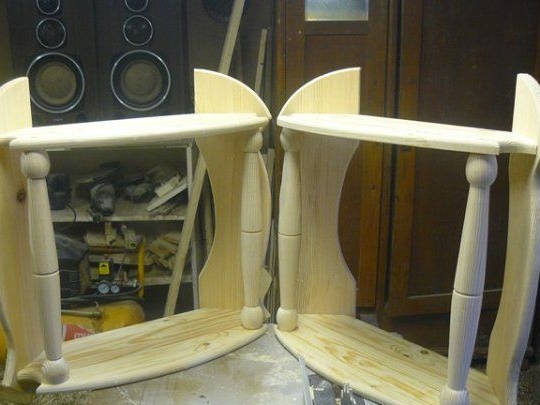
With the help of cylinders, the sides are screwed. For each side there are 3 cylinders. Self-tapping screws are inserted into the holes from the bottom. Only after that the cylinders are put on and the hardware is twisted into the side.

The final stage is coating the finished product with drying oil. It will give the tree an amber color and preserve its natural beauty.
Now the shelf can be attached to the brackets in a corner and put an icon on it. This product will serve as a wonderful frame for the icon and will fit perfectly into any home.