Often when fishing on silicone baits, fishers face a problem when it becomes difficult to catch on such tackle. First of all, this is underwater vegetation, which can be found in abundance in water bodies and not only. It can also be various other underwater obstacles, such as a snag. To successfully fish in such places with the help of silicone baits, they need to be slightly modernized, namely, made floating. Let's look at some of the available ways to do this in home conditions
Necessary materials and tools:
- a piece of foam;
- thread;
- scissors;
- soldering iron;
- polyurethane foam;
- a needle, a hook (tee), a metallized lead;
- stationery knife;
- drill;
- directly bait.
This is the set of tools and materials that will be necessary for the manufacture of two types of floating silicone. So, for example, for the simplest option, a drill and mounting foam will not be needed.
The easiest way to make silicone floating
Step 1. Choose the optimal buoyancy
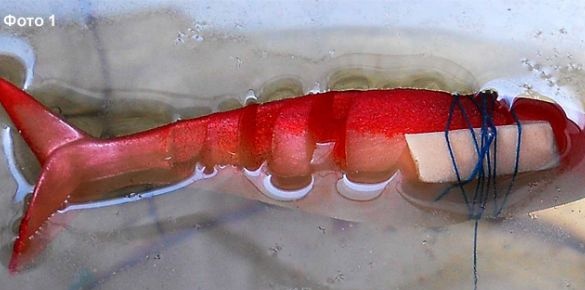
First of all, you need to correctly "adjust" the silicone bait. It is necessary to achieve such a result that the bait sinks very slowly or when it enters the water has zero weight, that is, it does not sink and does not float. To achieve this result, you need to do several experiments. A piece of foam is attached to the silicone bait with a thread, it is best to use an extruder for these purposes. Well, then you need to choose the optimal buoyancy, gradually cutting off excess pieces from the foam. It is important to note that experiments should be carried out with the hook attached. It can be simply temporarily tied with a thread.
Step 2. Installing foam in the body of the bait
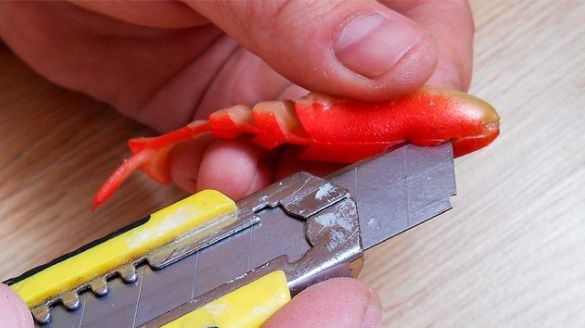
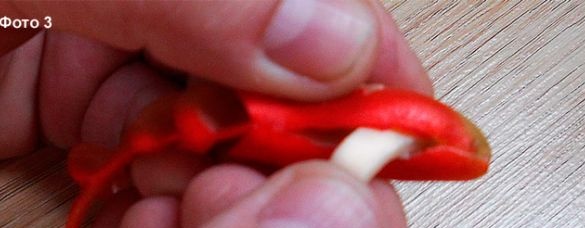
Then a piece of foam is installed directly into the bait itself. For these purposes, a clerical knife is taken and an incision is made in the wide part of the bait. Subsequently, a piece of foam is inserted here.
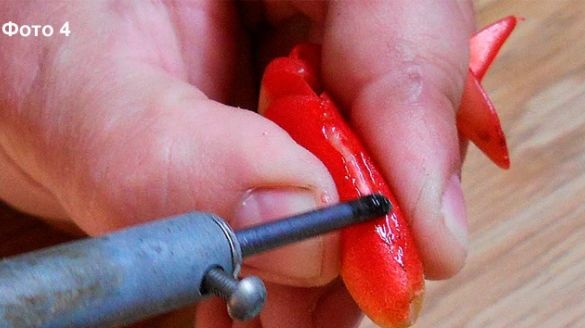
After this, the incision site is sealed with a soldering iron. In this case, you need to be careful, since the foam melts easily when heated, and this can lead to a decrease in buoyancy.
Step 3. Installing the hook
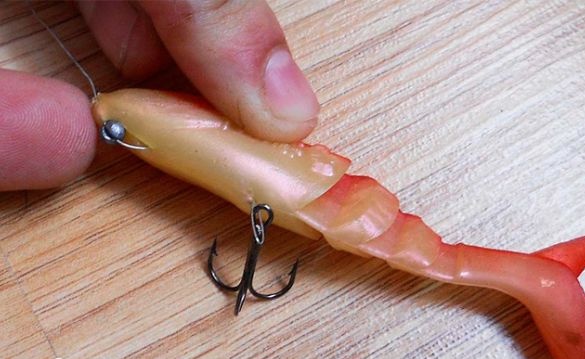
A tee will be used as a hook, and it will be attached using a thin metal wire. A needle is used to draw the wire through the bait. Subsequently, a tee is attached to the rear of the wire, and a small pellet is placed on the front. It is needed so that silicone does not slip on the leash.
Another way to make silicone floating
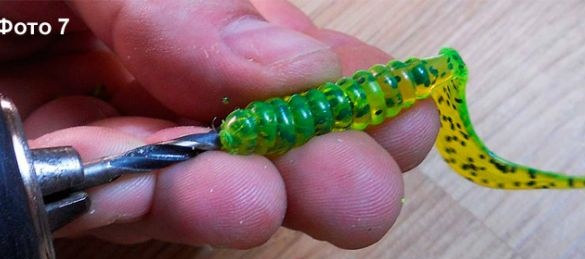
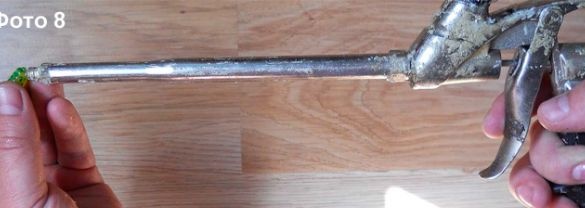
For these purposes, you need a drill and a drill of a suitable diameter. The whole point is to fill the silicone bait with styrofoam from the inside without cutting it. For these purposes, mounting foam is perfect. For convenience, the author decided to use a special gun, with the help of it it is convenient to fill the lures with mounting foam. You can use the same extruder, pushing it in small portions into the bait with a screwdriver.
After filling the bait with foam, you need to wait 2 to 6 hours until it dries.
Subsequently, the bait is equipped with hooks. The principle of installing hooks is exactly the same as when installing on a twister. Only in this case, it is desirable to use two hooks, one on top and one on the bottom, since such a bait predator attacks it from below.
According to the author, such a bait looks very realistic when playing. In this case, you can experiment and select various wiring methods. In practice, such a floating silicone has proven itself in fishing for pike and perch. It is possible that such a tackle will be an excellent choice when catching other fish.

