» Car DIY »We make LED dimensions ourselves

We make LED dimensions ourselves


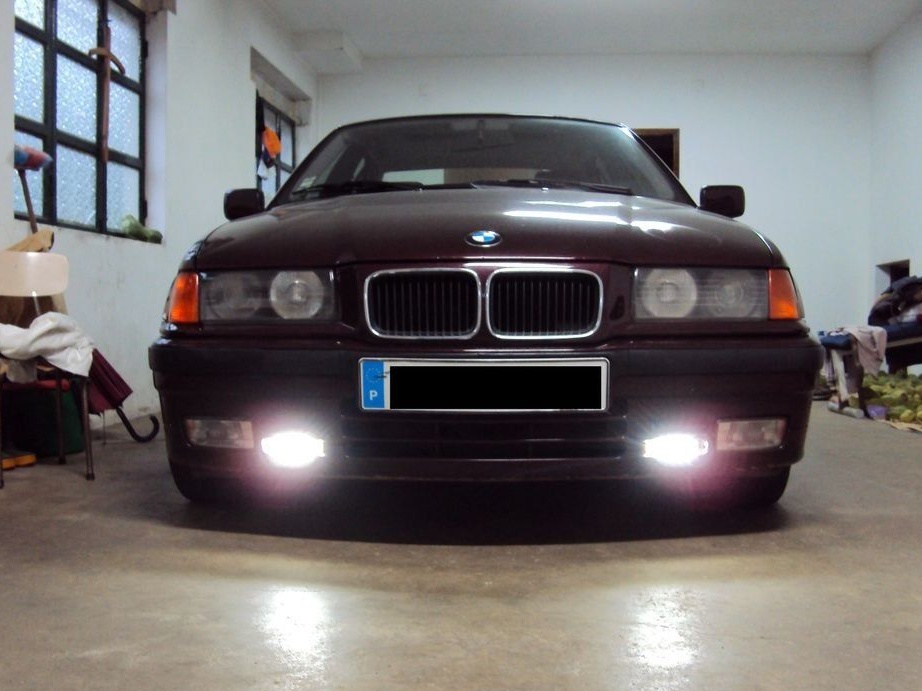
LED marker lights - a great addition to any car. The cost of such high-quality equipment can be quite high, so it makes sense to try to make it yourself. The author has proposed a simple option on how to quickly make LED marker lights at minimal cost.

Materials and tools:

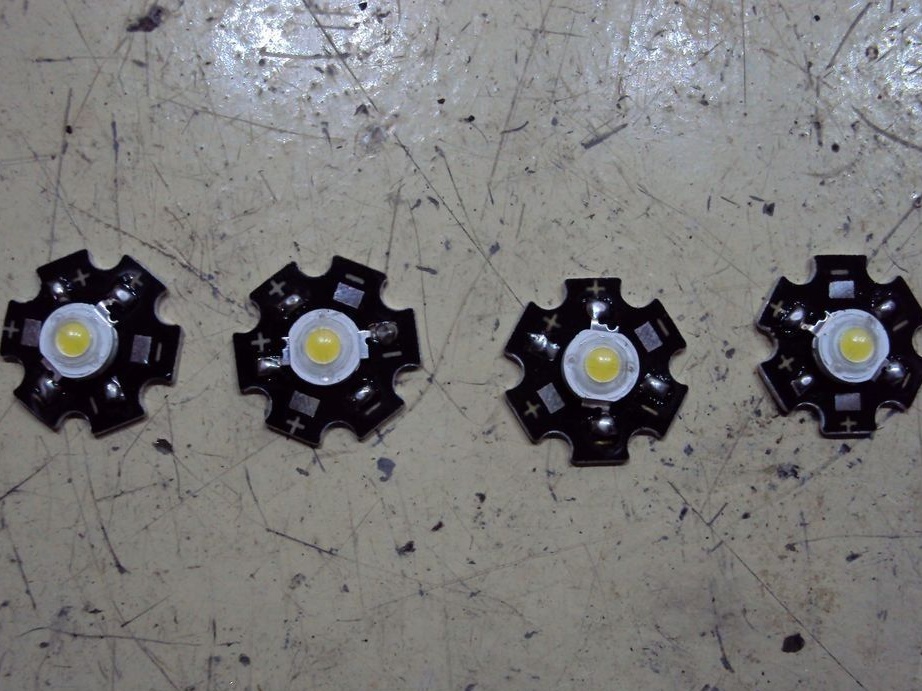
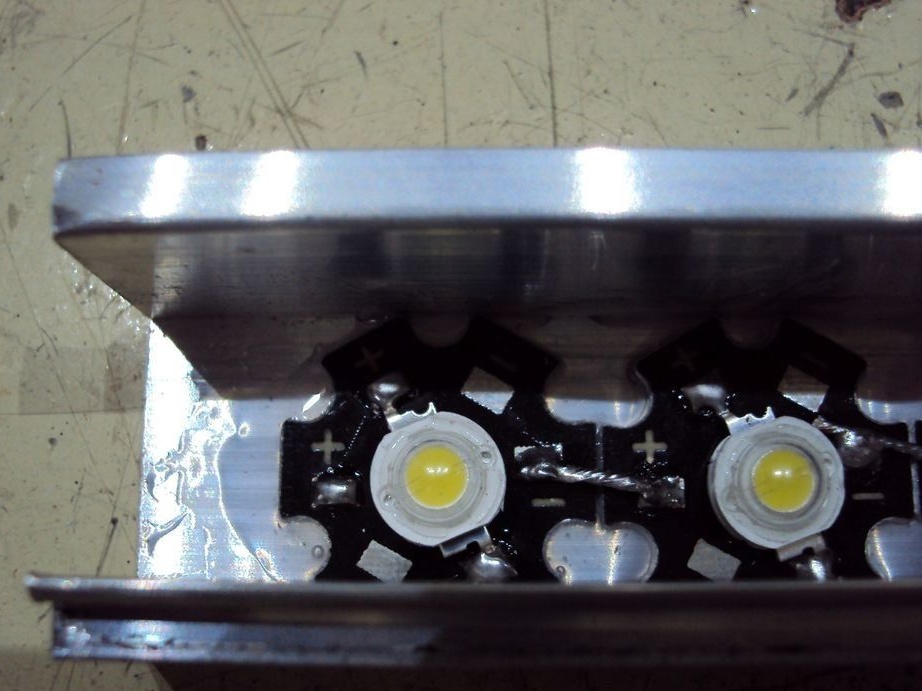
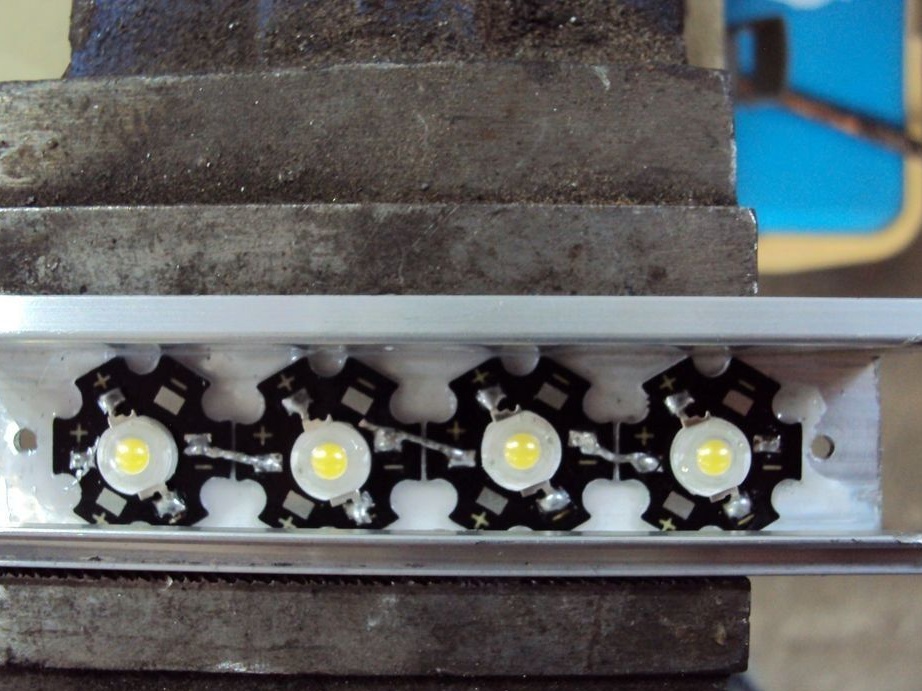
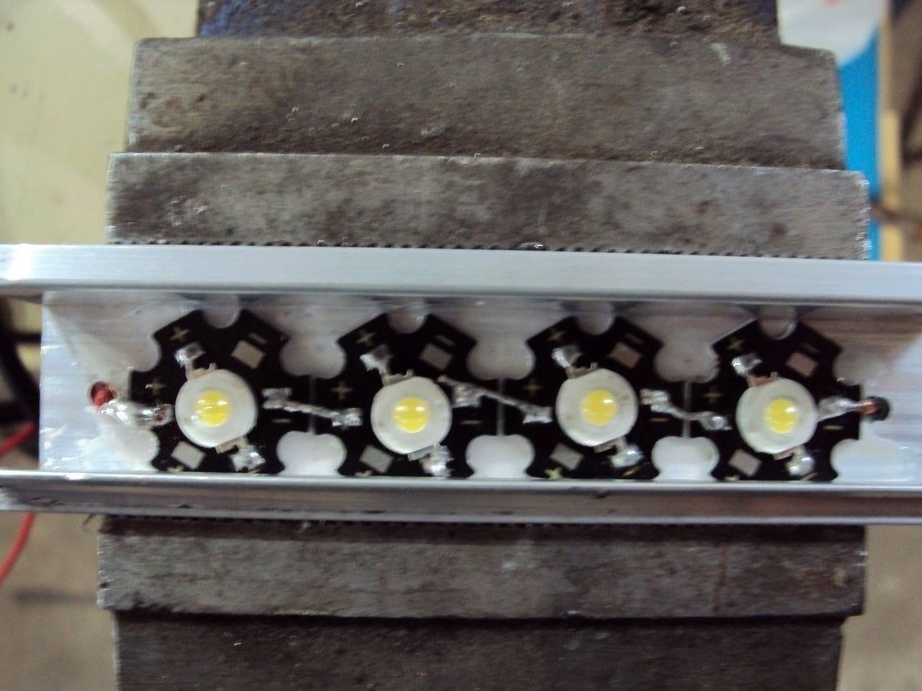
- LEDs (in this case, the author used the option in the form of asterisks, 4 pieces of 1 Watt each);
- aluminum rail (to create the base of the lamp);
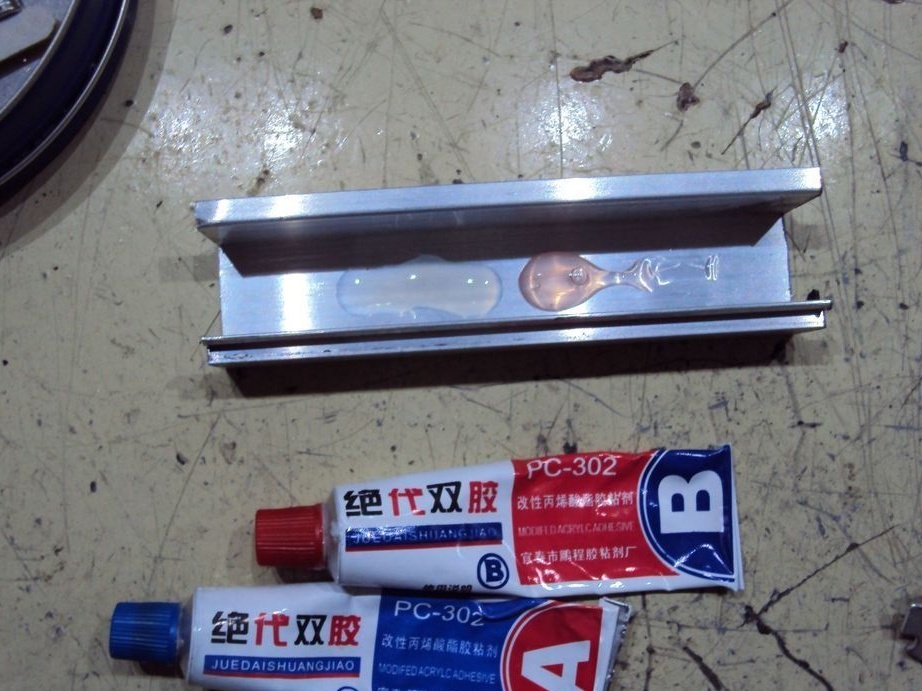
- hot glue and epoxy;
- drill or drilling machine;
- soldering iron with solder;
- wires;
- a grinder or other tool for cutting metal.

Manufacturing process

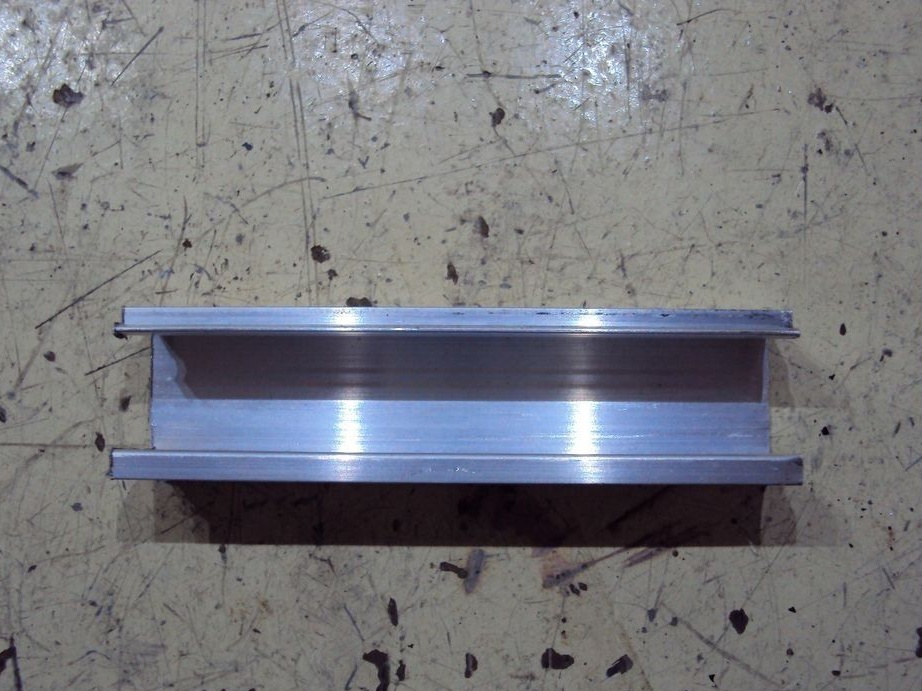
Step one. Creating the base of the flashlight

As the basis of the flashlight, the author used an aluminum channel. To create the base of the lamp from it you need to cut a piece of the desired length.


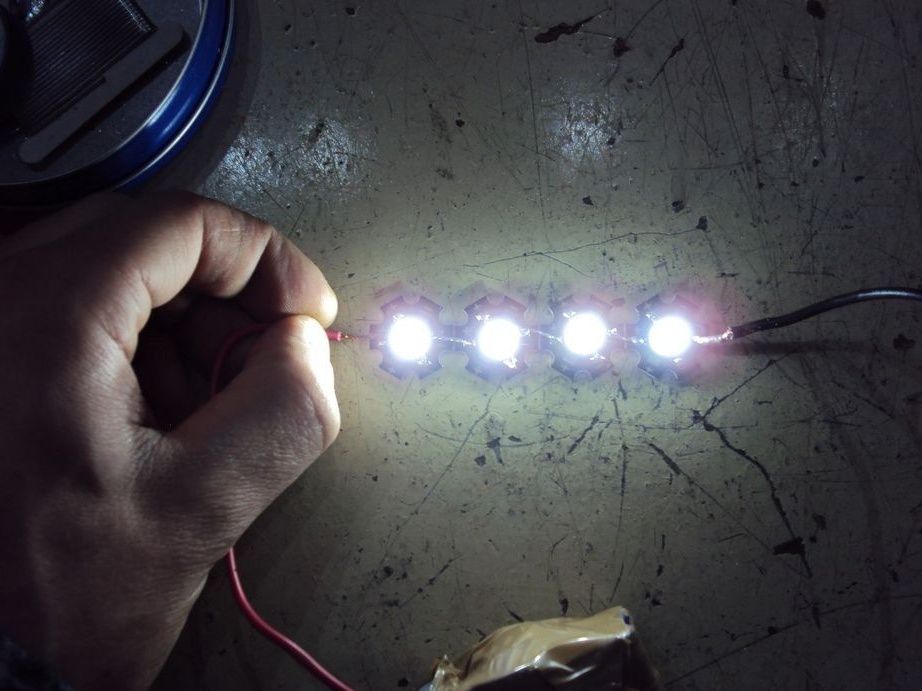
Step Two Creating an electrical circuit

In order for the LEDs to work, you need to create an electrical circuit. For this, the diodes are connected in series. Contacts need to be soldered in such a way that minus goes behind plus and plus minus. Otherwise, the lamp will not work, as the LEDs have a working polarity.
After creating the circuit, you need to check it by feeding it from a car battery or any other DC source.


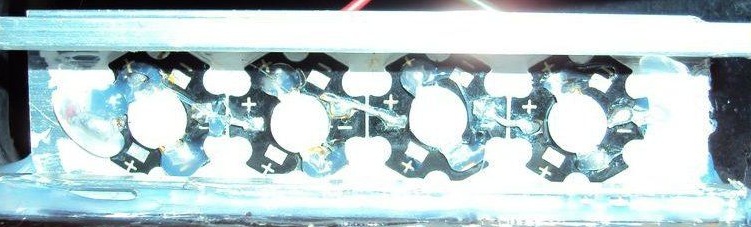
Step Three LED installation
The LED strip is attached to the base of the lamp with epoxy glue. Thanks to this approach, a radiator is formed from the lamp housing. It allows you to cool the LEDs, while they last longer and work better.


Step Four Installation and connection of marker lights
To connect the lights, you need to solder two wires to the ends of the LED strip, it is advisable to make them colored, so as not to get confused during the connection process. Then, from both ends of the strip of aluminum, two holes must be drilled, wires are drawn into them. In order for the wires not to rub on the holes and not cause a short circuit, they should be fixed with a drop of hot glue.
Now it remains to connect the lights to the power source. To do this, find the switch that is responsible for turning on the side lights, and connect the circuit through it. In this case, the switch must open the negative wire (ground). As for the plus, it turns on through the fuse box for safety.


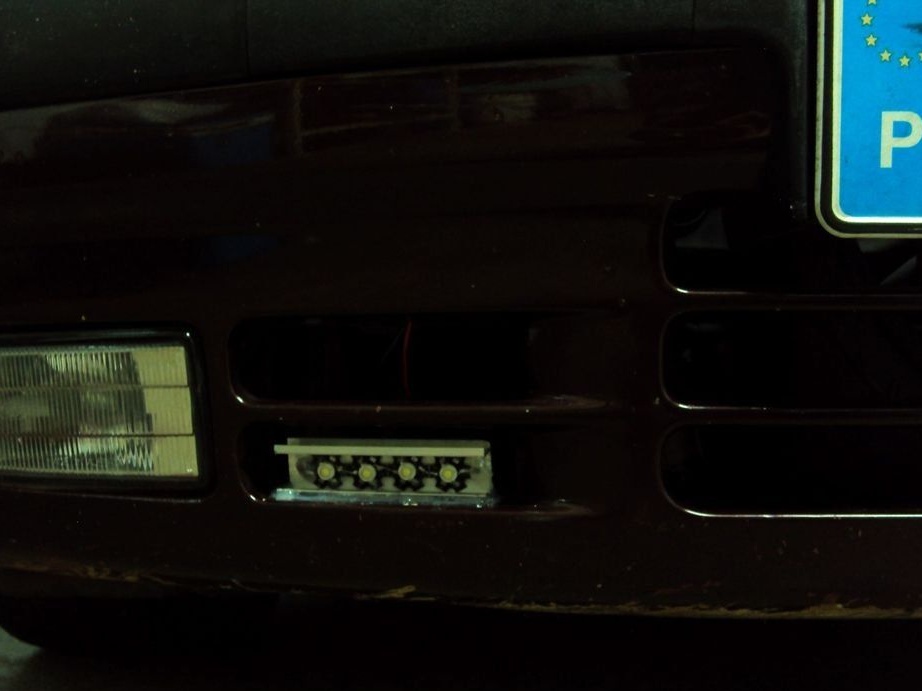
That's all, the marker lights are ready. As you can see, the process of creating such lamps is quite simple, and they work no worse than store counterparts. If you are smart, the lights can be equipped with glasses.
3
2
1

Add a comment

    • smilesmilesxaxaokdontknowyahoonea
      bossscratchfoolyesyes-yesaggressivesecret
      sorrydancedance2dance3pardonhelpdrinks
      stopfriendsgoodgoodgoodwhistleswoontongue
      smokeclappingcraydeclarederisivedon-t_mentiondownload
      heatirefullaugh1mdameetingmoskingnegative
      not_ipopcornpunishreadscarescaressearch
      tauntthank_youthisto_clueumnikacuteagree
      badbeeeblack_eyeblum3blushboastboredom
      censoredpleasantrysecret2threatenvictoryyusun_bespectacled
      shokrespektlolprevedwelcomekrutoyya_za
      ya_dobryihelperne_huliganne_othodifludbanclose
2 commentary
Regarding the location of the dimensions - Seyiaas, basically, for some reason, the dimensions are in the high beam headlights. That is, near the grille itself. I wonder why so! Why not put out the dipped-beam headlamps, for example, or, even, in the direction indicators? (They are now all the same, colorless in front. Either the lamp itself or the “cap” above it are painted.
But the thing is different - they were called wrong! If it were the dimensions, then the diodes would be one at a time, and even the light would be scattered by something - the side lights should not shine, they should shine !.
And these are daytime running lights.
But in general terms - so "kolkhozikh" - it is also necessary to try. The person who did this, as you correctly noticed, most likely does not know the difference between the concepts of "operating voltage" and "voltage drop across the diode", so the connection is primitive. (This is confirmed by pearls, such as "because the LEDs have a working polarity"). In the fuse box is also a "collective farm" with winding wires. Glue epoxy to the "radiator" and claim that they will cool like that - no words! (And if you screw the screws, putting thermal grease, will it be worse?))))) And, of course, TIGHTNESS !!!! The soldering spots and the diodes without glass themselves will last one rainy day. And then not until the end of the day, if at speed.)))) And how can I achieve tightness, I can’t imagine something ....
1. In fact, the main purpose of the marker lights is to designate the dimensions of the car, and in the photo they are located very far from the contour of the car. Is this a violation?
2. The current through the LEDs is unlimited. For some flashlight, this may not be so scary, since they are powered by a battery or a battery with a rather large internal resistance, during the discharge of the voltage source, the current will only decrease from the initial maximum, and the LED failure, as a rule, not very critical. But to power the vehicle’s side lights is unacceptable, because their failure affects the safety of traffic.
3.
If you are smart, the lights can be equipped with glasses.
And if you do not show, then you can ride like that?

We advise you to read:

Hand it for the smartphone ...