
A reflector with excellent characteristics and an acceptable appearance can be made from an ordinary plate. But for these purposes, you need to try hard. As a result, no one will ever guess and will not be able to distinguish that this is a plate, and not the professional equipment of the photographer.
Materials and tools:
- drill with drills;
- steel plates (different sizes);
- welding machine;
- two spray cans of paint (white and black, matte);
- a hacksaw for metal;
- newspapers or other paper;
- marker;
- ruler;
- mount for tripod;
- metal strips.
Reflector manufacturing process:
Step one. Markup
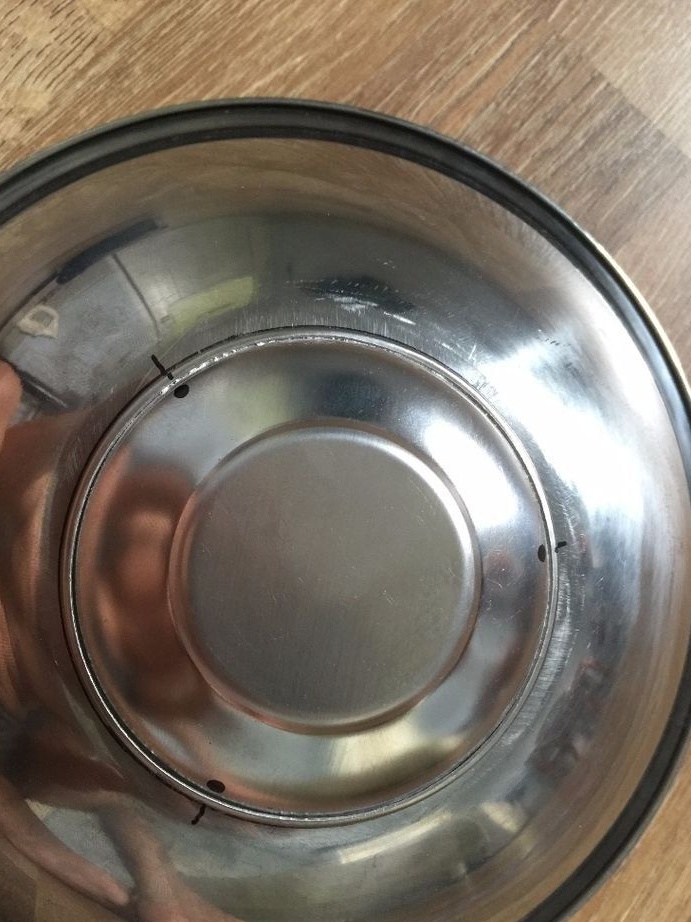
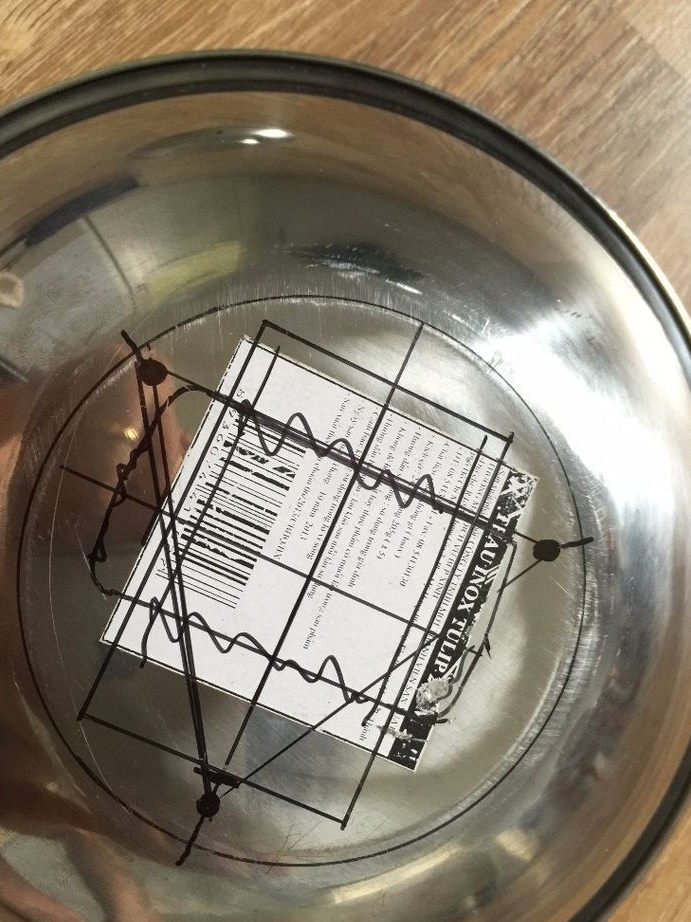
First of all, you need to choose a plate that is suitable in shape and size and make a markup. To do this, attach the flash to the bottom of the plate and circle with a marker. You also need to make marks for the holes, they should be located in the form of a triangle and correspond to the position of the small dishes. Similar notes need to be made on it.
Step Two Plate cutting and welding
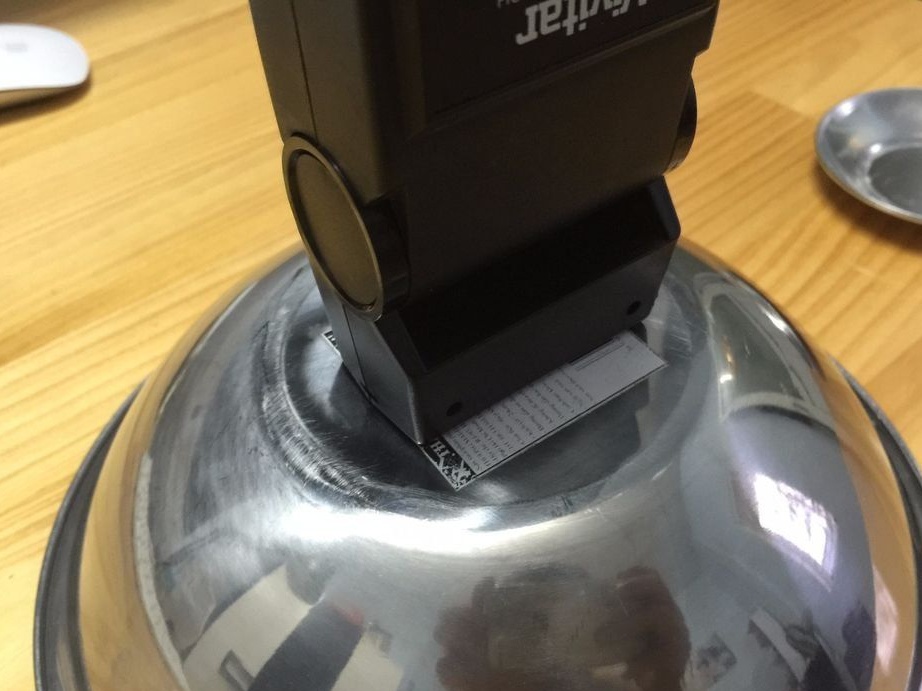
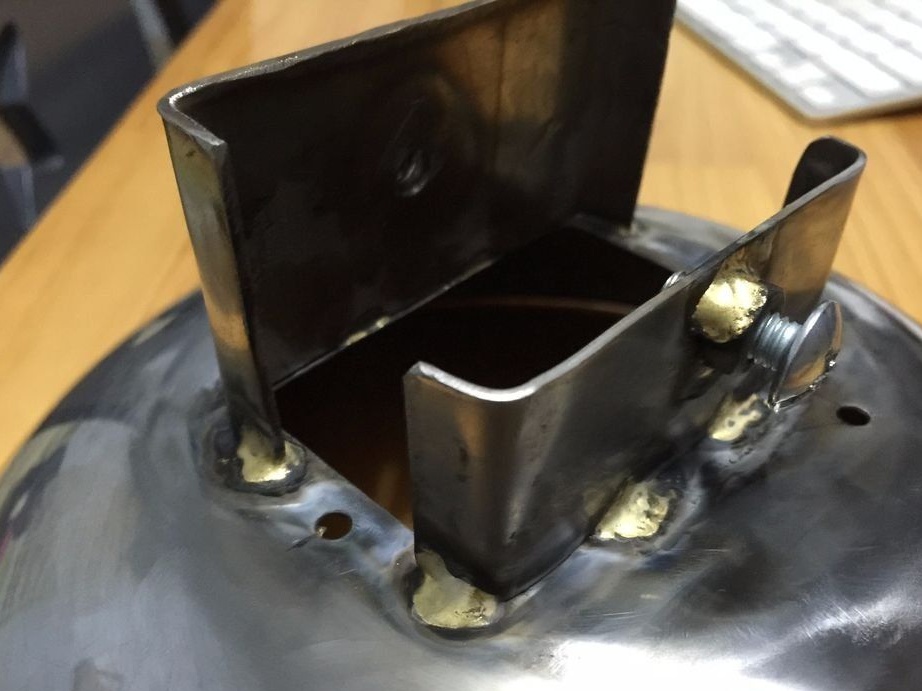
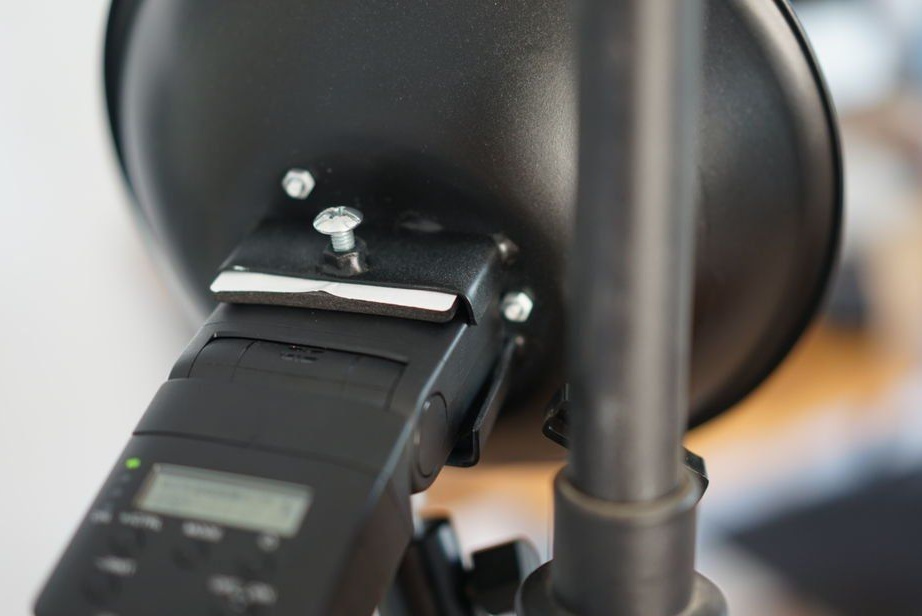
The bottom of the plate must be cut clearly according to the pattern that was drawn earlier. Now you need to take the metal strips, with the help of them the flash will be attached. They need to be adjusted so that they fit perfectly in width and height to the flash. Next, the strips are welded to the plate using a welding machine. The edges of the planks must be carefully treated with sandpaper. In conclusion, on the slats you need to drill two holes, with the help of them the flash will be fixed. You can cut the threads as in the strips themselves, still weld the nuts to the holes.
Step Three Reflector painting
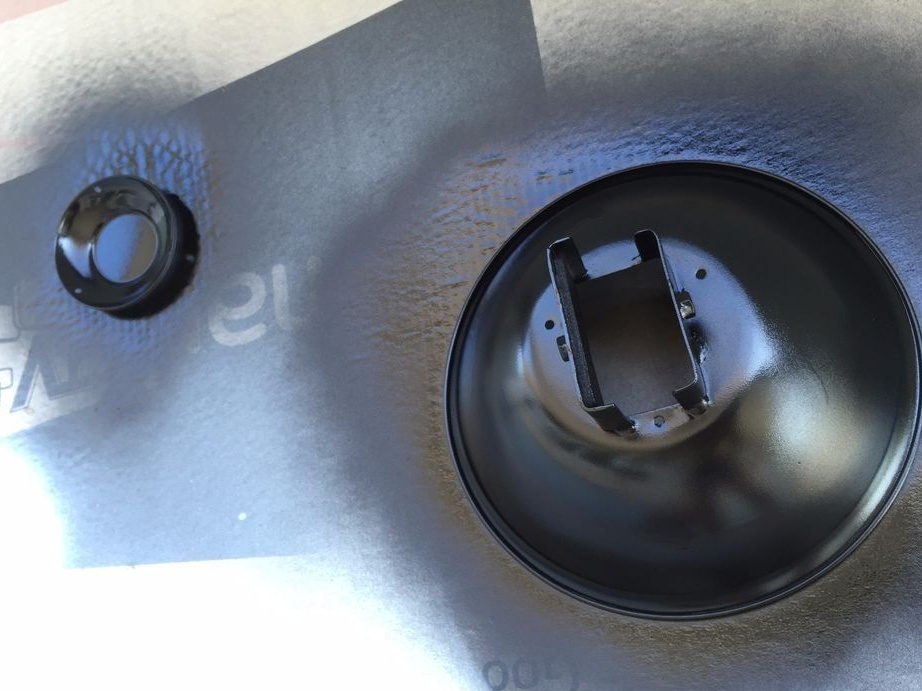
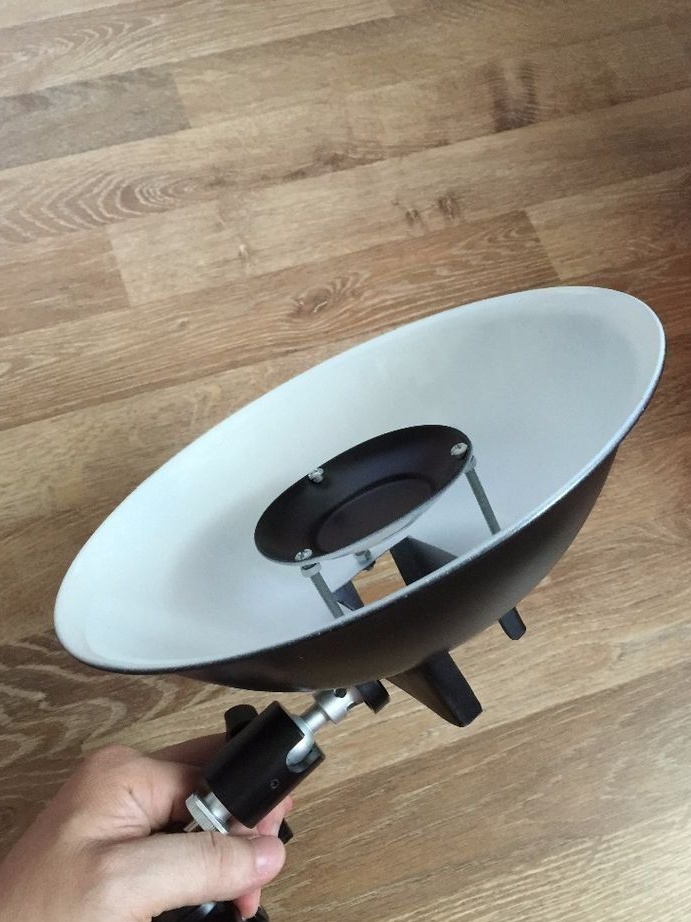
The large plate on the outside must be painted matte black. In this case, you must not forget to cover the workplace with newspapers or other paper before painting. A plate of small diameter also needs to be painted in the same color from the inside. It is important that the diameter of the small plate is equal to the diameter of the bottom of the larger plate, and it should also have a flat shape.
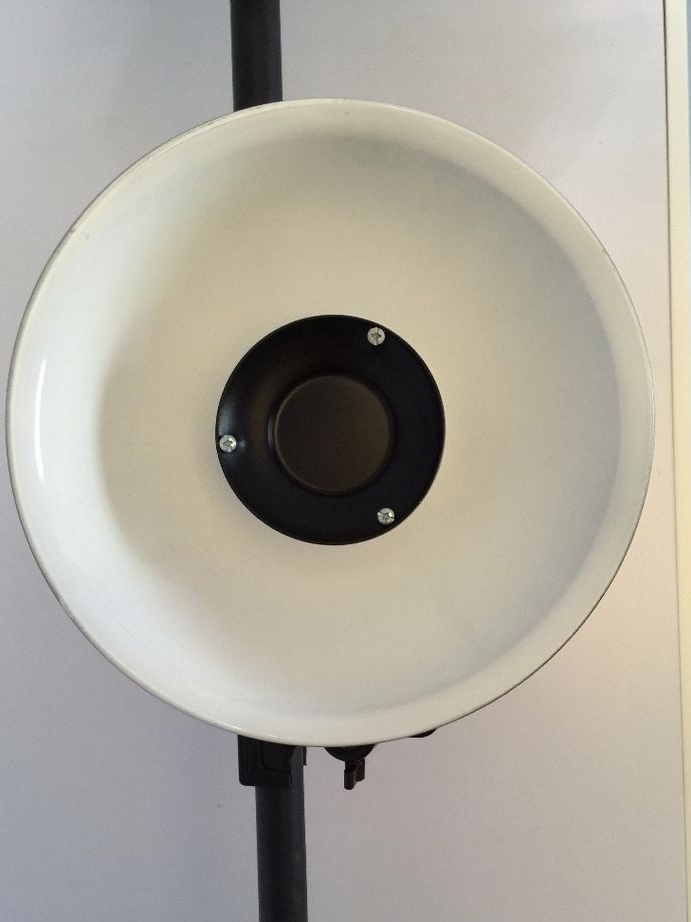
On the inside, a large plate is painted matte white.
Step Four Assembly and installation of a plate
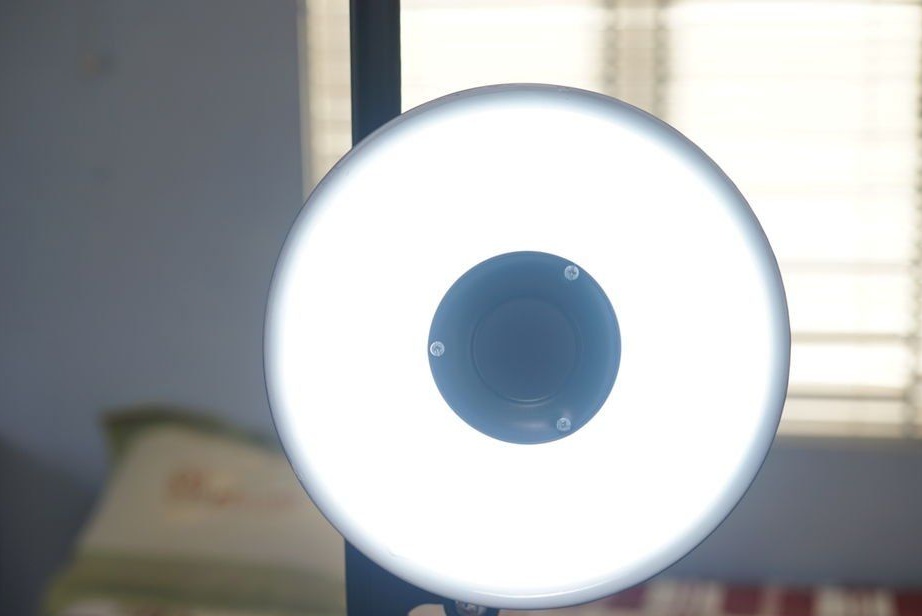
Now that the paint has dried, it remains to establish a small plate inside a large one. The plates will be fixed due to bolts with nuts. The distance should be such that the light from the flash can only propagate through the surface of the plates.
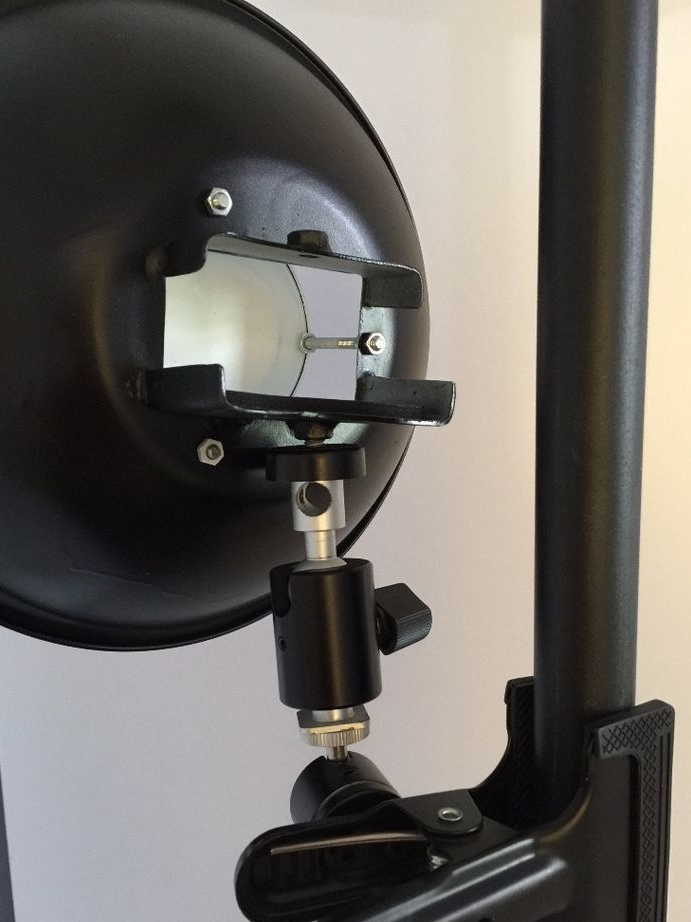
Now all that remains is to attach the reflector to the tripod and use a bolt to fasten the flash to it. That's all, an excellent reflector is ready to go.