An interesting experience of this person shows how easy it is to provide yourself with electricity. Looking ahead, I can say that of course he didn’t do everything correctly, but as they say from mistakes they learn.
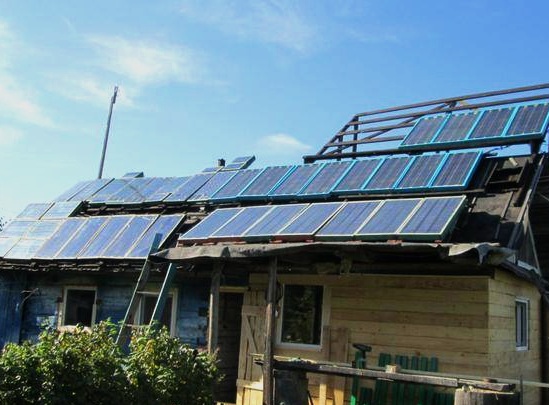
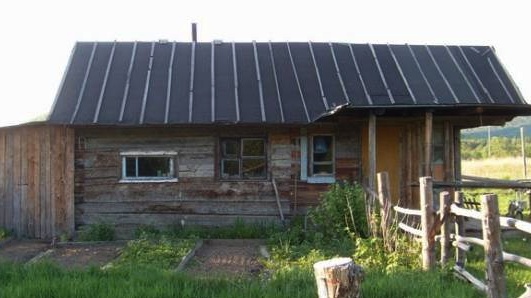
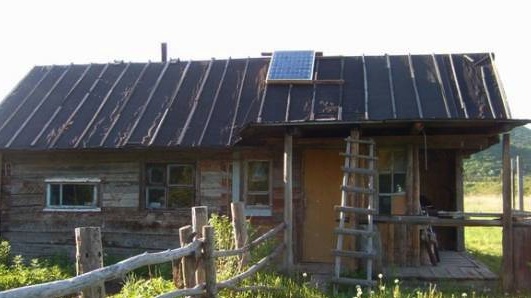
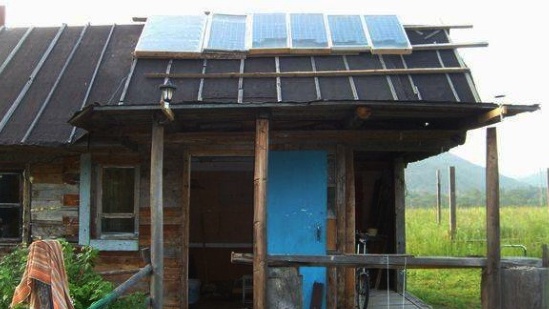
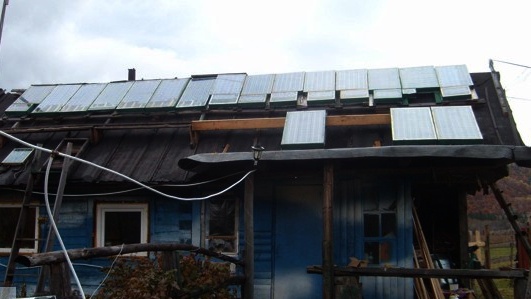
A house was purchased in the Topolevoye Settlement (aka Grace) of the Primorsky Territory, it was in good condition and it was decided to first settle in and establish life, and at the same time begin to build your own house. In the photo this is the current state of the house, but at the very beginning everything was somewhat different.
The first thing, of course, was the issue of electricity, because for a city dweller, and for any modern person, electricity is an integral part of life. The first thing that seemed like a decent option is solar panels, but they are very expensive. But friends advised that you can save if you order not ready-made solar panels, but only elements (FEM) and assemble the panels from them yourself. If you count it really turns out very cheap.
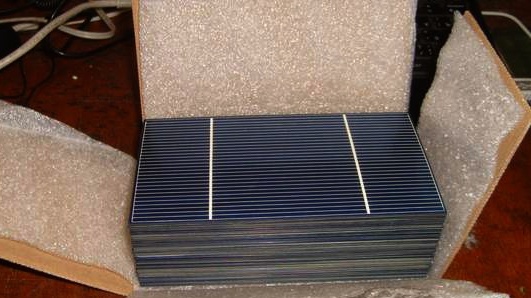
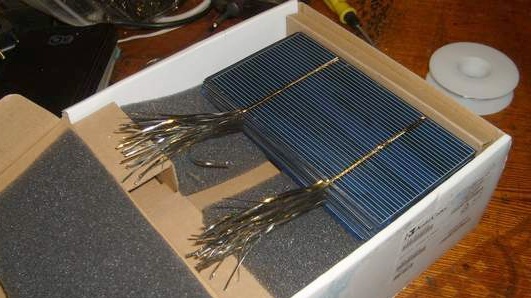
After searching for cheaper internet, I ordered 6 sets by mail. In general, plans for the future planned to have a powerful solar power plant, so six sets of experiments were ordered immediately to understand what and how and to work out self-assembly of panels. In one set, 36 plates + 2 spare ones, in case they are damaged on the road or suddenly accidentally broken. The power of each panel from these sets is about 50 watts.
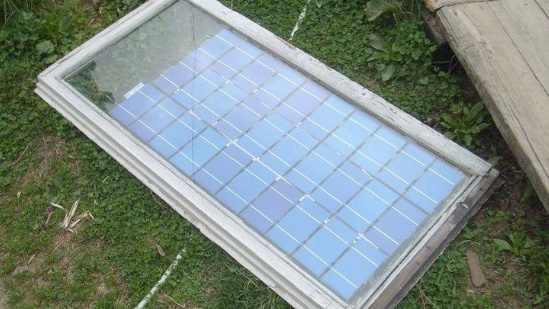
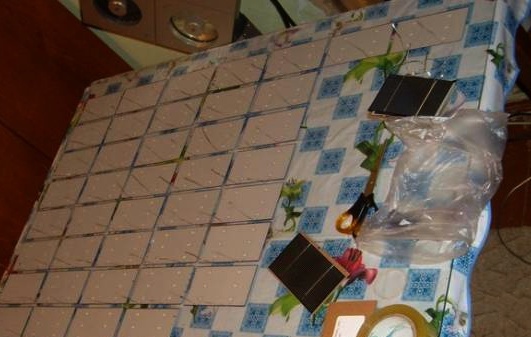
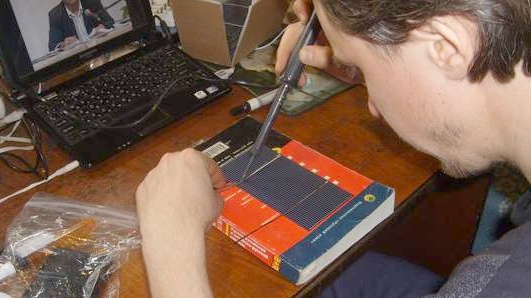
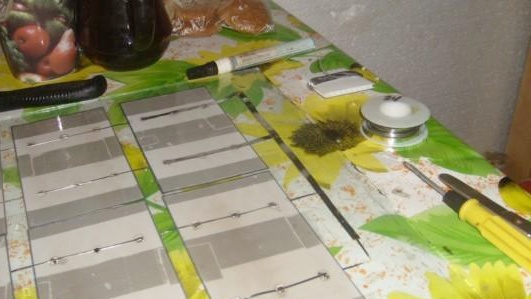
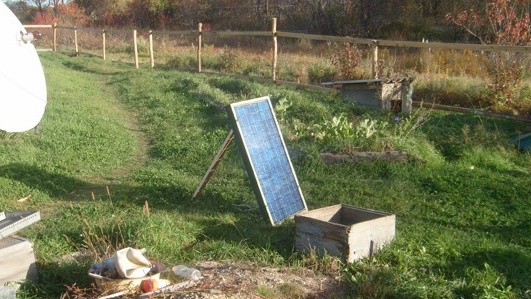
After unpacking the parcel in the first pack, I found a couple of broken plates and a couple with small chips. Most likely, they suffered on the road, as these elements are very fragile, approximately like an egg shell, and the thickness is only 0.2 mm. As the elements were in my hands, I wanted to immediately test them and see what happened. The first thing that was found was an old window frame, just one set of elements was placed in it, and it was decided to assemble the first panel from it.
The manual says that one plate gives a current of 3.5A 0.5V. Although in my opinion in real life it gives 0.6 V, judging by the measurements of the multimeter. Somewhere I heard that to charge a lead battery you need a voltage higher than it gives, for example 14 volts, so I decided that charging would probably be from 30 plates of 0.5 V, that is 15 volts.
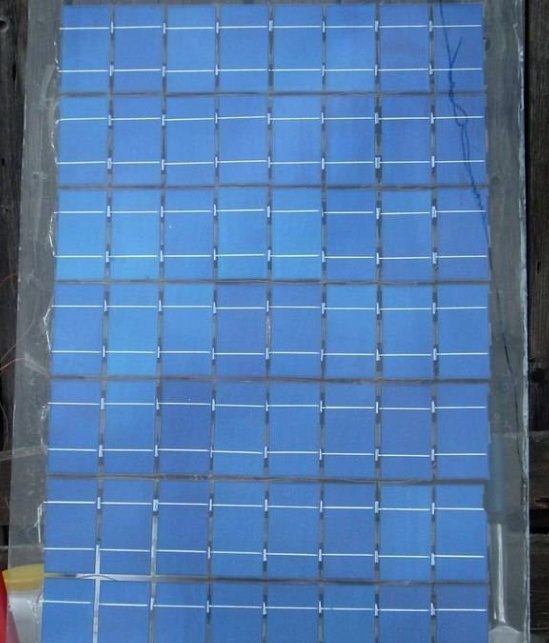
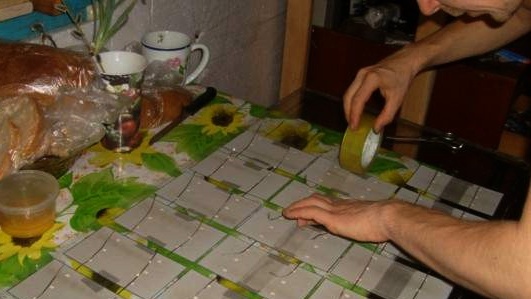
After a little reflection on how to attach the elements to the glass, it was decided to just use tape. He laid out the elements on the glass and fixed them in small pieces of adhesive tape, and then glued them at the seams with whole strips. After which it remained to solder the elements. In the package for each set was a pencil with a flux for soldering and a tape that connects all the contacts of the plates.
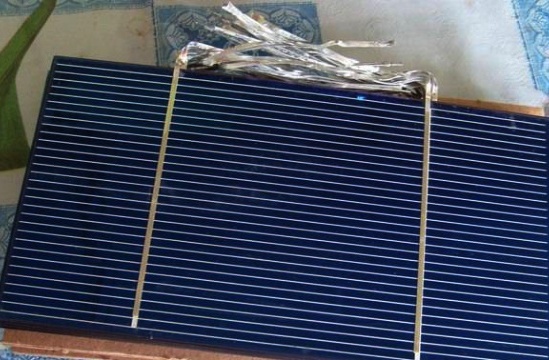
Yes, by the way, you don’t need to be afraid of those plates that without soldered ribbons on the front side, ribbons, although long, are soldered very simply. Just attach the ribbon and warm it up, and a thin layer of tin on the ribbon melts and sticks to the contacts of the front side. This is the first solar panel.
The back side of the panel shows how the contacts are soldered.
Well, the front view, nothing complicated seems to have happened.
The next day, various tests of this panel began. First of all, I measured the open circuit voltage, that is, without load, it amounted to 17.2 volts. Then I tried to connect a 12-volt portable TV, it worked, while the voltage dropped to 14 volts.
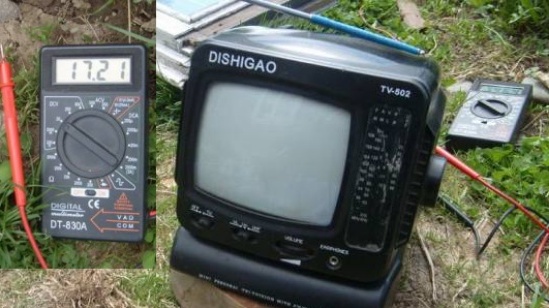
The photo is not very visible, but in fact it shows normally, just nothing is visible on the screen on the screen. Further, already through a 12 / 220V inverter, I tried to connect different things to the panel electronics. If the sun was working in the sky, then the netbook was working, but with the slightest cloud, the inverter turned off and the netbook naturally, too, as its internal battery was completely discharged.
And the next day I tried to connect a music center. It has a 12V input. Basically, it worked perfectly, but when it was becoming unbearably cloudy, at a volume of "full" it began to wheeze and the voltage dropped to 10V. At the same time, the center and the PDA did not want to work from the inverter. The inverter was cut down, but it was all in cloudy weather. I think that if you raise the power three times, then there are three panels to connect, then all the electronics would work perfectly, well, in the sun, one panel would be enough.
I realized for myself that it is necessary to calculate the system specifically for cloudy days, then there will be no problems at all, since there are always cloudy days. As practice has shown, out of 6 sets you can assemble 7 panels, even more plates will remain. I will describe it in more detail in the next article, but for now I have found a large glass on which the plates of two sets are placed right away, I will think about how best to do it.
A month has passed since the manufacture of the first panel. That's what I managed to do during this time.
A small story before.
At one time, one of the first settlers built a house in the field. They later moved back to the city, although I don’t know for sure, I won’t lie. This house they are a man, not like-minded. But he was a business man, a little modernized something in the house and maintained in good condition, built a bathhouse and toilet. And so he also moved and decided to sell this house, and I bought it. That is, he bought and drove out of town to the estate. Since this house is already ready in essence, it is warm, a good stove is there, I decided to work on this house tightly, make repairs, modernize and already move from the village there. Therefore, I now deal with it tightly and I will probably write articles about experiments already in it.
This is how it looked at the first moment when I bought it.
But back to the solar panels.
Thinking about the further manufacture of frames for panels, the idea was to make a frame with a groove under the glass, and then edge out the edges of the glass so that moisture would not get. This is to say that, while exploiting that first panel assembled on a window frame, I noticed that during rain the drops that fall on the roof next to the frame rebound off the roof under the frame, and the frame with the elements gets wet from below. Water falls on the elements, seeps between the plates and glass and dries for a very long time. Moisture leads to oxidation of the tracks, which are, as it were, painted on the plates themselves, which is not very good. After such observations, it was decided to close the lower part with a film so that water would not get there. (Immediately make a reservation, it was an unfortunate thought). But first things first.
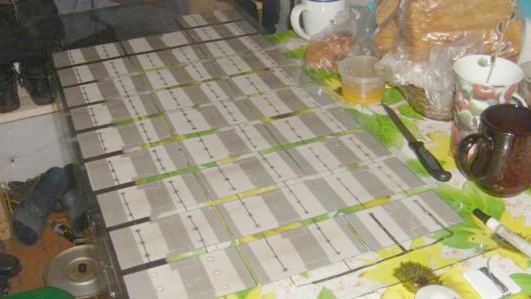
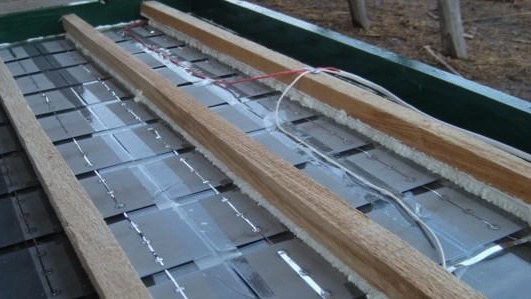
The next panel was assembled on a large glass, where two sets of 28 plates were to fit immediately, each assembly of 28 plates is 14V, just for charging a lead battery. At first, all the plates were simply laid out in their places.
Then I pasted the rows with tape, it turned out so.
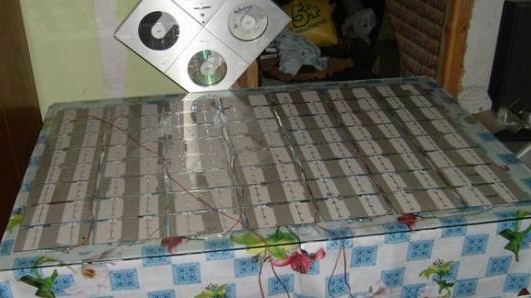
As you can see, all the connecting strips remained between the adhesive tape and the soldering spots were also not glued.
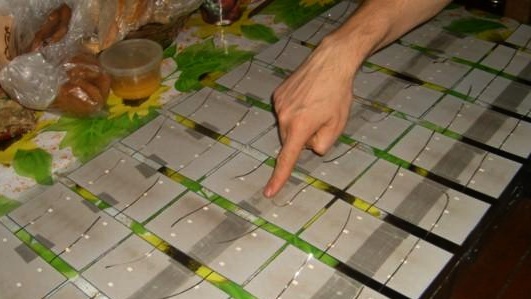
Well, then it remained to solder all the elements into chains.
In the process of soldering, it turned out that I laid out the rows of plates a little incorrectly, since the joints of the soldered chains were on opposite sides, it was necessary to reverse every second row, then it would be more correct.
Well, the socket in general turned out.
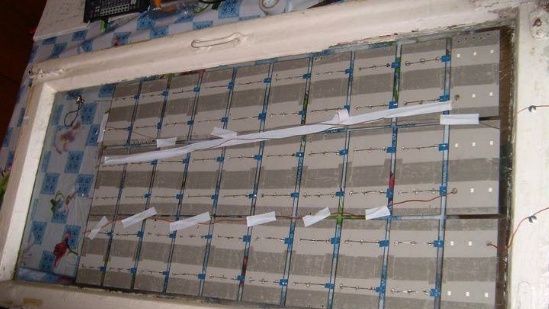
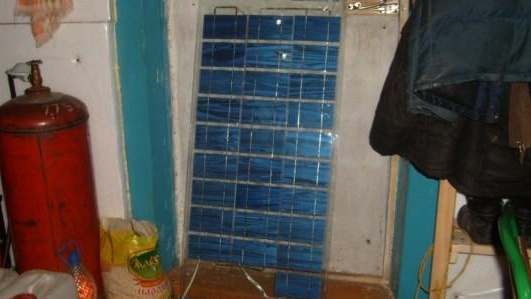
Then this glass was inserted into a makeshift frame. First, a film was placed on the frame, and then glass was inserted into the grooves of the frame along with the film, tapes were glued to the glass around the perimeter to provide a gap between the film and the glass.
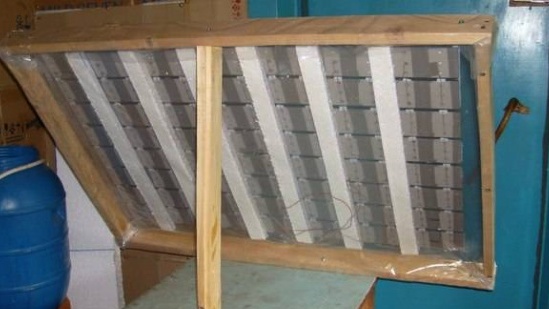
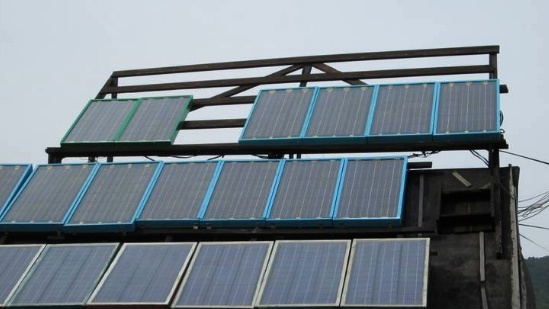
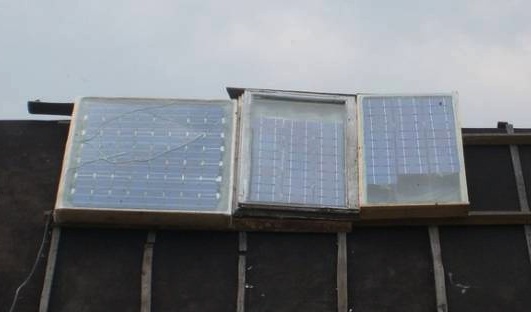
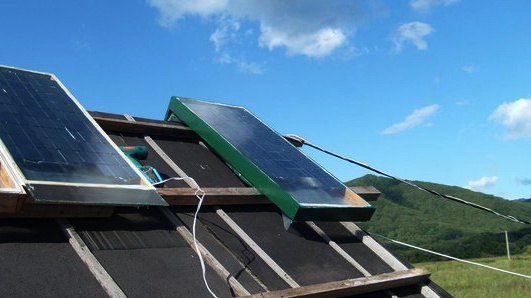
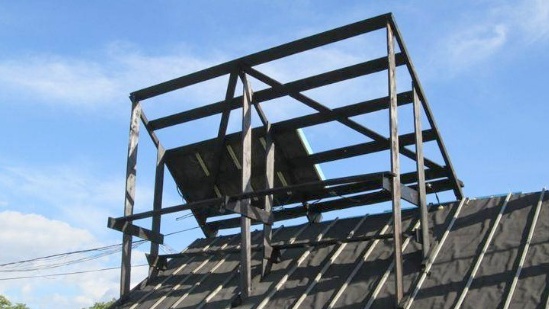
And I already mounted the finished panel on the roof of the house. This is of course a temporary solution, in general many panels are planned, so you need to think in advance how best to fix them and which guides to come up with. In the meantime, something else needs to be redone on the roof, in particular, to slightly rebuild the canopy.
After some time, an unexpected thing happened, after a few hours the glass of the panel took and burst. Perhaps this is due to the fact that I very tightly fitted the glass in the frame or at the bottom of the stick, which were adjacent to the foam, but all the elements remained intact, and smeared the cracks with silicone, though there was no transparent, so I used white. Judging by the readings of the multimeter, the efficiency has not fallen much, it will be necessary to redo this panel again.

Now there are already two panels on the roof, the very first one from the old window frame and this cracked one, The first panel was also insulated from the bottom with a film from the moisture, but not hermetically, but simply screwed with screws with large hats and that’s it. Practice has shown that after rains everything is dry. The first two results gave some experience and conclusions, based on which the third solar panel was launched.
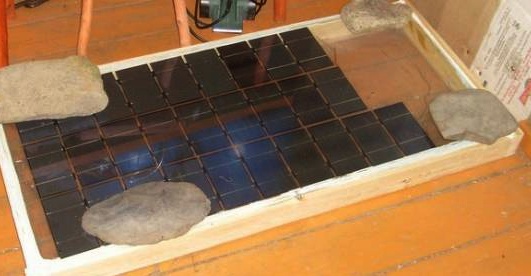
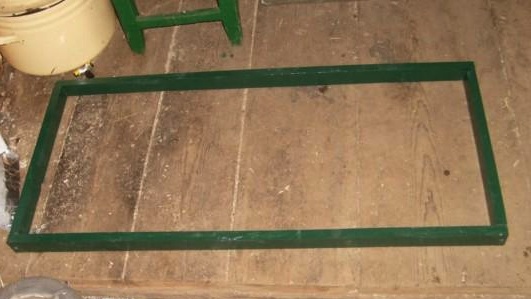
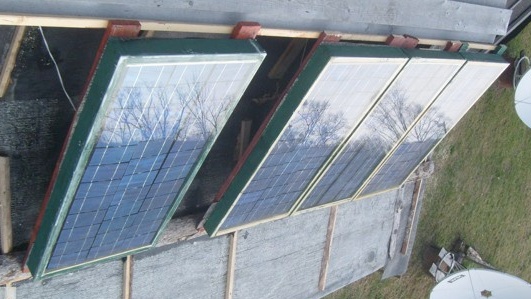
Now I made the frame without any grooves, I just assembled the box, walked around the perimeter with silicone and put the glass on the frame, basically glued the glass with the elements to the box on silicone. From the bottom, the elements were isolated from moisture by screwing a film with screws as in the previous panels.
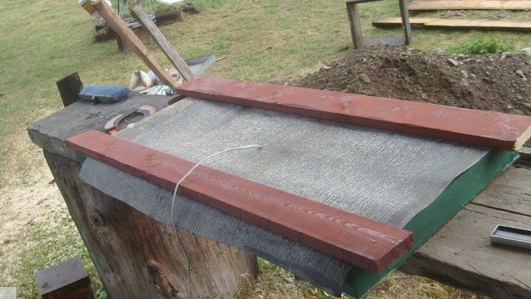
In the photo, for better pressing, while the silicone grasps, put additional loads in the form of stones. Verification by rains was successful, all elements are dry, so they do not deteriorate from moisture.
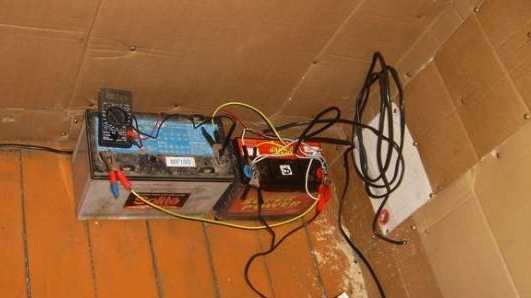
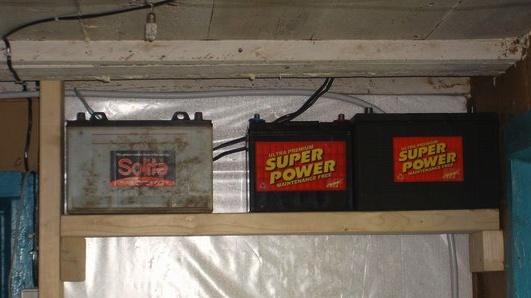
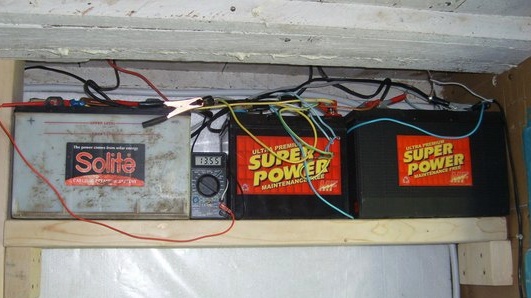
Inside, now there are 2 batteries for energy storage, the first with a capacity of 100A / h, the second 55A / h. I already had a big one, and I bought the 55th as the easiest one to carry on hand to the house. Batteries are connected in parallel. This is temporary, then I think to put two identical larger capacities and it will be normal.
The first days of operation of this system in action.
Almost every day in the morning already in the house, I turn on the netbook and speakers through the inverter to cut the music. A netbook consumes almost 50 watts, and speakers if the bass is “full” and the volume is then also almost 50 watts. While I didn’t live in the house, and only came in the afternoon on batteries, the charge was normal, usually from 13.2 to 12.7, once dropped to 12.6.
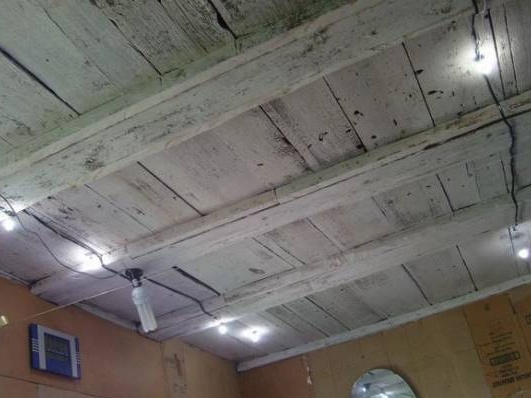
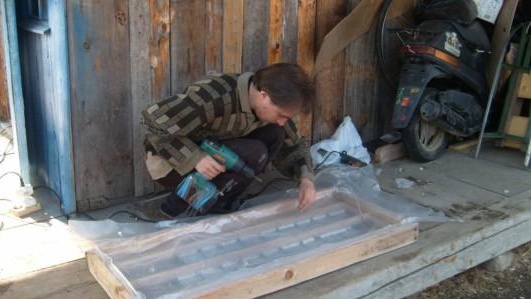
One day it was necessary to work with a power tool, the boards to suffer, to file with a jigsaw, to drill holes with a drill. In the evening on the same day I also decided for the first time to spend the night. I connected diode bulbs, there are 4 of them now, two-contact automobiles. These bulbs of a new generation are already not shining with a bluish light, but yellow, like ordinary incandescent light bulbs. Before I went to bed, the multimeter on the batteries showed 12.2V, and the inverter was cut off at 9.8V, which means there is still a lot of energy. The next day, in the evening, the batteries were charged somewhere up to 12.9V.
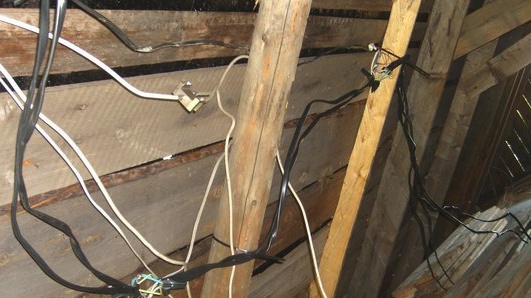
Then you will probably need to write a separate article on what and how it works. And how all this can be used, and what it gives. Focus on internal wiring and devices that can be powered by batteries.
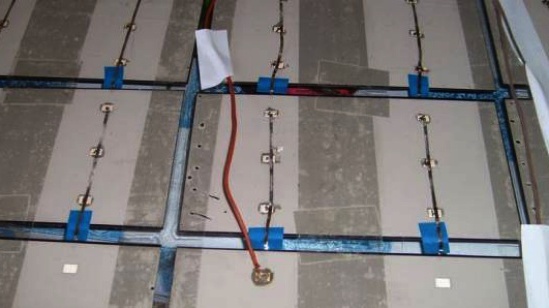
House wiring
Let me remind you that I have already used up 4 sets of elements by assembling four panels, one of which turned out to be large, 2 sets of 28 plates, which equals 14 V., got into it. In general, in essence, I made five of the four sets, a double panel in a large frame.
Four (5) panels worked for more than a month and now I completed all 7 solar panels. Of the six ordered, I generally got 8 assemblies of 14 volts. By the way, I wrote that the kit is 50 watts, but actually 75 watts, the total power of the elements is 450 watts. But when I inserted the eighth panel into a wooden frame, the glass cracked, and several elements were damaged, I found a new glass, but did not begin to redo it yet.
Here are some more interesting conclusions made. To the back side of the plates, where there are squares for soldering, it turns out that there are five not only in these squares, but also in any place since there is contact everywhere and everything works the same way. On the front side in exactly the same way, all the tracks are interconnected. If they are measured with a multimeter among themselves (Ohmmeter), then the resistance between all tracks that do not even intersect is zero. This means that even the broken-off plates still work, and small fragments can also be used if you solder the wires to them.
Well now I’ll tell you what and how to connect.
All seven panels are connected in one wire, which goes to the batteries. If there is no lighting, the panels themselves consume energy, so that the batteries did not discharge at night, a large diode was put in the wire break, which I dropped out of the old computer power supply. The diode, during the day when the sun, is noticeably heated, but the main thing is that all the current passes, and the rest is not important.
The first wiring around the house went to lighting, four LED bulbs. So also from the inverter I launch a powerful energy saving. By the way, about the energy-saving lamp. I brought it from the city, it says it shines like 180 watts ordinary, but it consumes 36 watts. I took it to run. The 300-watt inverter did not pull it, although it pulled an ordinary bulb with a 150-watt incandescent coil and also speakers and a receiver at the same time. The energy saving starts only through the second inverter, which is 800 watts.
According to the testimony of the multimeter device that is connected to the battery, it consumes an energy saving clearly more, somewhere around 80 - 100 watts. But LED bulbs consume very little current compared to their brightness, so I bought 6 more bulbs, it turned out a total of 8 pieces and it became quite bright. But if you do something small in the light, then your eyes get tired, but still I would like to be brighter. Well, I think I’ll gradually increase the brightness, though it’s an expensive pleasure, one such light bulb costs 150 rubles.
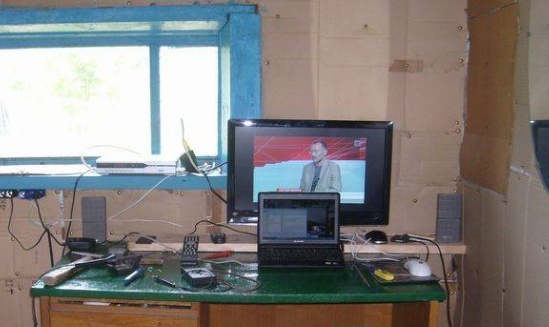
And it looks like a desktop, a netbook with speakers and a new TV that is powered by 12 volts. It’s just that the screen on the netbook is too small to watch something without sitting at the table, and this is a TV with a decent screen, and most importantly it works from 12 volts and consumes only 3A, this is 36 watts / h.
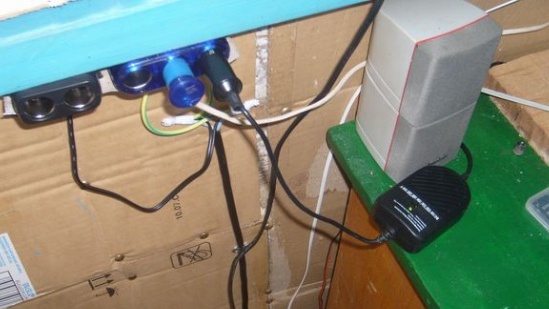
As sockets, I use car splitters that are inserted into the cigarette lighter, I saw off the back part that is inserted into the cigarette lighter and solder the wiring, and the whole outlet is ready. It turns out very convenient, especially since almost all electronics have now been adapted for cars.
Still from the lighting on the street there are two autonomous lamps that work from the built-in solar panels and themselves light up as it gets dark. Although it does not shine brightly, it’s very convenient at night to see everything in the courtyard and you can walk without fear that you will come across anything.
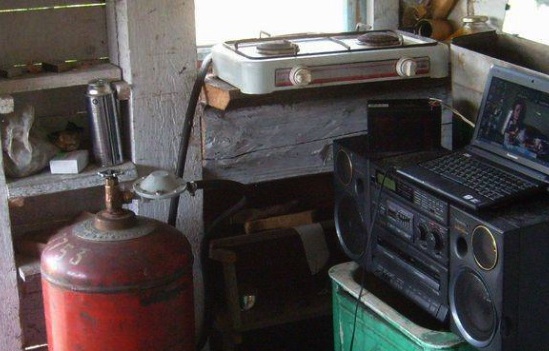
Well, I cook food on gas.
Meanwhile, the solar power plant continues to develop.
During the operation of this mini system, some points were clarified. When I had only three panels, it seemed that everything was fine, the batteries were charging, but when I put 4 more panels, something special did not happen and the energy quickly ran out in the batteries, I thought that there was simply not enough capacity and I added another battery, but no energy was added.
Perhaps if I first studied all the intricacies of building a solar system, I would have avoided banal errors, but I went through practice and until that moment I considered the system to work normally, especially since I had no experience and there was nothing to compare with.
It was noticed that if the inverters are connected through extended wires to the batteries, then energy is lost. If you connect, for example, when the inverter is on batteries, a jigsaw or a pump, then everything works, but if through an extension cord, the pump barely shakes, and the jigsaw does not start at all, the inverter simply cuts down.
From all this, I concluded that the current is lost in the wires. When there were only three panels, the losses were small, and with the addition of panels the wire cross-section was simply not enough to pass so much current and very few amperes reached the batteries.
And I, unknowing of these subtleties, drew a simple aluminum wire with a section of 4 mm from the panels. I do not know much about sections and electrics, I only know that when you come to the store, they always write thickness on the price tags with the numbers 2.5 / 4/6 / 10/16, and then I did not look.
As a result, as a temporary solution, it was decided to at least reduce the length of the wire from the panels to the batteries to reduce losses. Thinking how to do this, I decided to raise the batteries to the ceiling itself.
From a board I made a shelf for batteries, fastened it to the wall with long screws. Since the regiment will be in the hut, then it was molested and then polished with a “grater”. It turned out soundly soundly.
So, in order to shorten the length of the wire, I decided to connect and skip the wire a little differently on the roof. Well, for one thing I decided that it was necessary to paint the box of panels so as not to be so destroyed in the open air. I decided to run the wire not under them, but under the roof directly through the attic to the house, and in the attic it is convenient to combine all this in any weather.
The panels had to be unscrewed one by one to paint the side parts.
As a result, the length of the wire was reduced by almost two, I cut the wire and connected 4 panels to one piece of it, and 3 to the second one. I thought, if anything, I could try to charge the batteries separately in the future. Maybe it will be more effective. As a result, it turned out that in addition to the fact that I cut the wire in 2 times, I also somehow thickened it.
As a result of this modernization, during the charge, the voltage increased by one volt, that is, on average, before the multimeter showed at a charge of 12.5-12.8 V, and now the same thing only 13 volts, and not 12. Without load in the evening it generally showed 14.3V.
A few days later he added another wire from the panels, also aluminum. He doubled it up and connected in parallel the same way as the previous wires. The result was such a thick bundle of cables. And the tension has increased slightly. Before connecting to the multimeter it showed 13.15V, and at the time of connection it became 13.30V, as I understand it, the power increased, and, as a result, the voltage. On my multimeter, you can only measure current up to 10 A, so there is nothing to measure what current is coming from the solar panels.
So far, so I put everything together in the attic.
Now it became clear that the thicker the wires, the less loss and more energy goes into the batteries. I think in the future to buy copper wires with a thick section and replace these aluminum with them. And I also want to put stamps on the batteries so that the contact is better. Well, then there will be seen what and how.
Making solar panels do it yourself
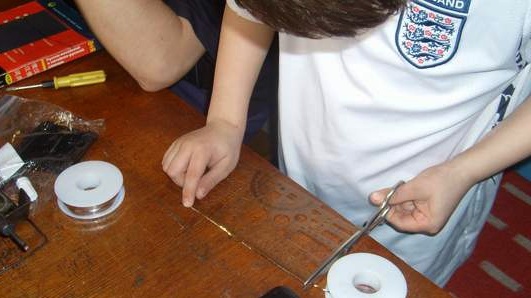
Finally, another batch of solar cells came. This time I decided to save money and ordered plates without conductors on the front side. The set contains everything you need, a pencil for soldering and tape for soldering, thin for soldering elements, and wide for desoldering blocks of elements. These elements are slightly different, some are lighter and as if matte or something, well, it’s basically not important, the main thing is to give energy. First you had to solder the strips to the front side. To do this, we first cut them to the desired length.
Next, the flux is applied to the track with a pencil from the kit.
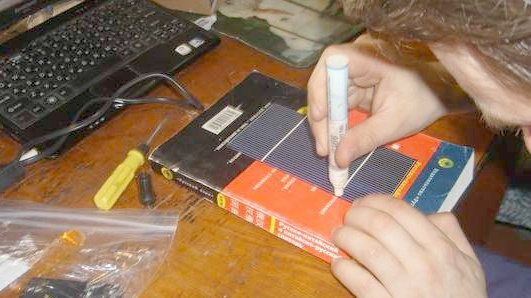
A strip is applied from above and a light soldering iron is needed on it, after which the strip is soldered and everything, the element has become like those from previous sets.
Everything is simple and good, though it's long and monotonous, so I do it with breaks so that my back does not get tired.
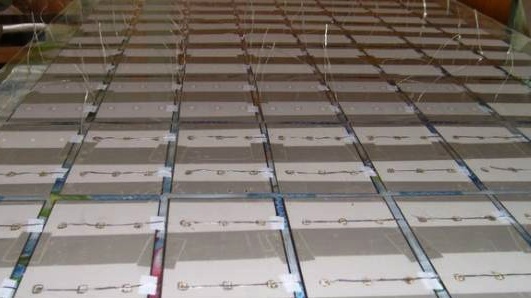
He began to collect new panels in the photo process. There are no fundamental changes in the assembly, so first I glue each element with small pieces of adhesive tape at the edges, and then I glue all the elements with wide adhesive tape tapes.
Further, all the elements are soldered.
The result is such an almost finished panel.
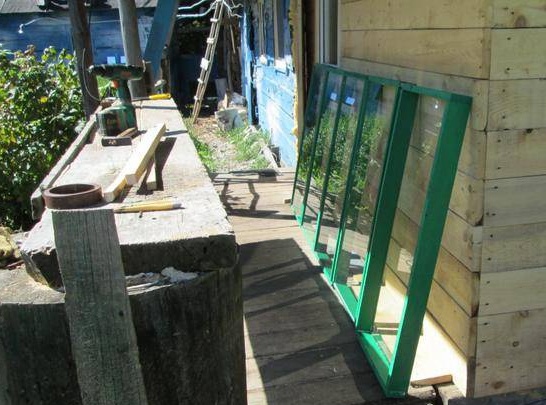
For new solar panels, I prefabricated and painted here such frames.
I connect the wooden box with the panel with the help of silicone sealant, on top of the box is a load of stones in order to keep the glass pressed well while the sealant dries.

Since the elements on the glass are held only by adhesive tape, they can fall off, in this regard, I decided to additionally fix the elements so that they would not go away. And the mount came up with this, with the help of slats and mounting foam.
Thus, I decided to make the previous solar panels. Of course, how long is all this I do not know, but if that can always be repaired. I also cover the back of the panels with an additional film, which I screw onto the screws.
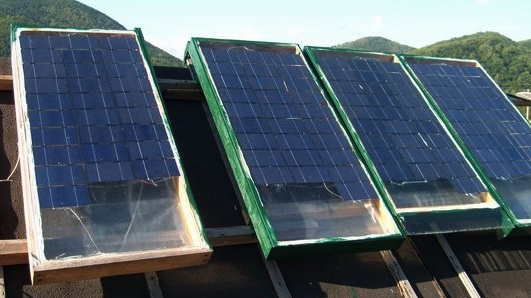
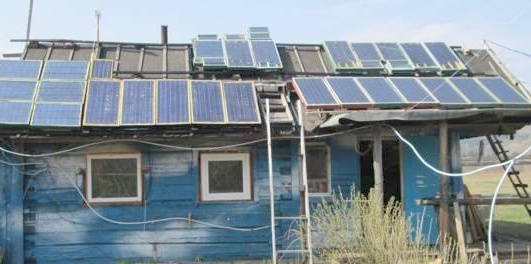
So the roof looked at the time of remaking the panels, remade 4 pieces already. + 1 new. Now there are only 8 panels in operation! (Big is 2 in one). Small is for charging flashlights, made of fragments.
Winter has passed, during which there were all kinds of experiments on electricity and all kinds of electronics. From the fragments of the elements, several small panels were assembled. By the summer, the total number of panels was 10 pieces, plus these small fragments. Autumn has already come and another package has arrived with elements for the manufacture of new solar panels.
This time I decided to order a kit for 1 kW, though not standard, that is, a set of damaged plates. Such elements were cheaper and I decided to try and see what happens. Here is the package.
Having selected elements for the new panel from the set, he set about manufacturing it. This time, I again decided to assemble a panel of 36 elements and connect through the controller.
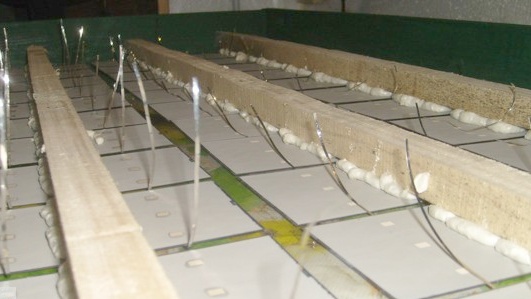
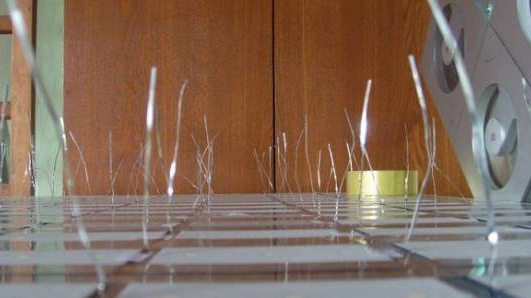
Now I did not attach the elements to the tape, just laid it out evenly, set the bars on top and foamed the elements. Then he unzipped all the contacts. After he unscrewed the bars with the elements half a centimeter from the glass. I did this so that if suddenly the inside perspires, the droplets will slide along it without affecting the elements and they will always be dry and will not be oxidized.
I tested the finished panel in the evening sun. The current was 2.5 A and 20V.

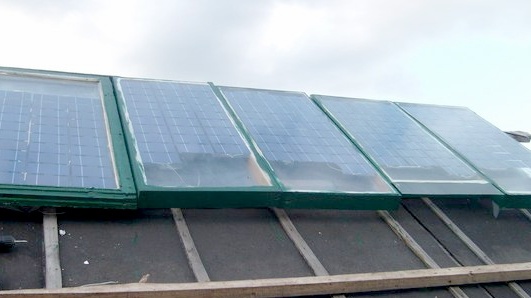
He closed the underside of this panel with roofing material, it seems to be quite good.
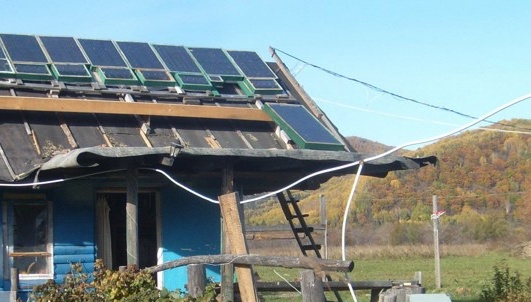
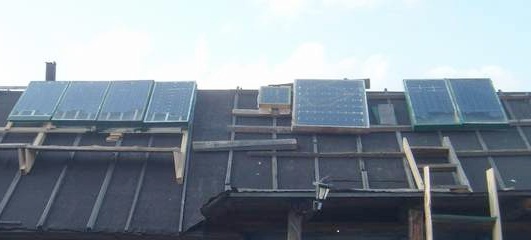
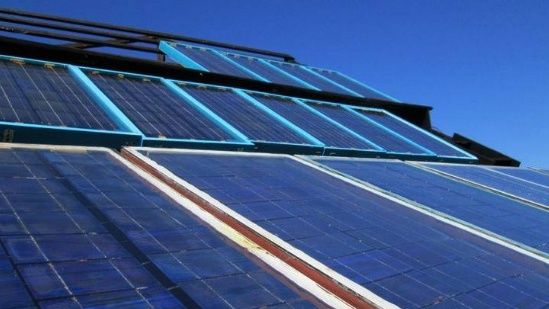
This is what a roof with solar panels looks like now.
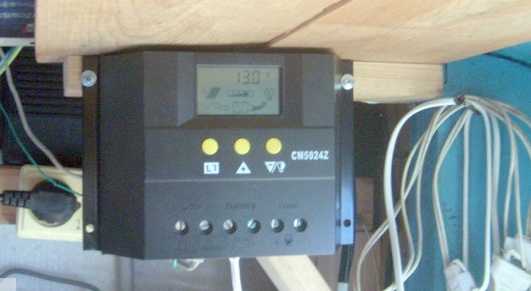
And here is the controller for the new solar panel of 36 elements, let's see if the use of the controller will justify the hopes. I selected a separate battery for the controller, the smallest one was removed from the general system, it is 55A. As a load, I hung up a Wi-Fi access point. Also, a new 150A battery was added to the system.
Then I continue to assemble the panels, the green paint is over, now everything will be red.
I made three new panels, before winter I want to do as much as possible.
Here is another panel added, now in this row there are already four new panels.
In total, 7 panels were assembled, during the winter there were many small experiments and improvements. But now the winter has passed and the month of May has been in the yard. Again I decided to redo all the panels, still with the controller it is much better, and the current efficiency is greater, and in cloudy weather the charge goes better. Part of the panels has already been redone into 36 plates, as expected.
Took to redo the rest. I redo it so that I connect it from three into two panels. Those from the left, 3 blocks each.I unzipped the middle panel inside, as it were, on the floors, 12 plates came out. And, one block, it turns out to be 24, I took one panel to 24 and attached half of the next of the 12 pieces to it. It turned out 36 as expected. As a result, these 3 form, as it were, the 2nd full-weight panels of 36 plates. That is, in those 6 blocks, like 4, normal panels. As a result, below, it turned out 16 panels in total.
Further, all that remained was already decided not to bother with subtleties and made, from what was. And, It was the small remaining panels (4 plates in one) I simply screwed to the one that was 28 and the one that was 27 + 1 separately and another, in one, there was free space in the frame, I glued the plates there and added just one frame of 4. As a result, it turned out externally "zalipon" of course. :-) But, on the other hand, on 36 plates, and Amperage gives out normal. Those on the right have not yet been redone. And those that are from the top left, though they are 36 square meters, are not yet connected to the controller.
With the controller in sunny weather, the charging current rose to 39A, which is not bad enough for 16 full-fledged panels. I use the electric stove through the inverter now, the amount of energy allows, all the same, it does not fit all in the batteries, I burn the surpluses to good use.
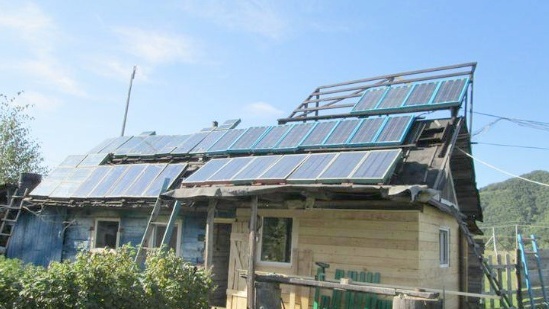
Over the summer, there was still minor work on the panels, and the assembly of the panels continued, which ultimately led to a lack of space for them on the roof. I had to do an extra rack under them. Now the roof is already like that.
I make new boxes under the panel.
From here it seems that the whole roof is completely covered with solar panels.

And this we cook tomato juice on solar electricity, connect the tile through an inverter and everything works.
Here it is, the energy of the sun.