When purchasing a pet, you must make sure that he lived in your house or apartment comfortably and comfortably. There are many ways to do this. One of them is the acquisition of a cat house. However, we will not talk about which house to buy, but how to make a house for a four-legged do it yourself.
Most modern apartments and houses live homework pets, cats or dogs. Many owners of four-legged consider them full members of their family, trying to make their living in a city apartment the most cozy and comfortable. And what could be more comfortable for an animal than its own little house corner?
Work in Kiev in modern markets, another type of trade offers a wide variety of makeshift houses for every taste and color. However, if you have creative imagination and desire, you can make a cozy home with your own hands.
So, what can we need to make such homemade:
- cardboard, 3 sheets (thickness from 3 mm);
- plush fabric in two shades: dark (1.5-2 m2) and light (1-1.5 m2);
- to warm the house from the inside, we use thin foam rubber;
- 10-12 meters of clothesline;
- silicone.
As the main tools we use:
- scissors;
- a pencil;
- a ruler (preferably metal);
- stapler used in repair and upholstery of furniture;
- a gun for silicone.
After all the necessary material and tools have been prepared, we proceed to the manufacturing process itself crafts.
The basis of any modern residential building is the walls and floor (foundation). We are guided by the same principle in our case. The dimensions of the walls and bottom can be arbitrary. We draw attention to the fact that the bottom for optimal strength is best made double, with a width of about 35 cm. It is unforgettable when making the bottom to make small sides about 4 cm in size, which we will need to hold the entire structure together. The height of the walls (rectangular shape) can vary from 40 cm and above, depending on the "dimensions" of the pet itself.
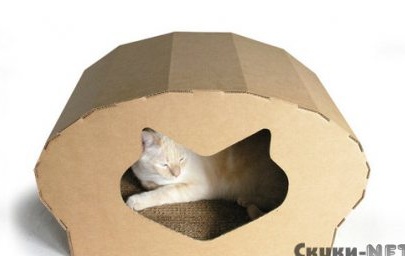
So, the bottom is ready. We proceed to the manufacture of the front (front) part with a hole-entrance in the form of a cat's head in the middle. To do this, we need a stencil with which we will outline the contours with a pencil. Carefully cut out the entrance with the scissors along the outlined contours. After the front part is ready, we use it as a sample for the manufacture of the back wall.
- the manufacture of side walls and roofs, which in our case will be one.At the edges of the structure, we also make sides of the same size as the sides of the bottom, that is - 4 cm.
After the main frame of the house is ready, that is, we already have a floor, walls and a full ceiling, it's time to prepare the fabric for upholstery. The edges of the plush fabric are passed through the overlock and, using the stapler, we fix the fabric on the cardboard.
- neat connection of all parts-blanks in one design. We connect all the elements from the bottom, that is, from the bottom using a stapler. In this case, we connect the sides of the bottom and side walls. The resulting seams are treated with silicone. As decorative elements, we use a clothesline, which, using silicone glue, we fasten along the edges of our house. In the same way you can decorate the entrance. And now, voila, the house for your beloved four-legged friend is ready. As you can see, everything is quite simple and fast.


