To date, the invention of robots with a soft body is the most popular and promising direction. In such robots there are no gears, no engines, no belts, or other similar elements. The role of all these elements in such a robot is performed by his body. As a material, rubber, stretch plastic and various other types of rubber can be used. Managed such robots can with compressed air or with the help of elements that change their location when an electric current passes through them.
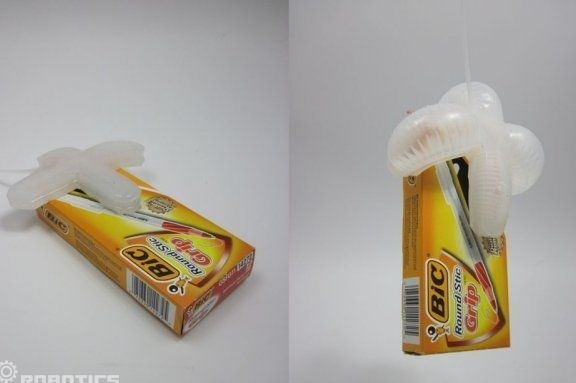
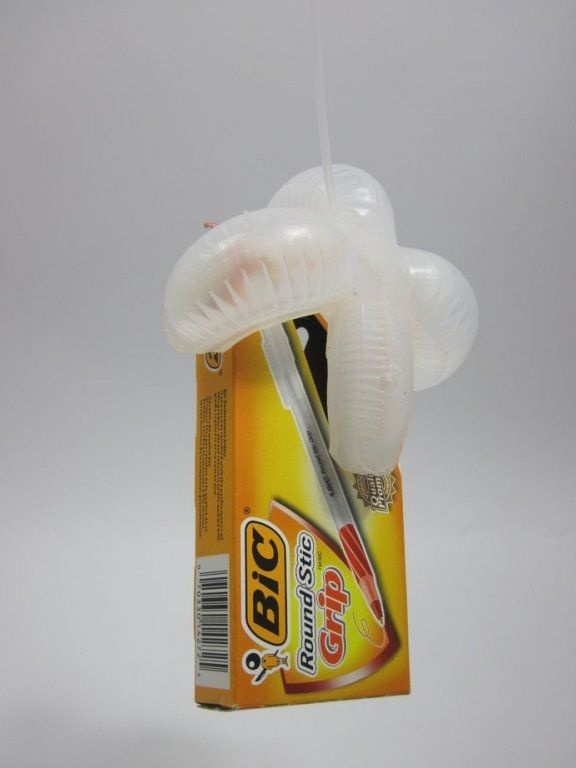
Specifically, this article will discuss how to make a soft-bodied robot, with which you can take various objects, and it will work due to compressed air.
Materials and tools:
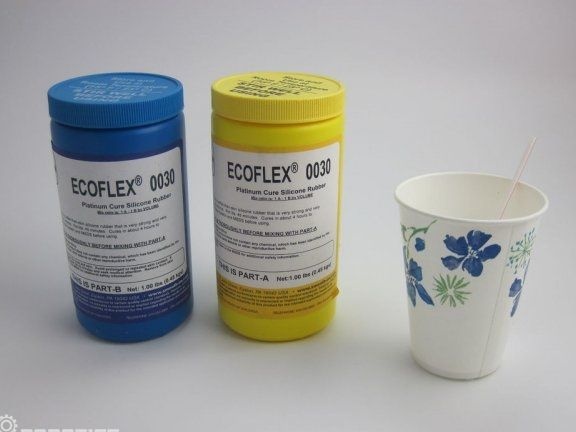
- Ecoflex 00-30 (from one such test kit you can make about 5-10 robots, it all depends on their size);
- 1/8 "ID threaded silicone tube, 1/4" OD (about one inch, 5236K832 on McMaster-Carr);
- one foot of 1/16 "ID, 1/8" OD polyethylene tubing (numbered 5181K15 at McMaster-Carr);
- a pear is needed, Polaroid Super Blower is best suited;
- forms for printing 3D;
- a baking tray or a plastic tray;
- scissors, disposable rubber gloves;
- paper towels;
- popsicle stick or coffee stirrer;
- an oven for such experiments.
Manufacturing process:
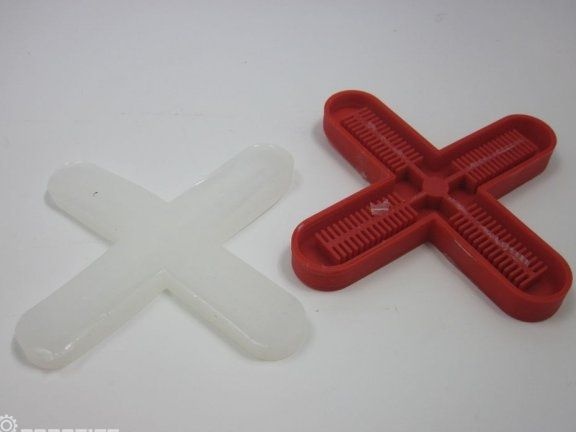
Step one. Create or order a form
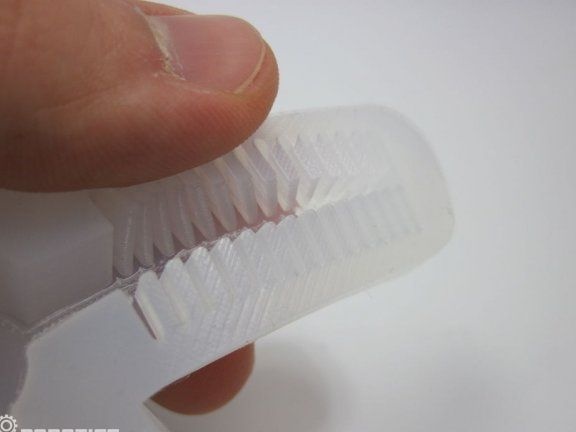
If you have access to a 3D printer, just download the 4-leg -gripper.stl file and then create a form on the printer. If a 3D printer is not available, then it can be ordered via the Internet. To create a shape you need a material with a smooth surface finish. Otherwise, removing the workpiece from the mold will be problematic.
In addition, if you have access to CAD software, you can create forms yourself.


Step Two Making Silicone Rubber Blend
A mixture called Ecoflex will be used as the rubber for casting the body of the robot. Such rubber is sold in bottles and these are two substances that must be mixed before casting. The formation of silicone rubber after mixing takes about 4 hours at room temperature. If the temperature is 150 degrees, then 10 minutes is enough.
Although this substance is not toxic, it is not recommended for a long time to keep it on bare skin, as it can cause irritation. In this regard, it is recommended to use rubber gloves for work. The mixture must be mixed in a ratio of 1/1, the mixing time should not be less than 2 minutes.
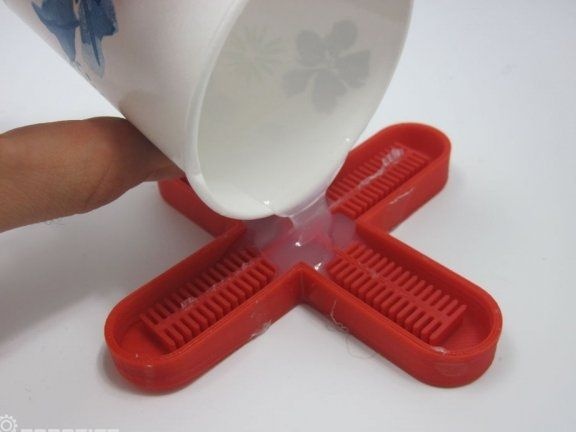
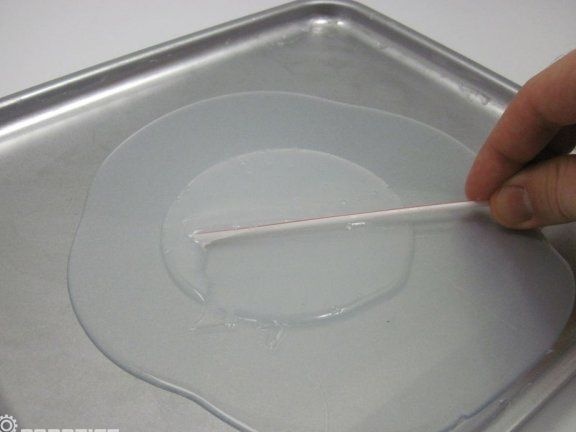
Step Three Fill the form
Now Ecoflex needs to be poured into the prepared mold. You need to pour slowly, since the mass is quite thick and if you tilt the cup too much, you can pour excess. Now you need to expel air bubbles from the mass, this can be done with a coffee stirrer, a toothpick or any other suitable object.
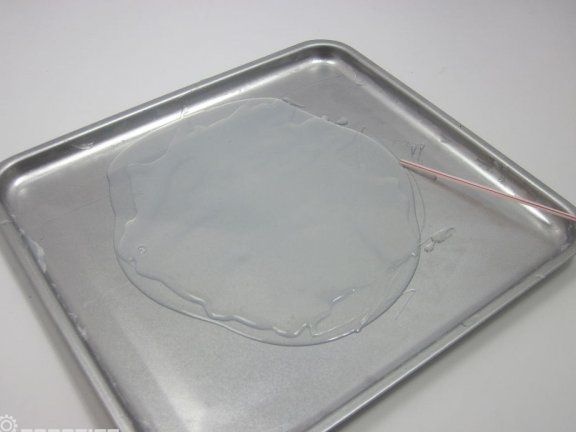
Step Four Pour the medicine onto the tray
Now Ecoflex needs to be poured onto a metal tray. As a result, the dimensions of the puddle should be such that it completely surrounds the plastic form. You need to wait until Ecoflex hardens, for this it must be left at room temperature for 4 hours.


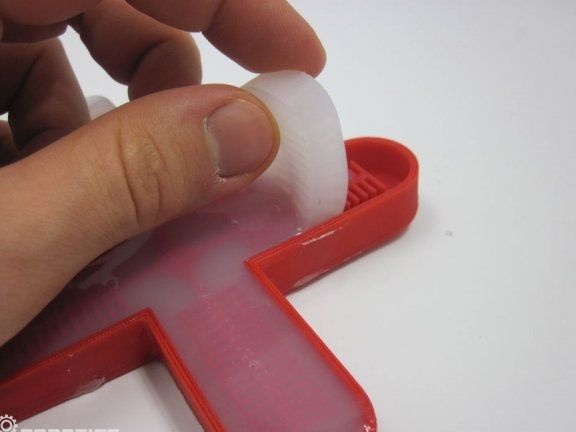
After 4 hours, you need to check whether the rubber has frozen on the tray and in the mold. It should not be sticky. If the silicone is frozen, it can be carefully removed from the plastic mold.
Step Five Apply the next layer of silicone
Now you need to again make a new batch of Ecoflex and apply it on top of the already dried layer on the pallet. After this, you need to wait a bit for the silicone mixture to grip a little.
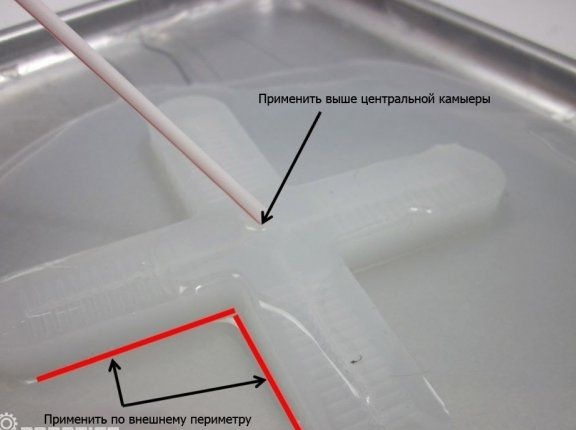
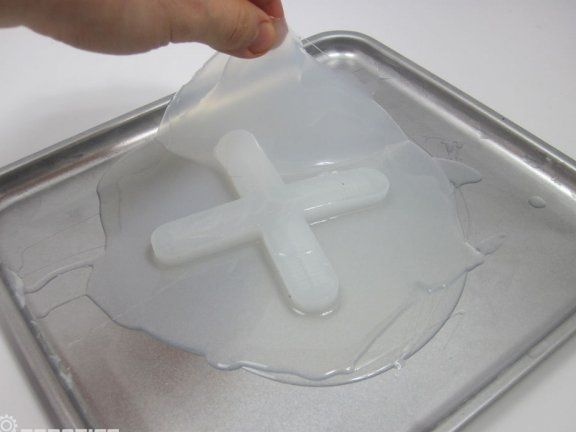
Step Six Bonding two halves of a workpiece
Now you need to take the workpiece extracted from the plastic mold and stick it to the silicone pool that was formed on the pallet. The workpiece is glued down by air channels. Next, you need to take a coffee stirrer and evenly distribute the silicone mixture around the entire perimeter of the workpiece. This will make the robot airtight.
After this, the glue must be allowed to solidify, it will take four hours.
[center]

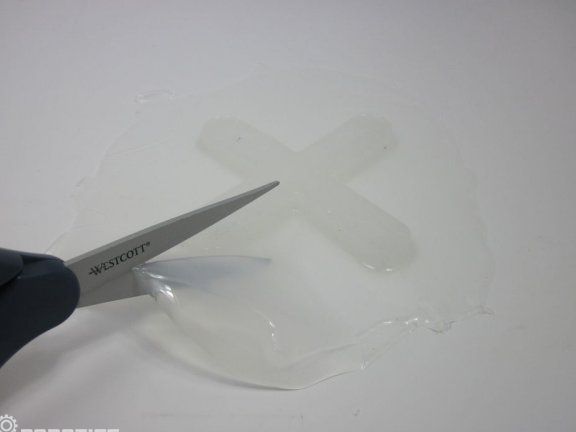
Seventh step. Final manufacturing step
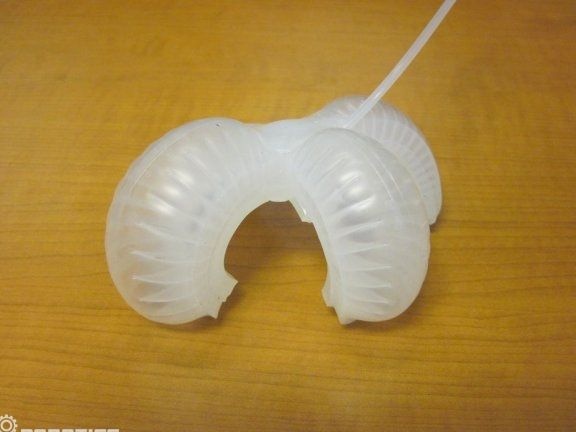
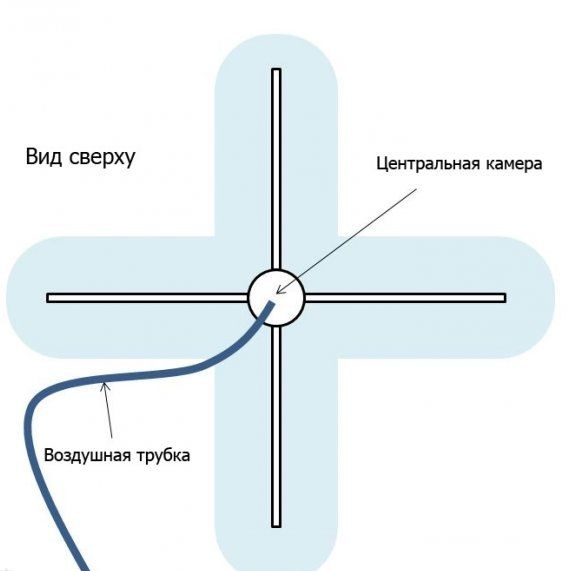
After the rubber hardens completely, the entire silicone mass can be removed from the pallet. Then scissors are taken, and the body of the future robot is carefully cut. In this case, you must be very careful, because when you open the air channels, the robot will be damaged.
Now a plastic tube is taken, one end of it must be cut off at an angle of 45 degrees. Further, with this sharp end, the robot makes its way in the middle at an angle of 45 degrees. Then it remains to connect the tube to the pear, for this purpose a rubber tube is used.
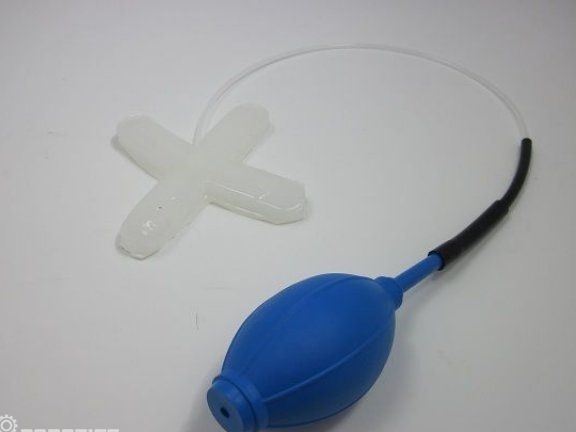
That's all, the robot is ready. When you press a pear, air will enter it, and all 4 legs of the robot will be compressed. Thus, you can take a variety of items. But when working with the robot, you need to be careful, because at too high a pressure a break can occur.