
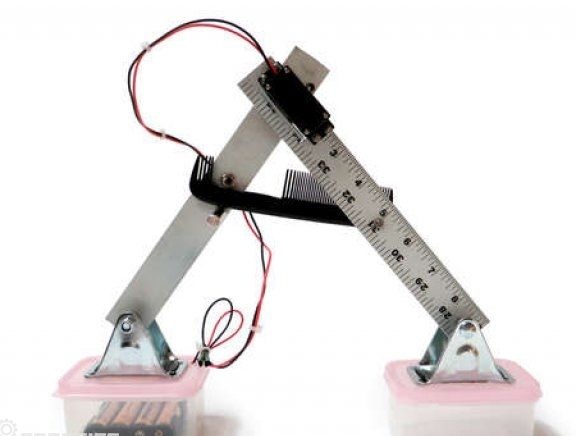
The peculiarity of such a robot is that it is assembled from a measuring line and household items. Robot refers to the walking type. According to the author, with all the necessary tools and materials, assembling such a robot will take only a couple of hours.
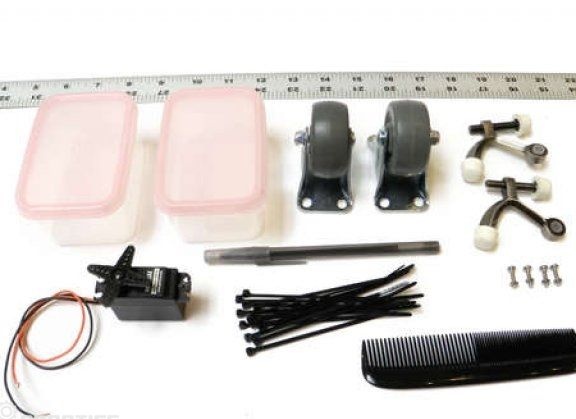
Materials and tools for assembly:
- servomotor configured for direct rotation;
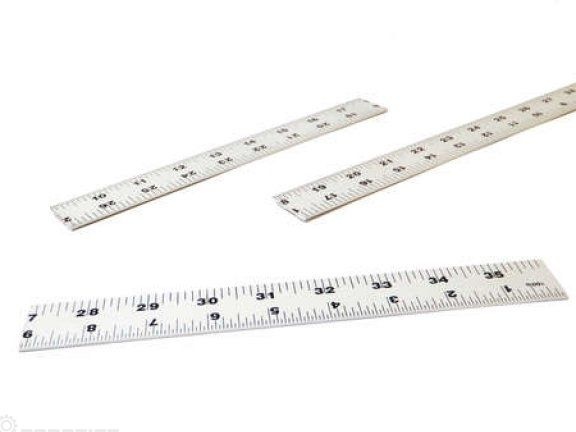
- aluminum rulers of size 2 - 18 ";
- two small food containers;
- two rollers with wheels 2 "- 3" in size;
- one ordinary ballpoint pen;
- one scallop;
- ten small bolts with nuts;
- four small washers;
- one metal counterweight 2 "- 3";
- four rivets;
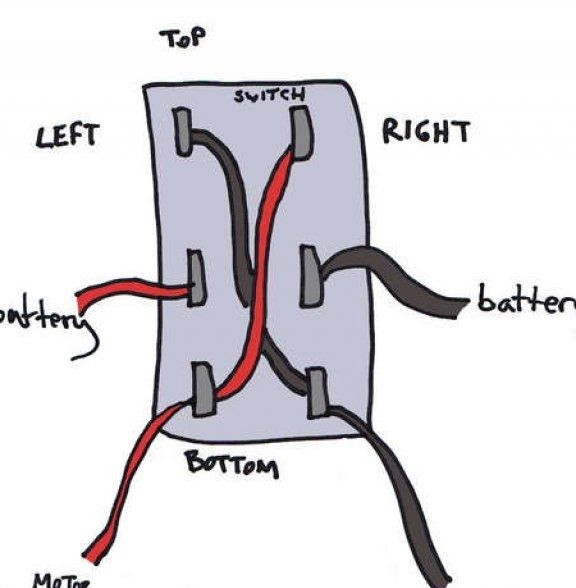
- one switch type DPDT;
- AA battery holder;
- four AA batteries;
- two wires of different colors (black and red);
- electrical tape.
The manufacturing process of the robot:
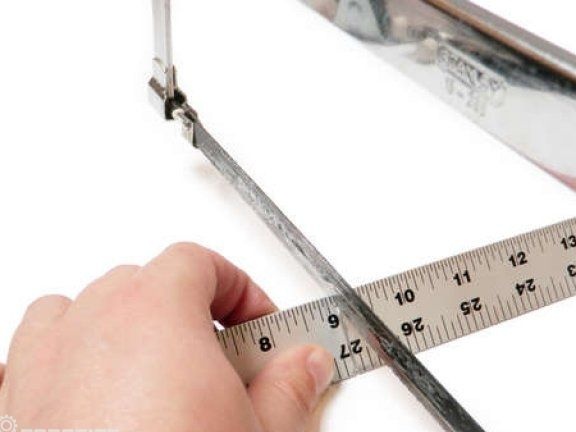
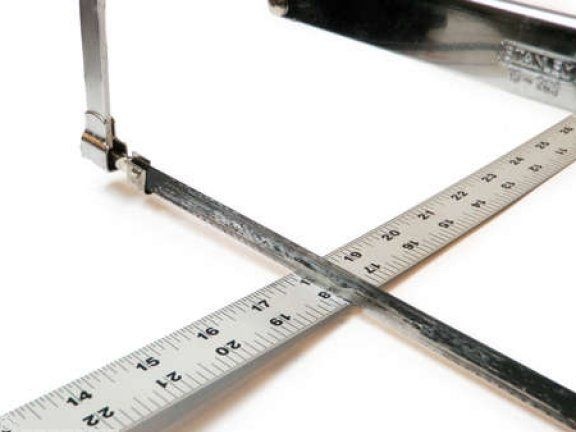
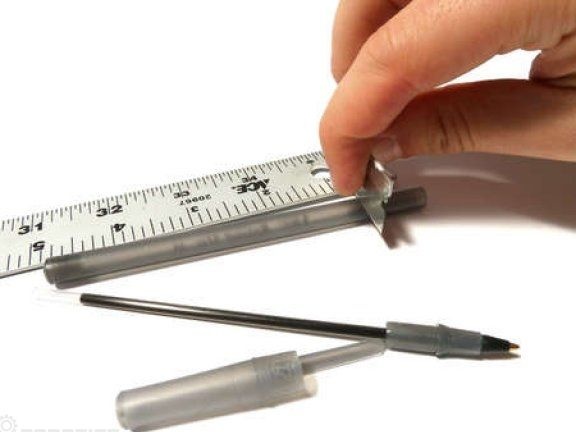
Step one. Cut the ruler
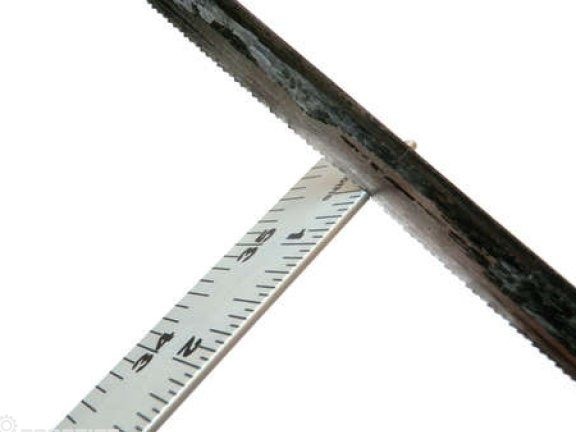
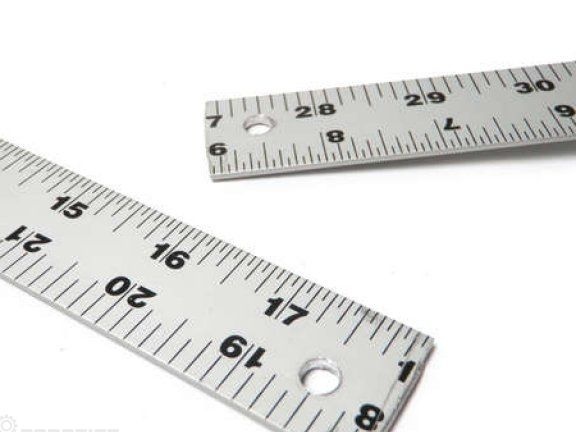
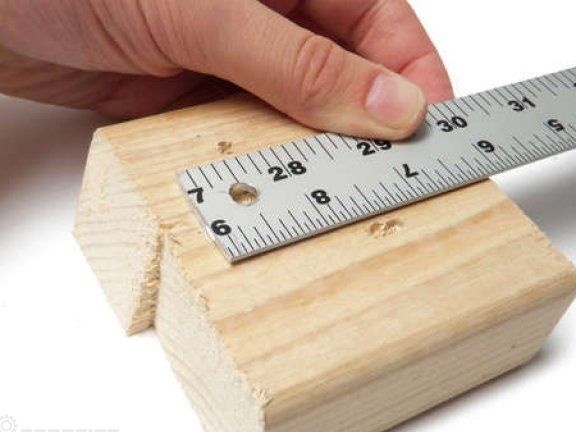
First you need to take a ruler and cut it with a bench saw. In total, two segments of nine inches should be obtained.

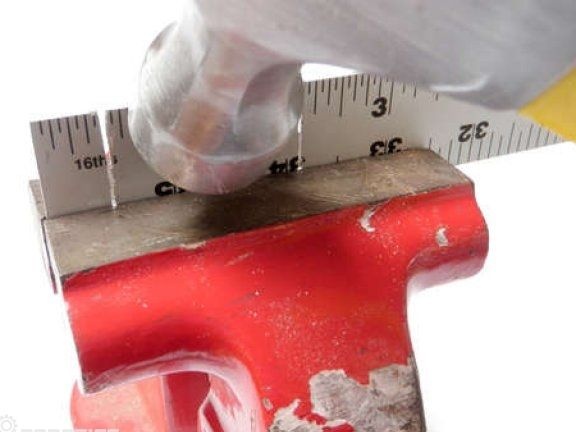
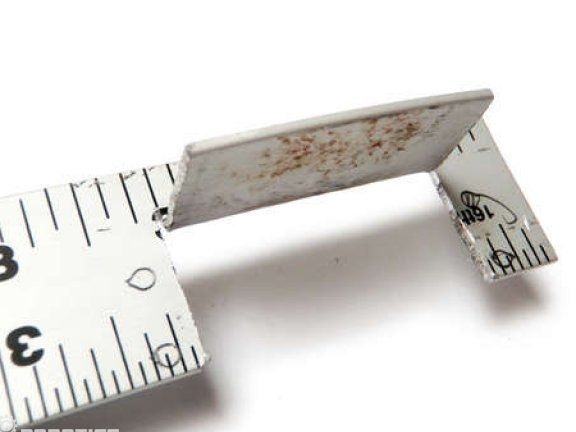
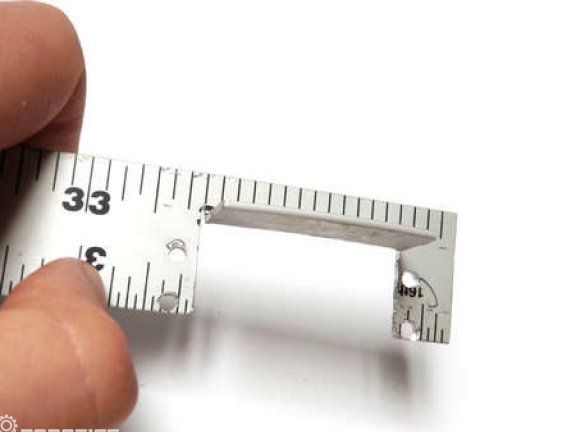
Step Two Create marks
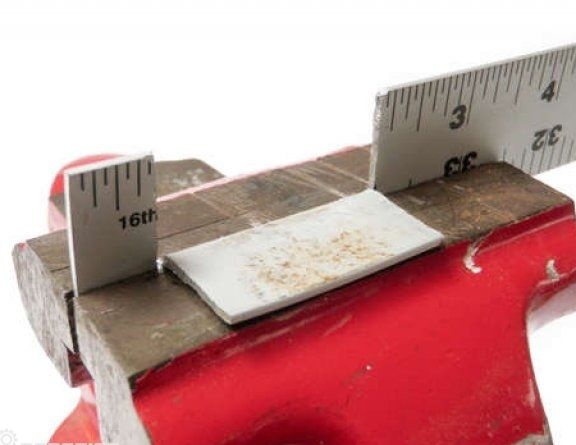
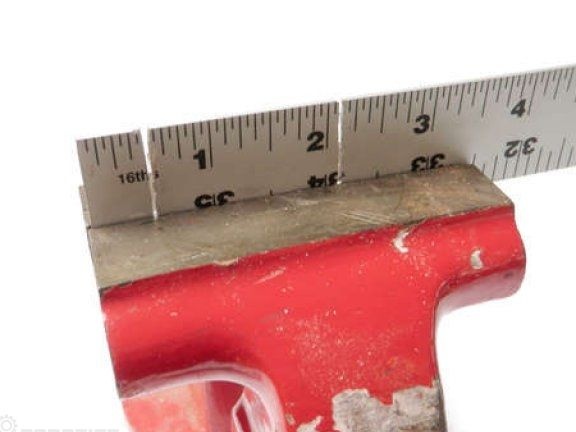
On one piece of the ruler you need to make two 3/4 incisions. From one edge, its depth should be 1/2 ", and from the other 2-1 / 8". Next, the ruler must be clamped in a vice and using the hammer to bend the section, this will be the basis for mounting the engine.
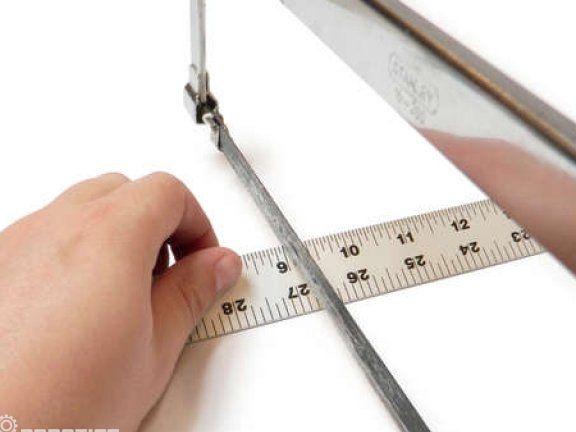
Step Three Drill holes
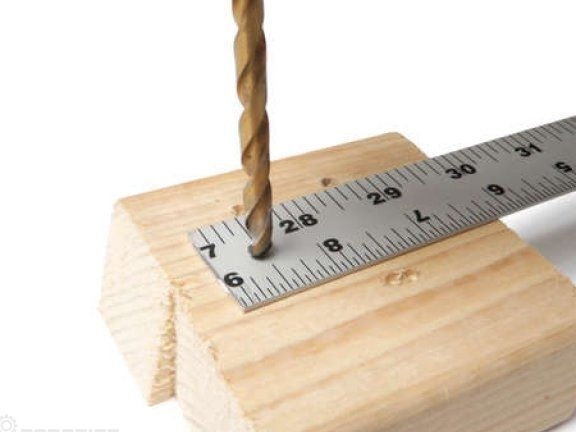
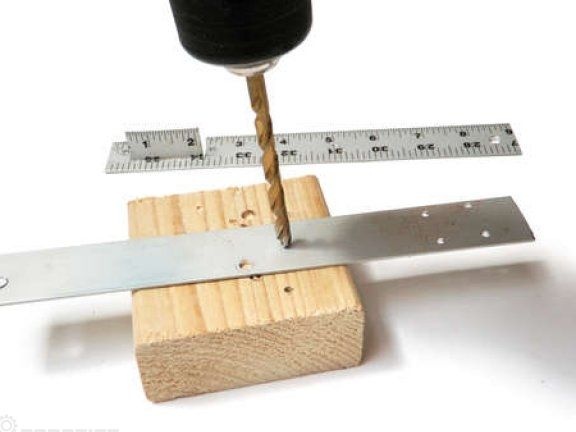
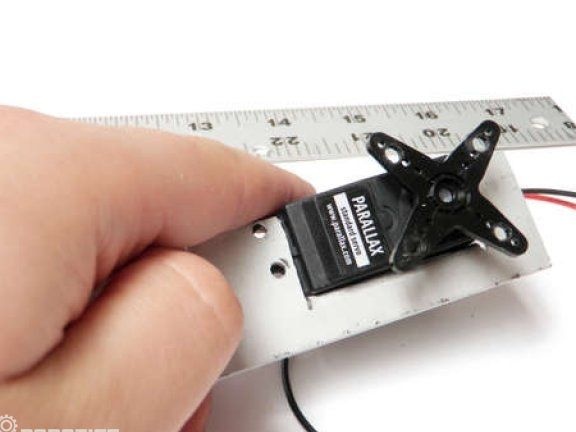
Now you need to take the servomotor and attach it to the place where it will be mounted. Then with a pencil you need to make marks where subsequently you need to drill holes with a diameter of 1/8 ".
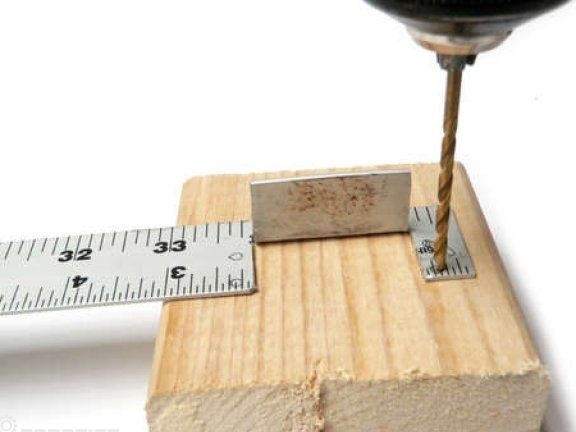
Now you need to drill a hole 1/4 ", stepping back from the end of the ruler 1/2". The hole is drilled at the opposite end from where the engine will be installed. The same hole must be drilled at the end of another piece of the ruler.
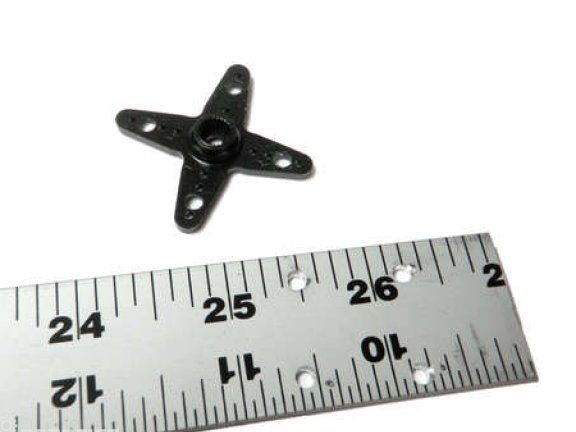
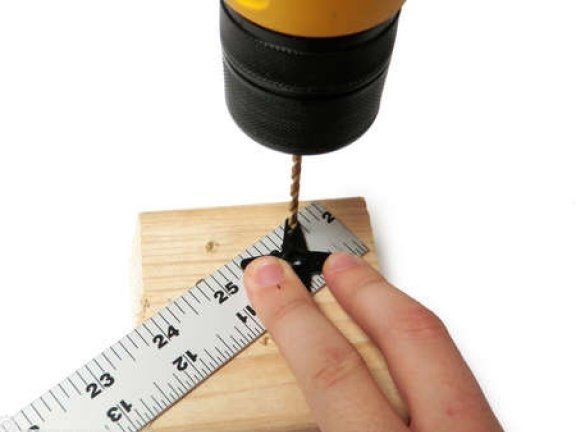
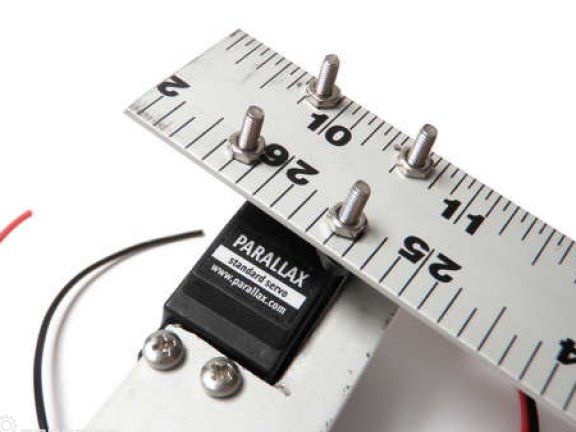
Now you need to drill holes in the servo blades, for this they need to be removed. In total, you need to drill 4 holes as indicated in the photo with a diameter of 1/8 ". Next, the blades need to be attached to the edge of the ruler, stepping back from the end 1/2". Now similar four holes need to be made in the ruler.
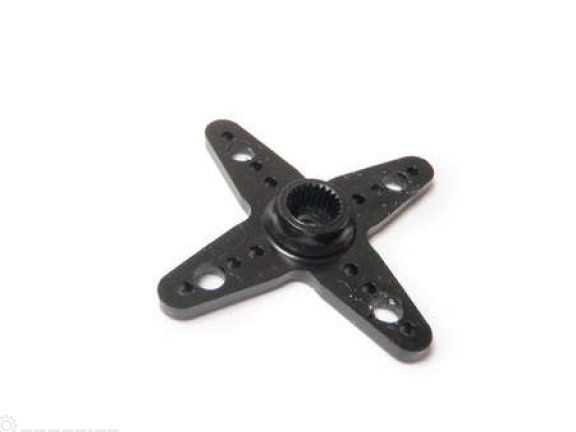
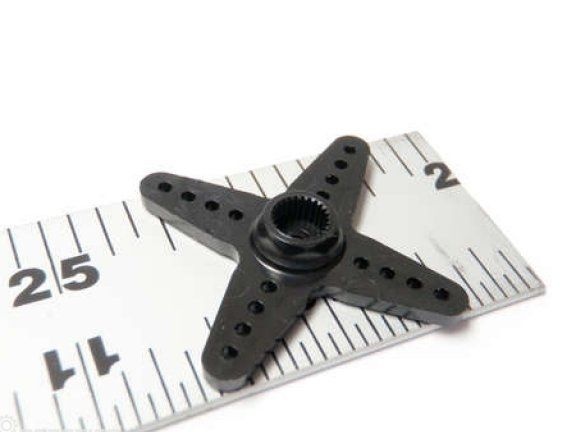
And finally, you need to drill holes 1/8 ", stepping back from the mounting location of the engine 5". You also need to drill 3/16 holes at the engine mount. You also need to drill another large hole to which the servo screws fit. That's all, all the holes for assembling the structure are ready.
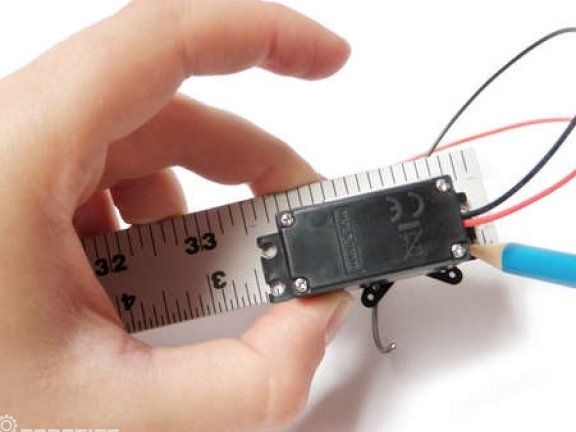
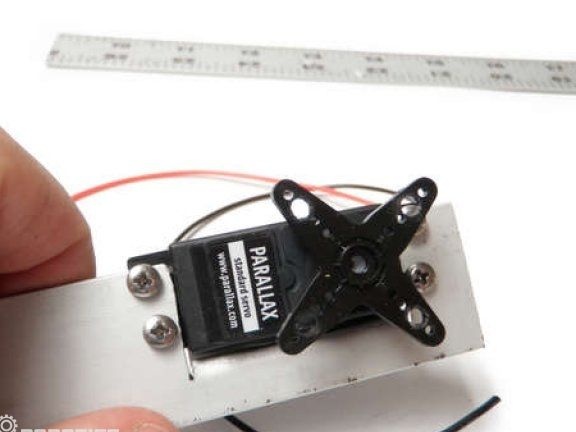
Step Four Engine installation
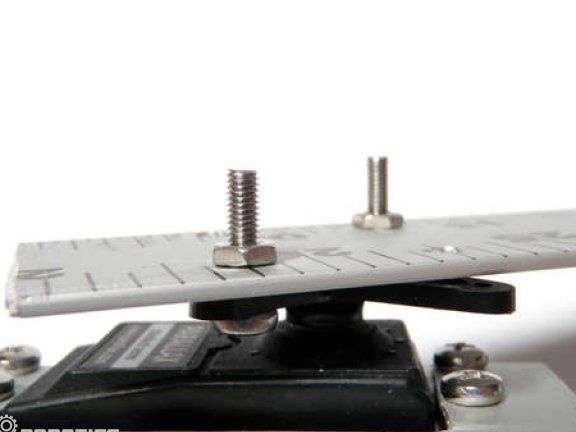
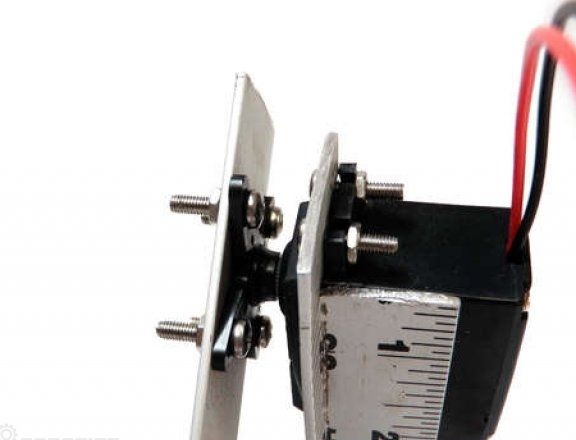
The engine must be mounted on a ruler with nuts and bolts.To ensure a low profile, the screw heads should be located on the side of the servo blades. After that, the second half of the ruler must be attached to the blades of the servomotor. In this case, the screw heads must be turned inward so that nothing interferes with the movement of the rulers.
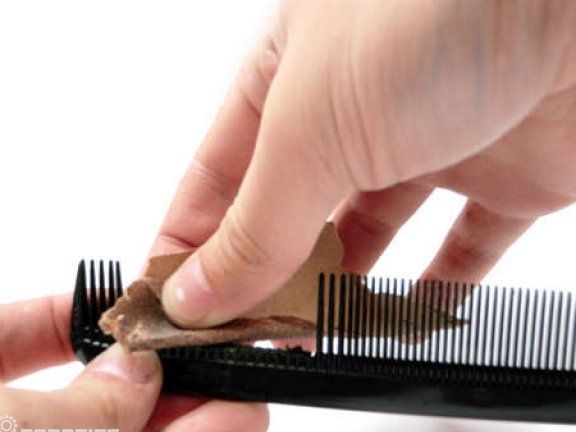
Step Five Scallop preparation
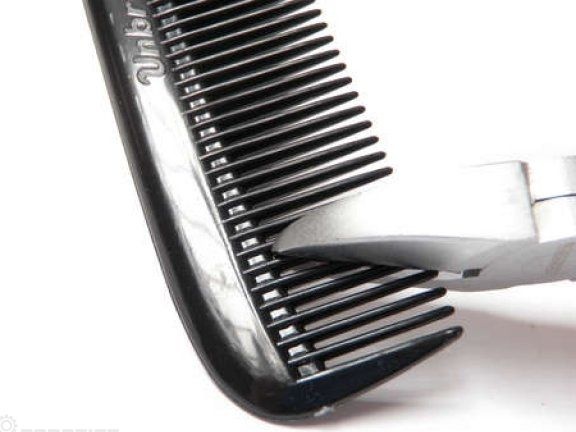
On one side of the scallop, two inches of teeth should be removed. The easiest way to do this is with a side cutter. At the edge of the scallop, you need to leave a certain number of cloves, thanks to them the comb will keep on track. At the edge, you need to drill a 1/8 "hole. At the final stage, the comb is carefully sanded with sandpaper to a smooth state.
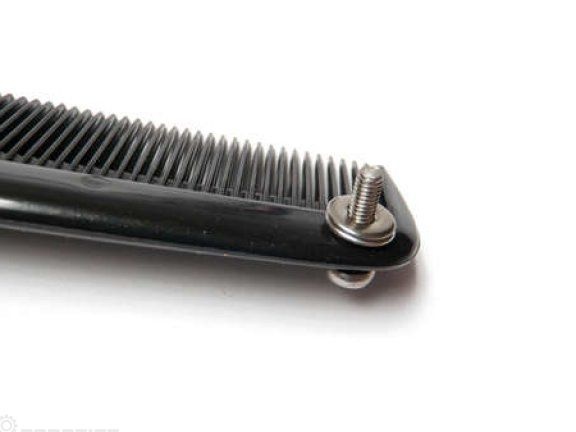

Step Six Scallop Installation
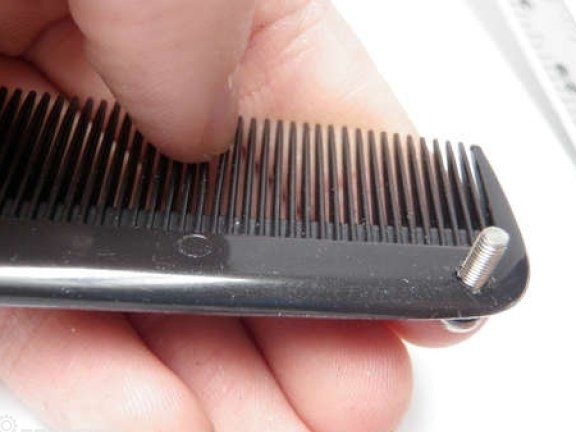
A screw must be inserted into the hole of the scallop, after that two washers must be put on the screw, they will allow you to take the comb from the rulers to a certain distance. At the final stage, the bolt is installed in a ruler, and then the scallop is fixed with a nut.
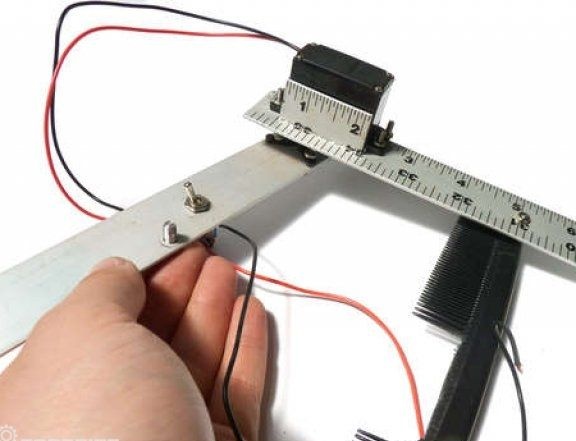
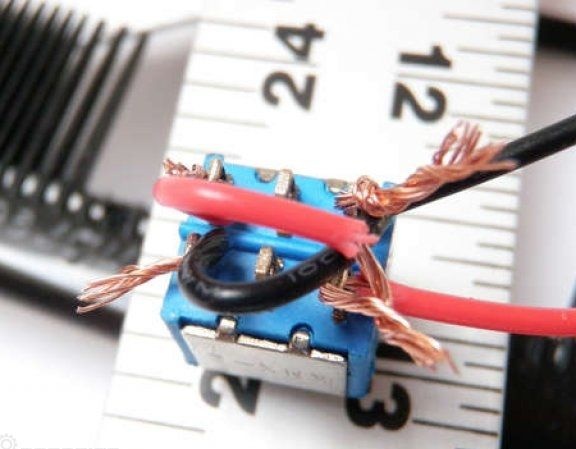
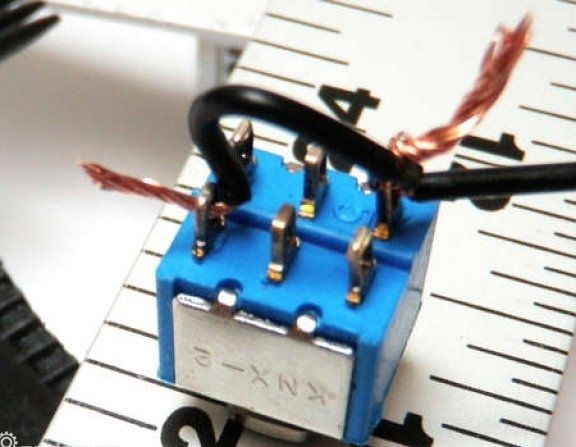
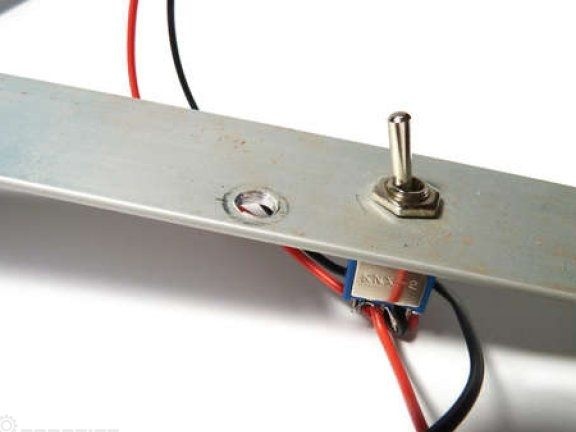
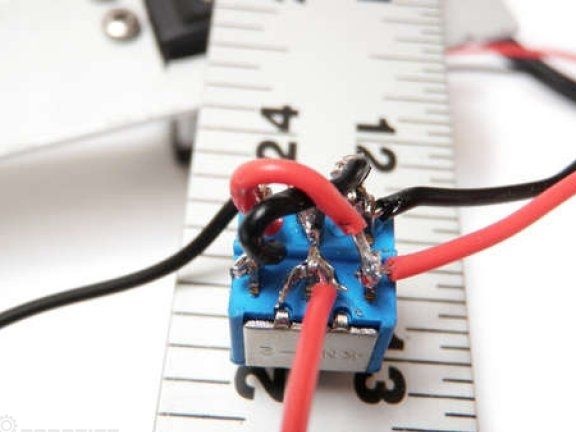
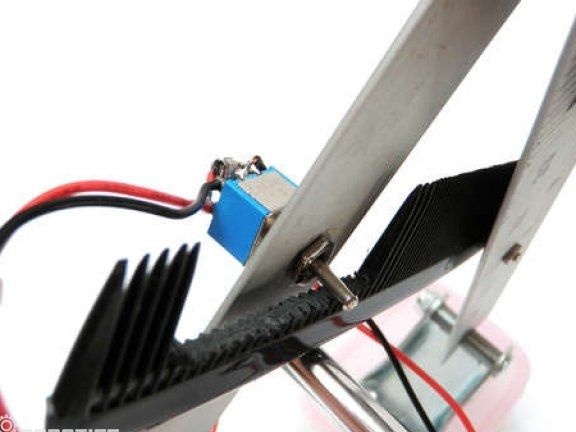
Seventh step. Switch mounting
The switch must be inserted into the prepared hole and secured with a nut. The switch must be inserted in the position indicated in the photographs. Now you need to take two pieces of wire, red and black, and solder them to the switch as shown in the picture. Then you need to solder two long wires to the side contacts of the switch.
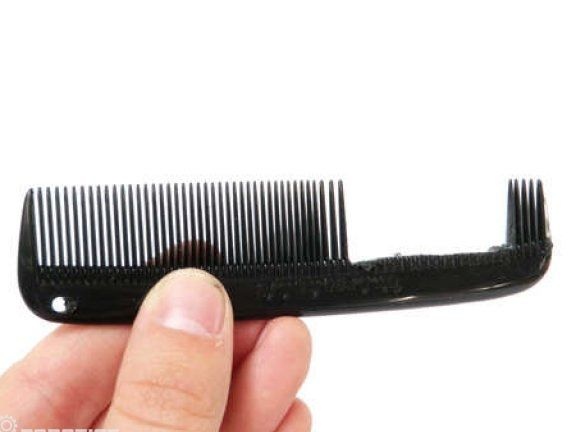
Step Eight. Counterweight installation.
The counterweight is installed in that part of the line where the servomotor is installed. The comb is mounted on top of the counterweight.
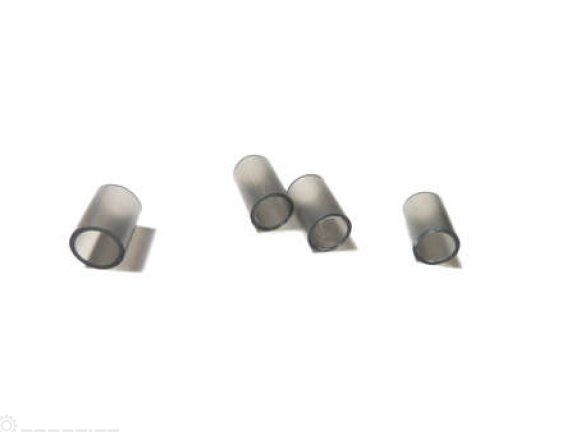
Step Nine. Cut the handle
Take the ampoule from the ballpoint pen and then cut the pen into two pieces one inch. Next, the manufactured tubes need to be cut in half, as a result, four tubes will come out.
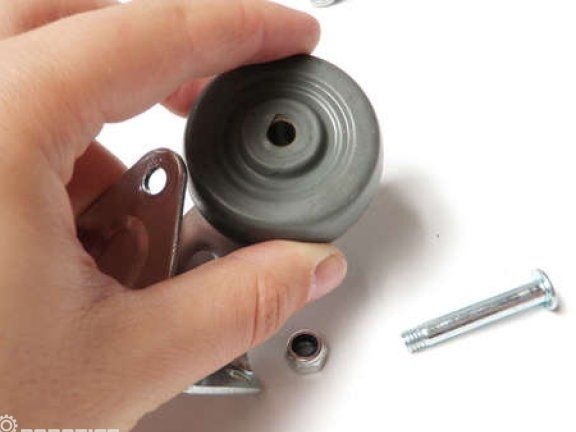
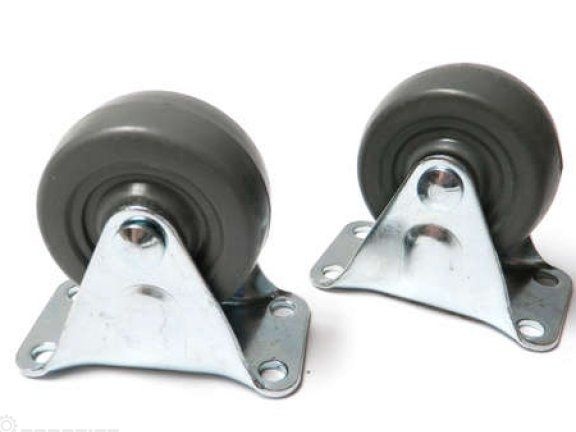
Step Ten Wheel extraction
Now you need to take two rollers and disassemble them by removing the wheels. Wheels need to be put aside; they can be used in others. homemade.
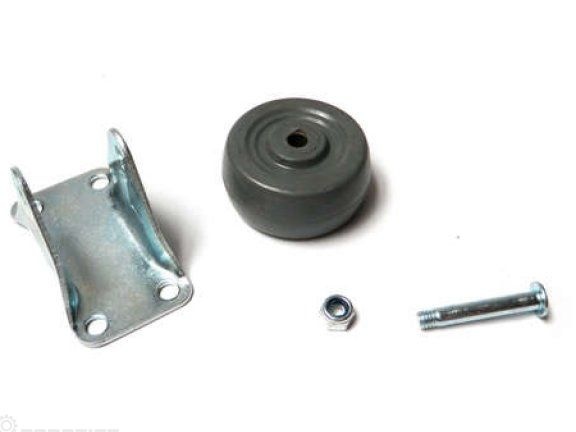
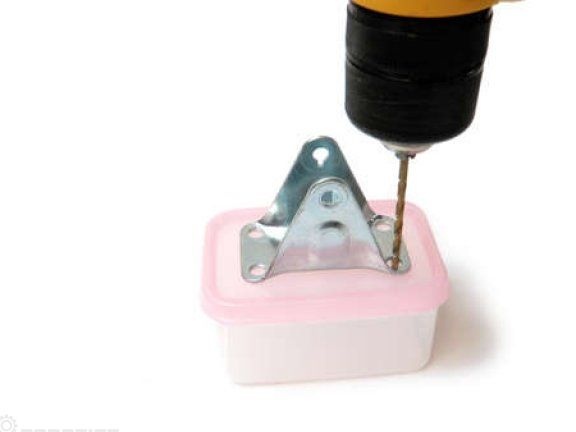
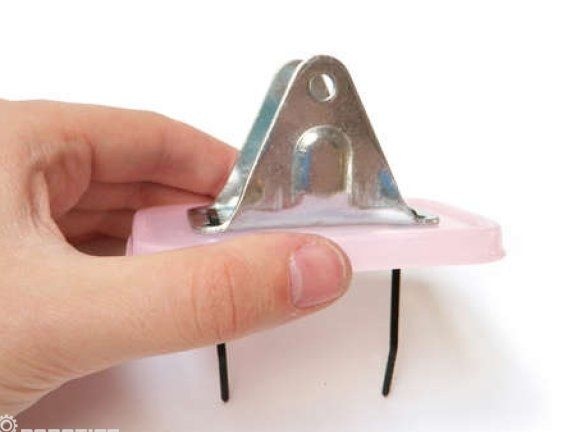
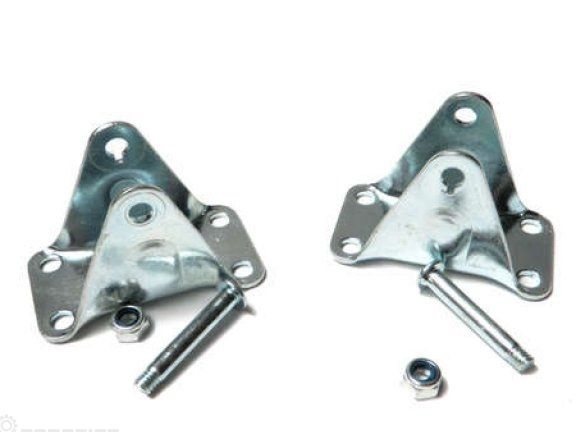
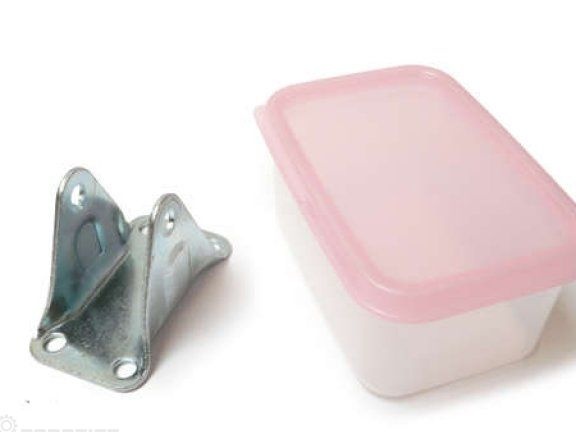
Step eleven. Create pivot points
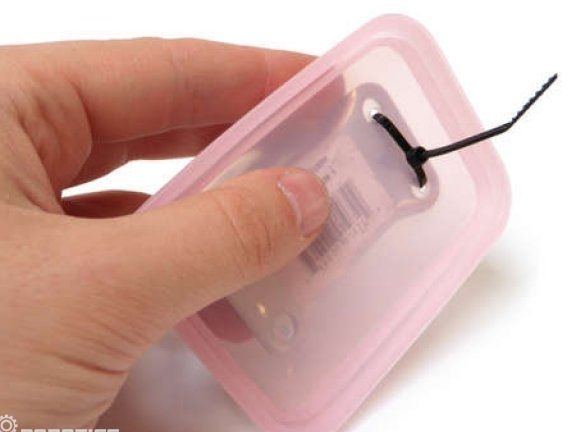
The housing from the roller must be placed in the center of the lid of the plastic container. Now you need to drill four holes and secure the element with ties.
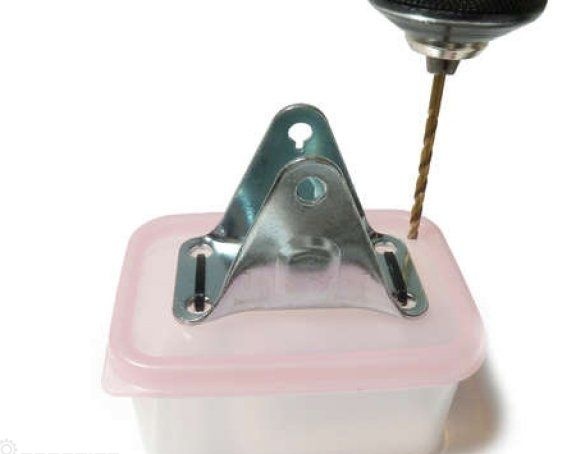
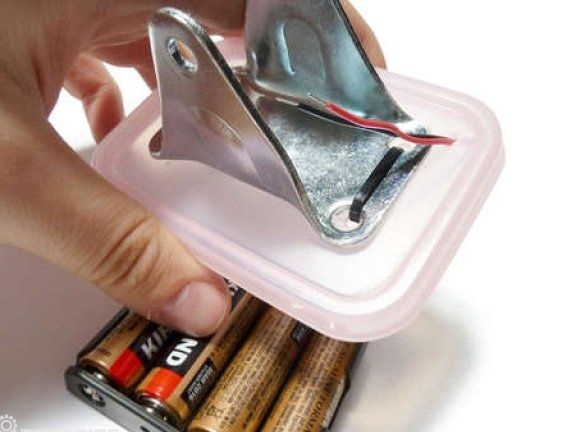

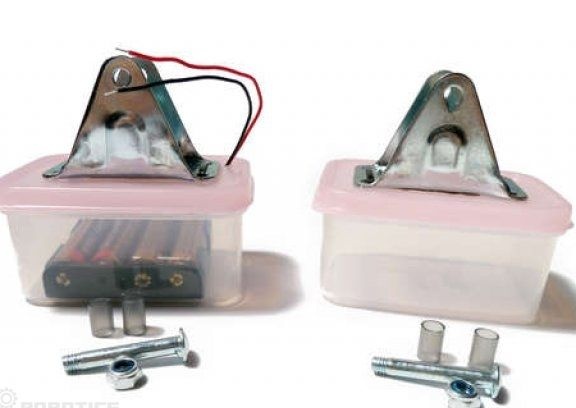

Also at this stage, you can install a power source. To do this, in one of the containers you need to drill a hole and install the batteries inside. Subsequently, through the drilled hole, you need to output the wiring.
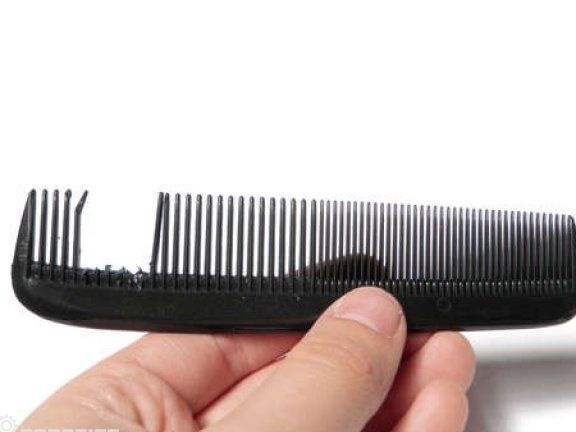
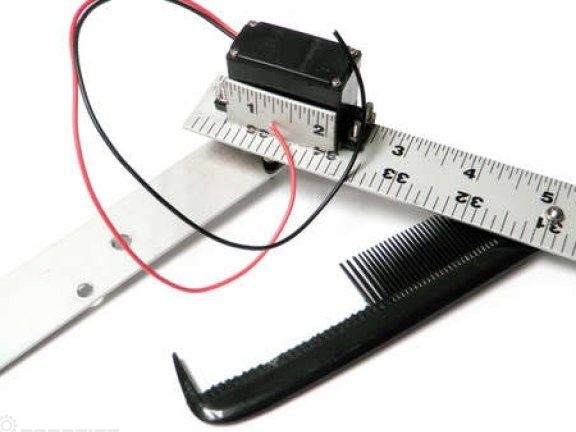
Step Twelve. Robot assembly
Next, the ends of both rulers must be attached to the supports as indicated in the photographs. Now it remains only to connect the wires from the power and the switch, it is easy to do according to the colors of the wires.
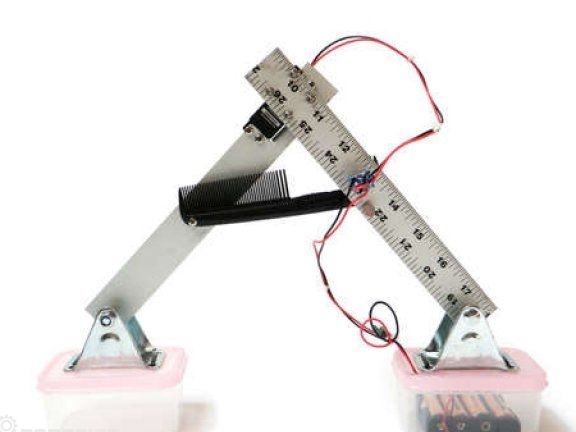
That's all, the robot is ready. When the engine is running, the robot starts to move, at some point, the scallop turns off the power and the legs of the robot return to their original state. Then the switch turns on the circuit again, and the legs of the robot are compressed again. So he will go.