
Vibrobots are like that robotsthat move due to vibrations. Despite the fact that their design is quite simple, they are no less impressive at work than their technically more sophisticated brothers. Such a robot will use bristles as a mover, this is a kind of its legs.
The robot described in the article can independently change the trajectory of movement and by itself circumambulates obstacles. As an experiment, the author created two robots on which different energy sources and engines were installed. In principle, there are no strict standards regarding the materials used, the main thing is to adhere to the given scheme when assembling the robot.
Materials and tools for manufacturing:
- nylon ties in size 3x150mm;
- insulating tape of black color;
- 9 Volt battery (6F22);
- laser disc (CD or DVD no difference);
- a protective casing;
- 9 volt battery connector;
- eccentric (erase).

The manufacturing process of the robot:
Step one. Create the basis of the robot
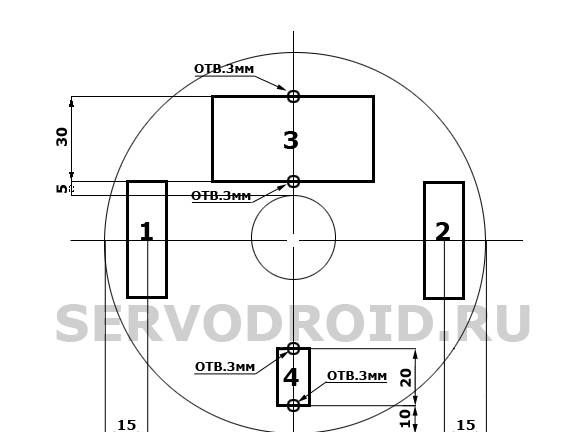
As a basis for the robot, a regular CD or DVD disc will be used. Make holes in it clearly according to the scheme, which is presented in the photo. Without exception, all holes are drilled with a 3 mm drill. This diameter is quite enough when used for attaching nylon ties. If you decide to use a different method of fastening, then the holes can be drilled to any other size. The proposed drawing is suitable for any assembly of the robot.
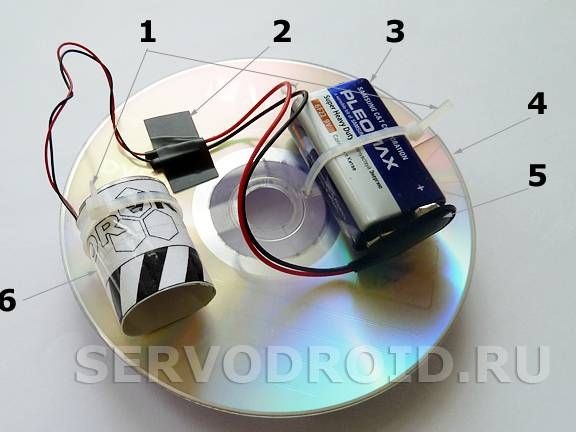
Numbers 1 and 2 indicate the installation locations of the brushes, a battery is installed in a square with the number 3, and a motor is attached in square 4.
Step Two We make and install movers
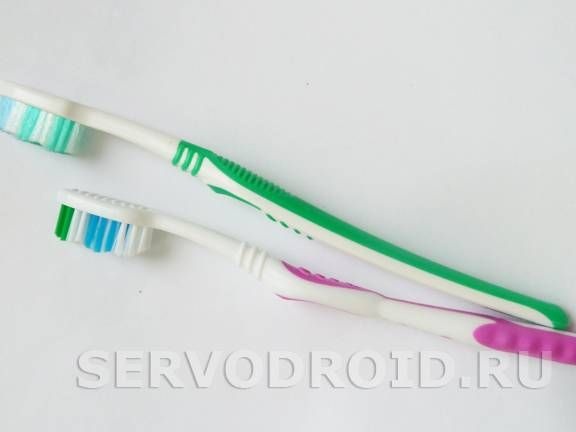
Thanks to the propulsion, the robot will move. To make them you need to take two toothbrushes. It is best that the brushes are the same in bristle height and shape. If the shape is different, it can be corrected with scissors.
Now the bristles need to set the direction. For this, adhesive tape is taken and the bristles are wrapped in the same way as indicated in the photograph. In this position, the brush should be held for about an hour, so that the bristles remember this position. In the photo, the gray arrow indicates the direction where the bristles are tilted.
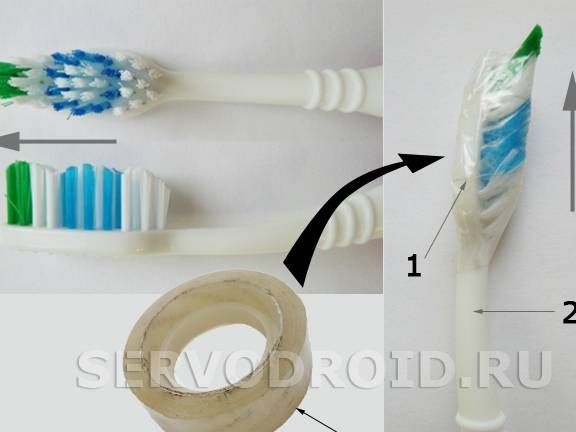
After the desired shape is set, you need to cut off the part with the bristles from the toothbrush. Then you need to take the glue gun and install the bristles on the disk in the specified places. All work must be carried out quickly and accurately, as hot glue cools quickly and hardens.You need to try to install the brushes so that they stand parallel to each other.
The bristles of the brushes should be pointing back, in other words, towards the battery at 9 volts. During operation, the robot will move against the direction of the bristles, that is, the battery location will be the back of the robot.
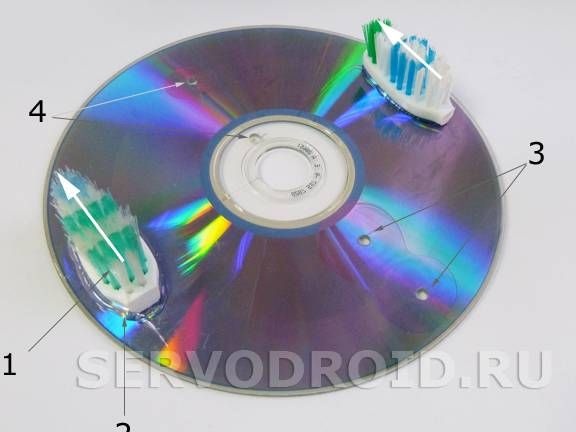
1 - disk, 2 - hot-melt adhesive, 3 - holes for installing the engine, 4 - holes for installing the battery. White arrows indicate the direction of the bristles.
Step Three Making an eccentric
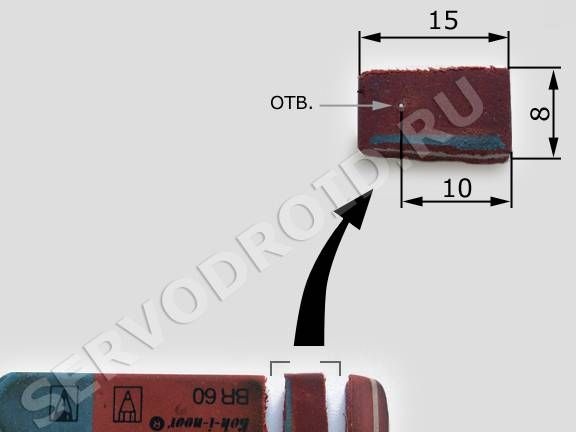
To get vibration, an eccentric, i.e. an unbalanced object, must be put on the motor shaft. The author made an eccentric of the eraser by cutting off a piece of suitable size. Make a hole in the place indicated by the white arrow. It should not be large, since the eccentric will slide off the motor shaft. It can be made with a needle.
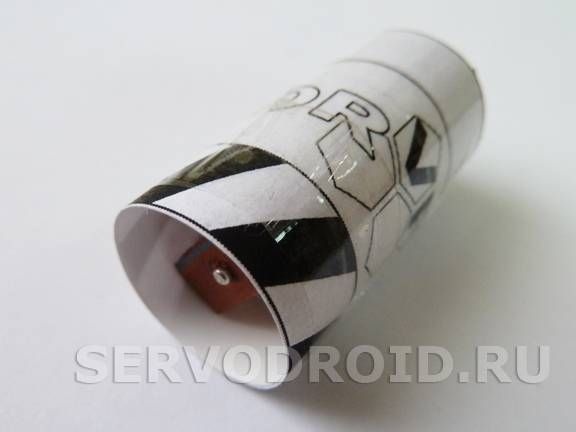
Step Four Production of a protective cover.
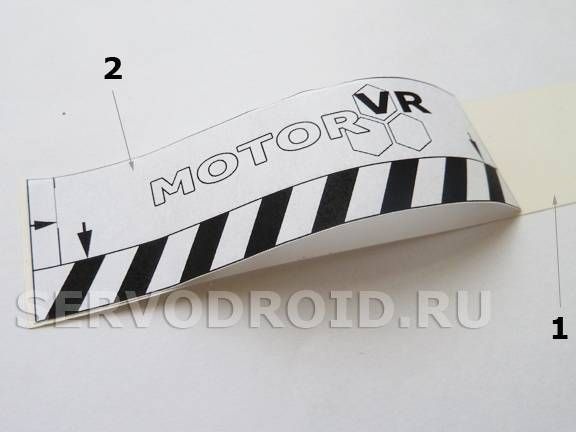
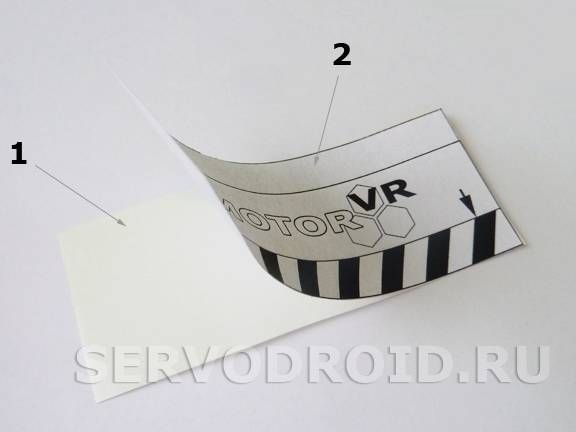
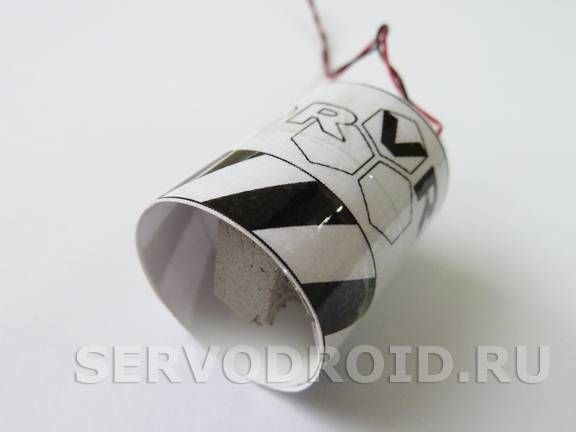
Since vibration is created by the rotating eraser for the robot to work, it is advisable to protect this place from various objects. In addition, such protection will give the robot a more interesting look. The protective cover is made of paper, which consists of several layers. You need to make a cylinder out of paper; its size depends on the size of the engine. To give more rigidity to the paper, it can be smeared with glue and thus put a few more layers. Or you can use cardboard for these purposes.
To create a cylindrical shape, the motor is simply wrapped with paper on top.
Step Five Final assembly of the robot
The engine is installed in a specific place and then fixed with a nylon screed. Such screeds can be bought in stores specializing in the sale of building materials.
The battery is also precisely attached. It is important to consider that the battery must be clearly centered, otherwise the robot's trajectory may change. By the way, in this way in the future it is possible to set the trajectory of movement homemade.
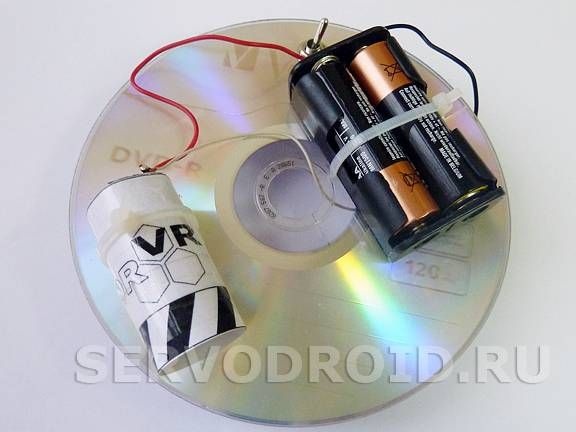
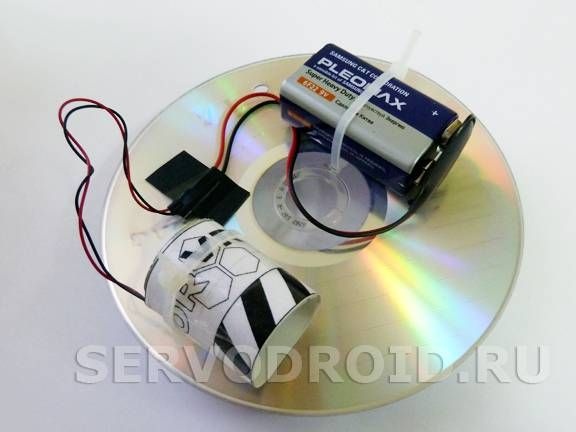
Now between the clip-connector and the motor you need to install a small switch. In conclusion, it remains to connect the clip-connector to the battery and you can begin to test the robot. Wires are connected by color.
However, when using a Kron battery, it is not necessary to install a switch; you can turn on the robot by connecting the connector.
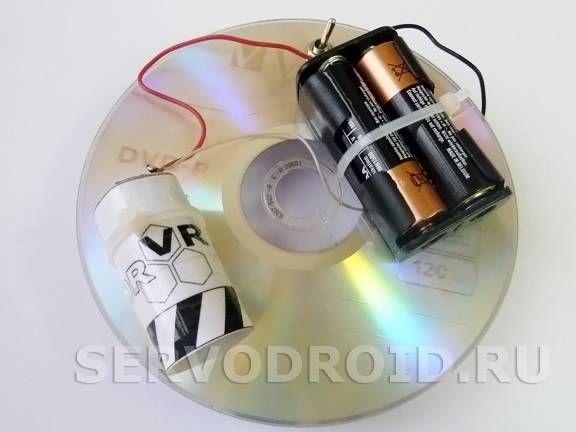
Well, for the second version of the robot, you can simply remove the battery from the device, but of course the switch is more promising.
That's all, the robot is ready, you can begin to test. To achieve the desired result, you can try to change the polarity, so the motor will rotate in the opposite direction, and the robot will behave differently.