
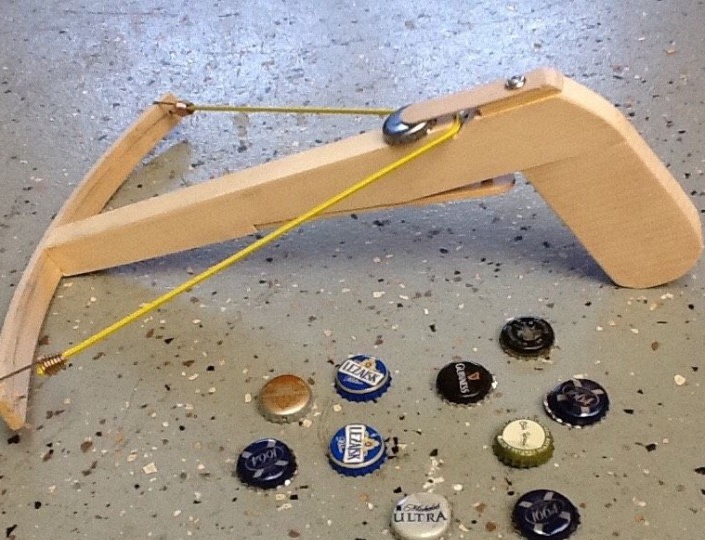
Good day, friends! Cause time, fun - an hour, and for this hour of fun I suggest do it yourself make a crossbow. Although for this homemade “Crossbow” is too terrible a name, it's just “a device for getting rid of covers”.
Despite the fact that bottle caps have corrugated edges and are often bent when opened, and their aerodynamic properties are so-so, this is still a pretty good projectile if you are not particularly concerned about accuracy and range. The trajectory of such shells also depends on the wind, so I recommend conducting “firing” indoors, for example in the garage or utility room. And be sure to use safety glasses when using this homemade product, and still do not let children play it without your supervision. As they say, it's all fun and funny until someone loses their eyes!
Depending on the materials used, a distance range of 15 meters or even more can be achieved. And as a target, you can use an ordinary plastic bucket. So, I offer you a guide to create a "cover" crossbow, and you choose the materials at your discretion.
Step 1: Bow and Bowstring
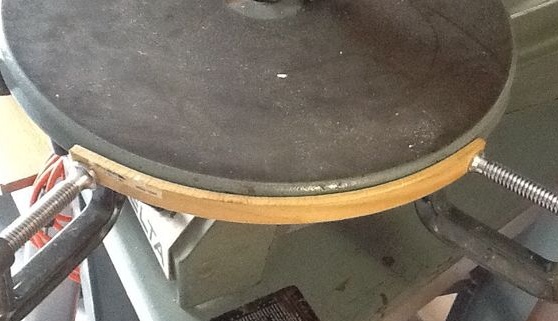
The onion is a lath of poplar 2x30x0.5cm, in addition to poplar, you can take wood of most hardwoods. After cutting to the required dimensions, the rail is soaked overnight in water and then clamped in a round pattern, in this case it is pressed to the table of a jigsaw machine with a diameter of 40 cm, but any round surface can be used. After drying in the template during the night, the rake will become curved.
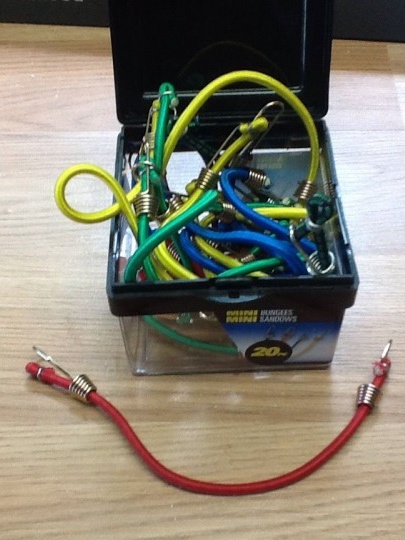
Three 3 mm diameter holes, one in the middle, and two on the sides, at a distance of 6 mm from the edge, are drilled in the resulting bow-rail. A rubber cord about 25cm long is inserted into these side holes.
Step 2: Determining the Tension Distance
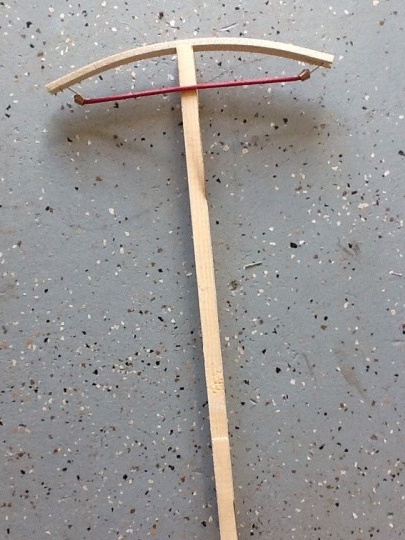

A wooden block 5x2.5cm is attached to the center of the bow with glue and a screw, then the string-string is pulled as far as possible and this distance is marked with a pencil on the bar.
Step 3: Prong and Hammer
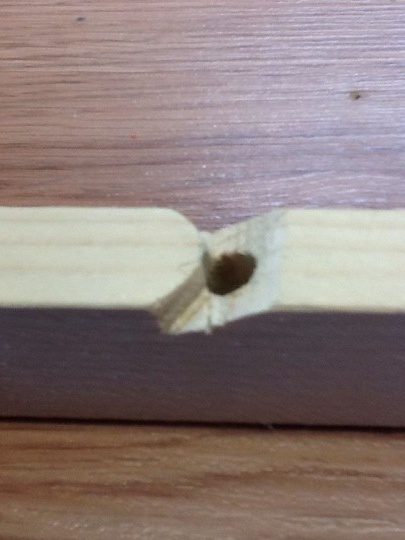
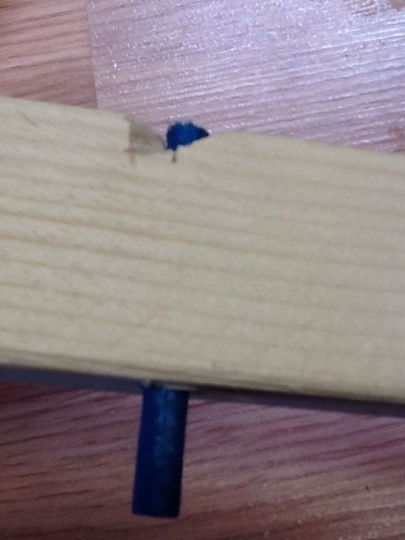
A groove is cut out along the marked line, with a depth equal to the thickness of the bowstring. Next, another cut is made at an angle of 45 degrees, so that the recess wall perpendicular to the crossbow body is closer to the bow. To make the bowstring descend easily, with the help of a file and sandpaper groove corners are grinded.A through hole with a diameter of 7 mm is drilled in the middle of the resulting tooth, and a piece of the 6 mm dowel is inserted into it, which will act as a striker.
When pulling the bowstring and placing it in the groove of the tooth, the dowel is lowered, and when you click on the dowel from below, the bowstring is lowered. This is the most difficult moment of the entire manual, if the descent occurs normally, all that remains is to make the latch and the trigger.
Step 4: Lock and Trigger
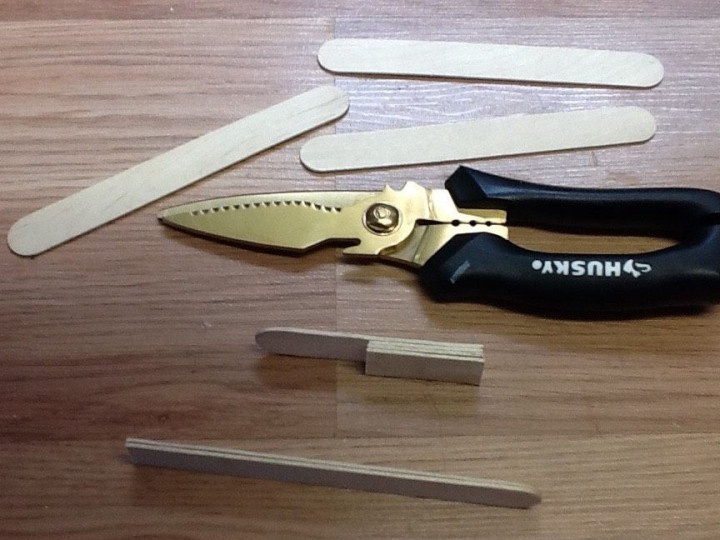
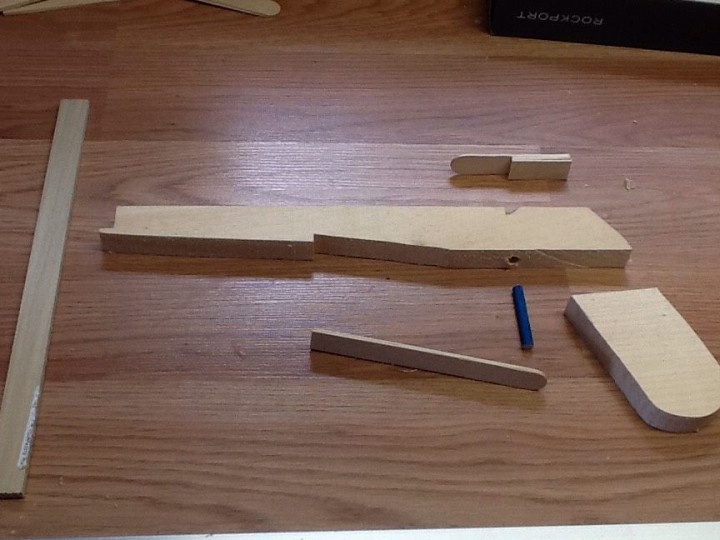
In order to hold the bowstring in a charged position, you need a latch, which is easy to make from large wooden sticks that hold the doctor’s tongue together. At the same time, the sticks are cut in size not with a saw, but with scissors with thick blades. A piece equal to 2/3 of the stick is cut off from the whole stick, it will hold the bowstring from above, then 1/3 of the stick will be cut off and glued to the previously cut piece, in more detail in the photo.
And to get the trigger, two whole sticks stick together.
Step 5: Finalization and "shooting"
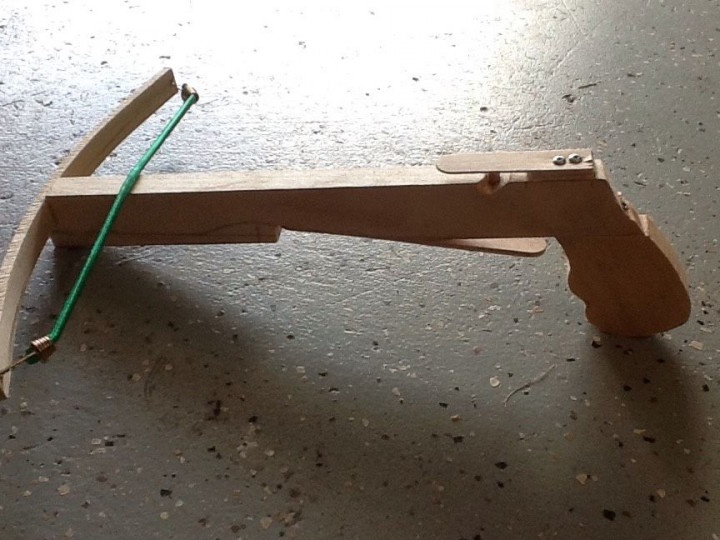
The latch is glued, and then also screwed to the body crafts so that it is behind the tooth, and its upper stick overlaps the groove of the tooth.
A cutout is made on the bottom of the case so that the trigger can be mounted on it, and it only fires when pressed. If necessary, the striker length is adjustable. When everything functions as it should, the trigger is attached to the glue and screws.
In principle, the existing prototype is already assembled and you can "shoot" before you cut the case and add a pen according to your own design. We take a bunch of traffic jams and start shooting!
But if you, like me, are not enough, then go to the next step.
Step 6: create an arsenal
The crossbow is disassembled into its components and, using them as templates, several more homemade crossbows are made. This process is not complicated, because you can immediately make several bows, clips and triggers. And if you carefully polish the resulting blanks, then the finished crossbows will look great.
Thank you for attention!