
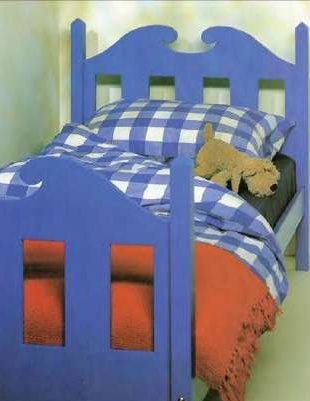
If the child does not yet have his own bed, there is an option to make it yourself. You can show the baby a photo of this bed, maybe he will like it. Then in a couple of days you can make such a gift for him.
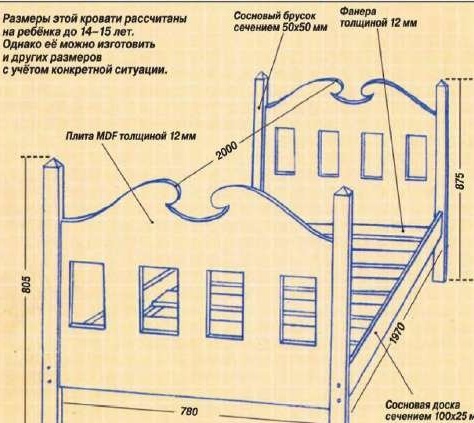
The main material necessary for the independent manufacture of a crib is an MDF board, plywood and pine lumber. The grooves for the ability to connect parts are best chosen using a milling machine. However, you can hollow them out with a chisel, but it will be a very time-consuming process, and the quality of work itself will be somewhat worse.
Materials used
Before you start work, you need to take care of the necessary materials, such as:
- MDF plate. Its parameters: dimensions - 1220x810 mm, thickness - 12 mm;
- 2 bars of pine, length - 850 mm and a cross section of 50x50 mm;
- 2 bars of pine, length - 900 mm and a section of 50x50 mm;
- 2 pine boards, length - 2000 mm and section 25x15;
- 2 pine boards, length - 2100 mm and section 1005x25;
- 8 cross furniture ties
- screws;
- polished skin of various grain sizes;
- PVA glue.
Headboards are made curly. They can be painted according to the taste of the child.
To determine the size of the product, you must first take into account the size of the mattress. This bed is made specifically for a mattress, the dimensions of which are 200x80 cm. The surface of the assembled structure is primed and then covered with semi-matte paint. Also, the option of finishing with matt varnish or colored stain is not excluded.
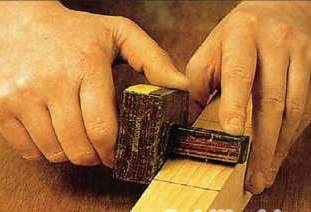
Step 1. It will be required for each headboard two bars having a section of 50x50 (two - 850 mm long and two - 900 mm long). Having laid all four bars on a workbench, align their ends on one side. The thickness gauge is set for marking the nests under the spikes, then they are marked on each bar between the lines drawn along the square.
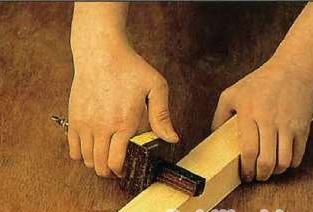
Step 2. Legs are stacked in pairs, indicating where the right leg is and where the left leg is. On the inside of the pair of legs, grooves for fixing the backs directly from the MDF plate are marked.
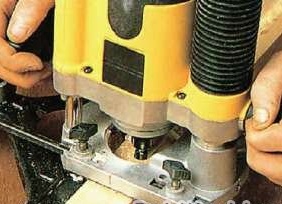
Step 3. The leg is fixed on the workbench using a milling machine with a parallel stop, a groove is selected, a depth of 15 mm. By turning the leg, a nest under the spike is cut out with a chisel on an adjacent face for a longitudinal connection. Mark along the length of the legs, then cut them off completely. The length of the legs for the head should be 875 mm, the length of the legs for the foot - 805 mm. The shape of the tetrahedral pyramid is attached to the upper ends of the legs.
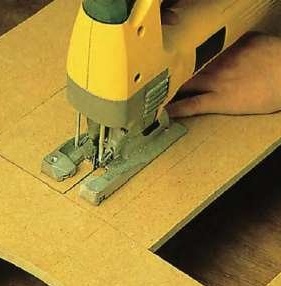
Step 4. The MDF board is cut into two parts.From one, the height of which is 580 mm, the foot is made, from the other, the height of which is 650 mm, the head is made. The jigsaw marks the complex contours of the backs, and the holes are rectangular in them. The backs are glued into the grooves of the corresponding legs, temporarily pulled together by large clamps.
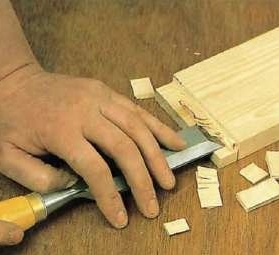
Step 5. Both longitudinal bonds, 2035 mm long, are cut out. At each end of them, with the help of an award saw, a chisel, a spike is formed, the length of which is 18 mm, the thickness is 12 mm. At the place, both bars are cut, the cross section of which is 25x15 mm and are attached to the glue and 3x25 mm screws from the inside of the ties, as support strips. By removing the glue immediately protruding, the longitudinal bonds are connected to the foot and the head.
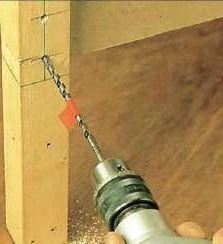
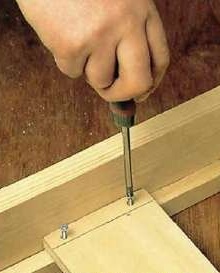
Step 6. The marking, which was performed at the initial stage, will allow you to determine the position of the holes directly under the details of furniture cross ties. Insulating tape wound around the drill will help to drill a hole to the required depth

Step 7. The screws are inserted into the holes so that they protrude approximately 30 mm. Mark on the square the holes in the longitudinal connections, also for bolts, for cylindrical nuts. Having assembled the bed frame, bolts are inserted into the holes of the legs. Cylindrical nut cross ties are inserted into the holes of the longitudinal ties.
Step 8. Plywood blanks are cut along the length, which are intended as the base for the mattress. They are stacked on the support strips with a step of 100 mm. The extreme plywood stripes, in this case, should retreat from the backs by 50 mm. After the holes for the screws have been drilled, the boards are first glued to the support strips, and then they are still attached with 3x18 screws.