
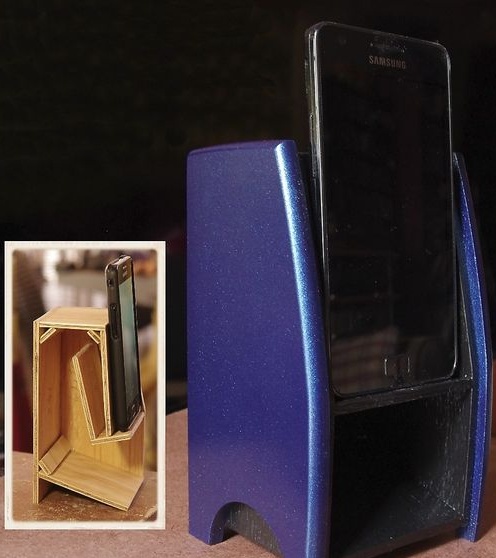
There is something very attractive in equipment that does not need electrical energy, and the passive speaker of the phone fits into this category. I decided to tell how to build it on the principle of a folded speaker. The design has a deep sound (but, of course, not real bass) and amplifies the sound by two to three times, while remaining quite compact. I have no doubt, a larger speaker will give an even better sound, but of course due to the size and complexity.
STEP 1 Folded Horn Principle
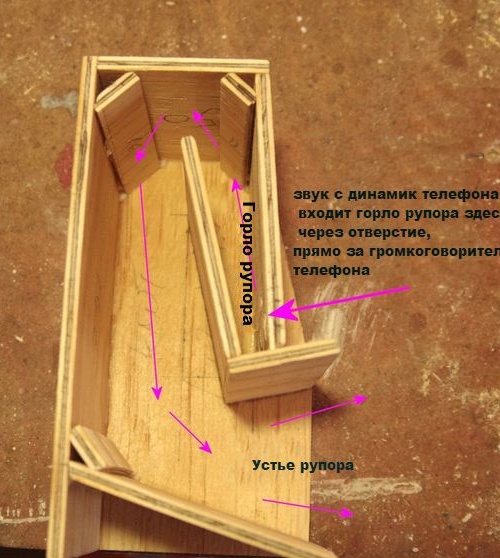
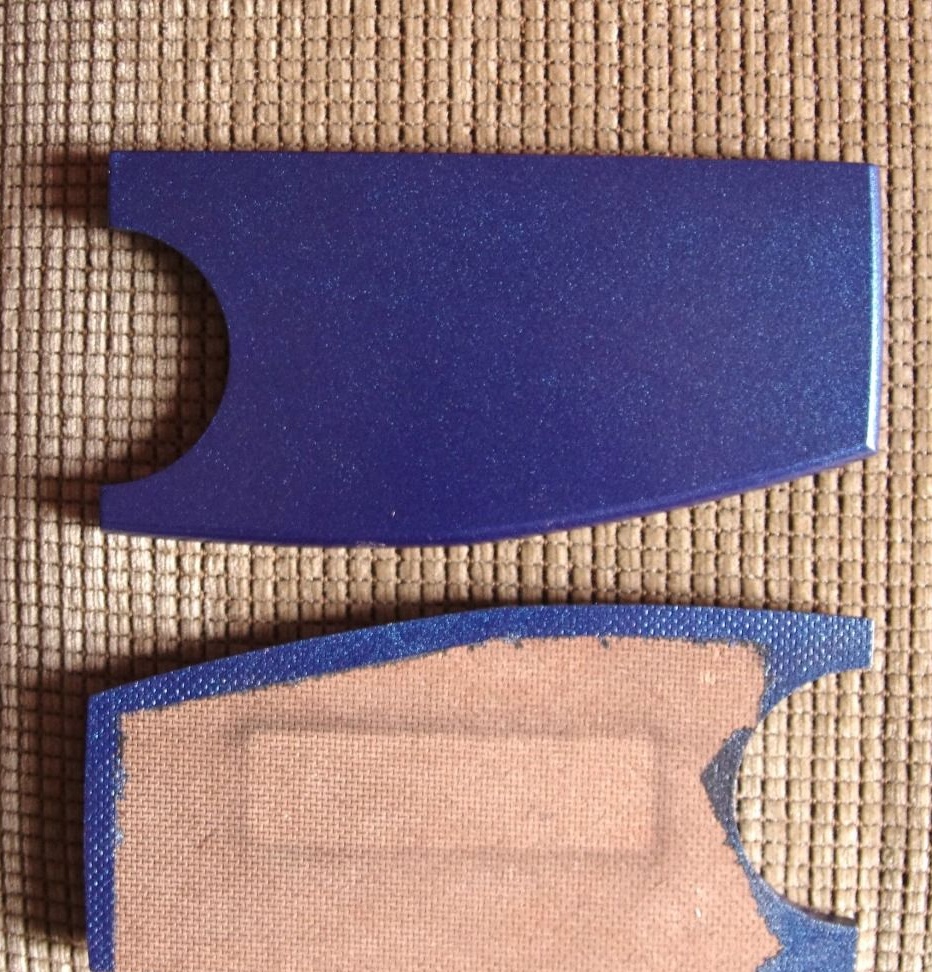
The first picture shows how the folded shout works. Sound enters the mouth of the speaker, into the hole opposite the speaker of the phone, moves through the gradually expanding wall of the speaker, until it reaches the mouth, the largest part of the speaker. The horn is called folded, only because it saves space by “folding” the structure. The second picture shows the hole that will be located directly behind the speaker of the phone, directing sound into the mouth of the mouthpiece. No calculations were made for this design. I arbitrarily chose a size that would fit my GALAXY SII, and then made a shout using trial and error. Perhaps if I made the calculations, the sound would be better, but this design is designed for people who do not have special knowledge.
I used plywood of not very good quality, 4 mm thick, but it is better if the plywood is of good quality with a smooth surface. Fiberboard is also suitable. You can use materials with a thickness of 3 mm, because the sound pressure in the horn will not be large.
If you are using plywood, be sure to take steps to limit edge crushing to a minimum. It can be a piece of adhesive tape that needs to be glued to the cut line, make a light cut with a saw or use a protective pad on plywood or MDF.
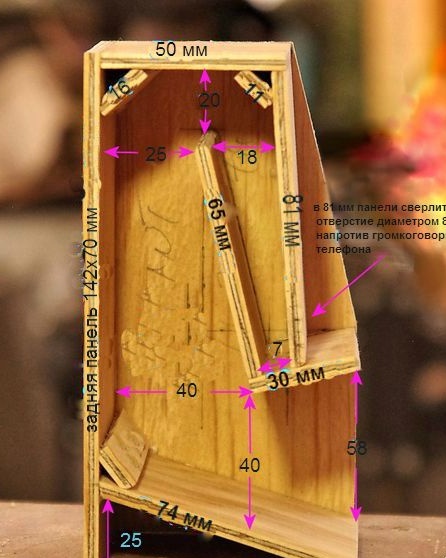
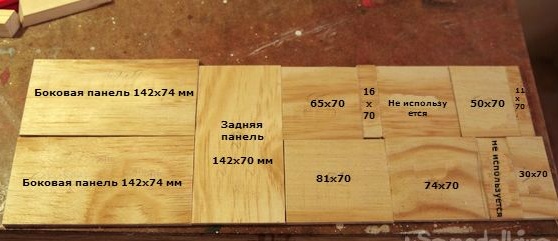
The width of all parts, with the exception of the side panels, is 70 mm - this is the width of my GALAXY SII. If you use a phone of a different width, then you will have to accordingly change the width of all the details to the width of your phone.
STEP 2 Assembly
The manufacture of the horn is very simple - only plywood and wood glue and a clamp are used. I use PVA glue, it does not dry very quickly, it gives time to level and fit all the details, but after drying it binds the material very strongly. This works well in designs such as this one where butt joints are used.The more glue you use, the stronger the bond. It is best to cut out all the details immediately in size, mark their length, because the width of all but the side walls is 70 mm.
Of course, many parts need to be glued together, I think that we should not try to glue them all at once. This is best done in a few steps, part by part. This will take a little longer. it will be necessary to allow each compound to dry, but will make the process simple and easy.
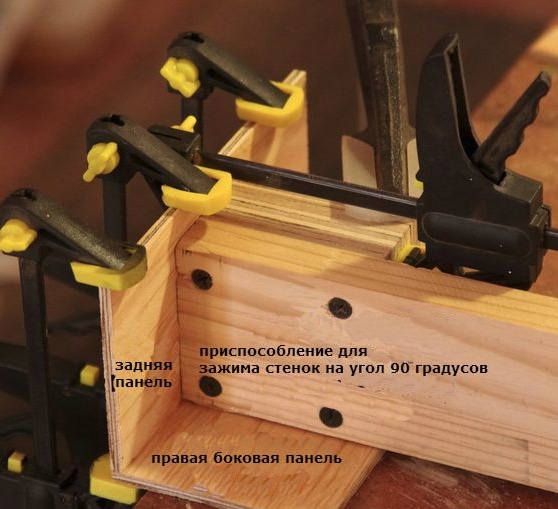
1. Start by gluing the rear panel at right angles to the right sidewall. I used a small block for this so that I could fix them.
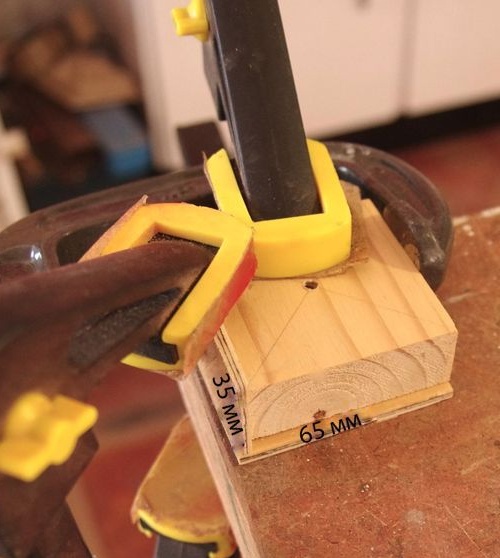
2. While they are drying, glue together at right angles two pieces with sizes of 30 and 65 mm. It is necessary that the edge of a part with a size of 35 mm be glued to a part with a size of 65 mm, and not vice versa. These two parts will form one side and the lower part of the mouth of the mouthpiece.
3. Once the back and side panels have dried, you can glue 50 mm of the upper part and 74 mm of the lower part, and the back panel will support them during drying. When gluing these parts and subsequent ones, keep the left side wall (which will be installed last) on hand and use it to check the fit of the parts, preventing unexpected surprises when the side panel will later be replaced. You can also use this panel as a load clamp when gluing internal parts.
4. Two parts 65 and 30 mm, glued together earlier, after drying can be put into place, taking into account the distance from the sides, as shown in the photo above.
5. The last item to be installed is a part with a size of 81 mm of the front panel. The horn should be 7 mm wide at the bottom. This is achieved by correctly installing a part with a size of 81 mm opposite the part with a size of 30 mm. In my case, this happened as a result of a slight deviation of the part (81 mm) from the right angle.
6. Glue parts with dimensions of 11.14.16 mm to the corners in accordance with the photograph. They will make the sound flow smooth (I think so). You can mold the ends of these parts so that they fit better to the walls, and fill the voids with silicone sealant.
7. Now glue the left sidewall.
STEP 4 Finishing
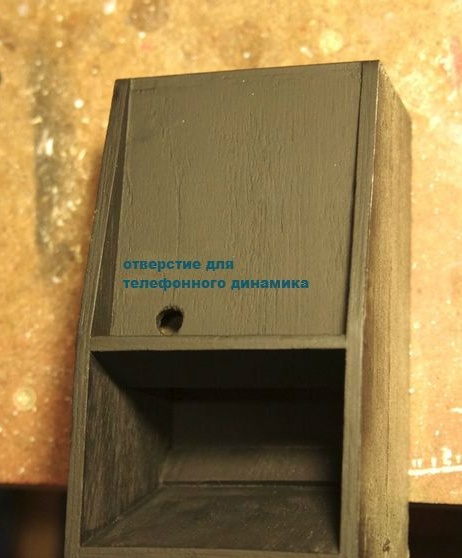
After assembly, your horn should look like in the photo, with the exception of the hole for the phone speaker and primer, I did this later.
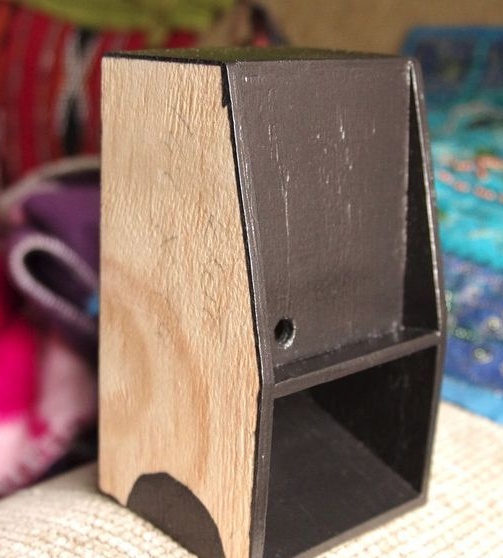
The hole should be directly opposite the speaker of the phone, in this case it was positioned for the GALAXY SII, for other phones it will be in a different place. As far as I know, most of the speakers on the phones are located at the bottom back. If your speaker is located higher, you can, of course, drill a hole in the appropriate place on the 81 mm panel, but I don’t know how this will affect the sound.
I also note that the upper front corners of the side panels were cut flush with the edge on which the phone will rest, after assembling the structure. It may be better to mark and crop them before assembly if you are sure that you can measure everything correctly so that there are no unpleasant surprises during further assembly.
The main speaker assembly is finished, and the final look is up to you.
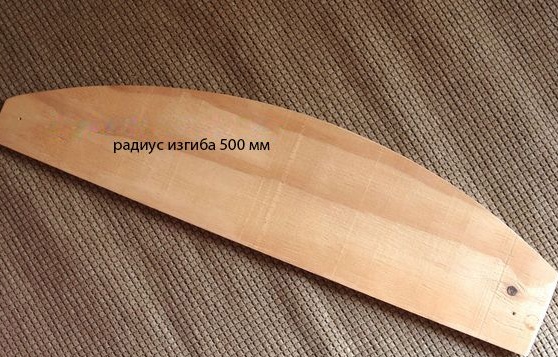
I made the front edges of the side panels a little curved using a template for this. The radius of the curve of the template is 500 mm.
Finally I rounded the edges of the side panels. And he painted the whole thing with spray paint. After that, I glued the legs, which I made of fiberboard 6 mm thick.
If you decide to repeat this design, enjoy listening.
Below I will give an example of a modification of the speaker for phone owners whose speakers are at the bottom, like the iPhone.
STEP 5 modifications for phones with lower speaker layout

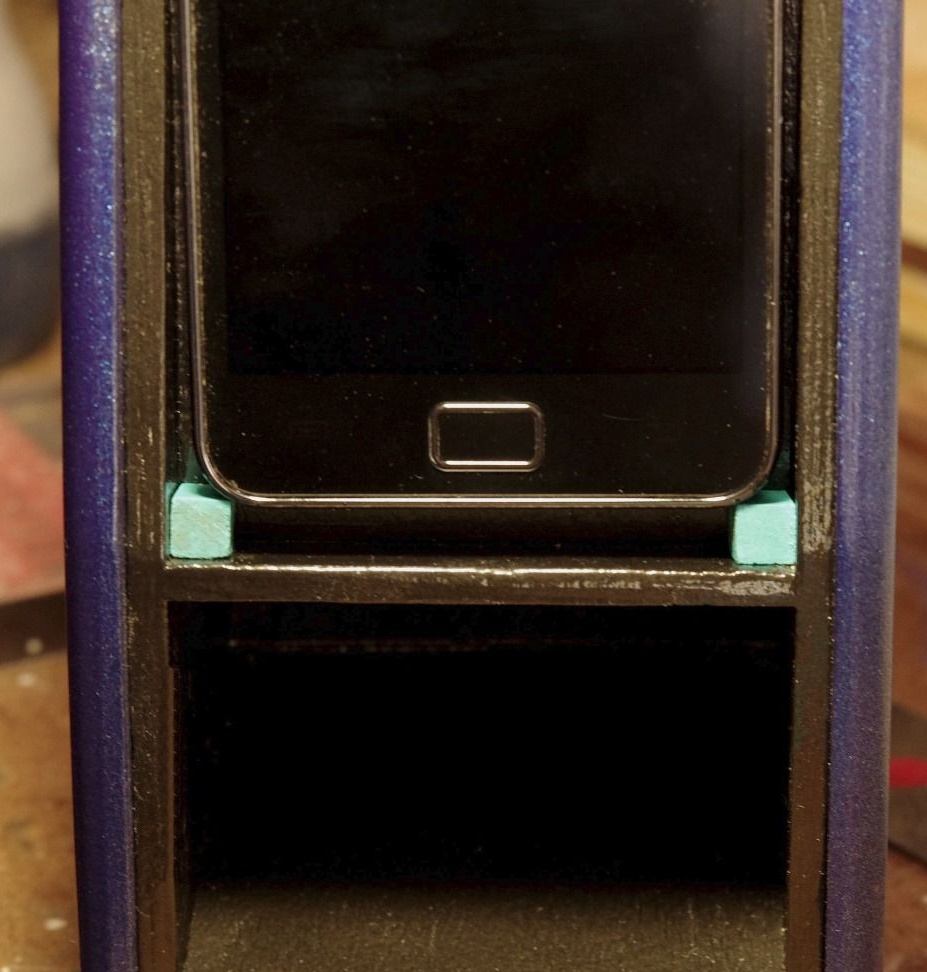
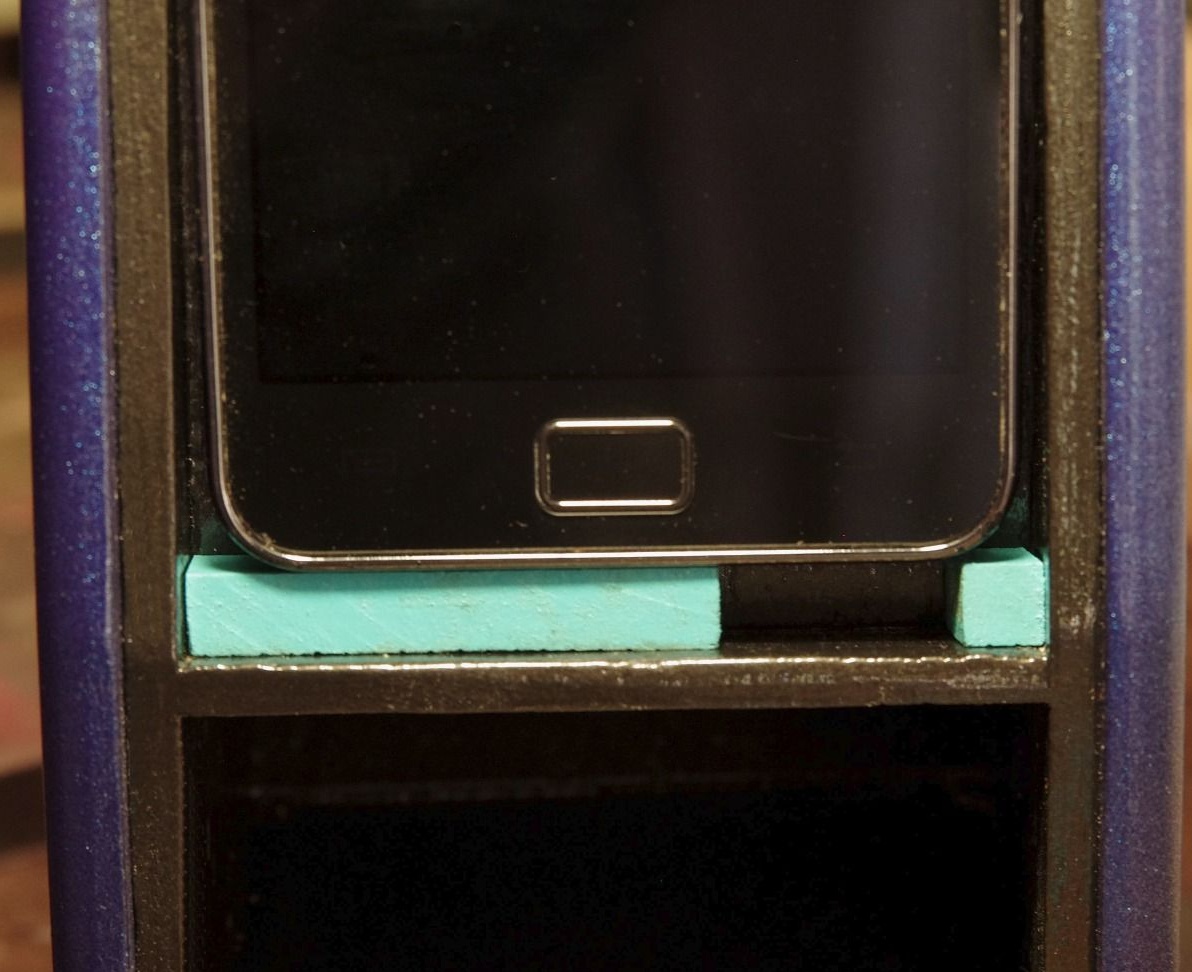
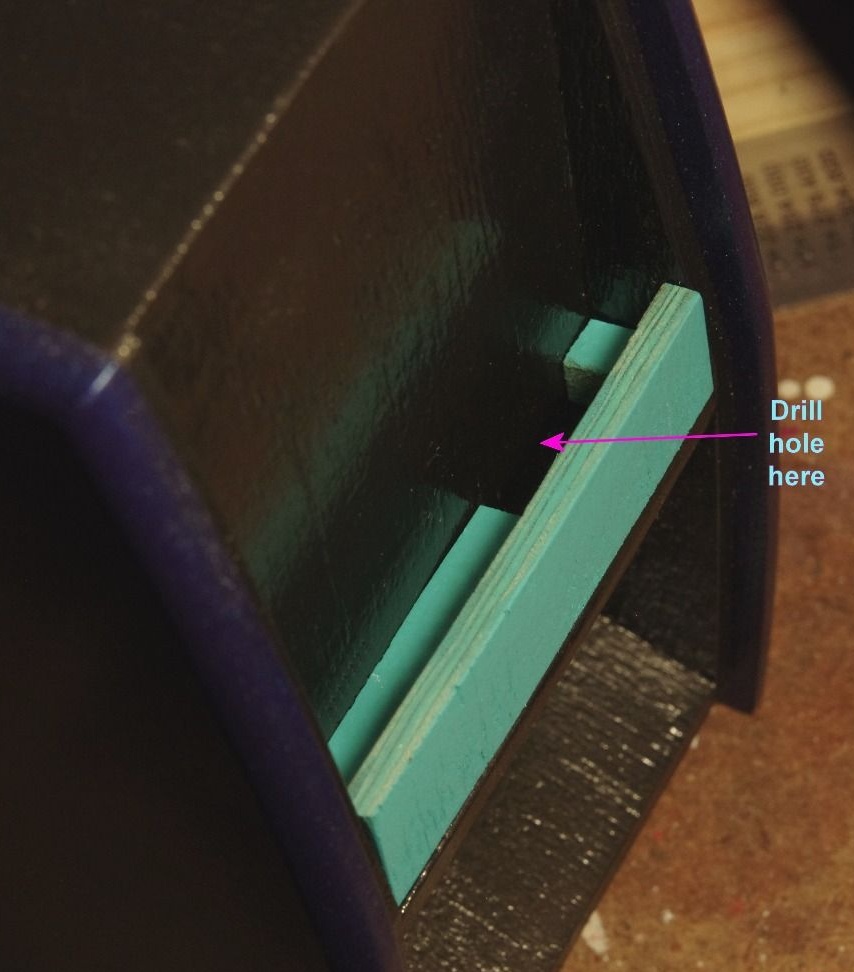
Place two blocks on the edges of the shelf that the phone rests on to raise it a few millimeters above it.If you want, you can further limit the space by inserting a longer block. Do not forget that you need to leave the distance between the blocks in the place where the phone speaker is located. To prevent the sound from coming forward, add another thin block as shown in the photo. Drill a hole in the throat of the speaker, opposite the speaker, so that sound can pass into the speaker, as shown by the arrow in the photo.
STEP 6 Trying to Improve the Sound
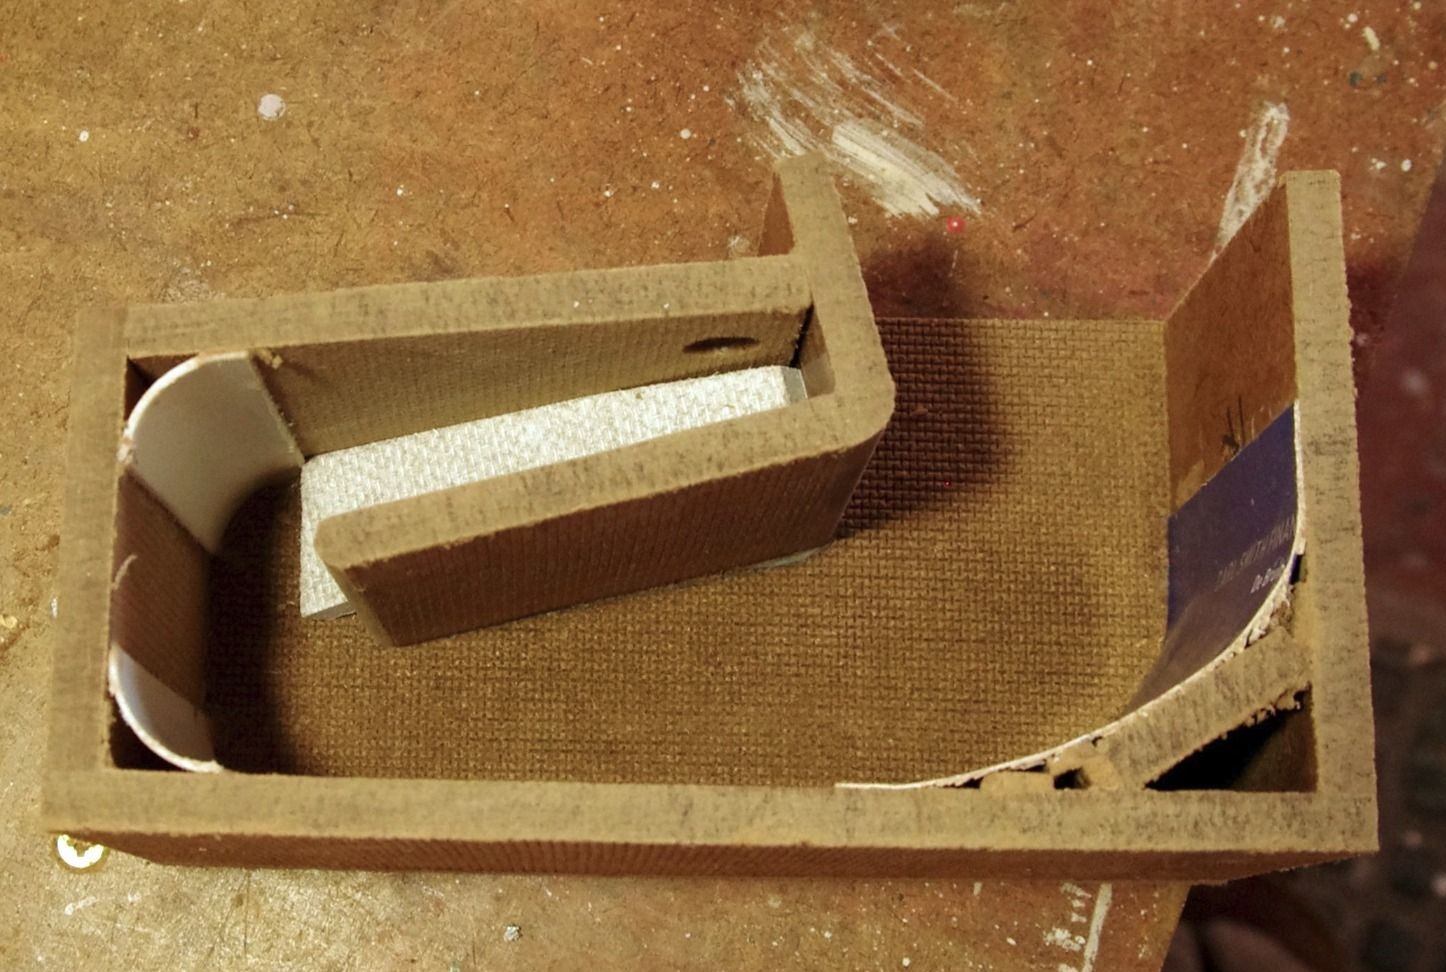
In the photo you can see the modification of the speaker that I built earlier, trying to determine whether the speaker will sound better if you use thicker plywood and round everything inside. This is strange, but the sound was only worse, so I put together the speaker that I described above.
So you can experiment with sizes to make the speaker sound good for you.