
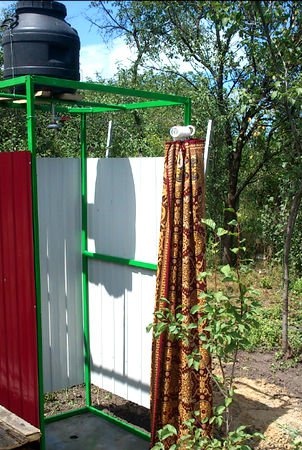
A shower is an outbuilding, which must certainly stand on each summer cottage. On hot summer days, even the most unpretentious plain-looking country the soul turns into an unusually demanded device, in a queue to which all households are lining up together. To make this much-needed object of country use can be quite simple. When developing the design of your soul, rely on the dimensions of a standard profile sheet, the parameters of which are 960 by 1500 mm.
For work you will need the following tools and materials:
steel profile pipe of rectangular section 30 by 20 mm;
three profile sheets of the above size;
a plastic tank equipped with a valve and a spray of water;
self-tapping screws;
anchor bolts;
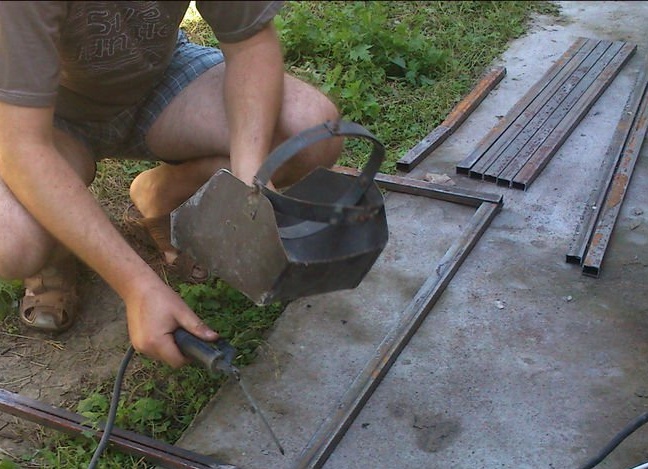
welding machine and electrodes to it;
cement, crushed stone and sand;
drill;
boards for the construction of formwork;
plastic sewer pipe;
primer and paint for metal;
shovel:
sandpaper;
vinyl shower curtain.
Operating procedure
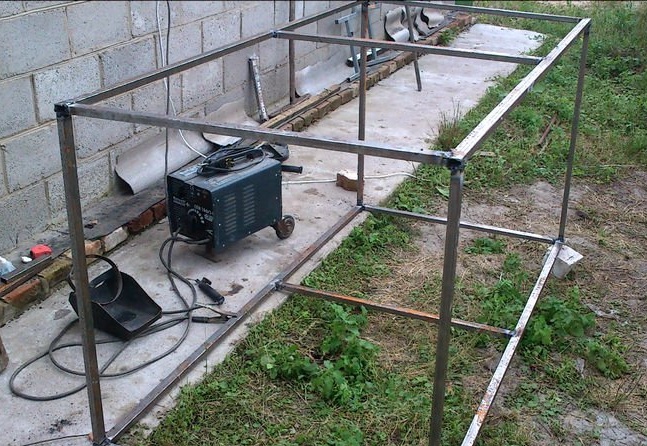
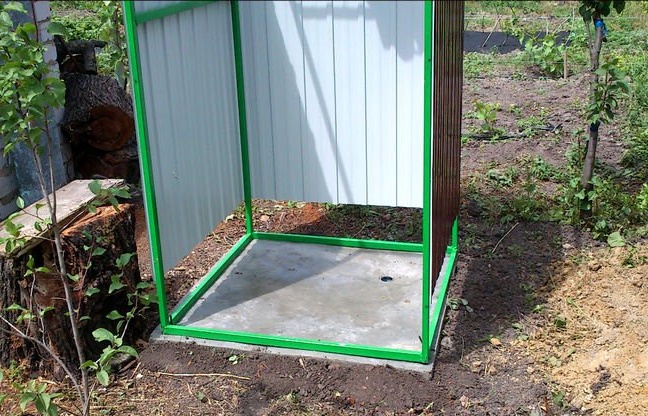
1. Cut the profiled pipe into bars of the required length, based on the dimensions of the future shower cubicle 960 by 960 by 2000 mm
2. Weld two rectangular frames of size 9960 by 2000 mm from the pipe.
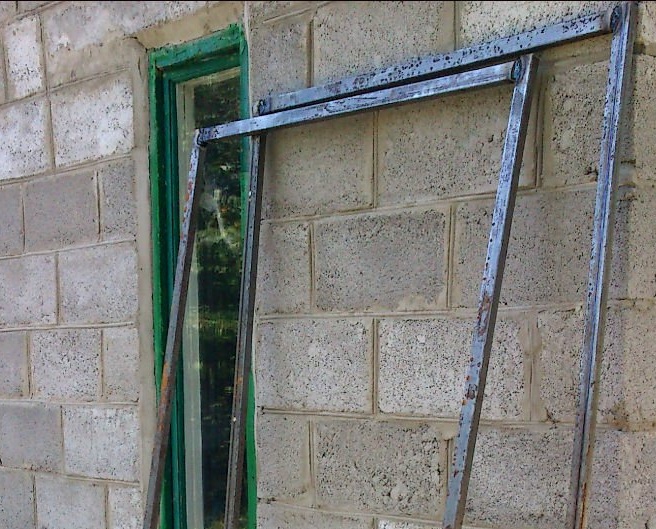
3. Install the frames in parallel and from above and from below using welding, connect them together with four 96 - centimeter pipe sections. As a result of your labors, you should get a shower enclosure frame - a parallelepiped with fins 960 by 960 and 2000 mm.
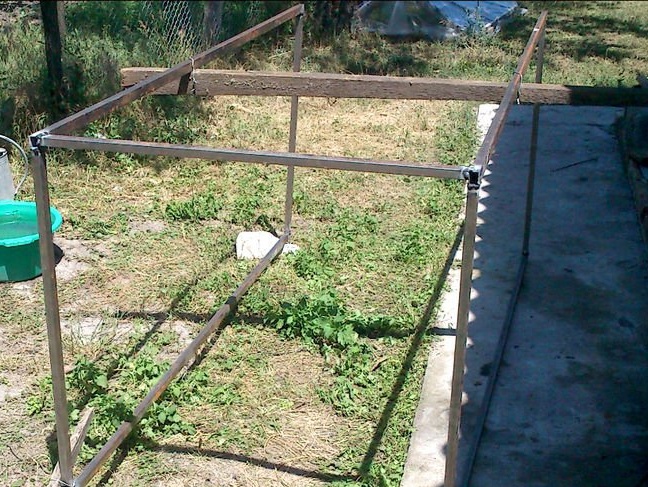
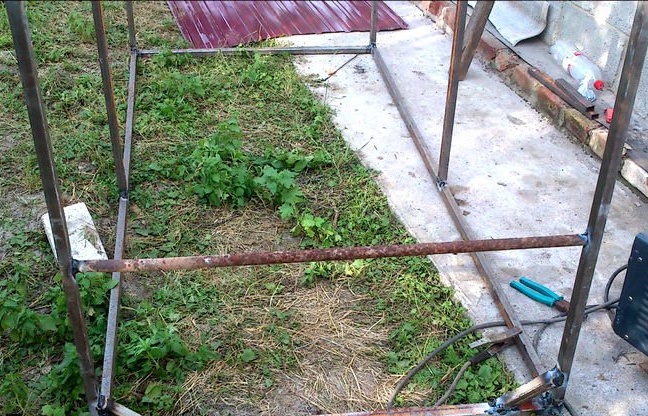
4. Strengthen the three side walls of the cabin with pieces of the profile pipe - for this, weld into them one segment parallel to the floor at a distance of 1 m from the ground.
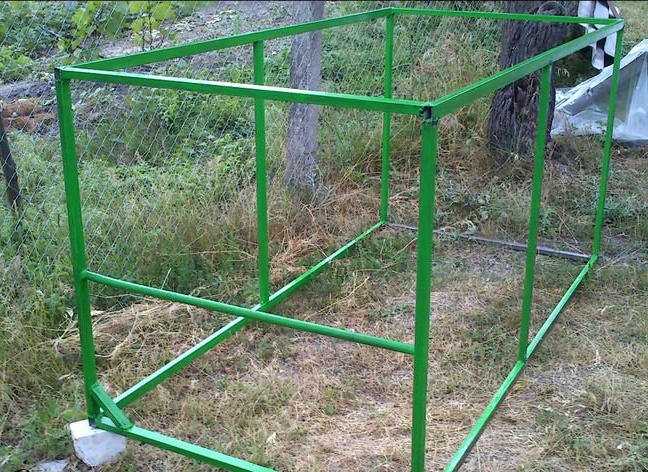
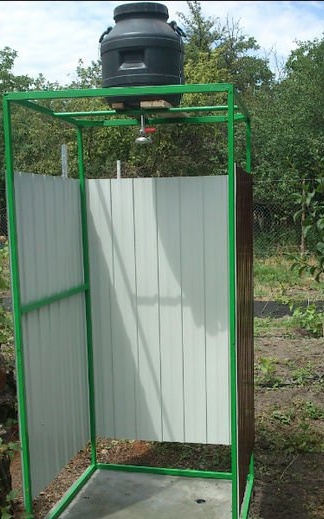
5. Make the soul of the roof - strengthen the welded area (cruciform or other shape) on top of which the water tank will later be hoisted.
6. After the shower enclosure frame is fully assembled, sand all seams, coat the pipes with a primer and paint them.
7. The field of how the paint dries, using a drill with screws, attach profile sheets to the frame from three of its sides. Fasten the sheets at a height of 15 cm from the ground, a gap formed from below will provide ventilation of the shower cabin and prevent mold and fungi from appearing in it.

8. Dig a wastewater pit, lay a plastic sewer pipe to it, and build the required formwork.
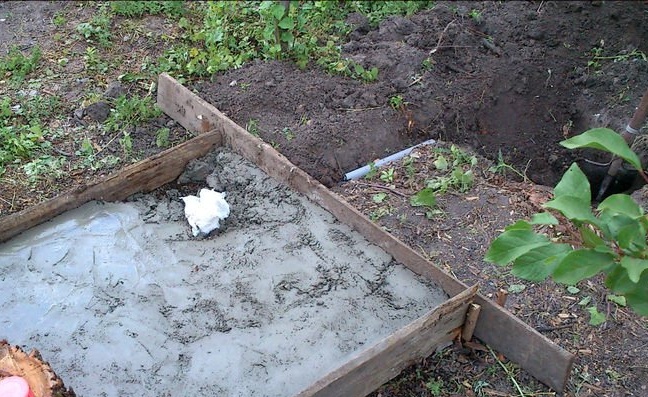
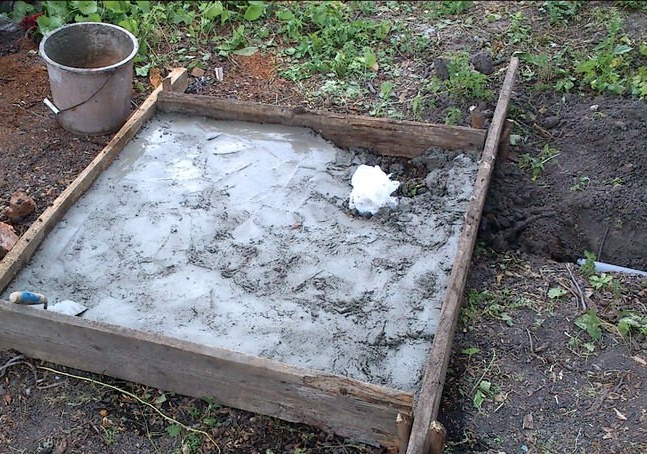
9. Close the concrete, pour it into the formwork. Smoothing the surface of the solution, form a slope for easy drainage of water. After the concrete has finally hardened, disassemble the formwork.
10.Place the shower cubicle in its intended place and attach it to the concrete with anchor bolts.
11. At the top of the shower, install and secure a plastic tank, pass all its fittings into the cabin.
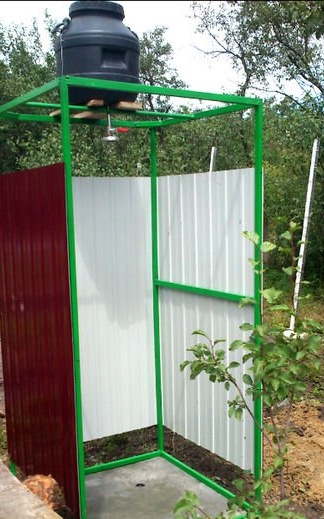
12. Hang a bright plastic curtain at the entrance to the shower.