
The article will consider an example of how to assemble such a robot do it yourselfwithout spending a lot of money and effort.

The answer to the question of why the robot is made of wood is very simple. This material weighs little, it is pleasant to work with it, moreover, wood is the most easily accessible and almost free type of material. To make the robot as cheap as possible, you have to use inexpensive low-power servos. In order for such engines to work, the design should be as light as possible; for these purposes, this type of tree as balsa is the best suited. In addition, such wood is very easy to process.
Materials and tools for creating a robot:
- 12 servos type Tpro - SG90;
- balsa tree Rectangle (36 x 6 x ½ inches), Dow (36 x 3/3 inches), Dow (12 x 1/8 inches);
- Arduino circuit type Uno;
- engine type PWM - TLC5940;
- 14 resistors with a nominal value of 4.7K, 1.7K, 10K Ohm;
- capacitor at 10 uF;
- connector 538 - 42375 - 1856 (male);
- board type Protoboard 589 - 8200 - 4565;
- 6 Volt battery, with a capacity of 5000mAh (availability is optional);
- 30 axis accelerometer type ADXL345.
Tools required:
- a drill size 1/8;
- a knife with a sharp blade;
- hot glue and joiner's glue;
- soldering iron.
This set of tools and materials will be enough to create a robot. Without delivery, all items will cost a total of no more than $ 100.
If you want to save money, then you can not install a battery on the robot, it can be powered through a 5-6V power supply.
To make it easier for the robot to maintain balance, an accelerometer is installed on it, but special programming skills will already be needed here.
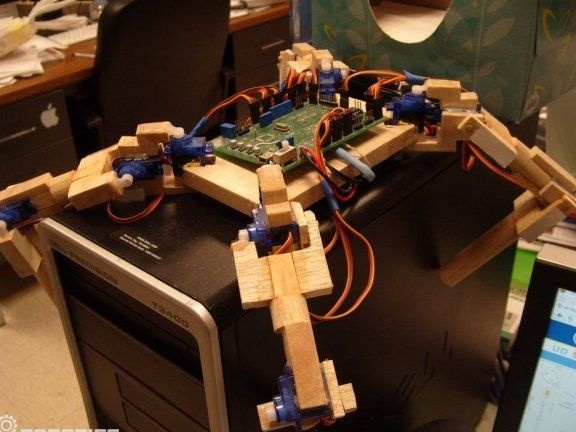
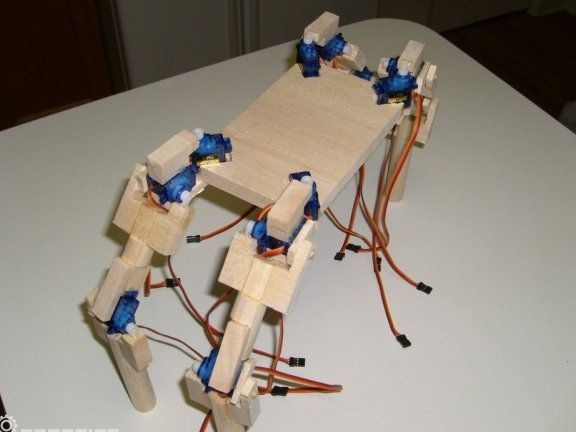
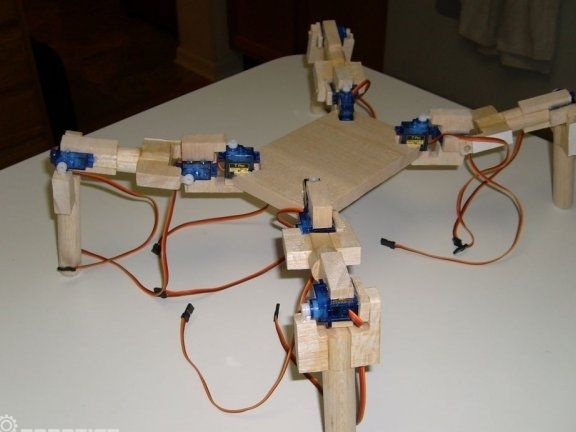
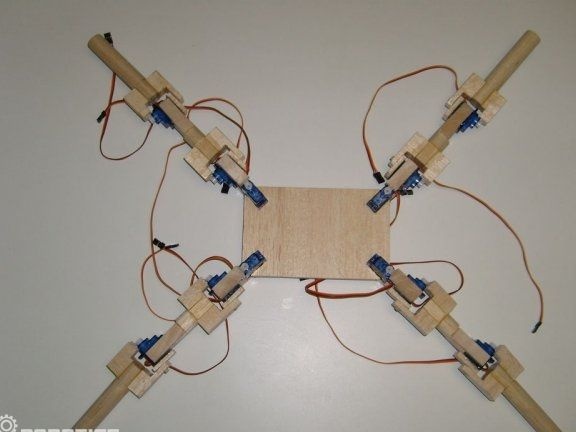
Step one. How to make a robot body
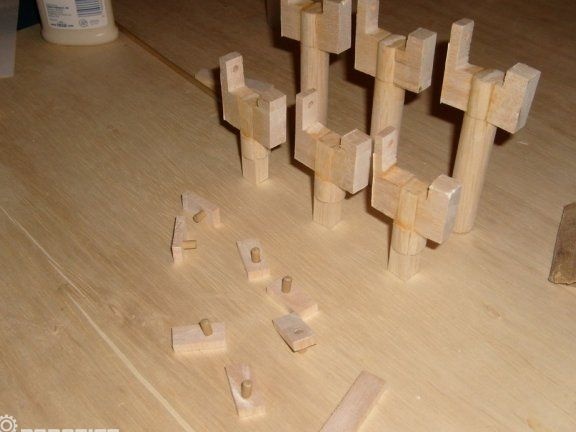
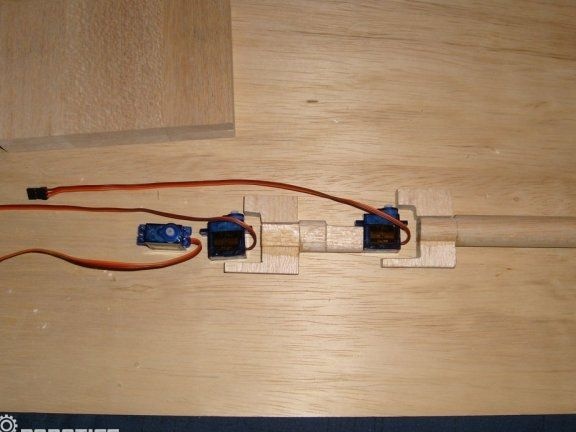
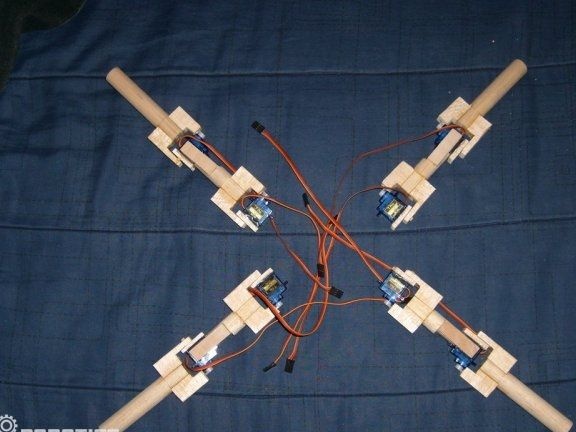
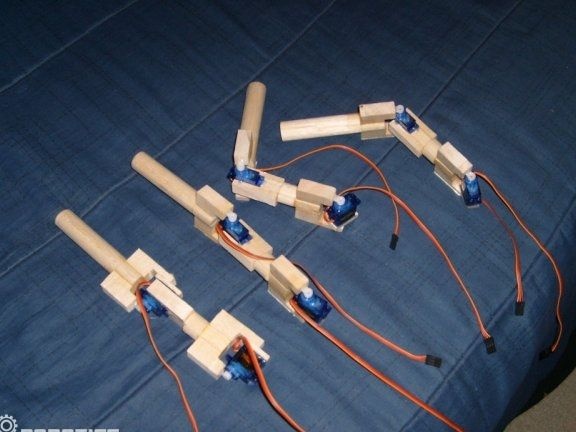
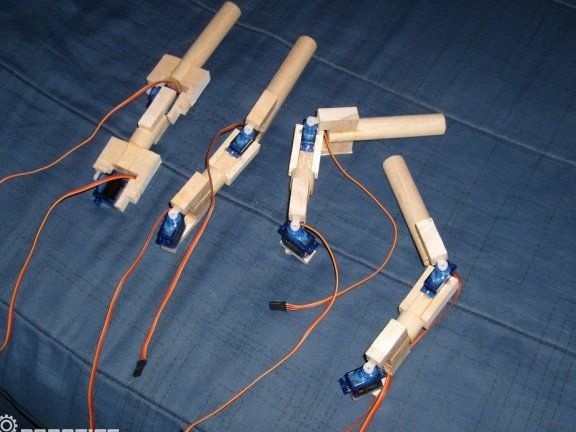
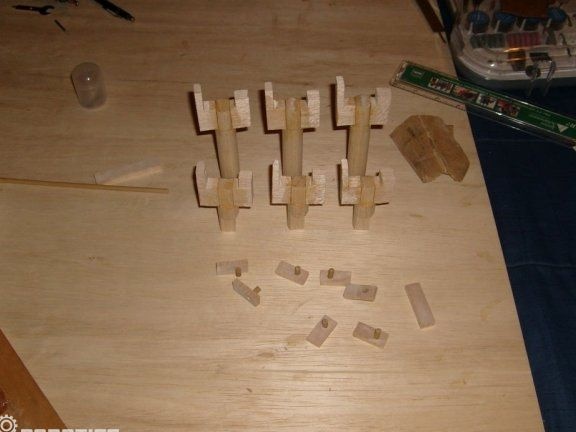
The most difficult element of the robot is the leg. The main thing is to do one first and then do all four is not difficult.
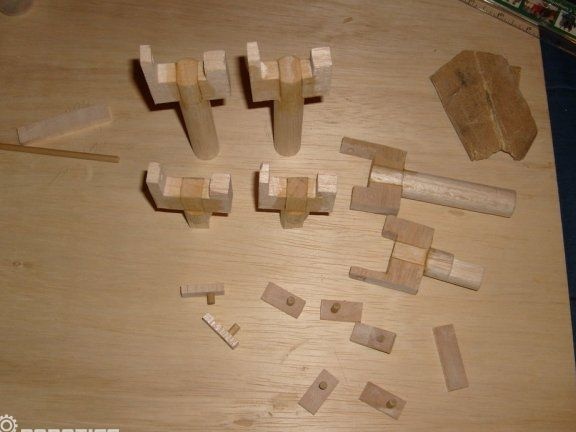
To work with cork, you need only one tool - a knife. It is best to work at the table, then you will get more consistent and parallel cuts.
To make the first leg of the robot, you need to see how it should look. For this, the author attaches a photo with various options for manufacturing the legs of the robot. Particular attention in the manufacture of legs should be given to the fulcrum.
You can also see the contacts of the servos in the figures.They are needed in order to strengthen the legs and reduce the load on the shafts of the servomotors.
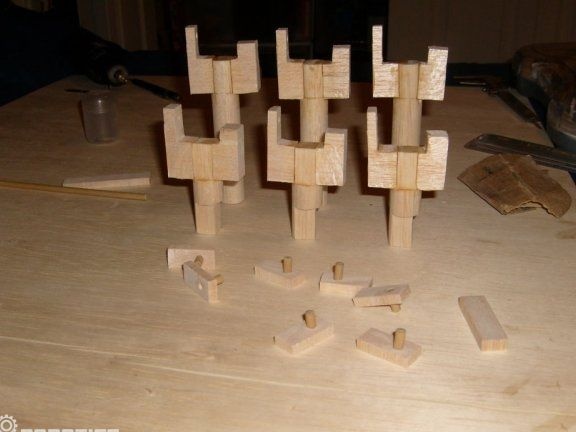
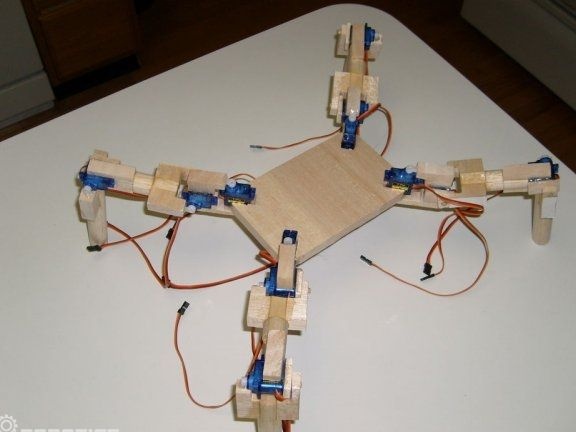
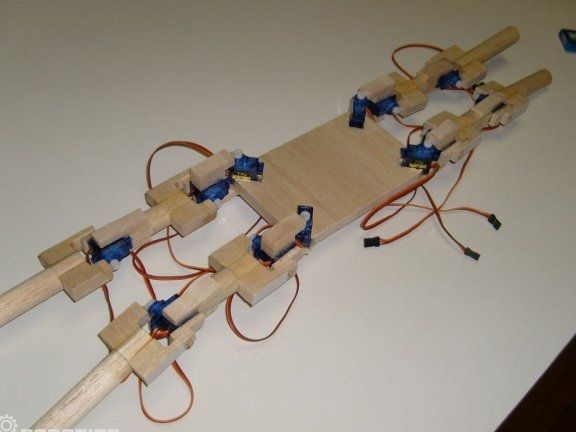
If we talk about the stomach of the robot, then this is a rectangle that has recesses on the edges for installing servos.
For bonding balsa it is best to use carpentry glue, it provides reliable bond strength. Even wood glue can be applied to the outer part of the wood to make the material stronger.
Hot glue is used to attach the servo to the tree. But practice shows that such a connection may not be reliable, so it is advisable to think and fix the servo in some other way.
A feature of the proposed robot project is that the legs can bend 180 degrees, so the robot can walk upside down.
Step Two How is it arranged electronic part of the robot
Initially, the circuit had huge functionality, but it was easier to simplify and now it has only one task - to make the robot walk. If the budget has a certain supply of funds, the system can be added with an accelerometer. Here it will be a great addition.
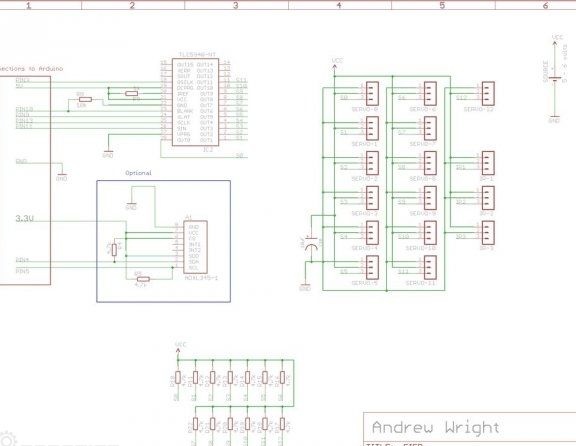
If you look at the diagram, you can see the power source for 5-6 volts. This is the main power source for the robot, this is enough for its normal operation. You do not need to use an Arduino power supply to power the servos. You need to use an Arduino power supply only to power the PWM motor.
To place all the elements, it is best to create a printed circuit board. The PCB Advanced Circuits transmitter will not be out of place here, since the project is often presented as an example in schools.
Step Three Robot Program Code
Below you can download the finished firmware for the robot. If homemade assembled correctly, then when you start the robot should rise and begin to swing its paw.
To install the code to work, you need the TLC5940 drivers, you can download them at.

When testing the robot, one error may occur, while the legs will move in opposite directions from each other. The easiest way to fix this problem is by changing the code. If you look at the code, you can see some functions that look like with tlc_setServo (4, 100). The first parameter here means the engine to be controlled. And the second parameter is responsible for the angle of the servo. To solve the problem, you just need to change the second parameter.
Now the robot is ready and you can test it. When launched, it will be very interesting to move your legs like a spider. As an upgrade to the robot, you can install a camera, various sensors and other elements that will significantly help expand its functionality and capabilities.