

Interesting and not complicated robotthat moves behind an object of a certain color.
To determine the position of the object, a smartphone camera is used, mounted on the robot chassis. You can use a ready-made constructor, about which I already wrote here. Here is a list of what the author needed. With the exception of the smartphone, the cost of this robot was $ 60
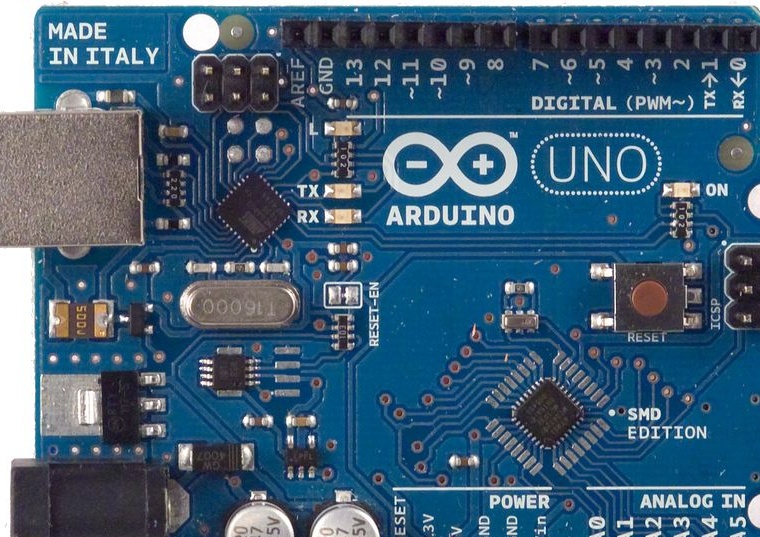
- Arduino Uno
- Smartphone with Android OS
- Robot chassis
- cables for connection
- H bridge for DC motors (author used pololu TB6612FNG)
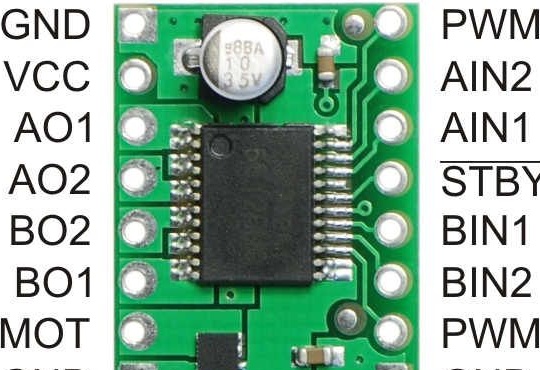
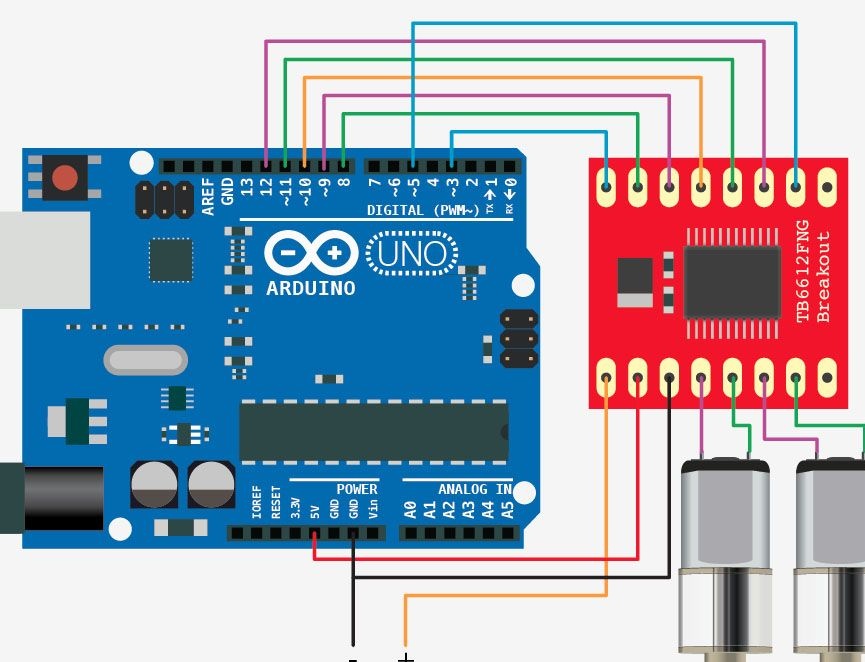
The picture shows how TB6612FNG and Arduino Uno connect
Driver conclusions and what they are responsible for:
1) GND - Connect it to the GND pins on the Arduino
2) VCC - Supply voltage of the driver logic. Connect it to the 5V pin on the Arduino.
3) A01 - output contact, which is connected to the positive terminal of motor A.
4) A02 - output contact, which is connected to the negative pole of motor A
5) B02 - output contact, which is connected to the negative pole of motor B.
6) B01 - output contact that is connected to the positive terminal of motor B
7) VMOT- Output voltage of the motors. Connect it to the positive pole of the battery. (To power the engines)
8) GND- Connect it to the negative terminal of the battery.
9) GND- Connect it to the GND pin on the Arduino.
10) PWMB- PWM pin of the motor driver to adjust the speed of motor B. Connect it to any of the PWM pins on the Arduino and specify a speed value for the motor from 0-255.
11 and 12) and BIN2 BIN1 - Input contacts of the motor driver for motor B, which determine the direction of rotation of motor B. Connect it to any two Arduino digital pins.
13) STBY- Connect it to any digital output. When installed on a high level, it includes a driver
14 and 15) AIN1 and AIN2- Input pins of the motor driver for the motor, which indicate the direction of rotation of motor A. Connect it to any two Arduino digital pins.
16) PWMA-PWM output of the motor driver for adjusting the motor speed A. Connect it to any of the PWM pins on the Arduino and specify the speed value for the motor from 0-255.
Bluetooth module HC-06
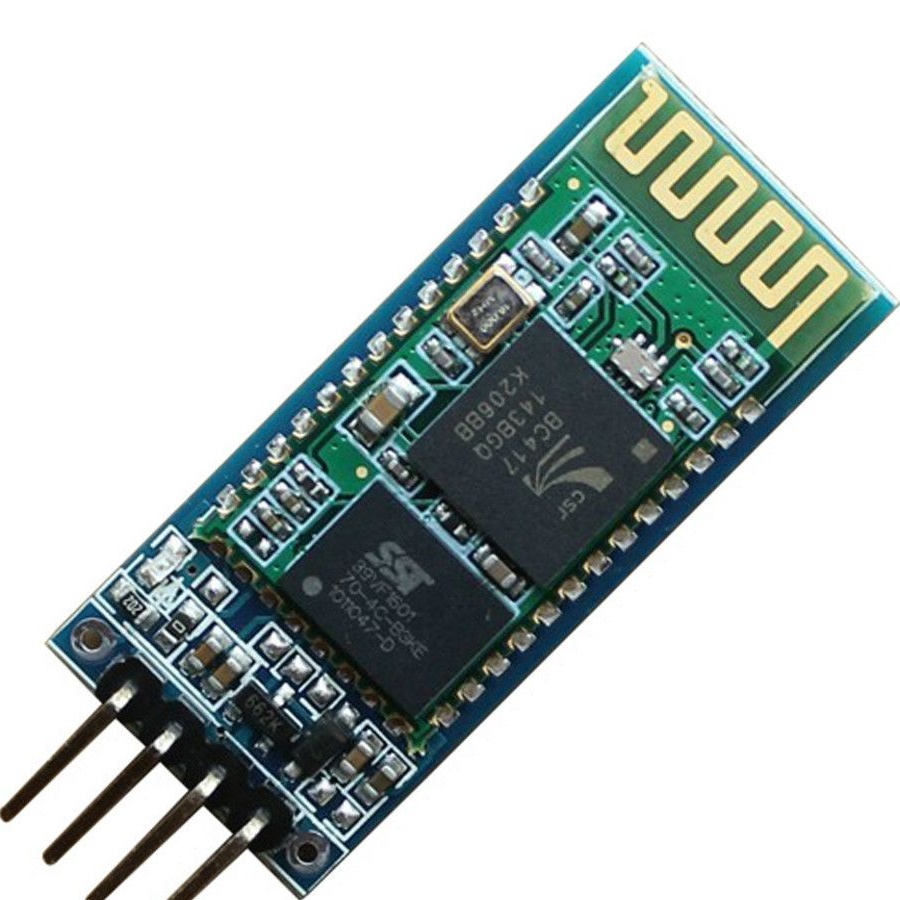
Aliexpress costs about $ 6
How does it all work?
This project uses an Android smartphone with a special application that processes information from the camera to determine where the red object is, calculates its coordinates
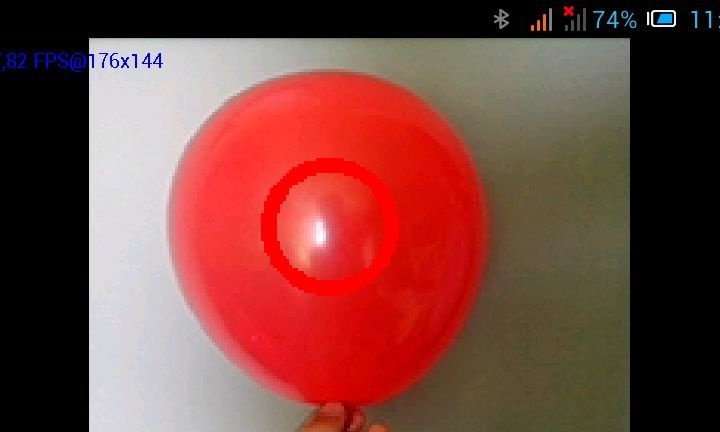
bitmap = Bitmap.createBitmap (mRgba.cols (), mRgba.rows (), Bitmap.Config.ARGB_8888); Utils.matToBitmap (mRgba, bitmap);
int x = 0;
int y = 0;
int all_x = 0;
int all_y = 0;
while (x <176) {
while (y <144) {
int pixel = bitmap.getPixel (x, y);
int redValue = Color.red (pixel);
int blueValue = Color.blue (pixel);
int greenValue = Color.green (pixel);
if (redValue> 200 && blueValue <70 && greenValue <70) {
points ++;
all_x = all_x + x;
all_y = all_y + y;
}
y ++;
}
x ++;
y = 0;
}
y = 0;
x = 0;
x_center = all_x / points;
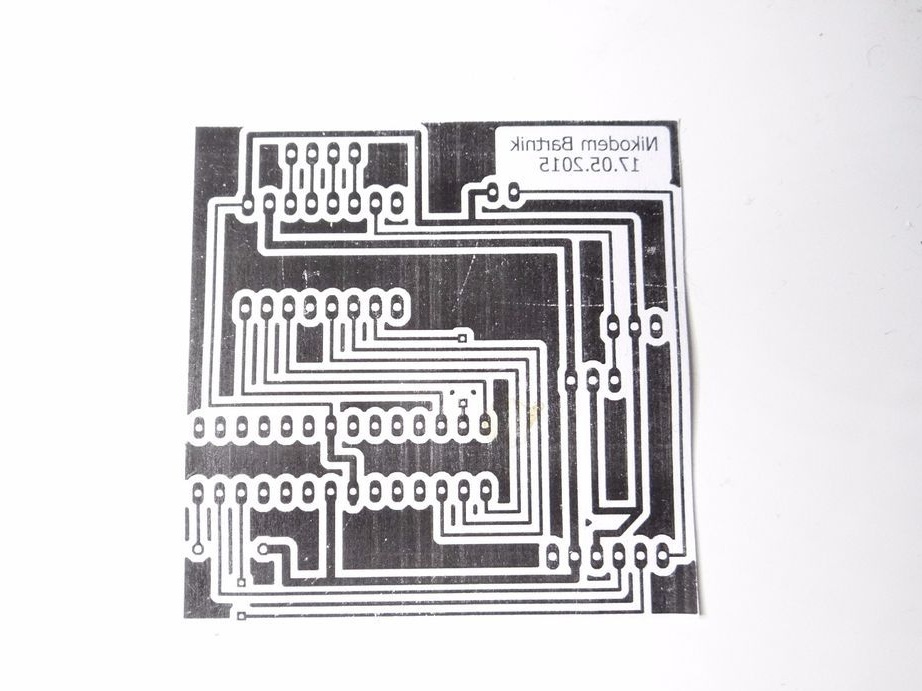
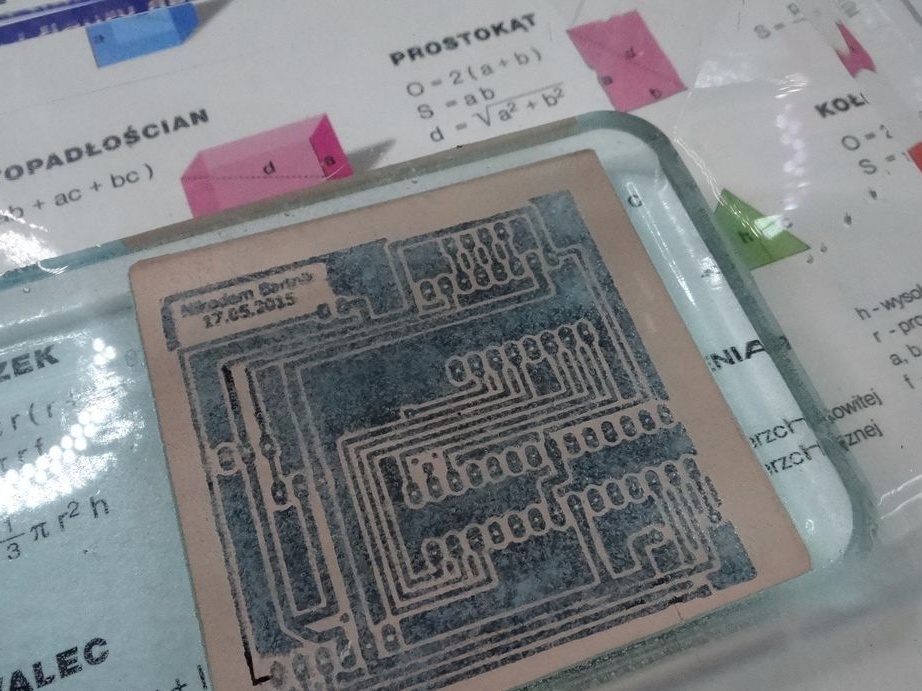
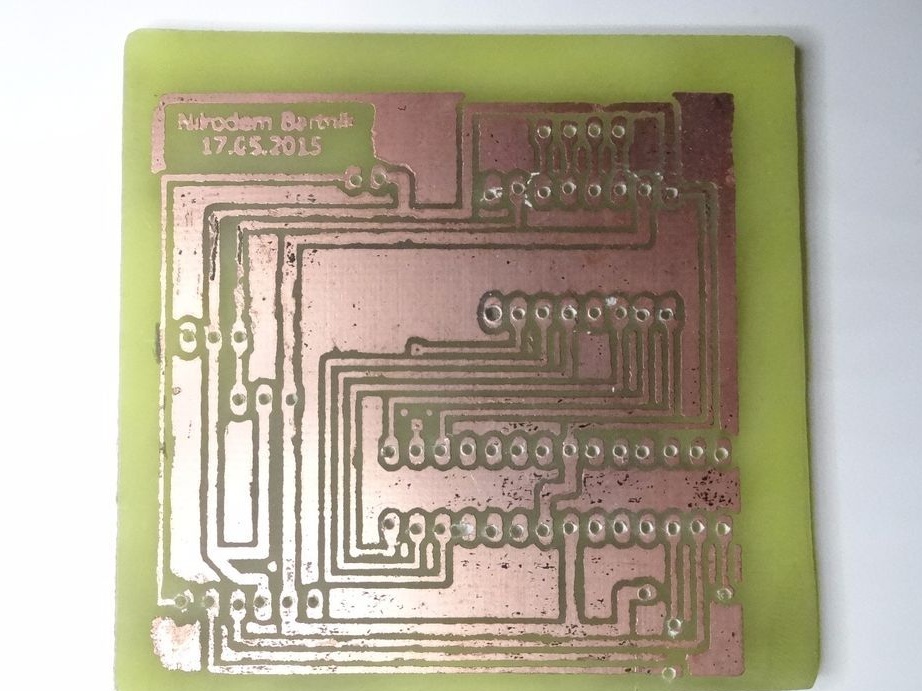
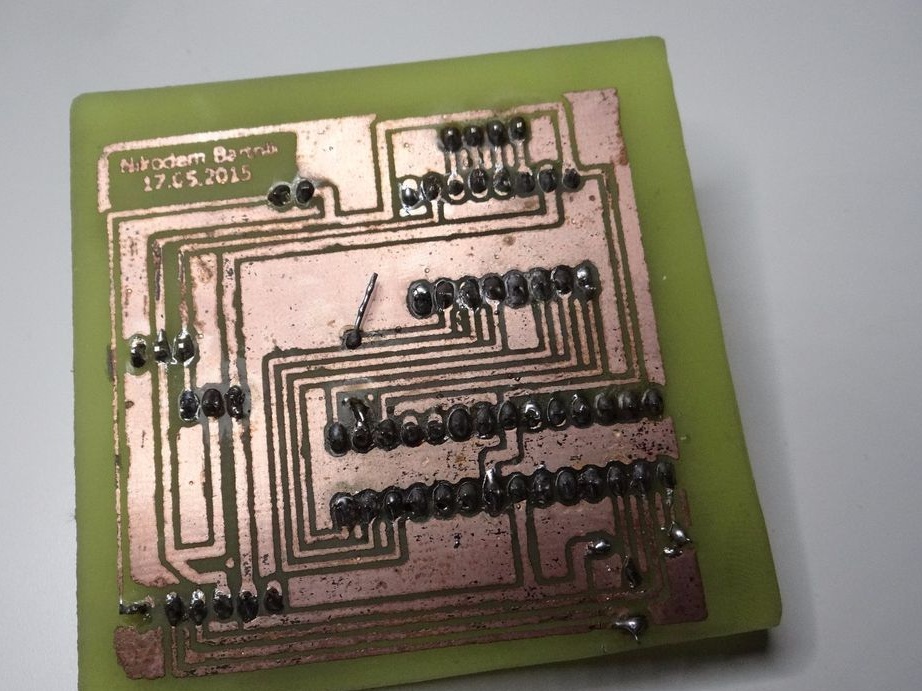
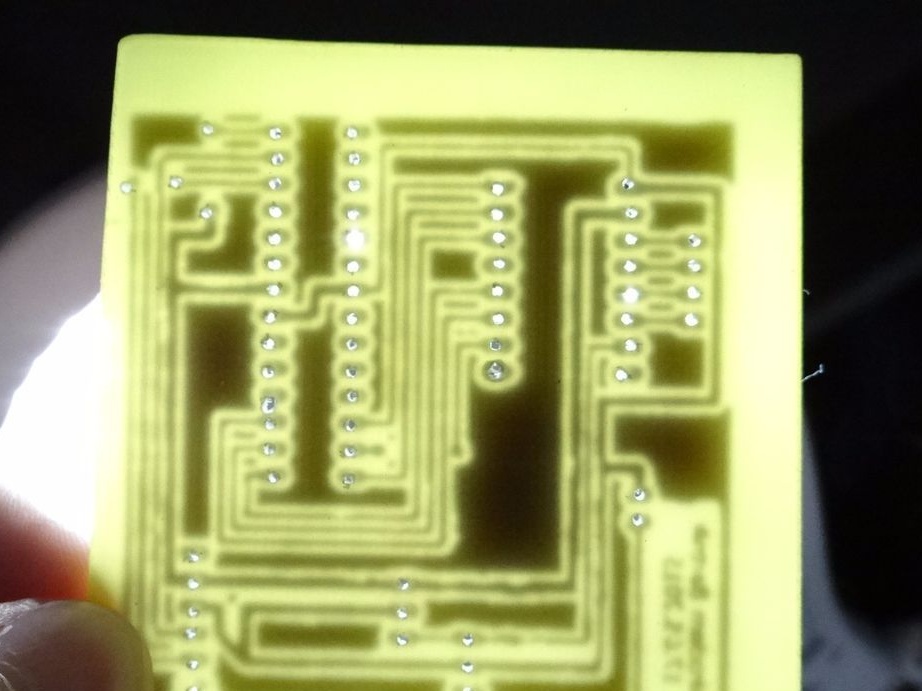
y_center = all_y / points;In the archive, the connection diagram and the printed circuit board for the robot, for those who do not want to buy Arduino UNO
What is needed for assembly:
- All that is mentioned above, atmega 8, 128 or 328
- LED, no matter what color
- 5v linear stabilizer (for version without Arduino)
- Pin connectors M and F

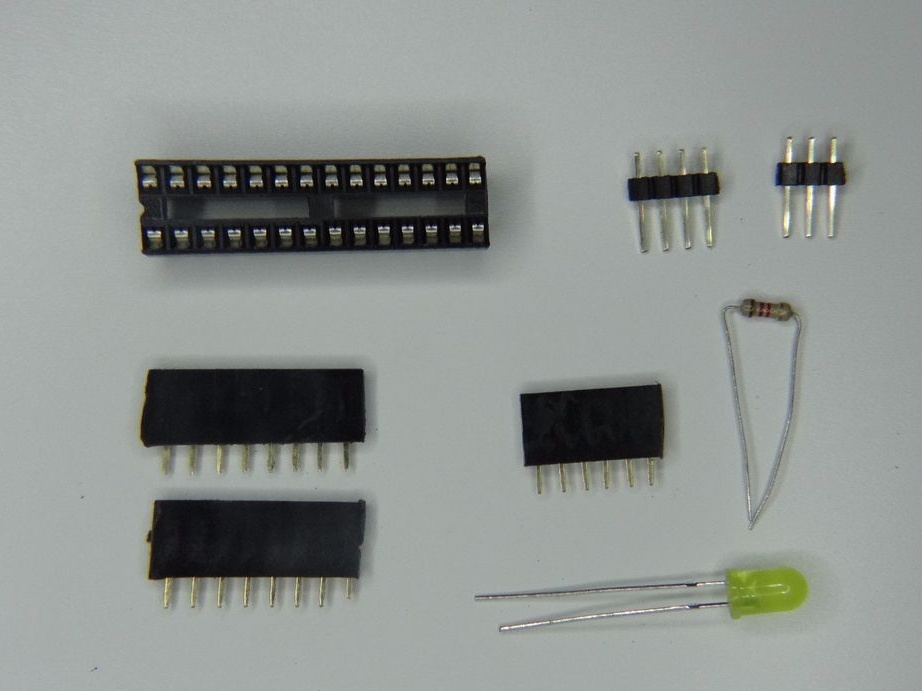
- Etched and drilled PCB (for version without Arduino)
- Drill, soldering iron.
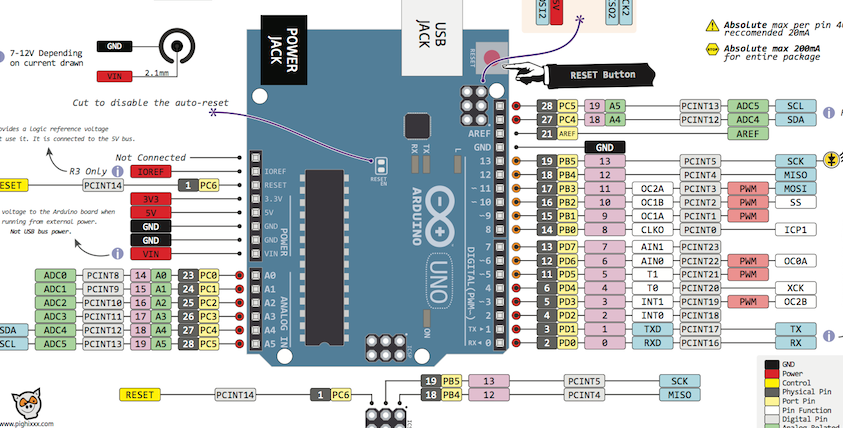
- Arduino Uno. For those who do not know what conclusions Arduino Uno are needed, in the attached file description.
Program for Arduino
The program for Arduino is very simple. The archive code for this program.
Program for phone
In this archive, the program for the phone is installed, like a regular application, and the source code of this program. Import it into Android studio, collect the apk file and install it on your smartphone.
This program uses Bluetooth just to send data. The library description (openCV) can be found on the Internet. The author made a printed circuit board for atmega 328. Remember this if you will not use a breadboard, but will distribute your signet: