

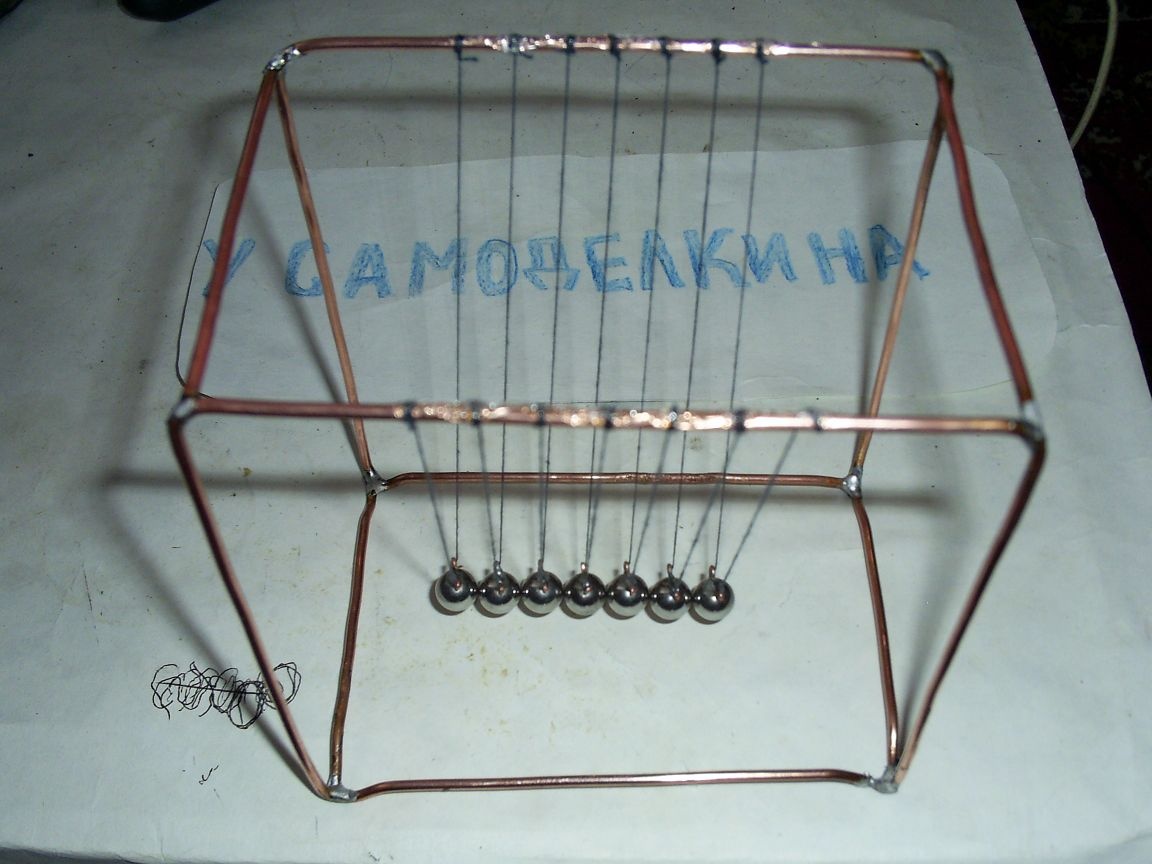
Newton's cradle.
Hello. The other day, I decided to make that no matter what was interesting and informative for my son, my attention was focused on Newton's pendulum or as some people call it Newton's cradle (and sometimes even Newton's balls).
It is a mechanical system invented by an English actor in 1967, his name was Simon Prebble.
Of course, you saw this pendulum in the physics office, the teacher, using his example, explains to children how energy of various forms is converted into each other, for example, potential energy into kinetic and vice versa.
Tools I used:
1) Pliers.
2) The hammer.
3) The beard.
4) File.
5) Soldering iron.
6) Nippers.
7) Tweezers.
Of the materials for the manufacture of the pendulum, I needed only:
1) Bearing.
2) Rosin.
3) Solder.
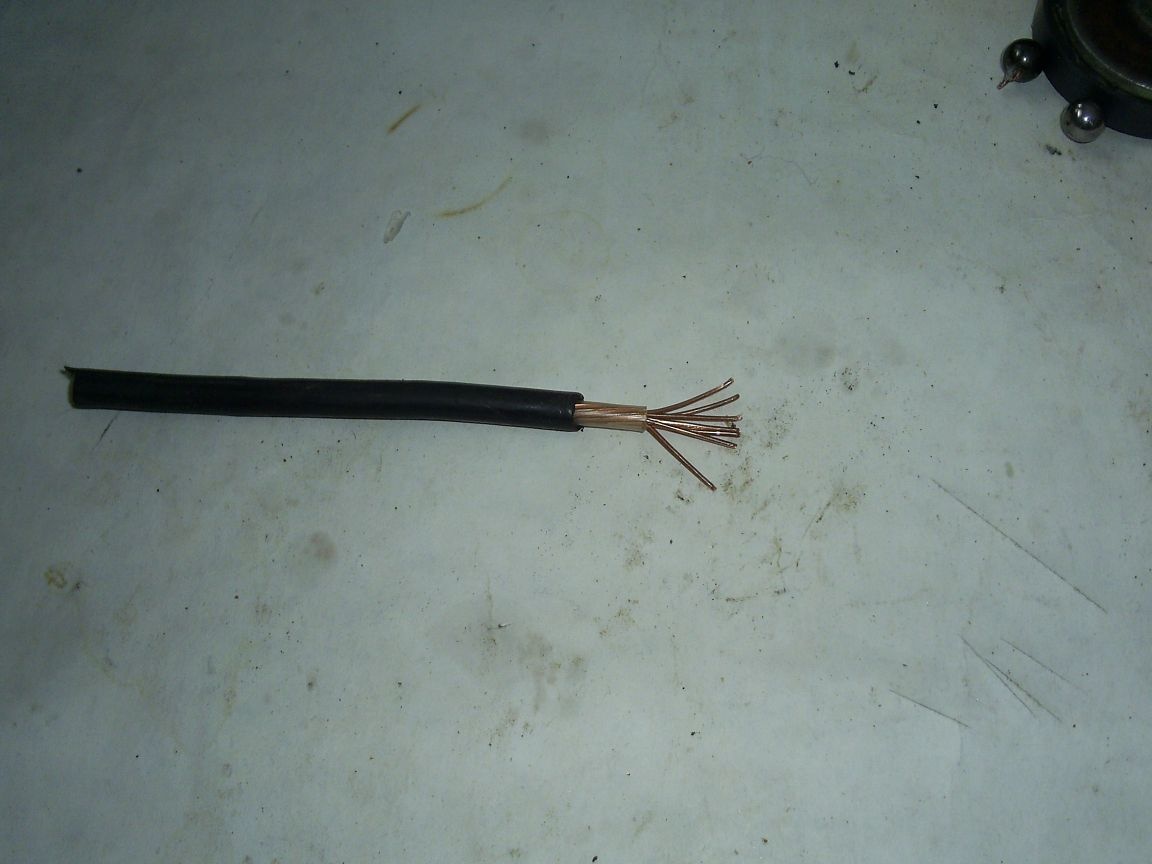
4) Copper wire (thin).
5) Thick copper wire (four square millimeters).
6) Threads.
7) Glue.
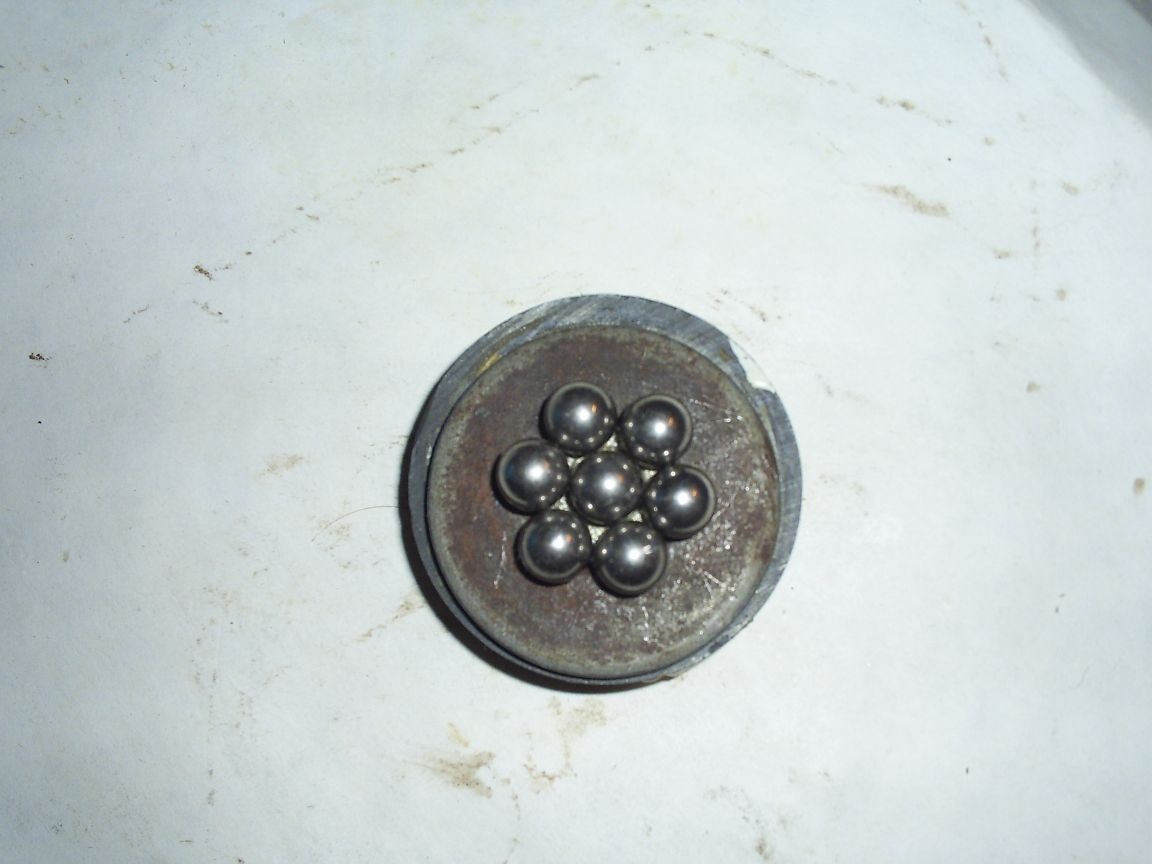
To begin with, I would like to talk a little about how I removed the balls from the bearing. It’s just that a friend of mine was telling me how he and his comrade pulled them out in an unsafe way, one might even say they weren’t at all safe and almost lost their eyes. He said that he put the bearing on a hard surface, hit the cage with a hammer and the balls scattered (two balls lost). I did not take such a risk and began to disassemble it.
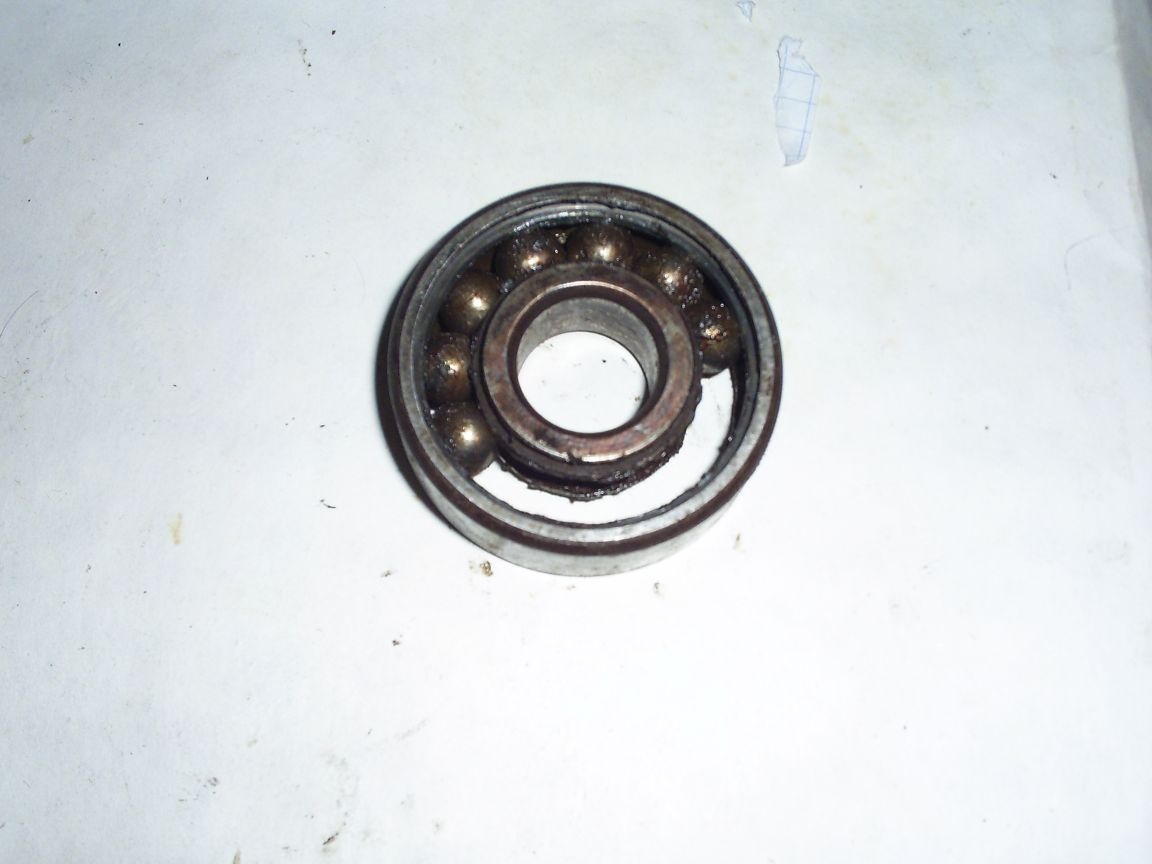
First I removed the oil seals.
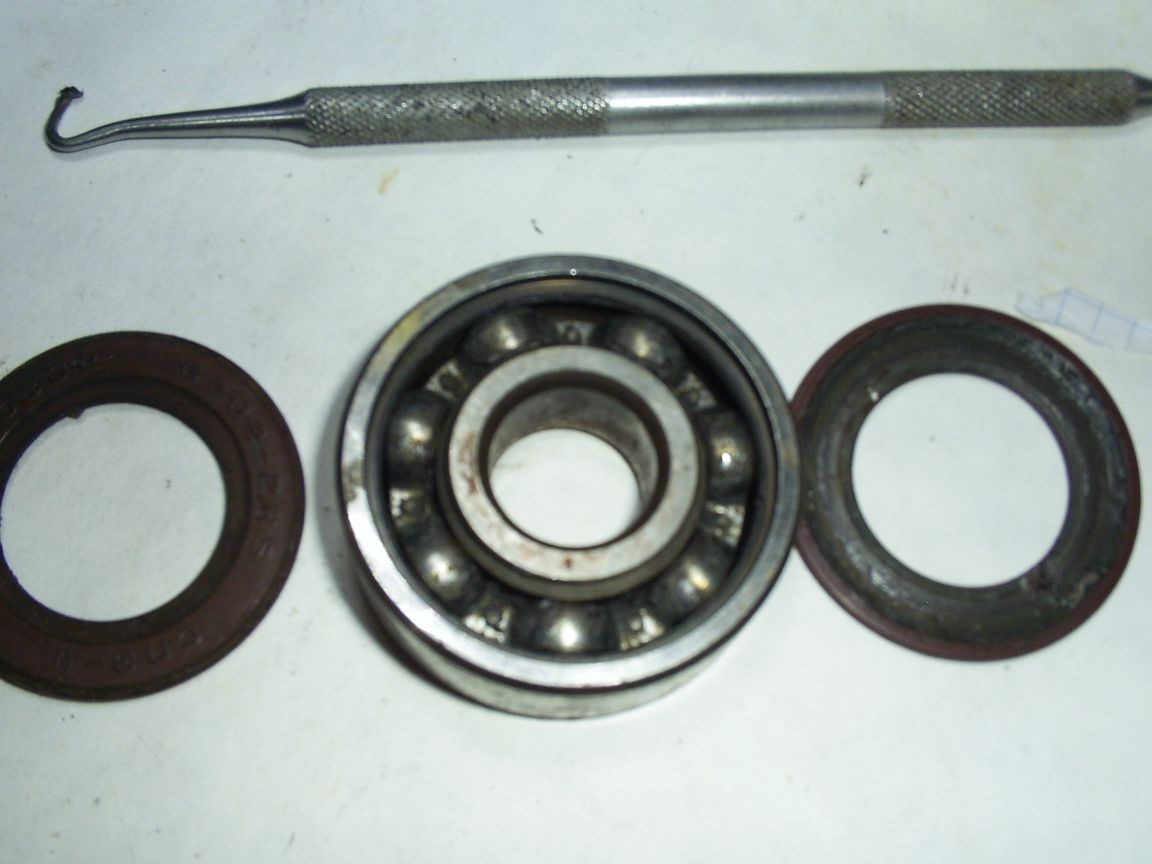
Then resting the barbs on the separator (where the rivets), with a slight movement of the hammer, riveted and bent the separator to the other side in several places and dismantled it with pliers.
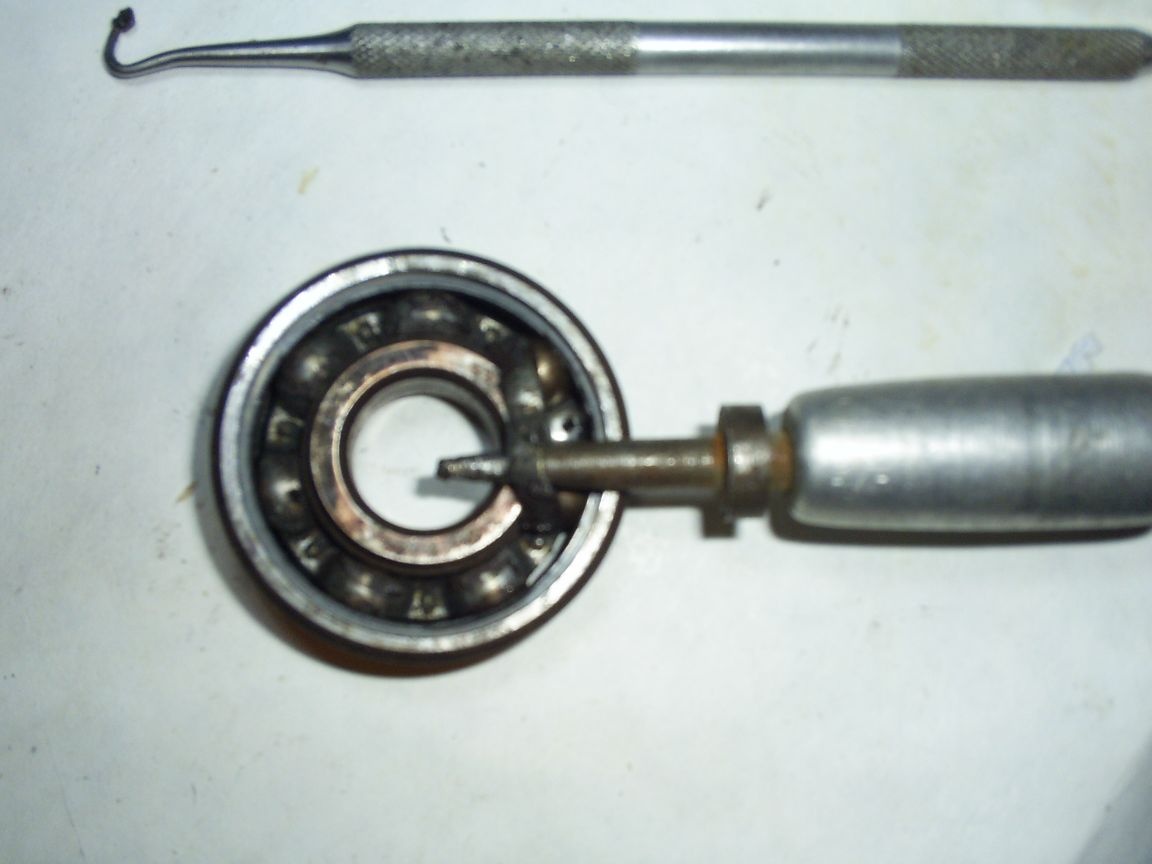
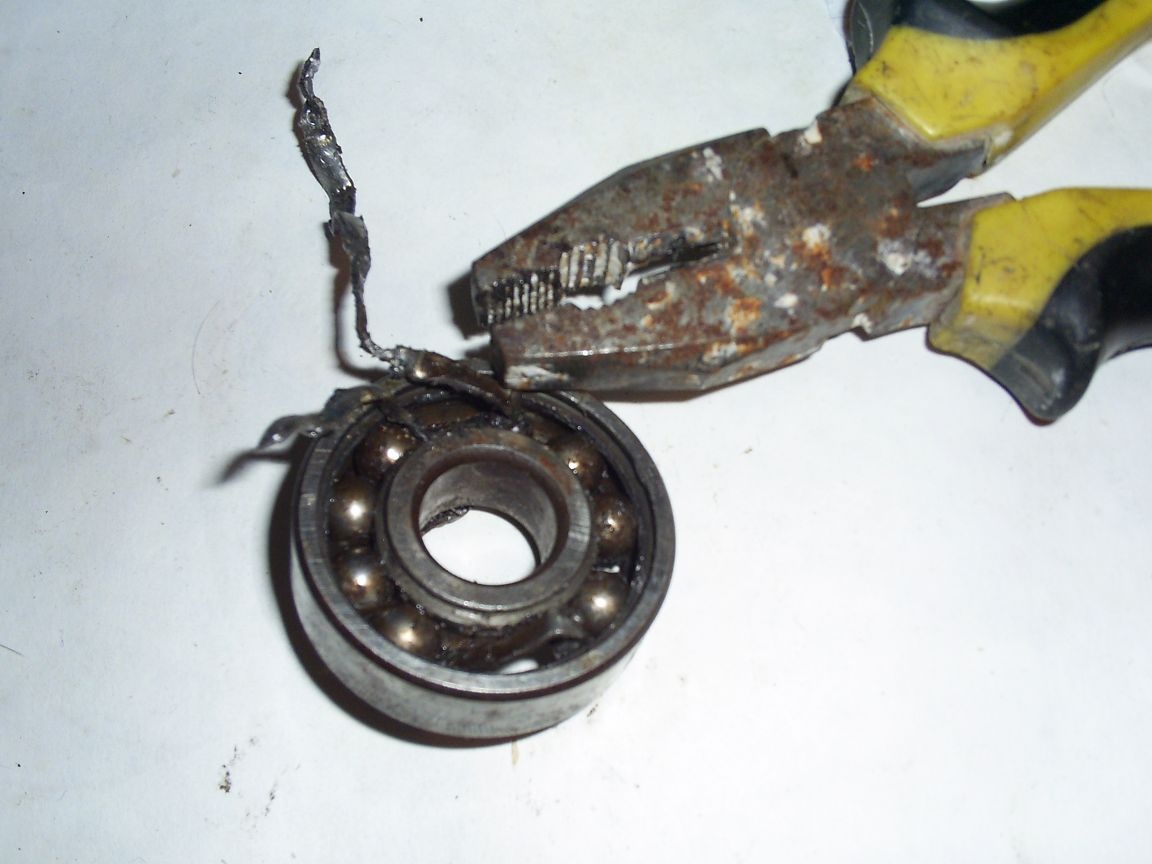
Next, grouping all the balls, with pliers, shifted the inner ring to the outer ring.
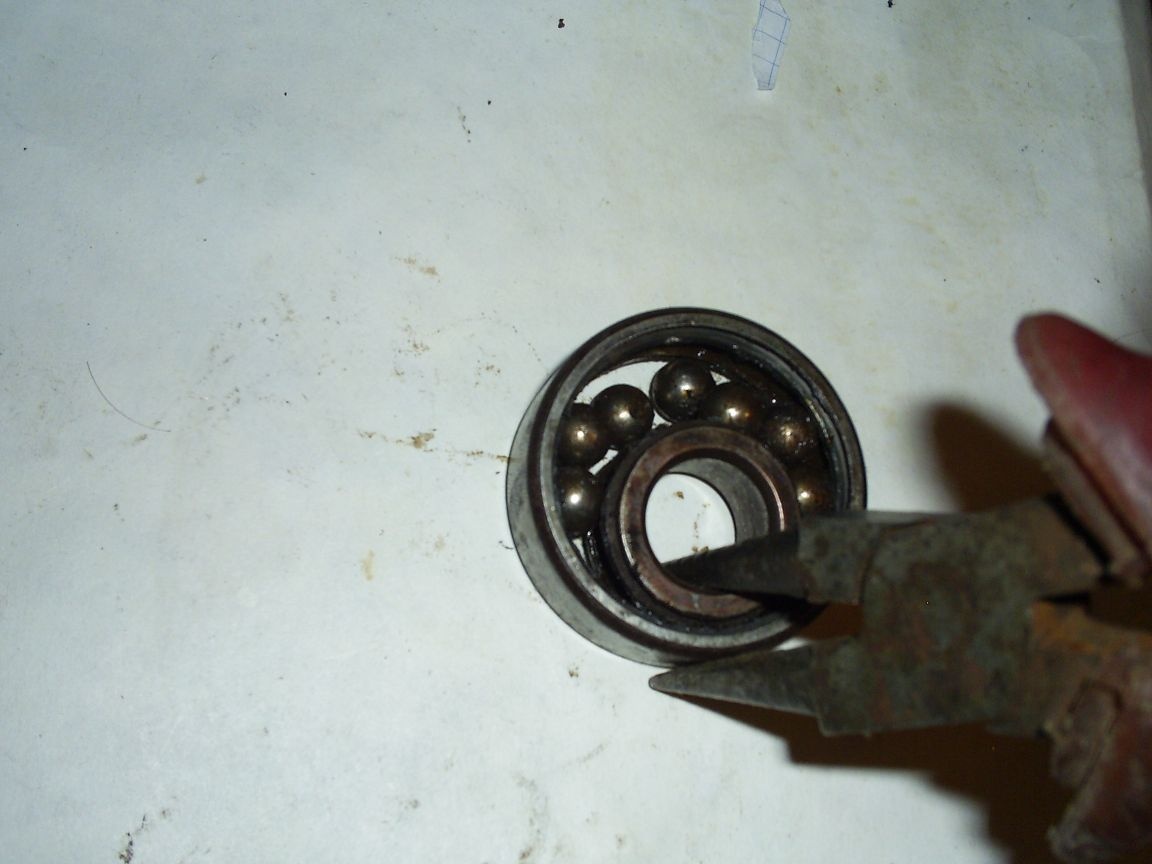
With such simple manipulations, it was easy for me to pull out the balls without damaging myself and others. Moreover, not one ball did not leave my field of vision.
Then I cleaned the file with a file where I would solder the ring.

I had a good rosin in this place.
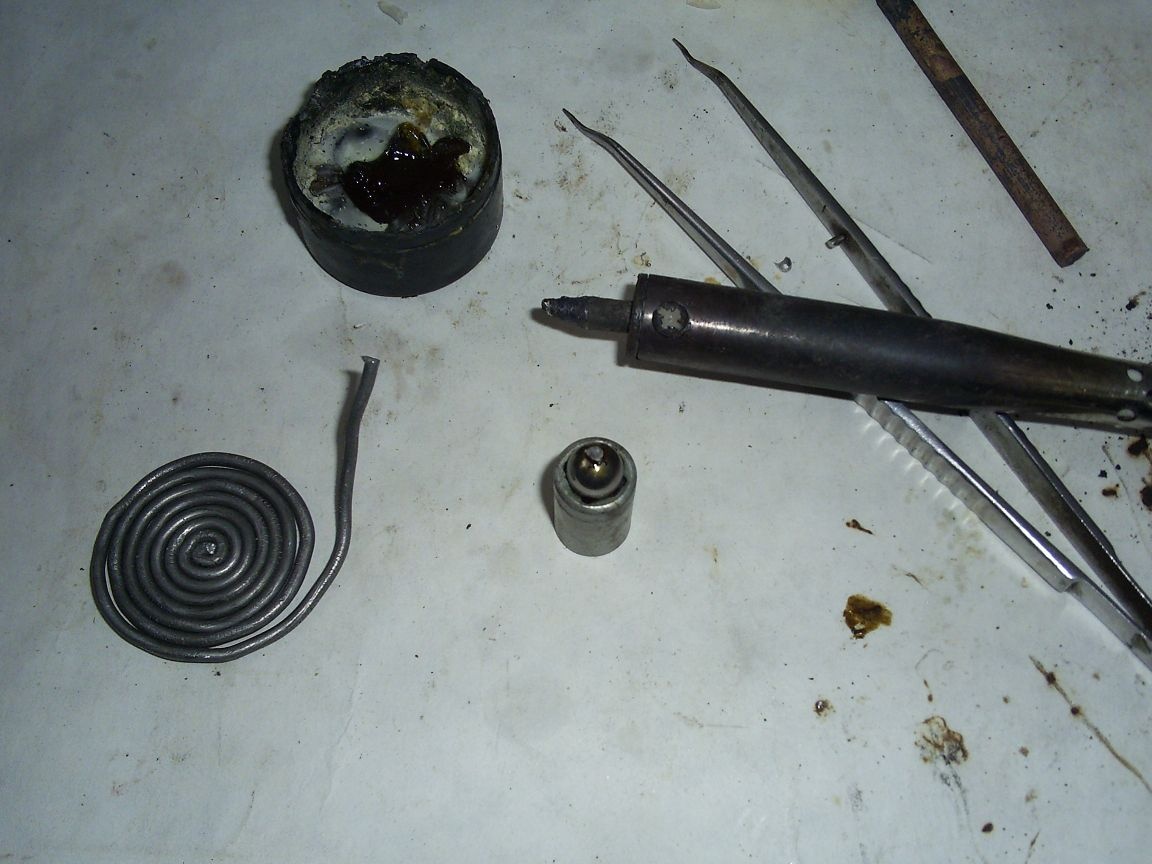
Found in the bins a piece of stranded wire of a small cross section. He pulled out one vein with pliers.
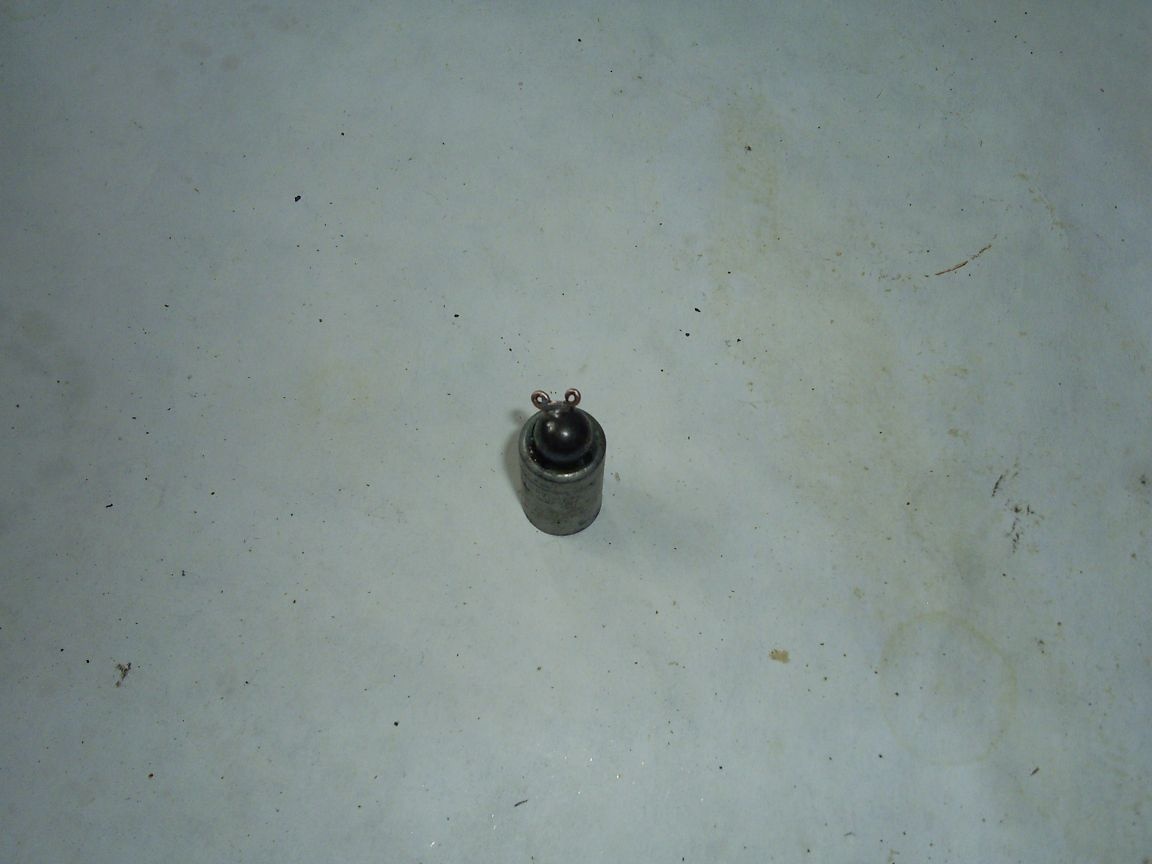
And he made rings from it.
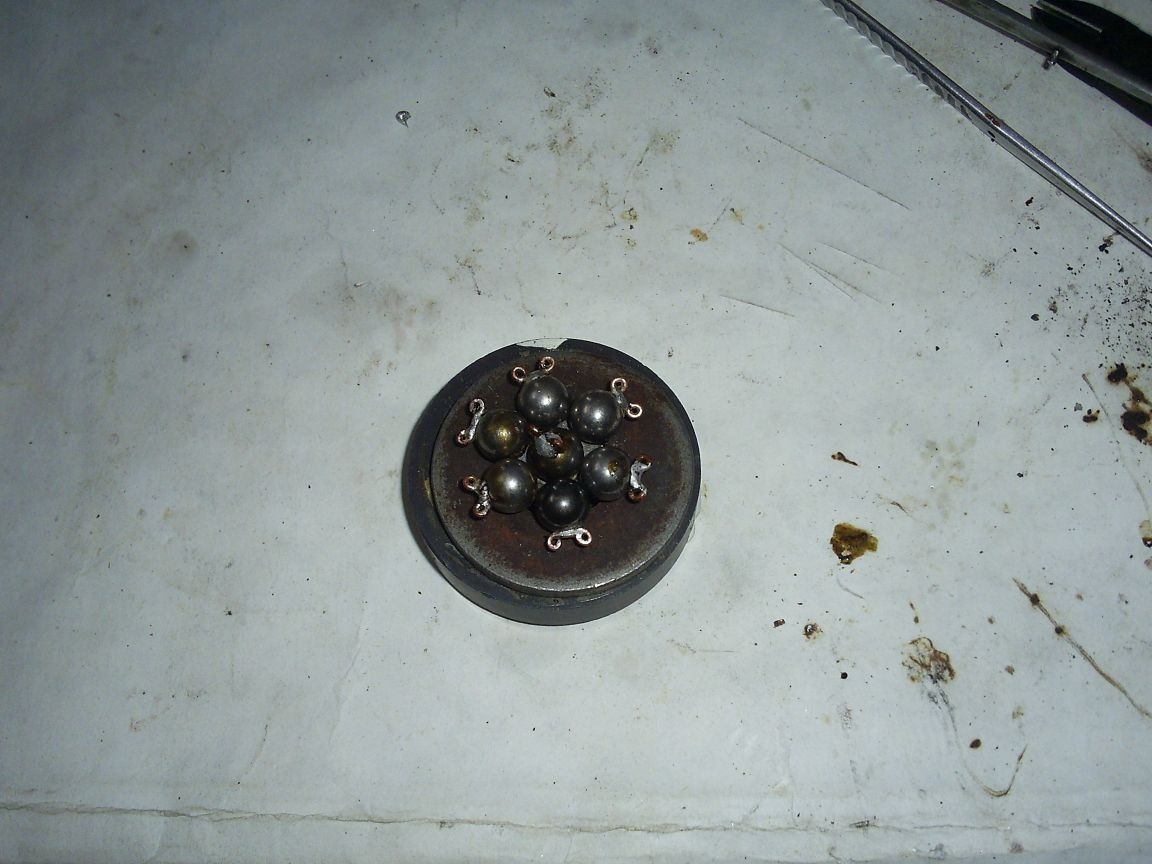
Sealed rings on the ball. I tried to keep it as even as possible.
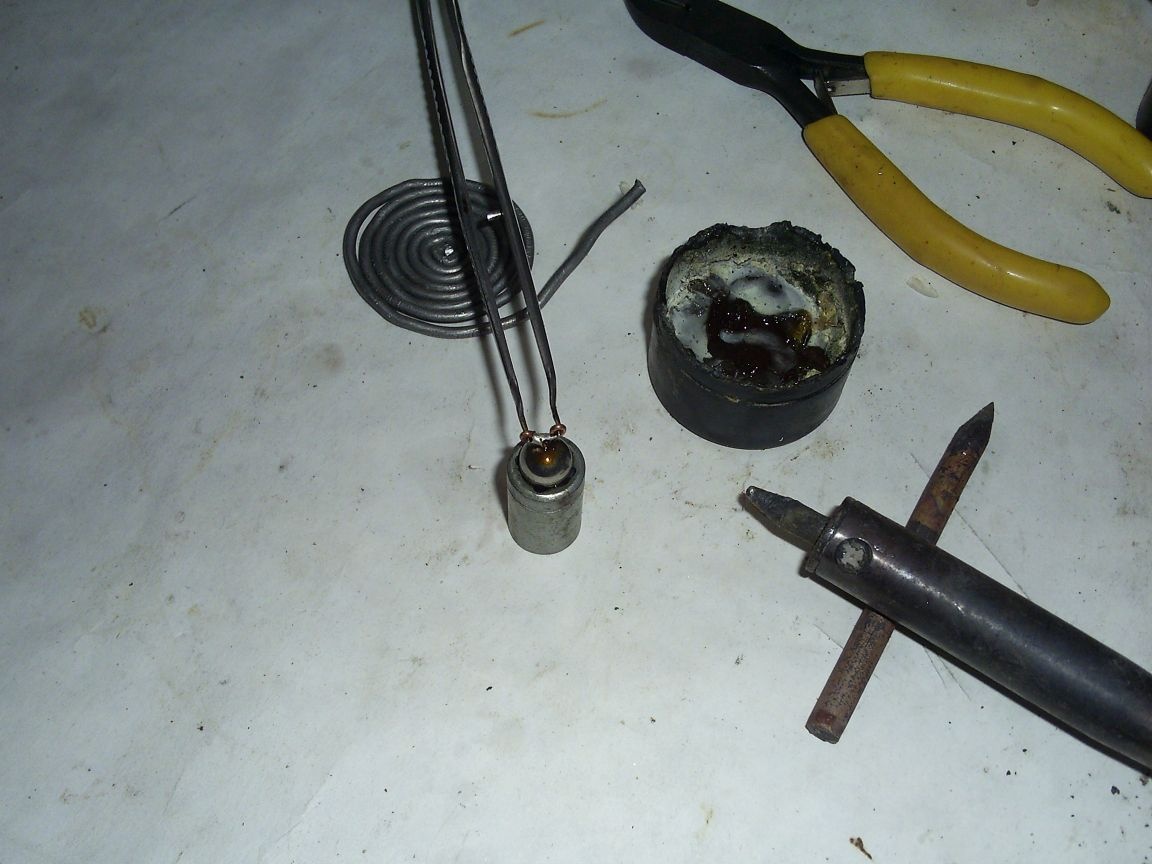
As they say the first ball is lumpy. He kept the soldering iron tip on the ball, and it darkened (received a thermal burn: wink :).
Rings, so that they were at least a little bit alike, checked against the finished. Then he did the same manipulations with the rest of the balls.
As a result, I got seven not very beautiful (spoiled with rosin) cheburashka, and one of them became a black race.

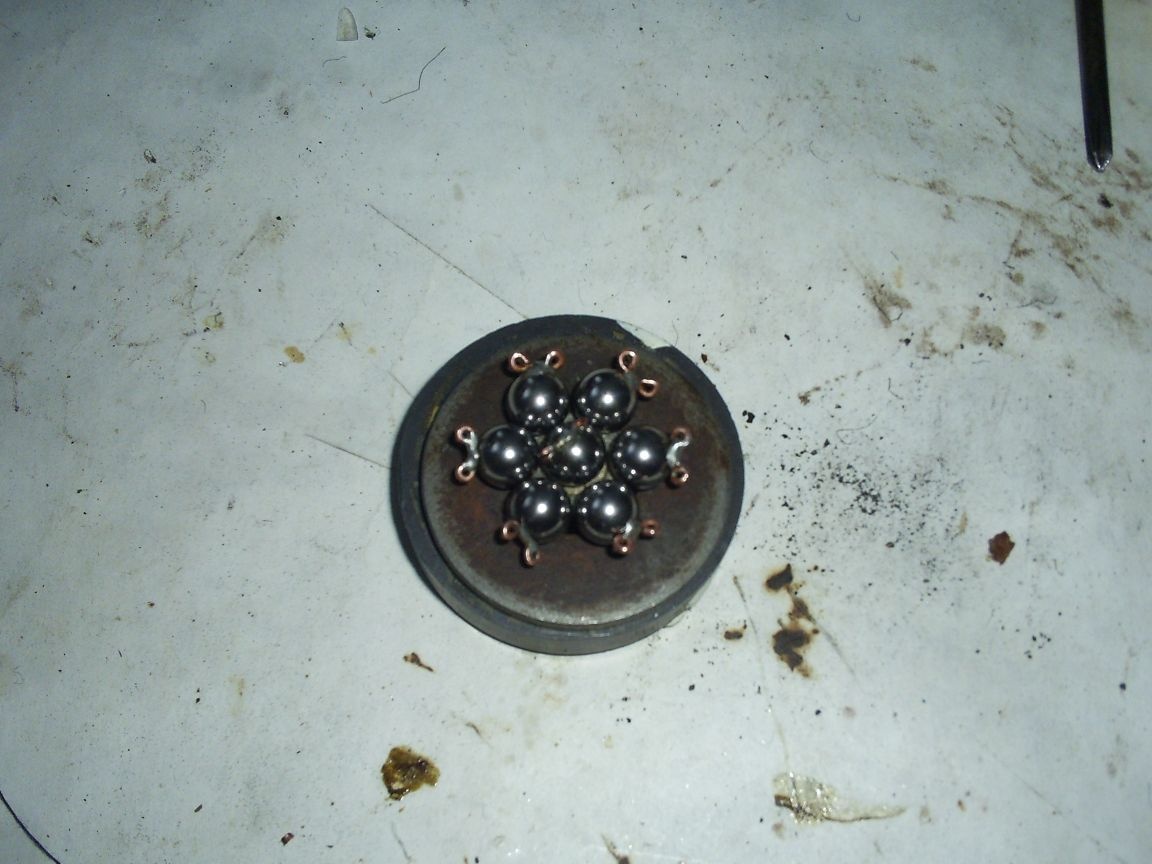
After processing with felt with goy paste. (Even the African American began to shine). As I understood during the tests, I should not have placed the balls on the magnet, they were magnetized, and I had to demagnetize them. I did this with a frameless magnetic coil taken from an inoperative old TV. Information for those who want something to demagnetize these coils is available only on old-style televisions with a cathode ray tube; in other cases, almost any frameless coil is suitable. And another detail, the voltage supplied to the coil must be variable.
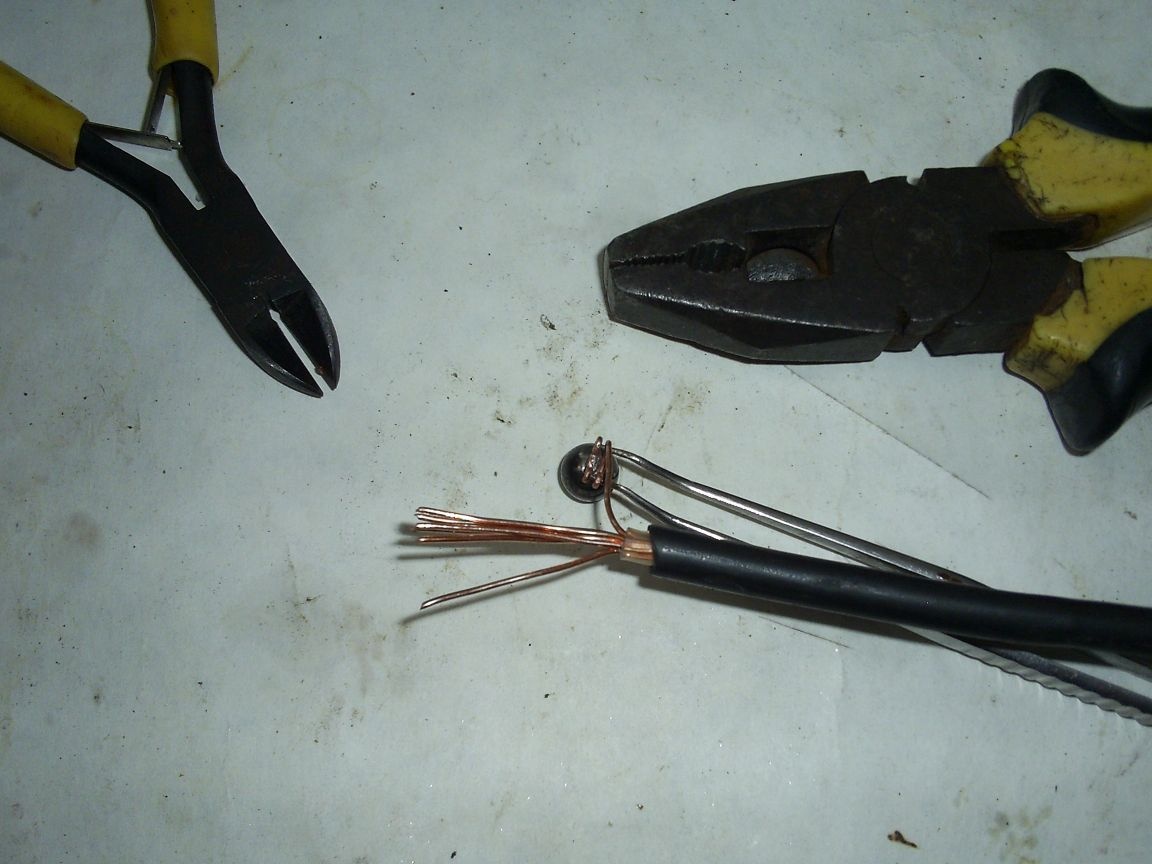
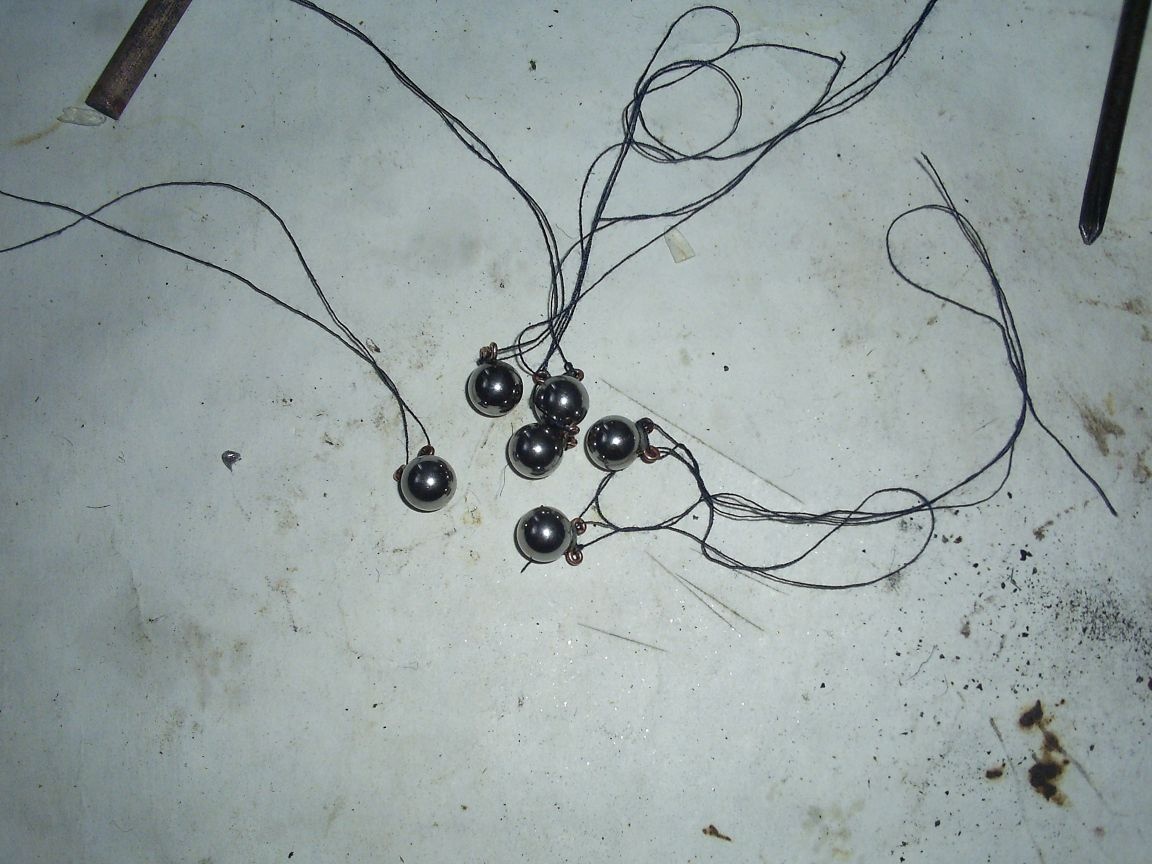
Then a long and painful threading through the rings.
Having cleared the insulation, a wire with a cross section of four square millimeters began to make the frame of the future pendulum.

At first I made the frame as in the bottom photo, but it was ineffective, it turned out to be too low (there was not enough acceleration) and it took part of the energy of the balls (the antennae holding the balls swayed).
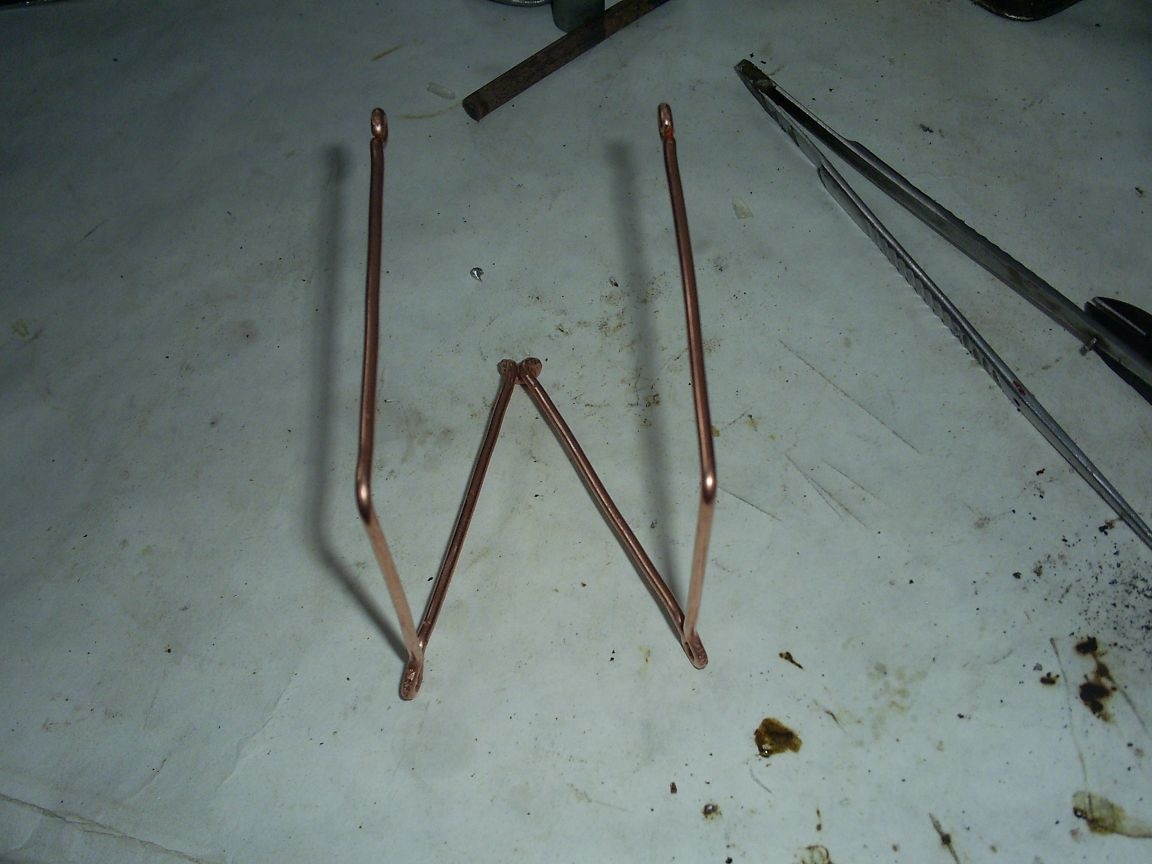
And it was decided to make a stronger and slightly higher design.
He tied the threads in a few turns. This is done so that when adjusting the location of the balls by turning the thread, it does not scroll back under the weight of the balls attached to it. From the beginning, I simply tied the threads to one side of the resulting frame.
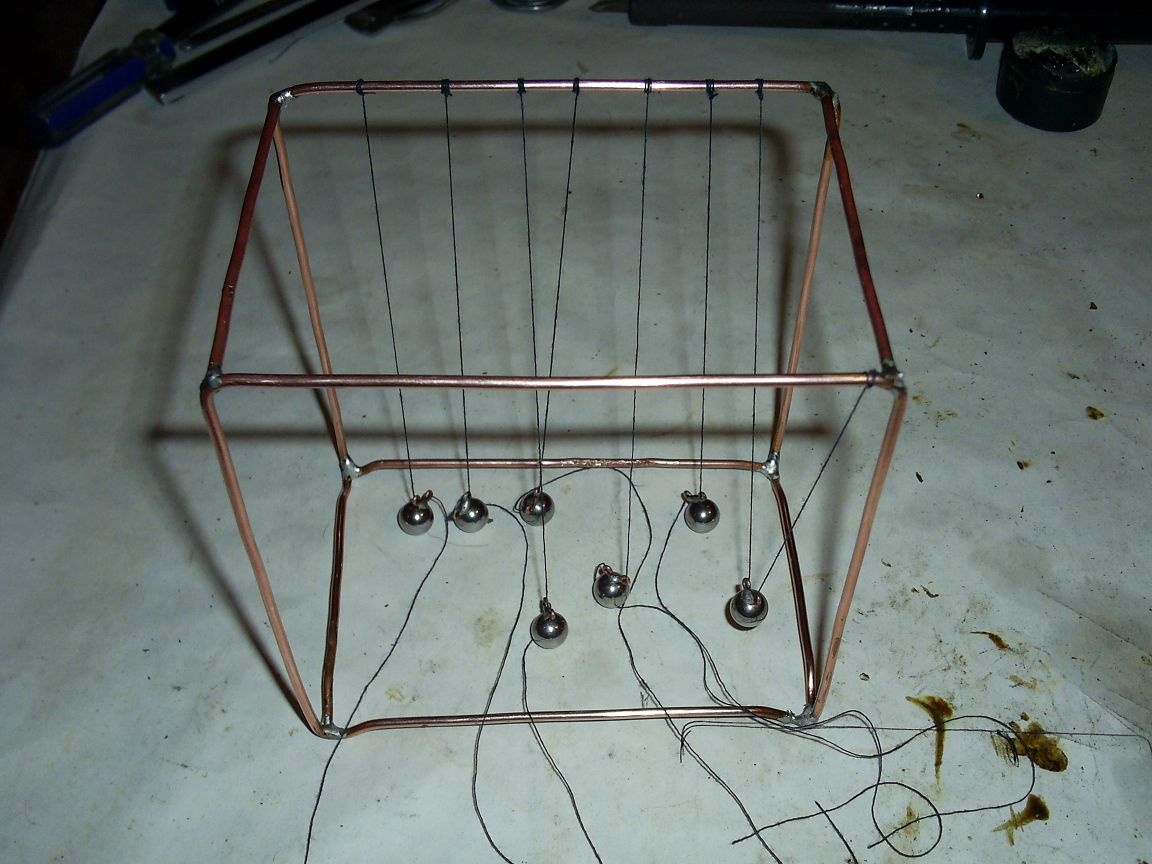
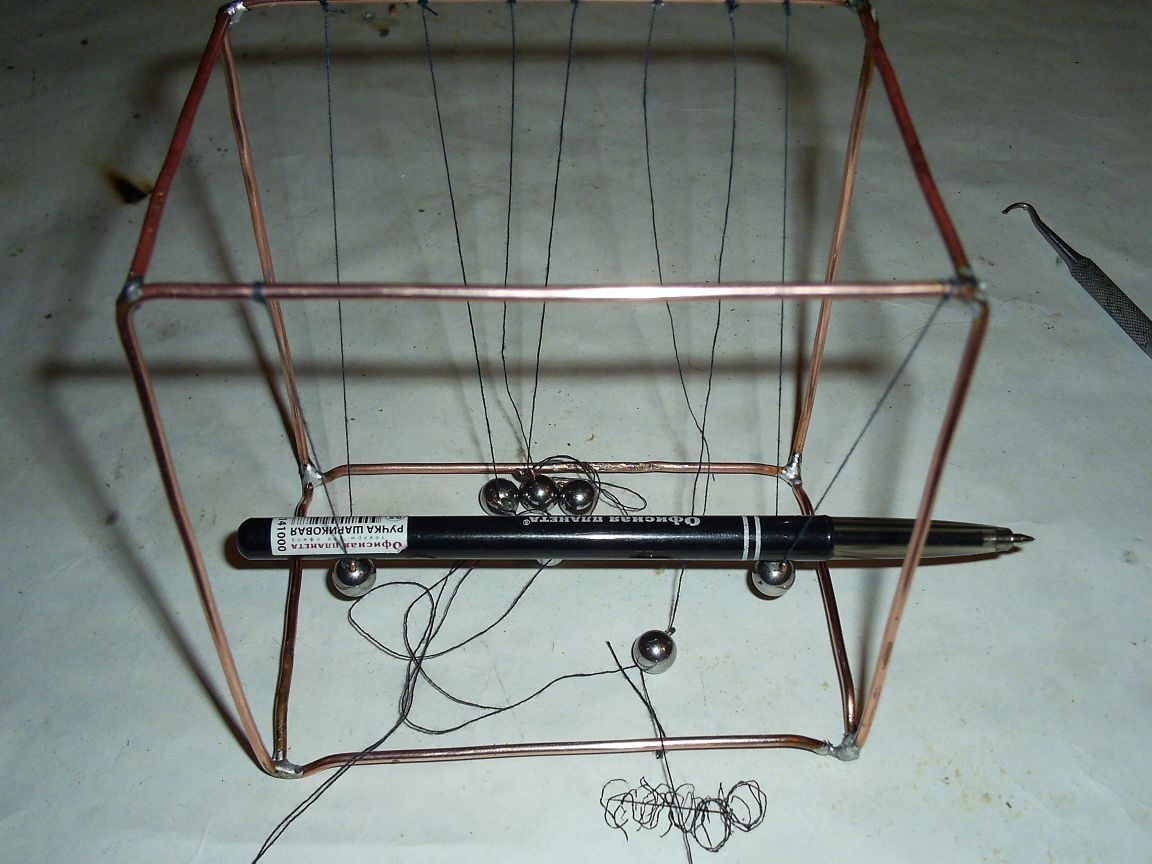
Then (while adjusting) tied to another beam.
And in the end, I adjusted the balls (by twisting the thread on the beam) so that they lined up in one row as accurately as possible, because it also very much depends on how long it takes to click. After fine tuning, I applied a small amount of glue over the threads tied to the beam, thereby fixing them from scrolling and moving around the beam.
And here is Newton’s ready cradle, so to speak.
It may not be as beautiful as those in the store, but it is made with your own hands and from available materials.
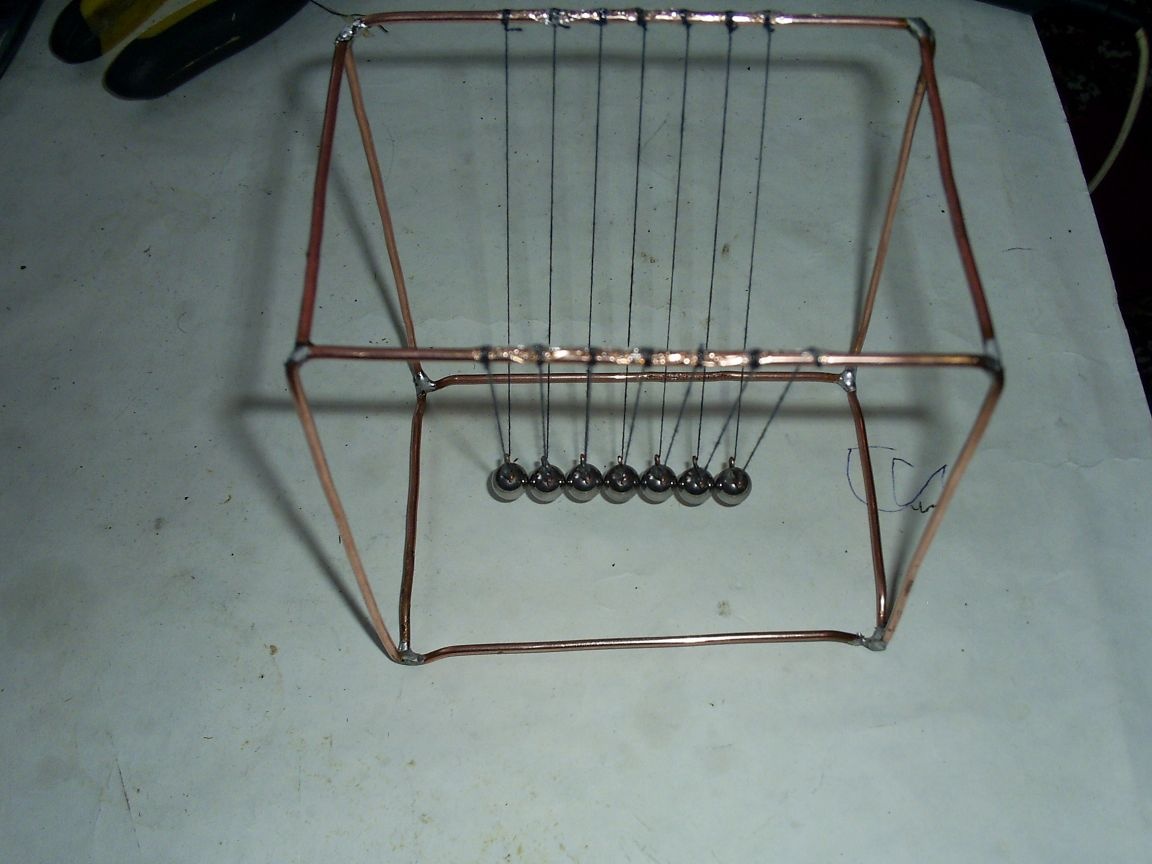
Since there were no balls of large diameter, the pendulum, of course, does not tick for long, but it still gives my son a lot of positive impressions and I was able to give him pleasure by collecting do it yourself such an amazingly interesting and soothing toy.