
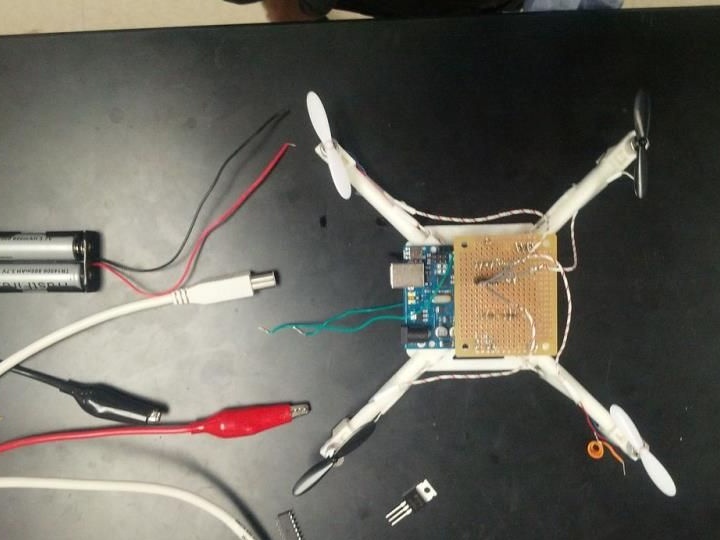
The main task that the author has set himself homemade - make an inexpensive quadrocopter, the flight of which will stabilize due to Arduino. Another quadrocopter has autonomous power. The total cost of such a homemade product is about $ 60.
If there is a more substantial amount, then it is more perspective to equip homemade motors without brushes with the corresponding controllers.
To stabilize the flight, a gyroscope and an accelerometer are used. A gyroscope is needed in order to determine the angle of inclination of the quadrocopter relative to Earth's gravity. The accelerometer is needed in order to calculate the acceleration.
Materials and tools:
- lithium batteries (3.7 V);
- wires;
- transistor ULN2003A Darlington Transistor (you can use more powerful transistors);
- engines like 0820 Coreless Motors;
- microcontroller Arduino Uno;
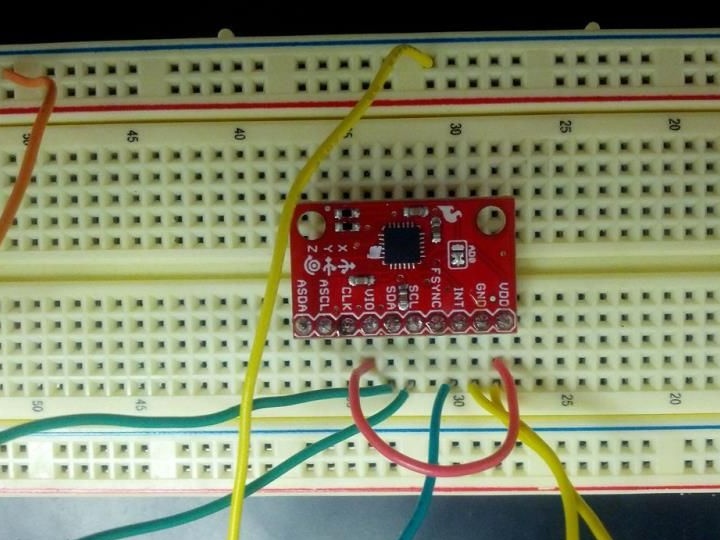
- MPU-6050 board (it is both a gyroscope and an accelerometer);
- the presence of a 3D printer or access to it;
- necessary tools.
Manufacturing process:
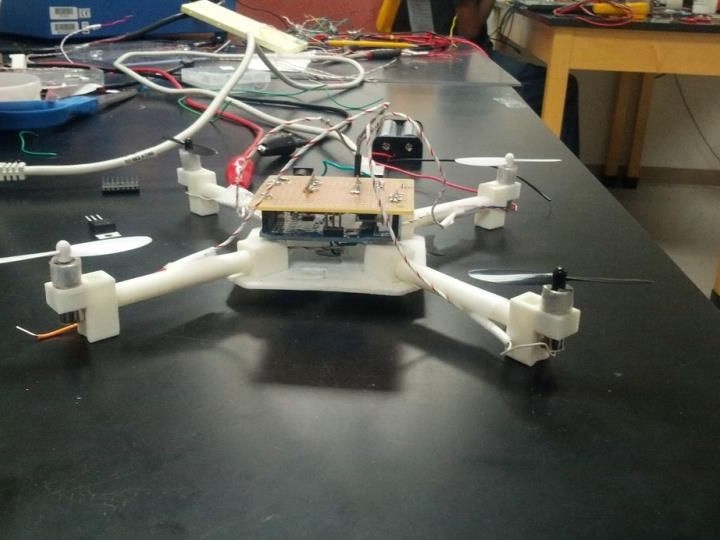
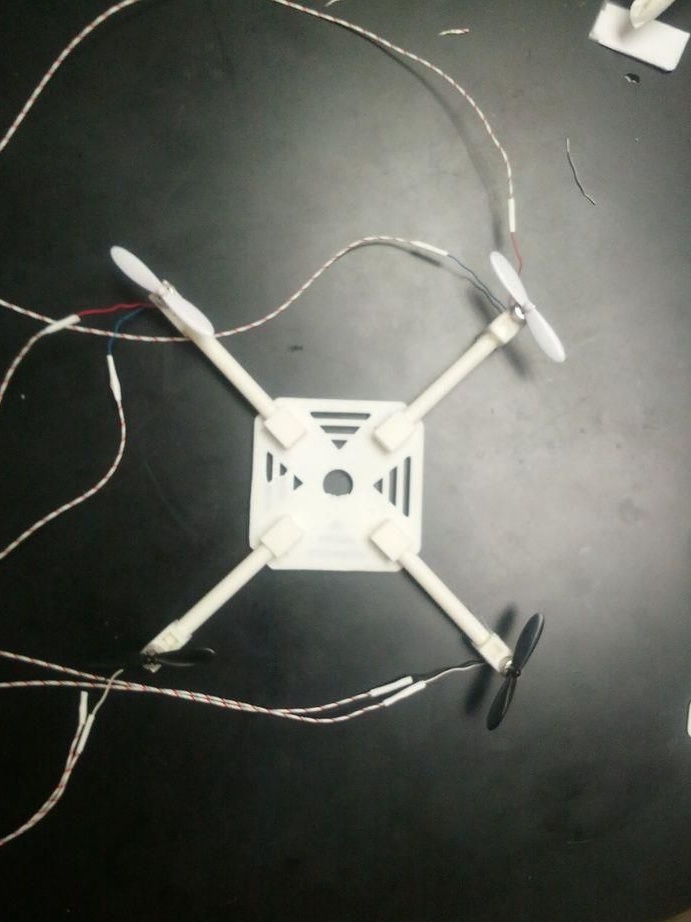
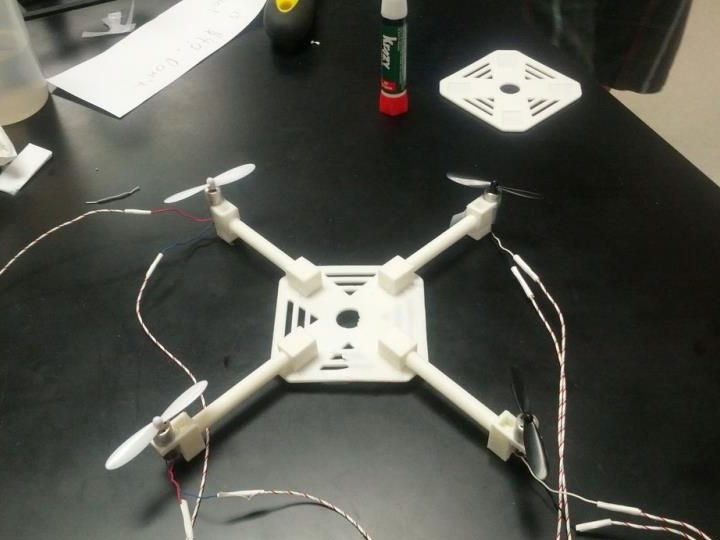
Step one. Create a quadrocopter housing
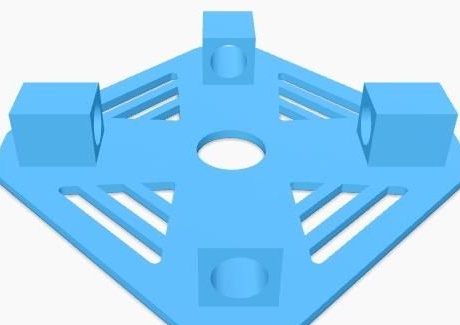
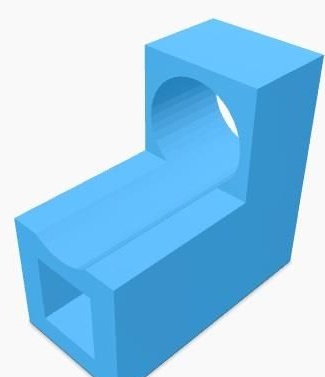
The case is done very quickly and simply. It is printed using a 3D printer. The creation of the frame, therefore, is good because it comes out light, all this thanks to the printing of "honeycombs". Parts design took place in the Solidworks program. Using this program, you can edit the parameters of the case, make your own changes to it, if necessary.
After the quadrocopter frame is printed, you can install the engines and solder the wires to them.
Step Two We connect Arduino
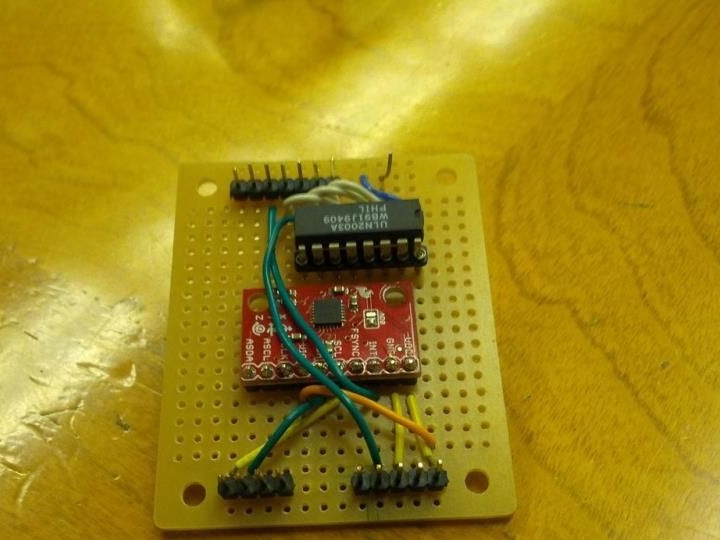
How to connect the MPU6050 board can be seen in the diagram below. It is important to understand that the Arduino library means connecting through these contacts. If you are using a circuit from another manufacturer, it is important to make sure that the contacts are in the same sequence.
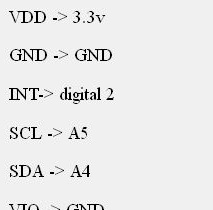
Only 3.3 V voltage is used to power the board. If it is powered from 5 V, it will deteriorate. Some MPU6050 boards have a fuse that protects the system from high voltage, but it’s better not to risk it. If the board has contact AD0, it must be connected to ground (GND). In this case, the VIO is connected to the AD0 output directly on the board, so you do not need to connect the AD0 pin.
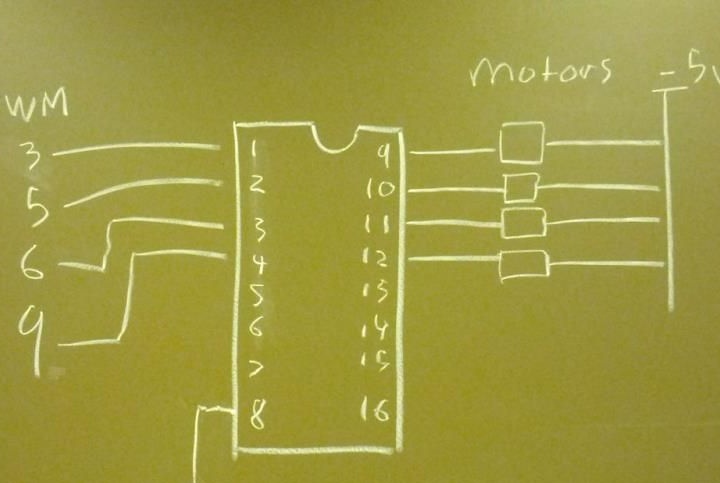
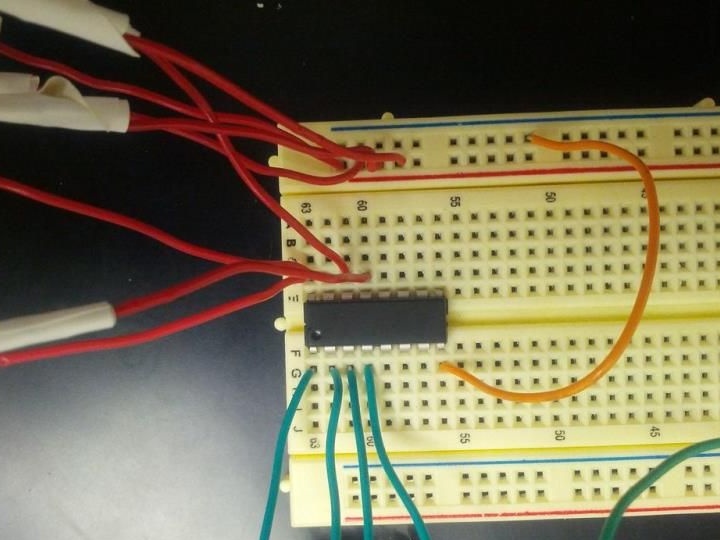
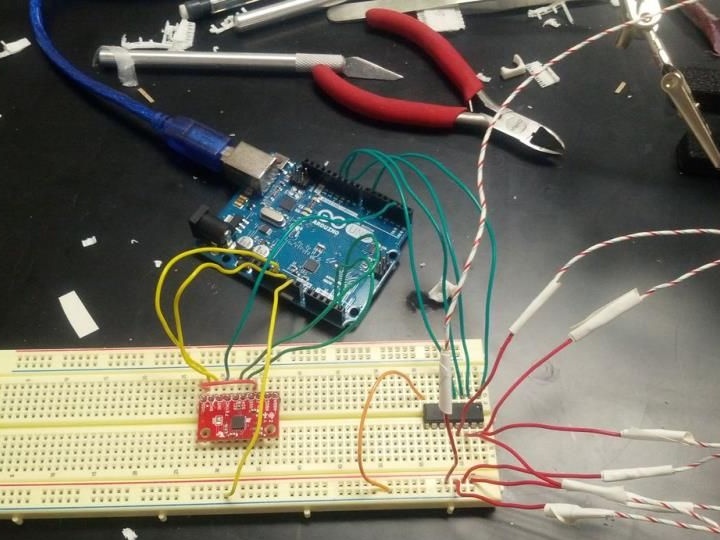
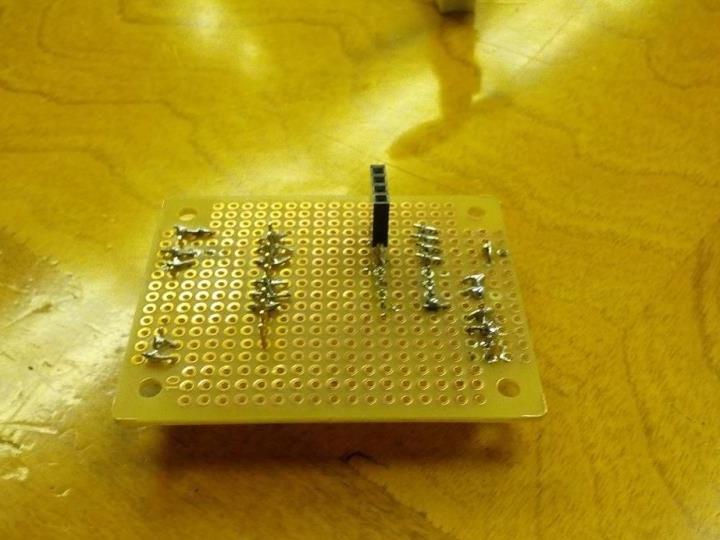
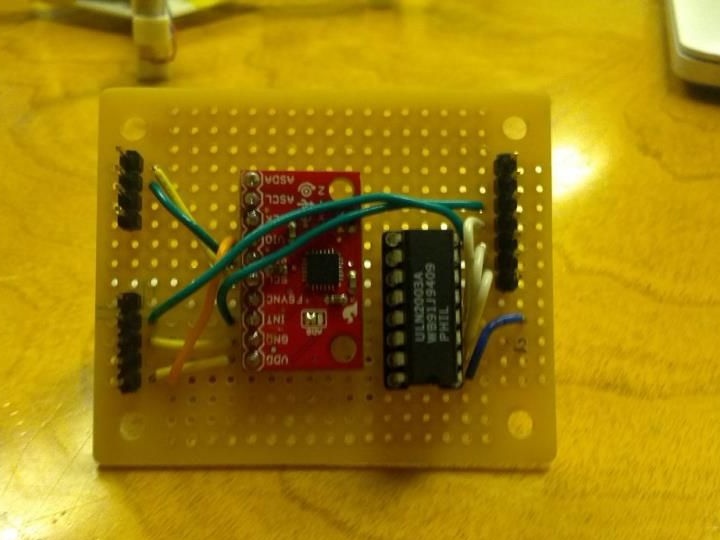
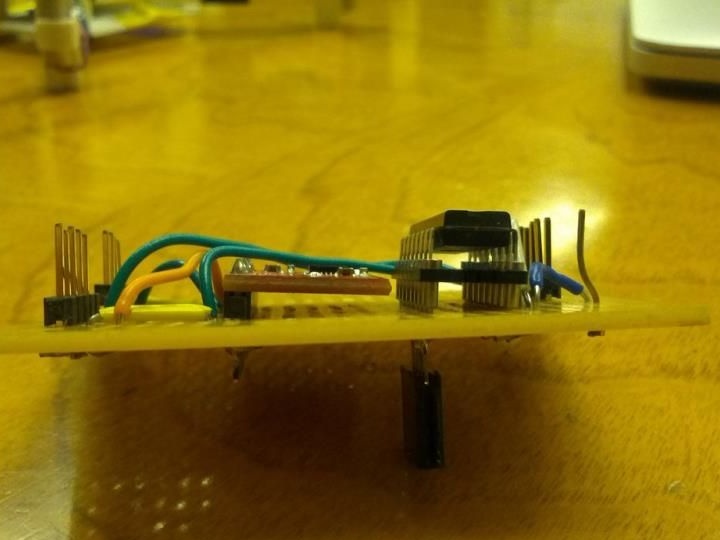
In order for Arduino to be able to control the motors, transistors will be needed, thanks to them it will be possible to supply a lot of voltage to the motors. You can see in more detail how all the elements are connected in the diagram.
Step Three Sketch for Arduino
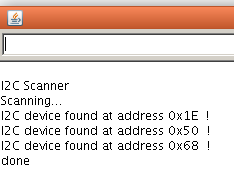
After the MPU-6050 is connected to the Arduino, you need to turn it on and download the I2C scanner code sketch.Next, you need to copy the program code and paste it into an empty sketch. After that, you need to open the Arduino IDE serial monitor (Tools-> Serial Monitor) and make sure that 9600 is connected.
If everything is done correctly, an I2C device will be detected, it will be assigned the address 0x68 or 0x69, it must be written down.
Next, a sketch is loaded, which processes information from the gyroscope and accelerometer. There are many of them on the Internet, but it is best to use.
At the final stage, you will need to calibrate the values of the gyroscope and accelerometer. To do this, find a flat surface and place the MPU6050 on it. Next, the sketch for calibration is started, the obtained deviation data is recorded and then used in the sketch MPU6050_DMP6.
Step Four Program for Arduino
Thanks to the program, which is laid out, the quadrocopter stabilizes and freezes in a stable state. Next, using this program, quadrocopter control is performed.
To stabilize the quadrocopter, two PID controllers are used. One is needed for pitch, and the second for roll. The controller measures the rotational speed of the screws and based on this, the quadrocopter is controlled.
Step Five Quadrocopter modification
The main problem of a small and cheap quadrocopter is its weight. To solve this problem, you need to install more powerful and lighter engines, brushless ones are best suited, they are also called valve motors. They are much better than brushes, but you also need to buy speed controllers for them, so the cost of homemade products increases sharply.
To make the design easier, it is best to use the Arduino Uno controller, you can remove the already stitched microprocessor chip from it and then put it directly on the ProtoBoard. As a result, it will turn out to win about 30 grams of weight, which is pretty good. An alternative is to use the Arduino Pro Mini.
A program that was created to control homemade work can be easily expanded. But the most important task is to stabilize the quadrocopter in flight, at this stage it was completely solved. To control homemade work remotely, you can use the bluetooth module or take a closer look at the transmitters / receivers.